DIY: Budget Friendly Pantry Organizing!

Hi friends! I’m writing to you from frigid Iowa, where it’s a whopping 1 degree today, but hey we are over halfway through January so this won’t last a whole lot longer! I haven’t posted a DIY for a while, so I wanted to share with you what I recently did with my pantry.

I normally take everything out of my pantry once or twice a year just to make sure nothing is expired or forgotten about, and as I was getting ready to do that again recently I did a few searches on Pinterest and Instagram for inspiration on how to make the space a bit more visually appealing.

There were hundreds of gorgeous photos to choose from, but as I started researching the actual bins and containers for everything it became apparent that this was an EXPENSIVE task. I mean, $14 for a clear plastic tray to put on a shelf?! $25 for a set of 4 glass canisters?! There was just no way I was going to spend that kind of money or organize this space.

Starting Point

Our pantry is a walk-in space, that has a knack for collecting random items due to it’s proximity to the kitchen. The problem with this catch-all space, is that it only has a half door, so all of the random items are on display for every visitor to see. Let me show you what I mean…

From this angle, you can’t see the mess inside!

From this angle, you can’t see the mess inside!

The mess!!!

The mess!!!

Ok, now you know what I was up against! I knew there had to be a more budget friendly way to spruce this up, so I put my thinking cap on.

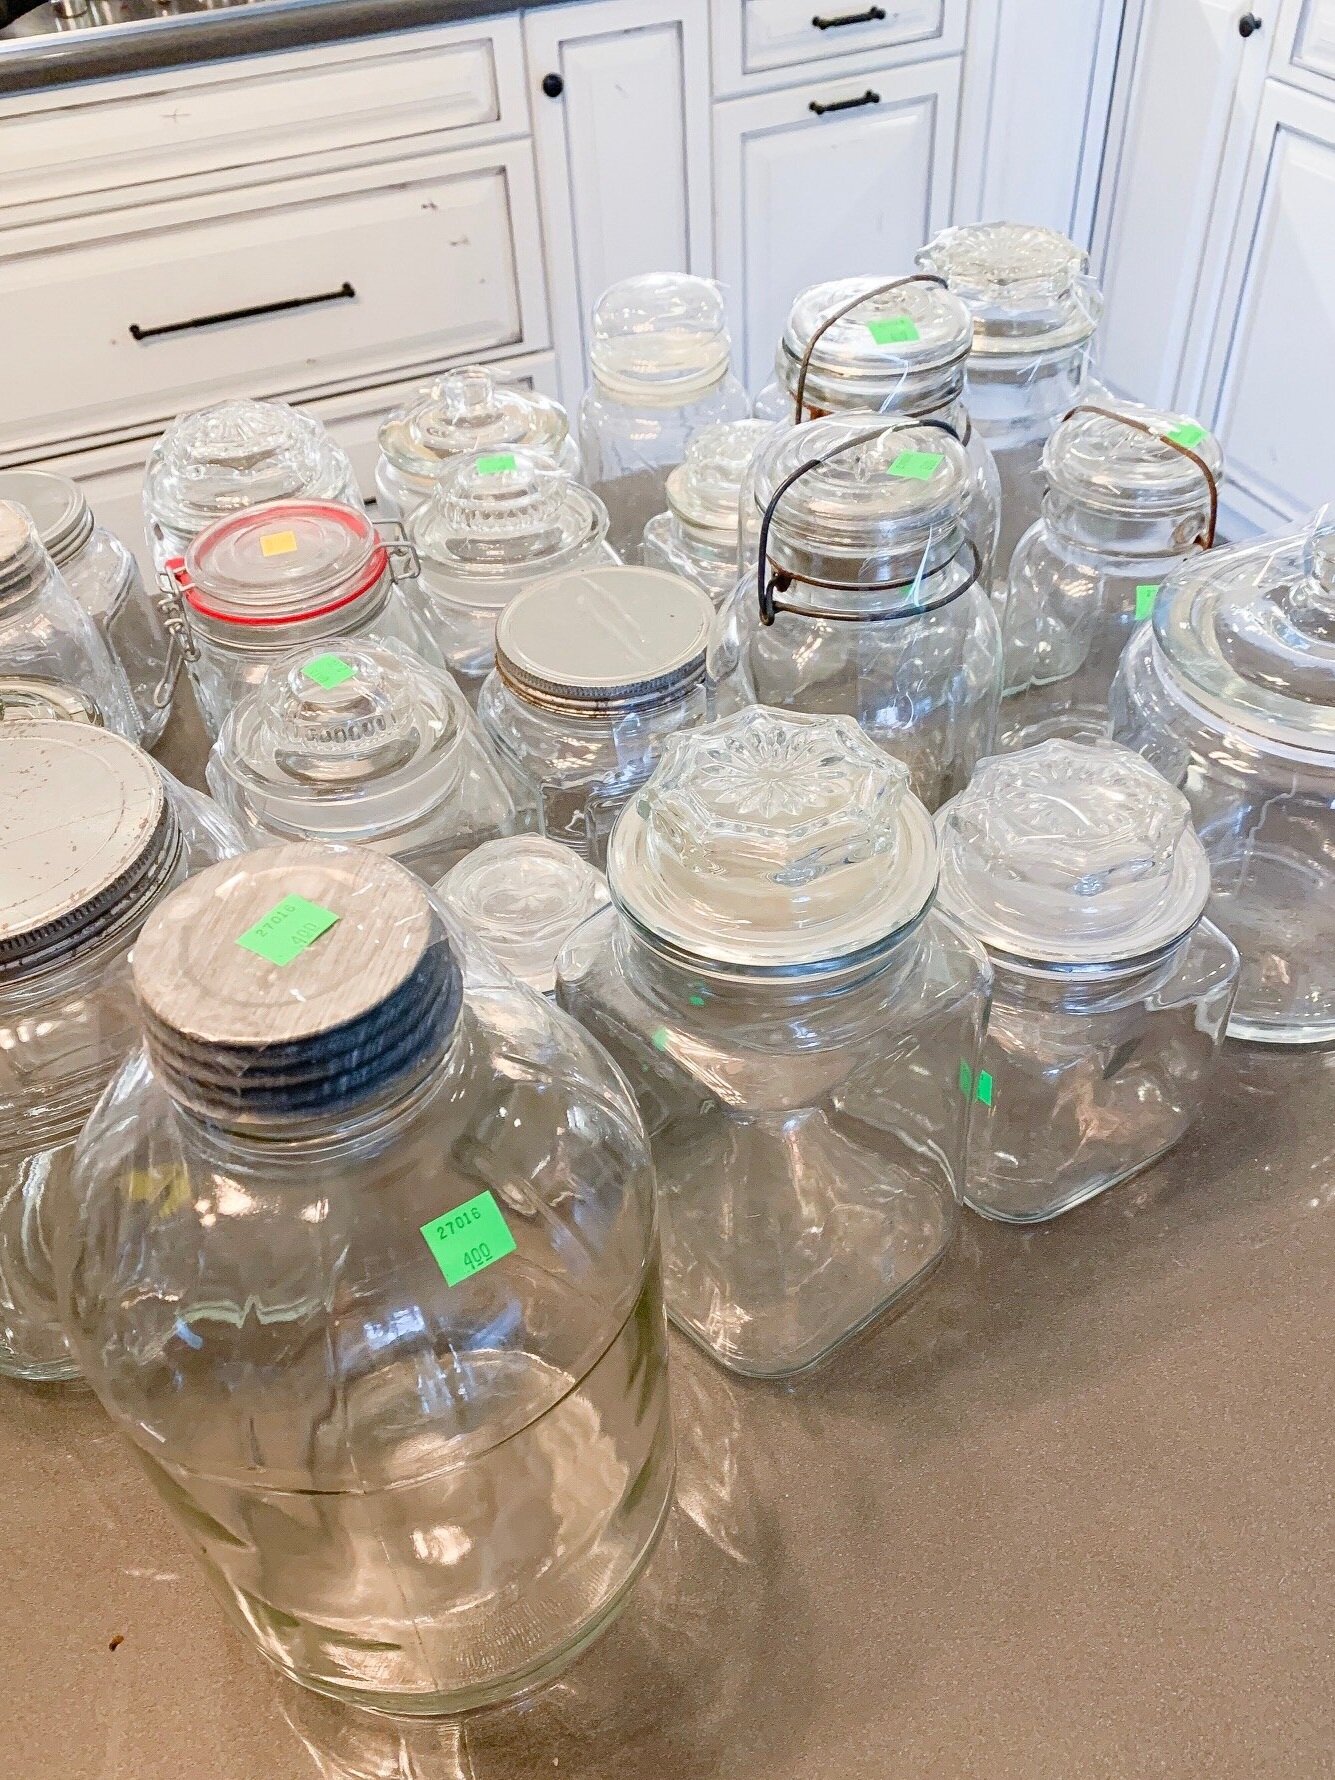
First up, I needed some glass containers. A lot of them. I didn’t really care if they all matched, and I wasn’t going to buy a dozen from Amazon at $5 a piece, so I went down to my local thrift store for some vintage jars and canisters.

IMG_5203.jpg

Next up, I needed some labels for these jars and Amazon seemed to have quite the selection. I ordered a set of labels that was around $14 for 50+ stickers from a shop on Amazon called ‘The Talented Kitchen’.

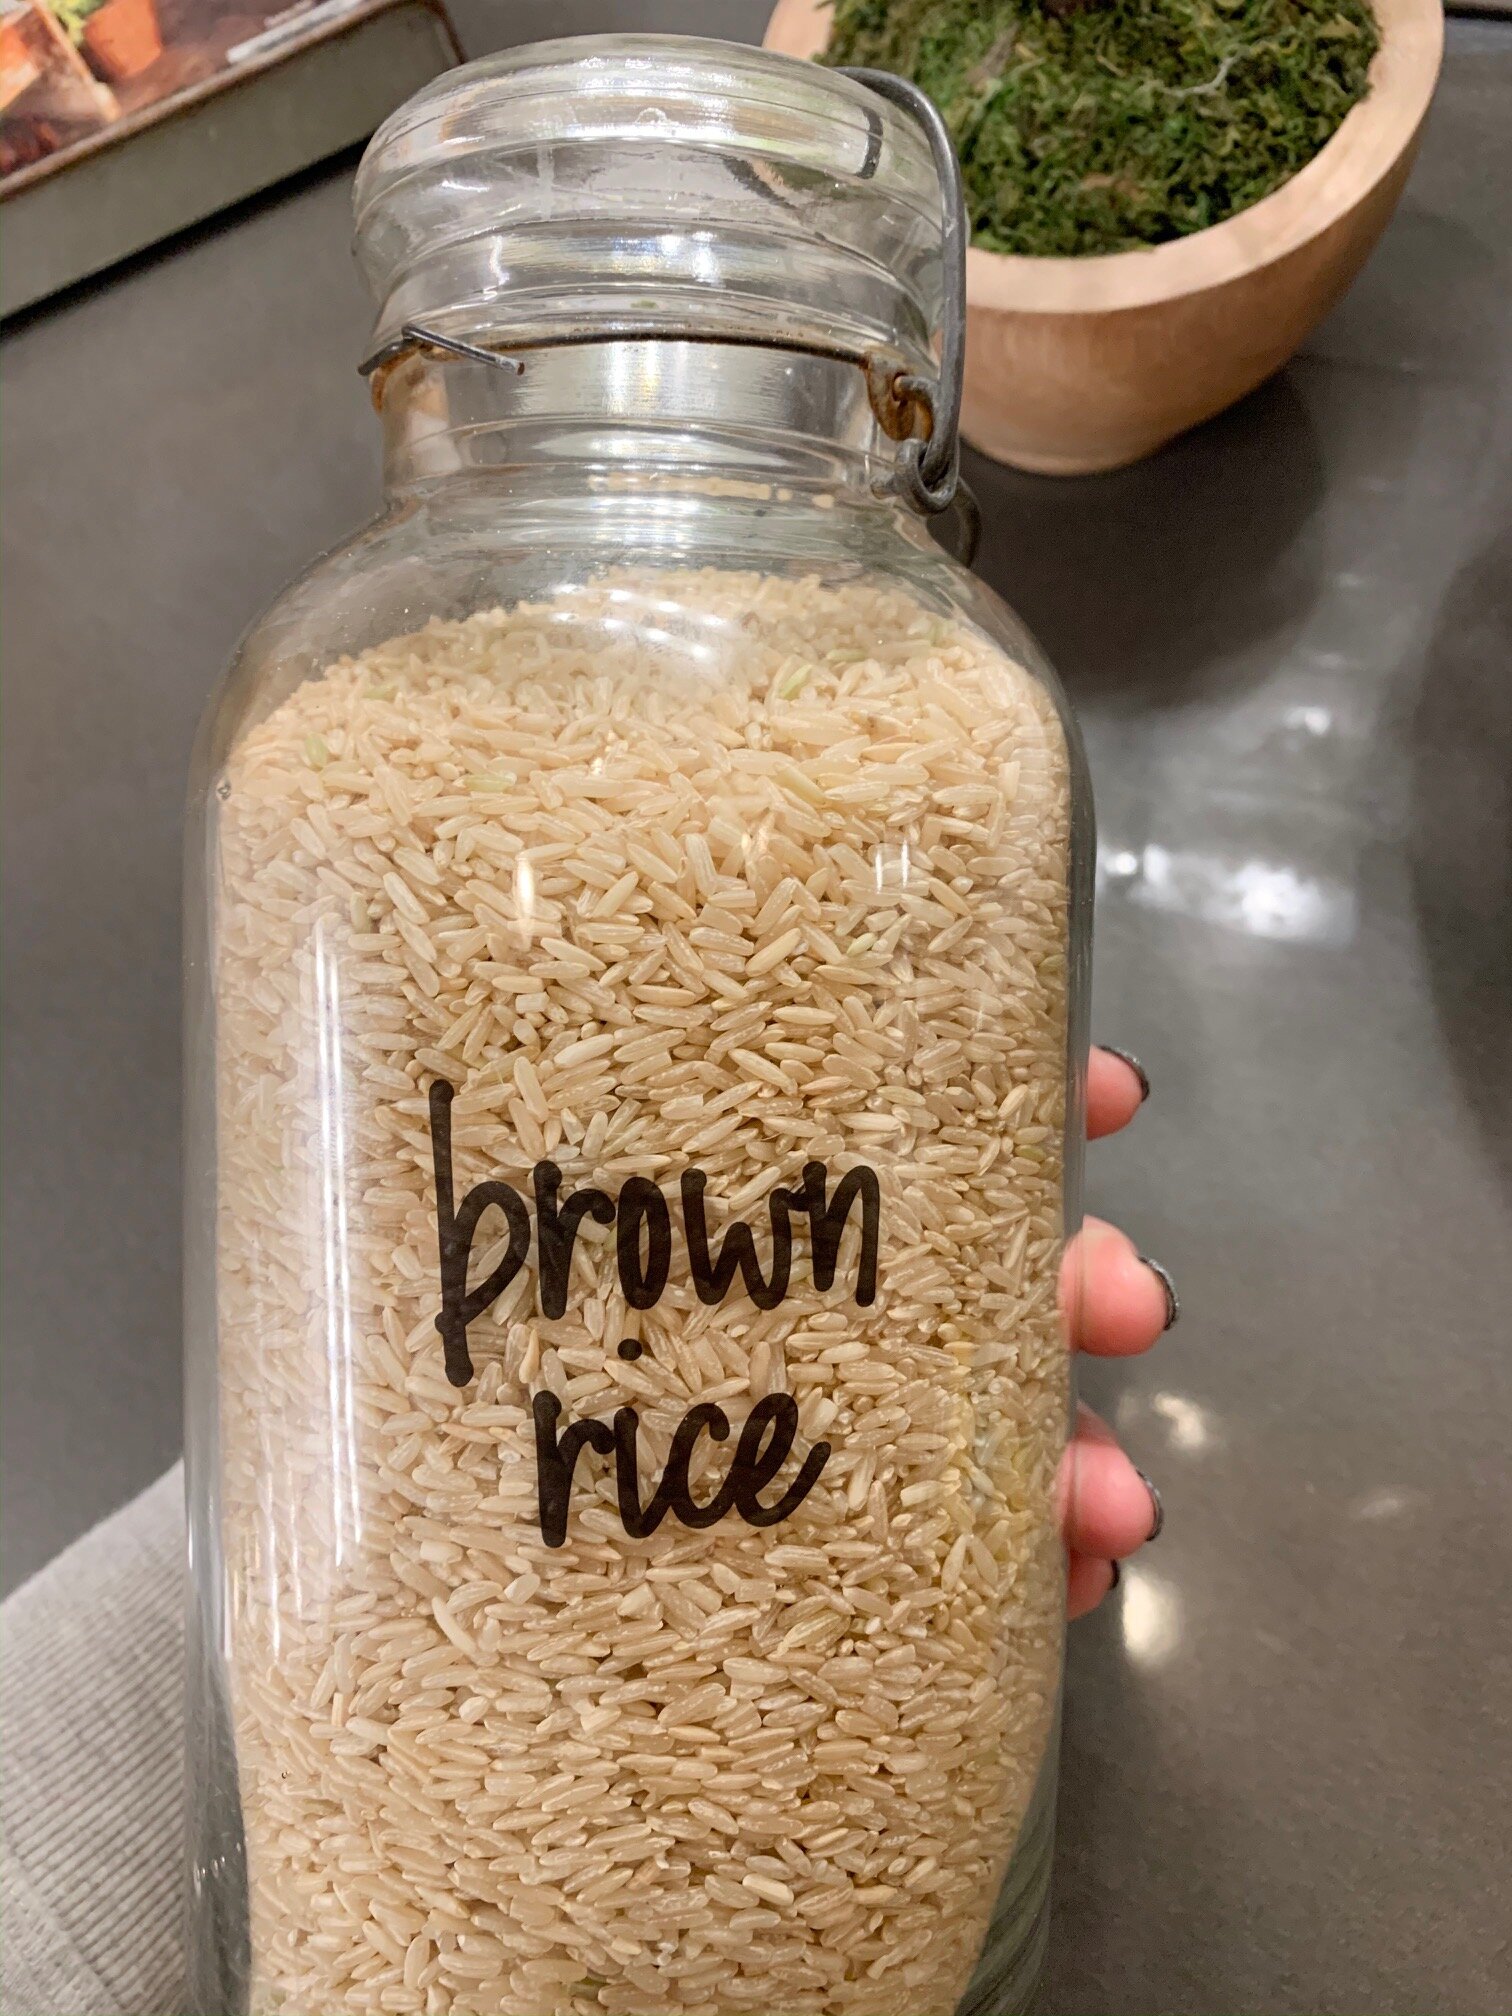
I started the tedious process of emptying boxes and containers into the jars (after washing them of course!) and tossing all the expired items. I even found out what a very rotten avocado looks like, yikes! Here are a couple close up photos of the jars with labels…

IMG_5267.JPG
IMG_5268.JPG

These turned out really nice, and I was able to toss all the half packages of items! Bonus feature of the clear glass jars is the ability to see the amount readily available, making that grocery list a breeze!

Last up, I needed some clear bins for random things, and Amazon had some outrageous prices on clear storage containers so I went with what my local Target had instead. I included a couple pictures of the bins below, the larger one was $4 and the smaller one was $1.

IMG_5274.jpg
IMG_5270.JPG

All Finished!

Here are a couple photos of the finished project, I am not entirely certain that I have everything in the exact place that I want it, but it works for now.

IMG_5251.JPG
IMG_5250.JPG
IMG_5253.JPG

I am really excited how this turned out, as it is no longer an eyesore to anyone walking by the area. Also, I was pretty impressed that I accomplished this project for significantly less cost than originally thought. Next up, I need to repeat this process for the spice cabinet as I currently cannot find anything in there!

That is all I have for you today, thanks so much for stopping by the blog and I would love to see some of your own pantry transformations, feel free to tag me on your photos on Instagram (@aps_design) or Facebook (apsdesignblog).

Cheers!!

Rachael

Spring Front Porch

Happy Spring to all of you!

It’s been a little while since I have had time to get on here and share what we are up to, which consists of a long list of projects that seems to grow by the hour! I feel like the winter was so long, that when spring finally arrived we ran out and attempted to do all of the things. We may have taken on a bit too much all at once, but that just means we have more fun projects to post in the upcoming weeks.

For today, I’m sharing my front porch setup for spring. We still have tricky weather here in Iowa, so unfortunately no live plants are included in my decorating this go around, but hopefully I can add some soon. I’m all about budget friendly decorating, and today’s post includes just one purchase, a $10 rug. So let’s get to it!

We will start with the left side of the door…

c7d39c325a8db0d22febb31f53a45ad9.jpeg

Recently, I picked up these ultra heavy duty closet doors (that look like shutters) for free on Facebook Marketplace. I knew I wanted to used them on the front porch, since their weight would help withstand the wind/storms of the Spring weather here in the Midwest. I went through my garden supplies and found these steel buckets from a few years back (they are originally from Lowe’s), and filled them with dirt and faux succulents. Real plants would be ideal, but since we had a freeze warning (and snow!) as little as a week ago, I had to hold off for now.

e5abba03dedd4a9beaeeeebc585a057f.jpeg

Next, we have this vintage water pump and wash tub I picked up at a flea market a couple years back. Simple!

c5f7e6e567d44582ba62fa6d56e4c41f.jpeg

A neighbor was cleaning out their home and had an old red metal star they gifted to me, which I simply spray painted black and hung on the door. This white door is not our permanent front door, just one we used to secure the house during construction. Somehow we have lived here three years without replacing it, but Adam assures me this is the year the official front door will be installed! Until then, we have this plain one to deal with. And in this photo you can see my ‘home sweet home’ rug from Target.

88f30b2f792ca217170c36d9ed7ef5b3.jpeg

On to the right side of the door, which includes more faux plants, and a very old milk jug that is epic heavy. I also included my ‘hello’ metal sign from JDH Iron Designs, I used a few command strips and stuck it right to the stone.

e04c6ef83428a6f2f17cdb0d899f2d8b.jpeg

Alright, here is the full photo of the entire front porch! I am enjoying the little pop of red from the water pump, and the simplicity of the rest of it. I hope this post has brought you some inspiration for your own front porch and as always, thank you for stopping by today!

Happy decorating!

Signoff.jpg

How To Clean Up Your Vintage Glass Bottles

Today I am writing from SUNNY and WARM (ish) Iowa! I can’t tell you how excited I am to not have to brace my face for the cold every time I open a door. Today’s post goes along with all things ‘spring cleaning’ which is the theme at my house these days! We have been doing all those yearly tasks, cleaning out dryer vents and bathroom fan motors…safety first!

If you have been following along you know I love everything budget friendly, and therefore I find a lot of my decor pieces at thrift shops. I love the hunt for a good deal, and I recently came across a collection of medicine bottles and many were marked $1 . I have a plan to display them in my bathroom (after I re-paint it) and while I love the look of vintage bottles, I noticed some of these had a residue or film on the inside that was taking away from the look.

After a little research, and some trial and error, I came up with a fairly simple method to cleaning some of the residue out of the bottles that didn’t use any harsh chemicals and also didn’t damage them. The end result was not a sparkling clean look, but it’s better than where we started!

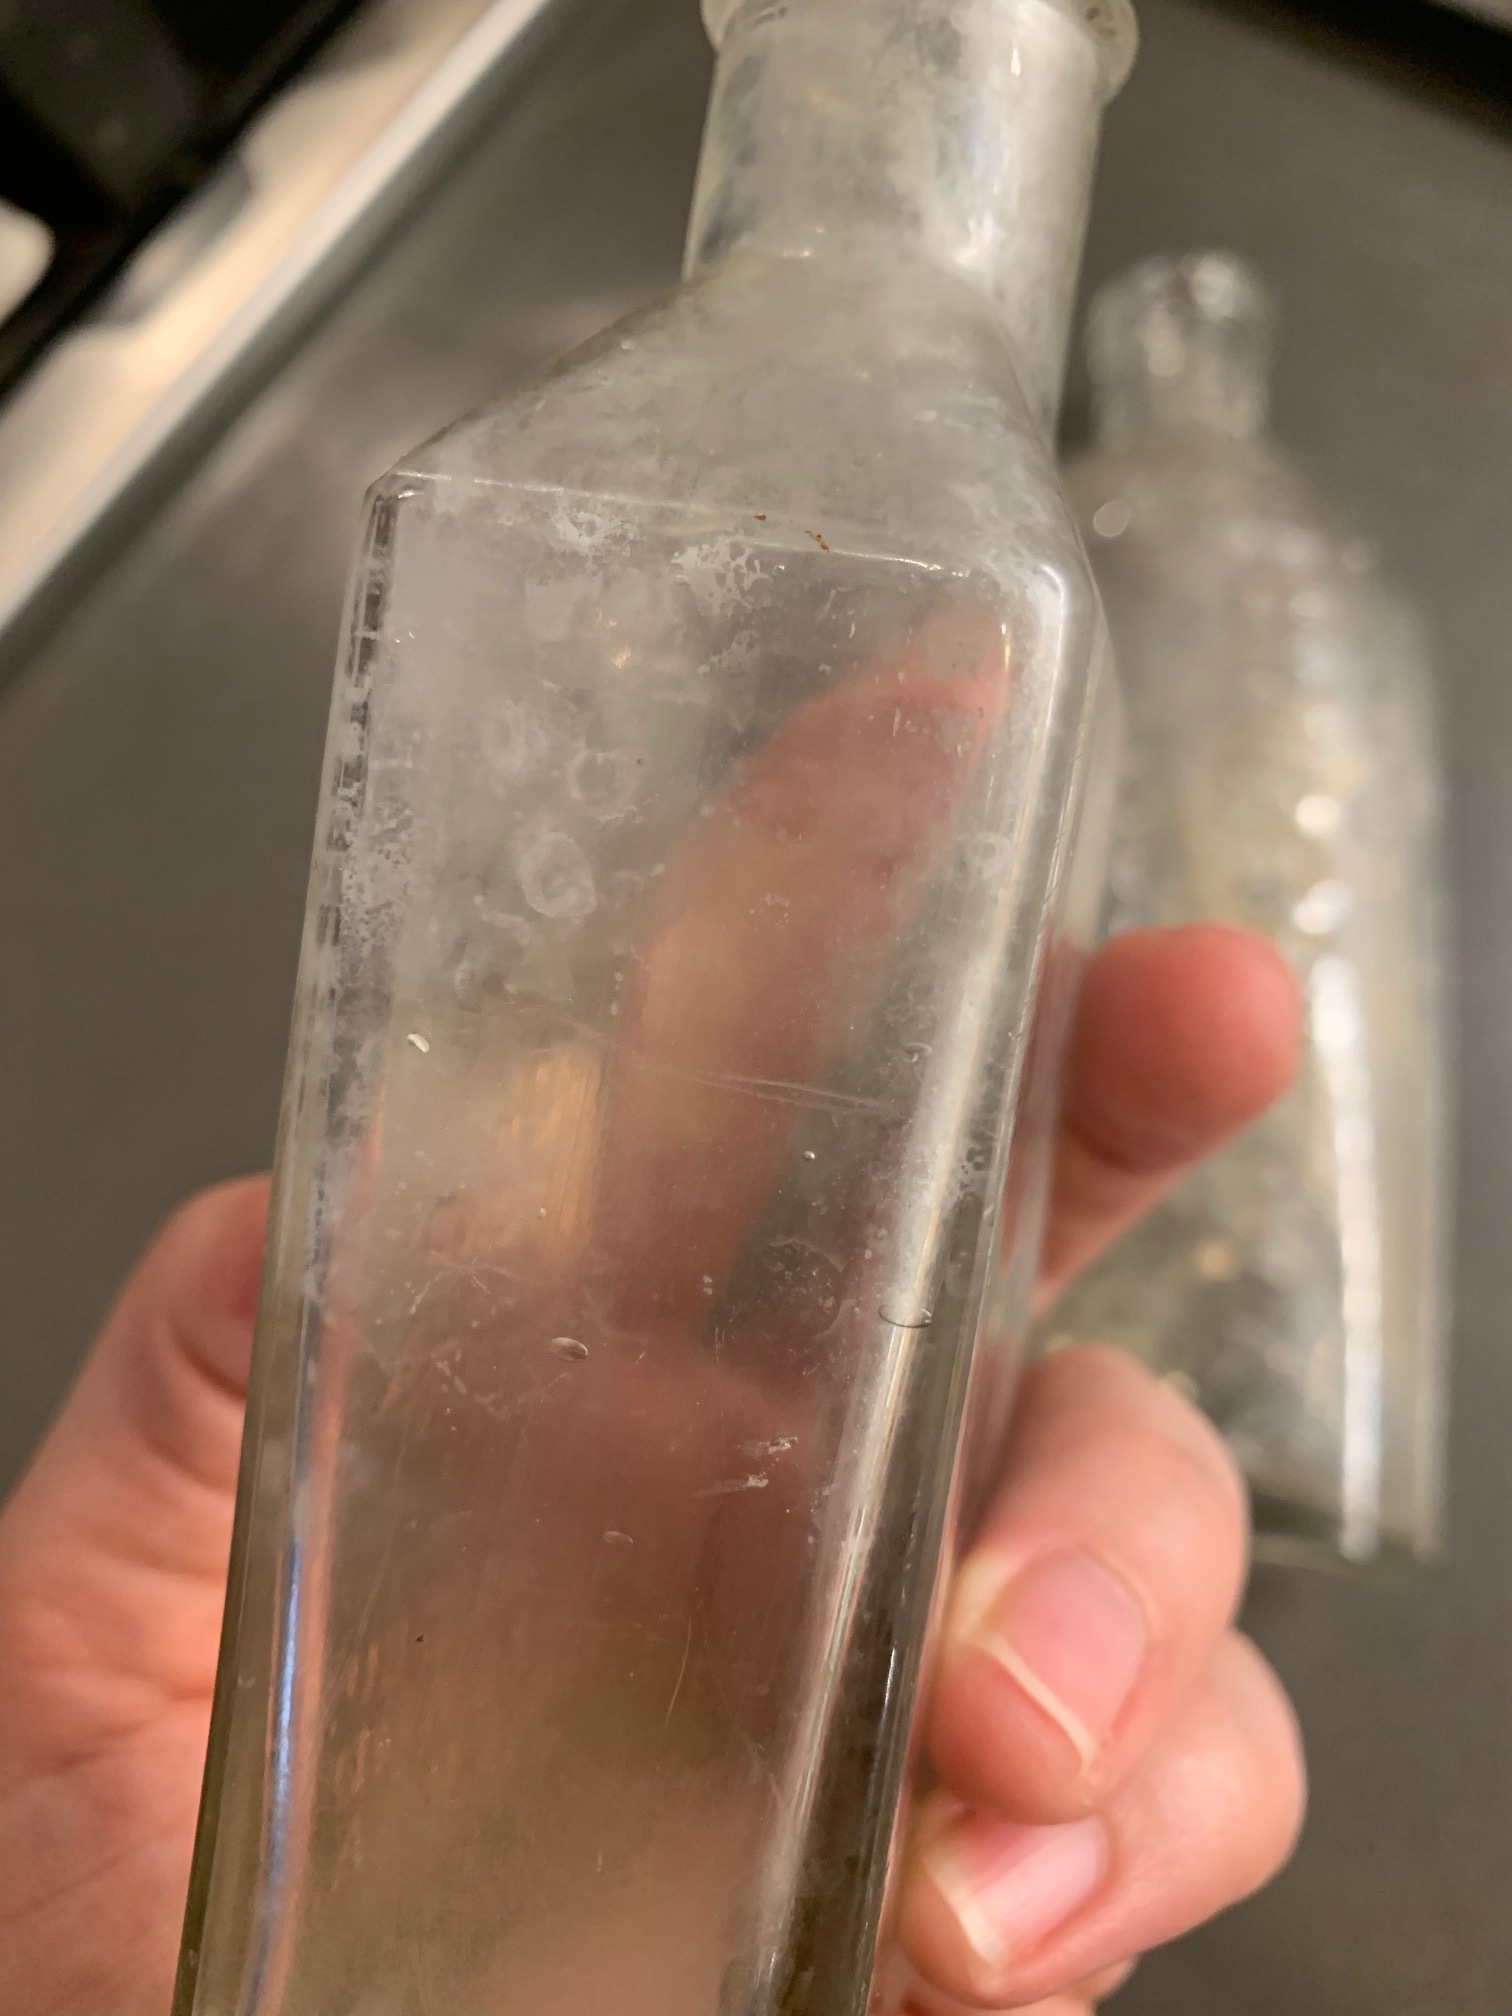
Here are a couple before photos to show you what I was working with…

IMG_1416.jpg
IMG_1417.jpg

As you can see there was quite a bit of buildup on the inside of these bottles, and it was taking away from their appearance. Here is how I cleaned them up:

  1. Fill them half way with warm water and other half white vinegar

  2. Let them sit on the counter for 24 hours

  3. Rinse well

  4. Fill them completely with white vinegar

  5. Let them sit for another 24 hours

  6. Rinse well and dry

You could repeat this process as many times as you wish to achieve your desired result.

Here are the after photos…again they are not perfect but definitely an improvement!

IMG_1494.jpg
IMG_1495.jpg

These bottles are now ready to be added to my collection that I’m working on for the spare bathroom, and of course I will share that cabinet and collection when I get it completed. Now that the weather is nicer, we have been working outside most days but I will find time for the indoor projects again soon!

As always, thanks for stopping by the blog today, and feel free to pin this post for later use!

Signoff.jpg