Iowa Winter Fun & Life in 2021

Hello 2021!

Iowa started off the new year with nearly a foot of snow. Exciting for those who like to play in the snow, but also challenging for those who remove the snow. Our household experienced both sides of this dilemma.

6B03B899-8FAF-4D84-8006-D82E72933DD3.JPG
IMG_0160.jpg

I am grateful we took some time to slow down and recharge over the holidays, we certainly needed that. If I could just have one week every quarter to sit at the beach and refill my cup, I think I could go on at this intense pace of life indefinitely! Not too much to ask, right? Ha!

In all seriousness, we are using the beginning of this year to organize our business to the highest level. I am a big advocate for efficiency, and gathering receipts for taxes has shown this is an area that is lacking (does anyone else have a large plastic tub full of paper to sort through?).


We have a couple large projects that will begin once the ground is un-frozen, until then its clean and purge time at home. Each year I feel the need to really minimalize my house around January/February. Maybe it stems from trying to get every last piece of glitter left over from Christmas, or just that I’m over the clutter of the holidays. Either way, it’s time for it to all leave my house and as a bonus I am reminded of what my kitchen counters look like. I consider it my yearly surprise. Here are a few photos!

IMG_1201 (1).JPG

Also, we will be selling our house soon to move to the farm, so I guess the clean and purge is currently serving two purposes! We don’t quite have our house plans finalized yet at the farm, and thus no start date, but there is not much that can be done right now in the frozen tundra of Iowa in January.

Speaking of that, it is supposed to snow again tonight so I had better tidy up some things outside. I hope this post finds you safe and healthy!

Talk soon!
-Rachael

DIY: Budget Friendly Pantry Organizing!

Hi friends! I’m writing to you from frigid Iowa, where it’s a whopping 1 degree today, but hey we are over halfway through January so this won’t last a whole lot longer! I haven’t posted a DIY for a while, so I wanted to share with you what I recently did with my pantry.

I normally take everything out of my pantry once or twice a year just to make sure nothing is expired or forgotten about, and as I was getting ready to do that again recently I did a few searches on Pinterest and Instagram for inspiration on how to make the space a bit more visually appealing.

There were hundreds of gorgeous photos to choose from, but as I started researching the actual bins and containers for everything it became apparent that this was an EXPENSIVE task. I mean, $14 for a clear plastic tray to put on a shelf?! $25 for a set of 4 glass canisters?! There was just no way I was going to spend that kind of money or organize this space.

Starting Point

Our pantry is a walk-in space, that has a knack for collecting random items due to it’s proximity to the kitchen. The problem with this catch-all space, is that it only has a half door, so all of the random items are on display for every visitor to see. Let me show you what I mean…

From this angle, you can’t see the mess inside!

From this angle, you can’t see the mess inside!

The mess!!!

The mess!!!

Ok, now you know what I was up against! I knew there had to be a more budget friendly way to spruce this up, so I put my thinking cap on.

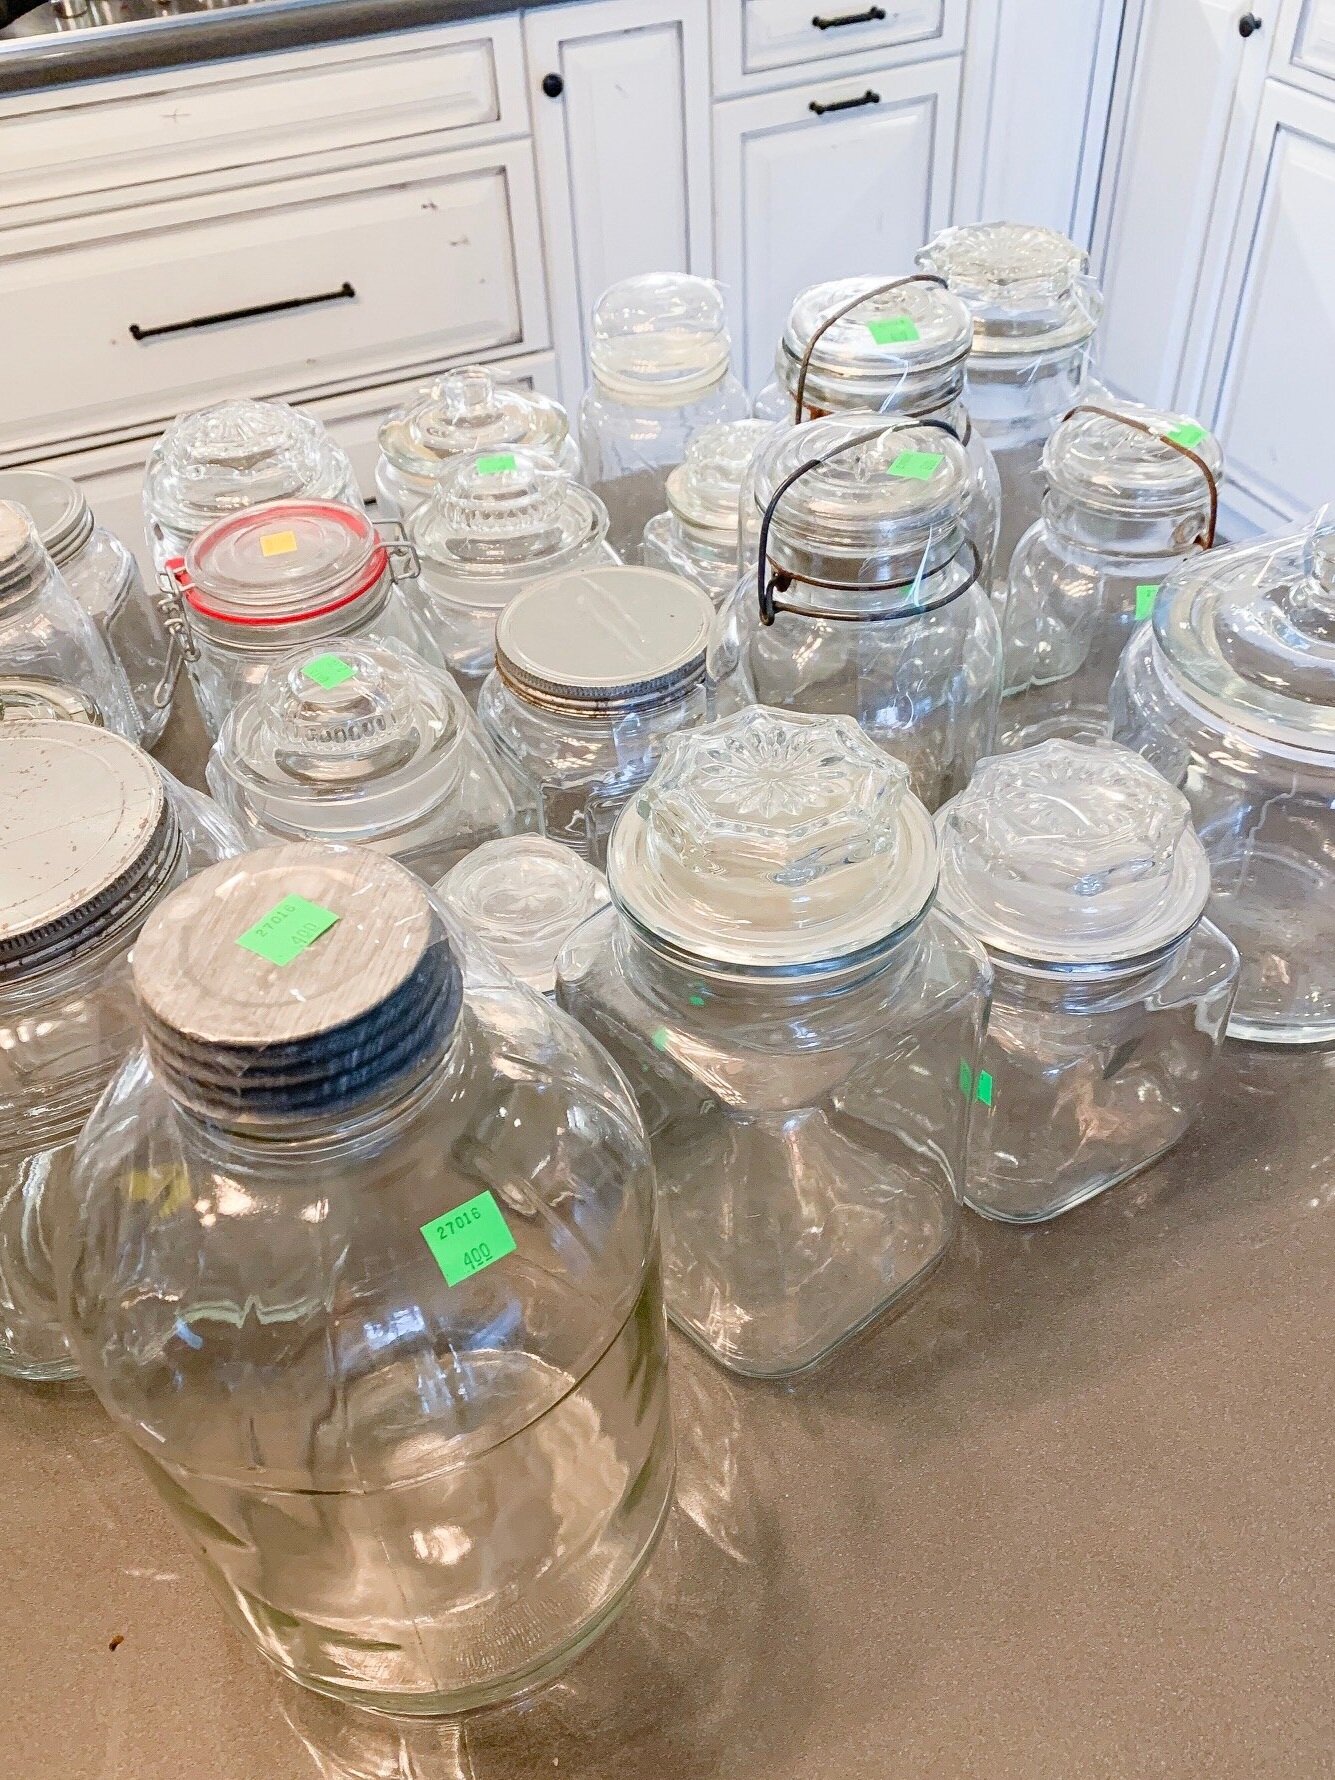
First up, I needed some glass containers. A lot of them. I didn’t really care if they all matched, and I wasn’t going to buy a dozen from Amazon at $5 a piece, so I went down to my local thrift store for some vintage jars and canisters.

IMG_5203.jpg

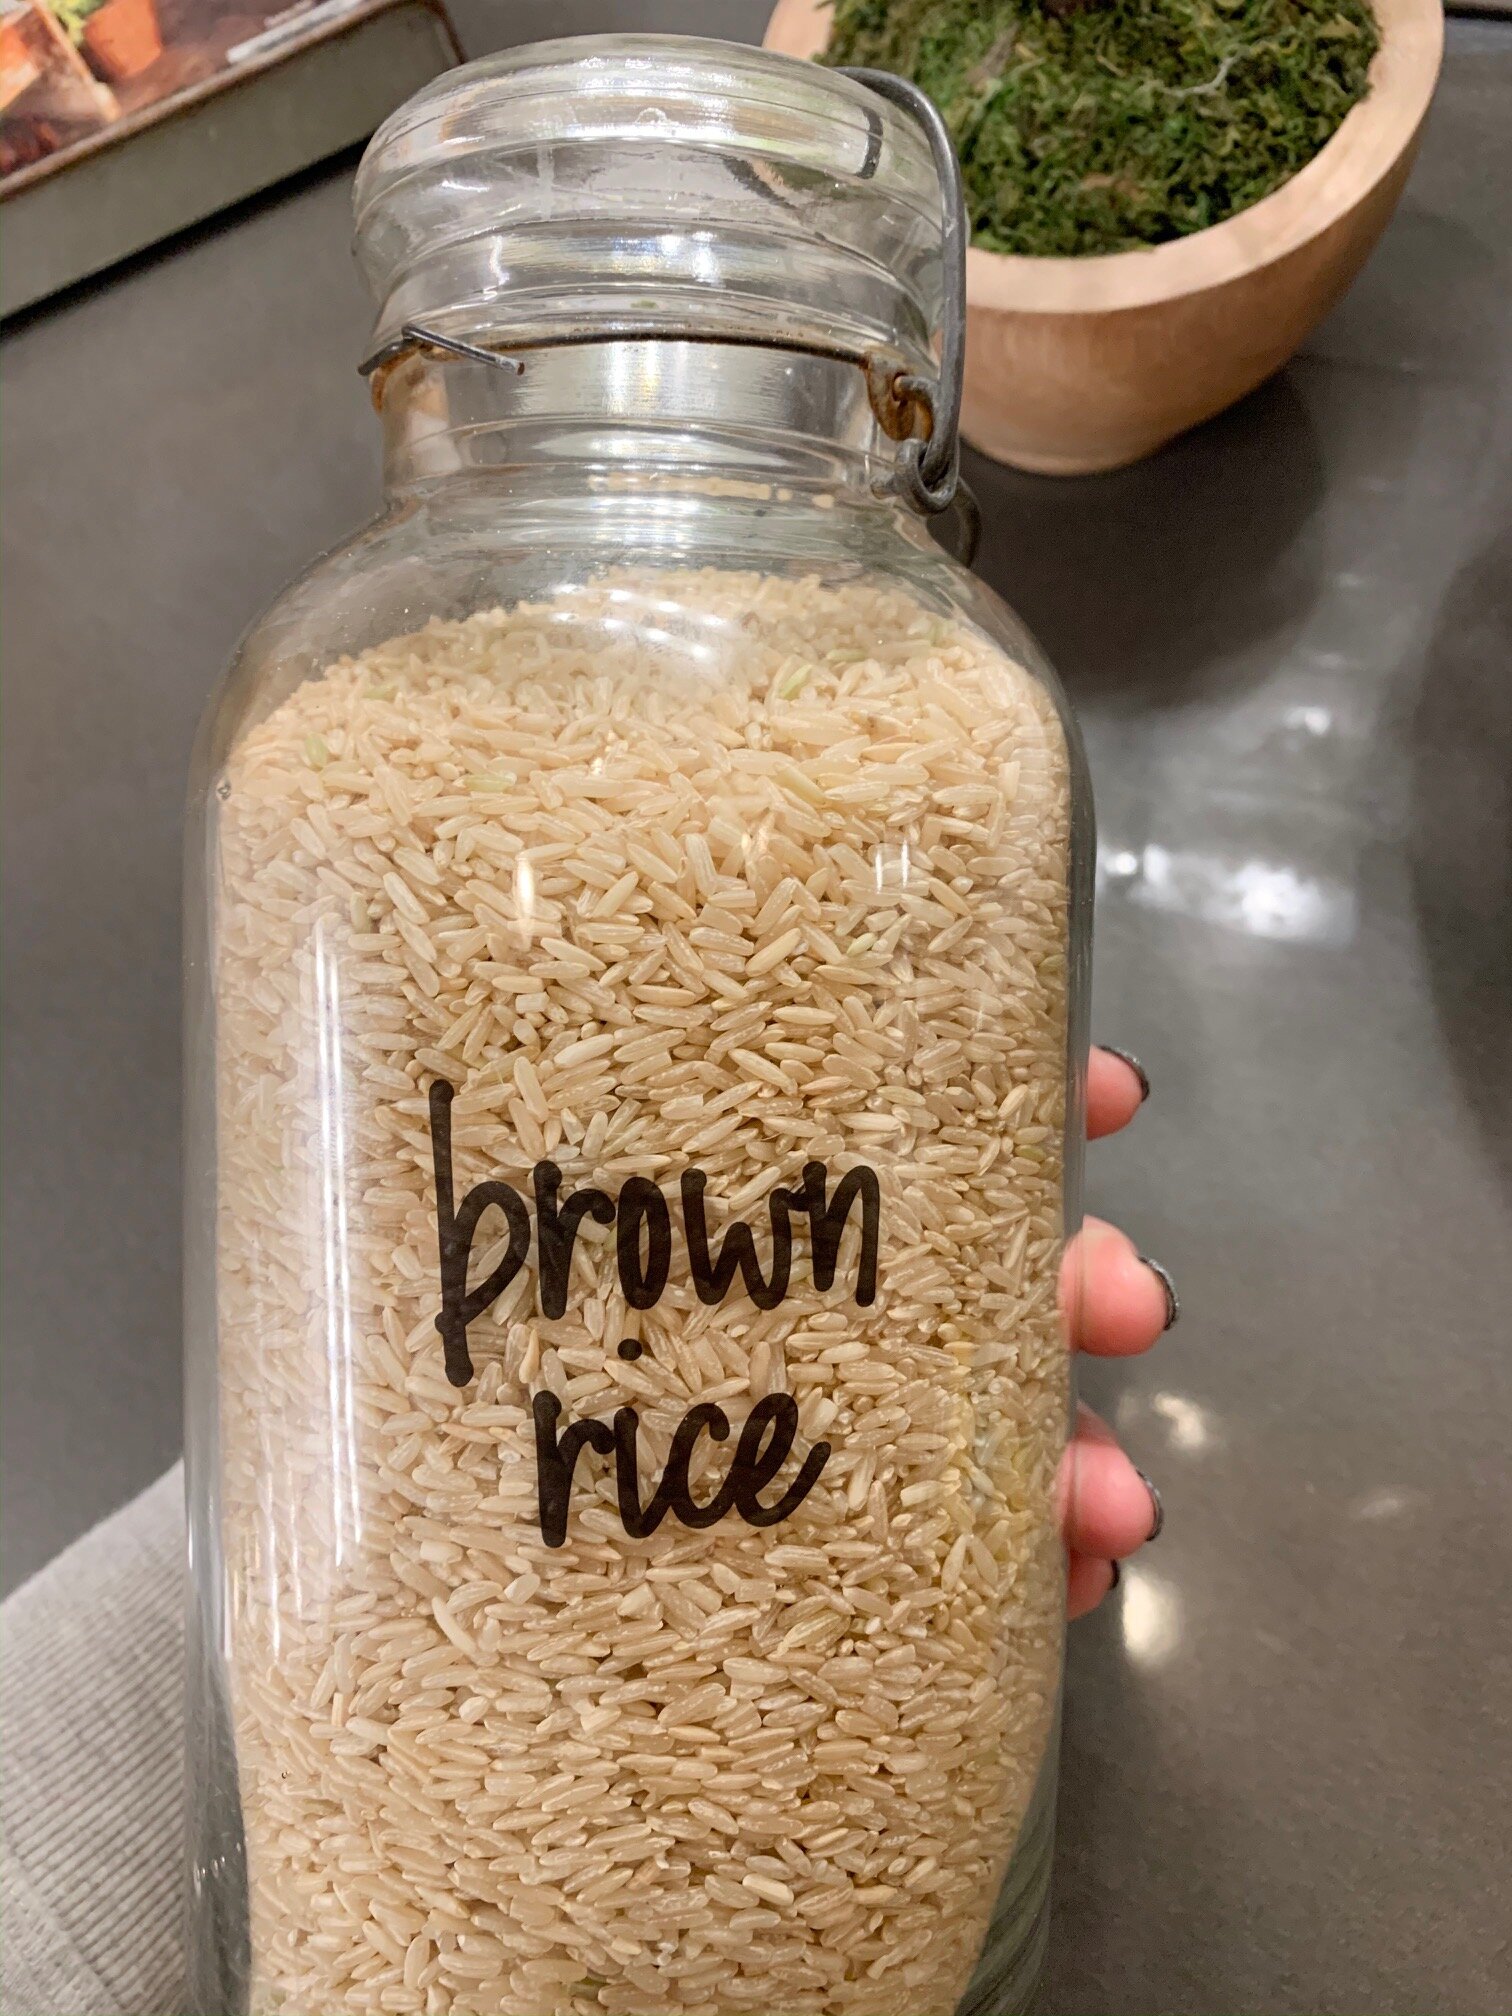
Next up, I needed some labels for these jars and Amazon seemed to have quite the selection. I ordered a set of labels that was around $14 for 50+ stickers from a shop on Amazon called ‘The Talented Kitchen’.

I started the tedious process of emptying boxes and containers into the jars (after washing them of course!) and tossing all the expired items. I even found out what a very rotten avocado looks like, yikes! Here are a couple close up photos of the jars with labels…

IMG_5267.JPG
IMG_5268.JPG

These turned out really nice, and I was able to toss all the half packages of items! Bonus feature of the clear glass jars is the ability to see the amount readily available, making that grocery list a breeze!

Last up, I needed some clear bins for random things, and Amazon had some outrageous prices on clear storage containers so I went with what my local Target had instead. I included a couple pictures of the bins below, the larger one was $4 and the smaller one was $1.

IMG_5274.jpg
IMG_5270.JPG

All Finished!

Here are a couple photos of the finished project, I am not entirely certain that I have everything in the exact place that I want it, but it works for now.

IMG_5251.JPG
IMG_5250.JPG
IMG_5253.JPG

I am really excited how this turned out, as it is no longer an eyesore to anyone walking by the area. Also, I was pretty impressed that I accomplished this project for significantly less cost than originally thought. Next up, I need to repeat this process for the spice cabinet as I currently cannot find anything in there!

That is all I have for you today, thanks so much for stopping by the blog and I would love to see some of your own pantry transformations, feel free to tag me on your photos on Instagram (@aps_design) or Facebook (apsdesignblog).

Cheers!!

Rachael

Hanging Cast Iron Cookware

Hi friends!

Today I have a quick post for all the cast iron cookware lovers out there. We love using this cookware at our home but find it impossible to have enough room to store all of the heavy/bulky pieces. My husband has wanted to hang up a pot rack over the island for years, but I didn’t want all the heavy cookware to block the view of the rest of the living area. Finally, during one of the 800 snow days this month, we came to an agreement on how to hang and store our cast iron pots and pans.

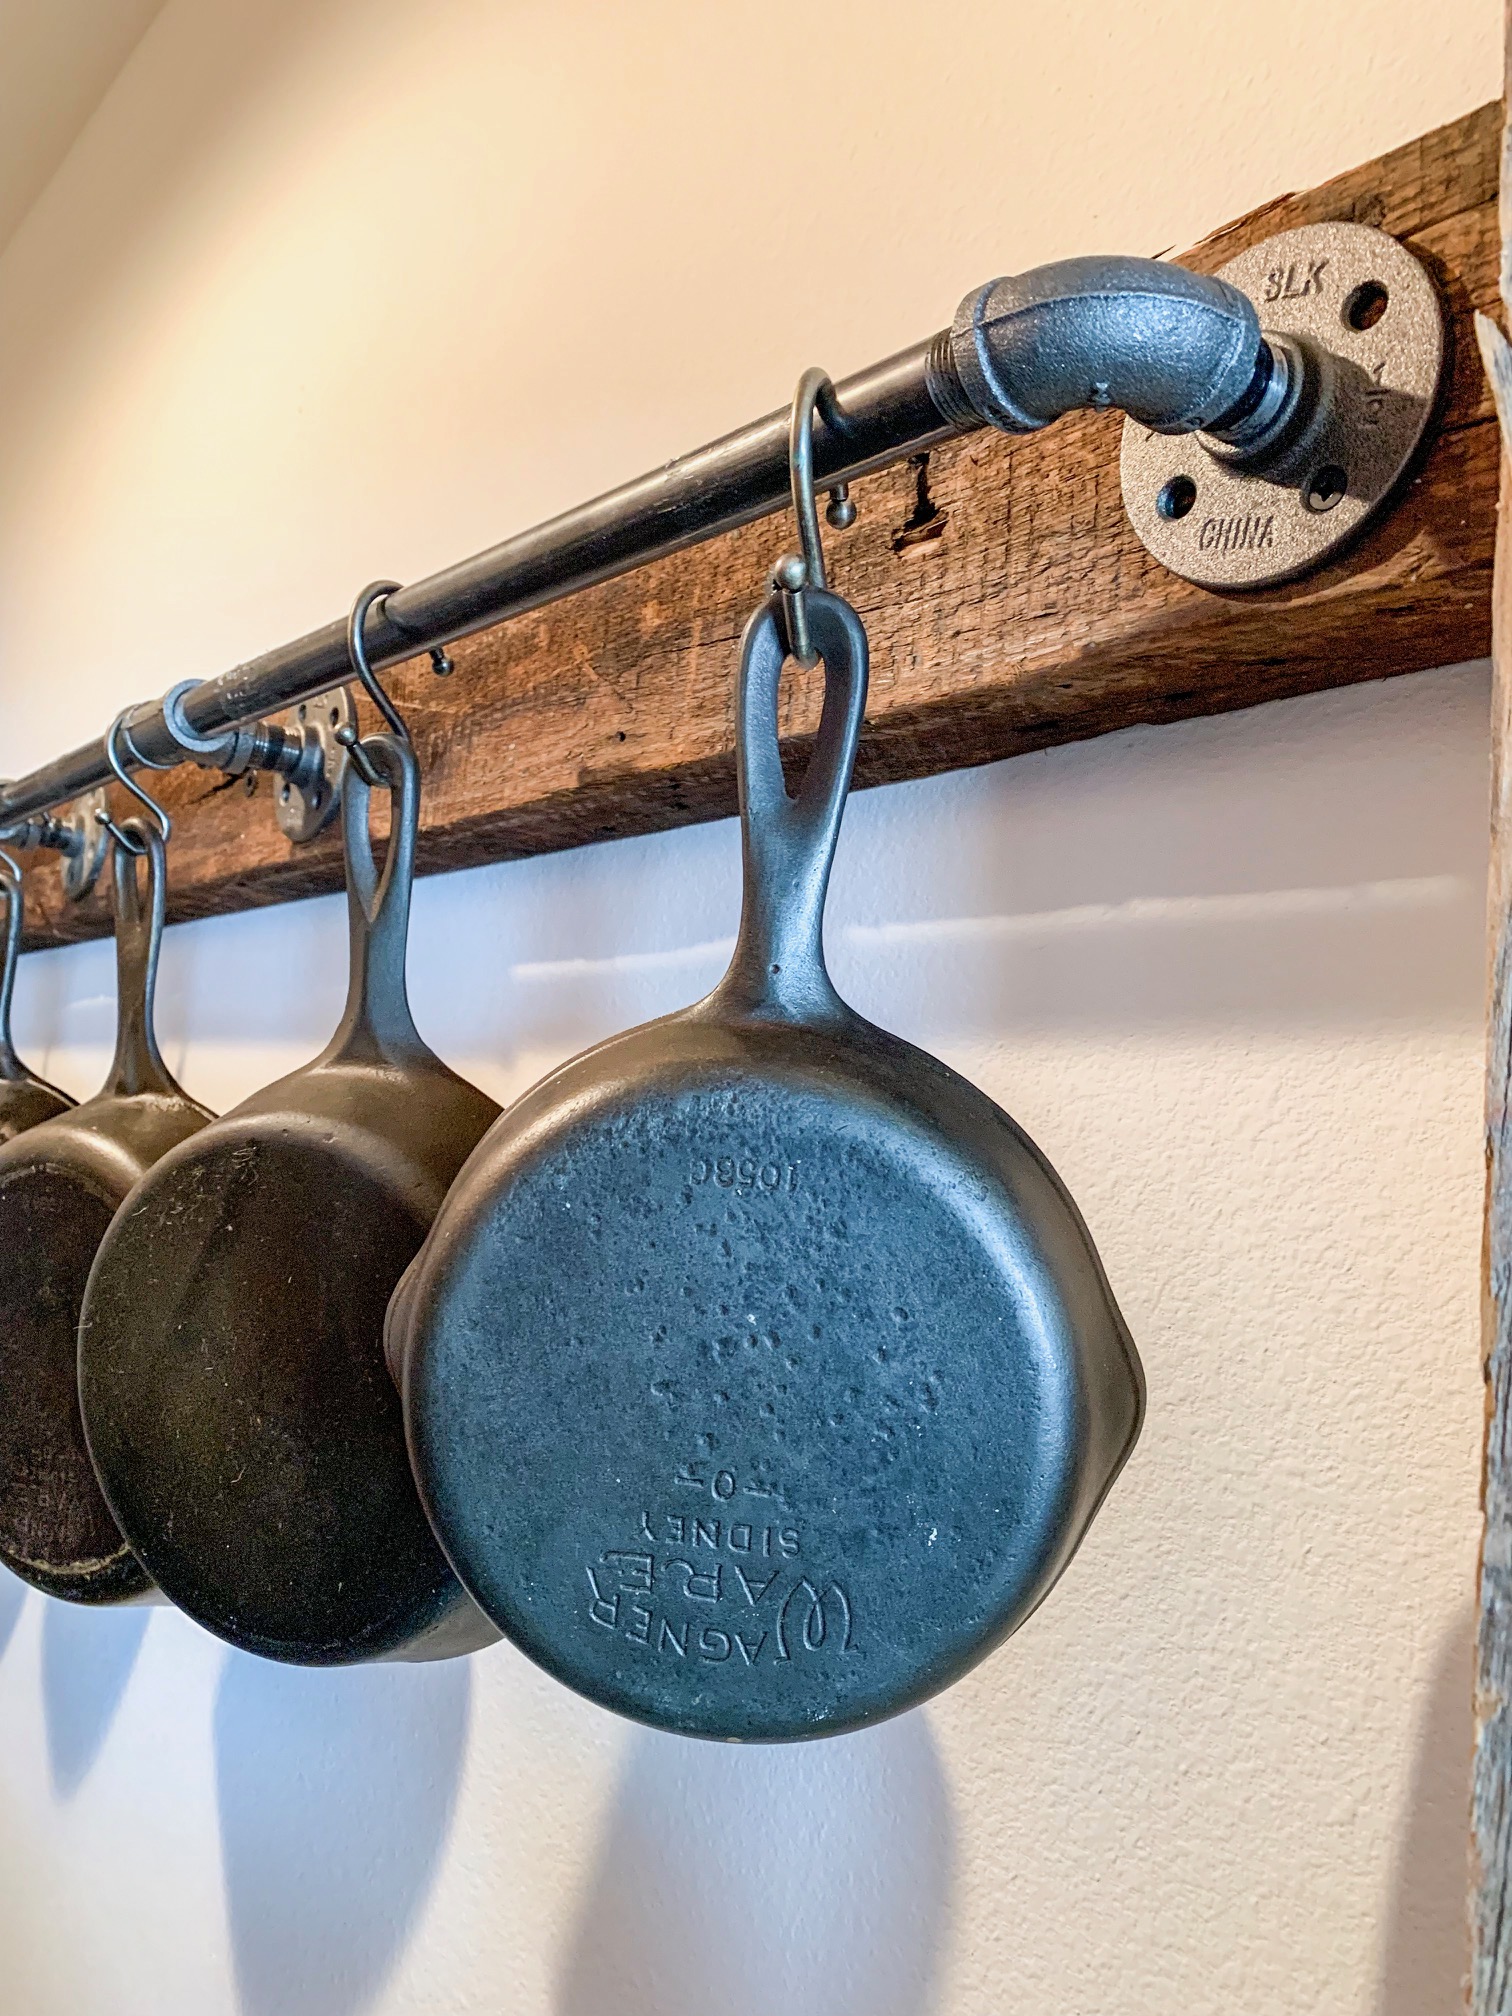
Our pantry was the obvious location, due to it’s proximity to the stove and vast amount of unused space. We also needed the pans out of reach of our 1 year old, so hanging them on the wall seemed to be the best choice. Adam found a barn wood 2x4 in the garage and fastened it to the wall in the pantry, and then added the gas pipe and fittings. For those of you that don’t happen to have a ton of gas pipe sitting around in your garage, you can buy them from any hardware store. We used 1/2in size, but you could use larger if desired. The only downside to working with gas pipe (besides the grease) is all the adhesive and stickers that have to be removed. If you follow us on Instagram, you saw my struggles with this the other night on stories.

IMG_1122.JPG

Here is a close up photo of the gas pipe hardware. I had some old shower curtain hooks from a previous residence that I used to hang up the pots and pans, but I’m sure you could find something more aesthetically pleasing on Amazon. In the future I plan to hang up another identical rack below this one, and use it for hang baskets for potatoes and veggies from the garden (to get them off of the kitchen counters).

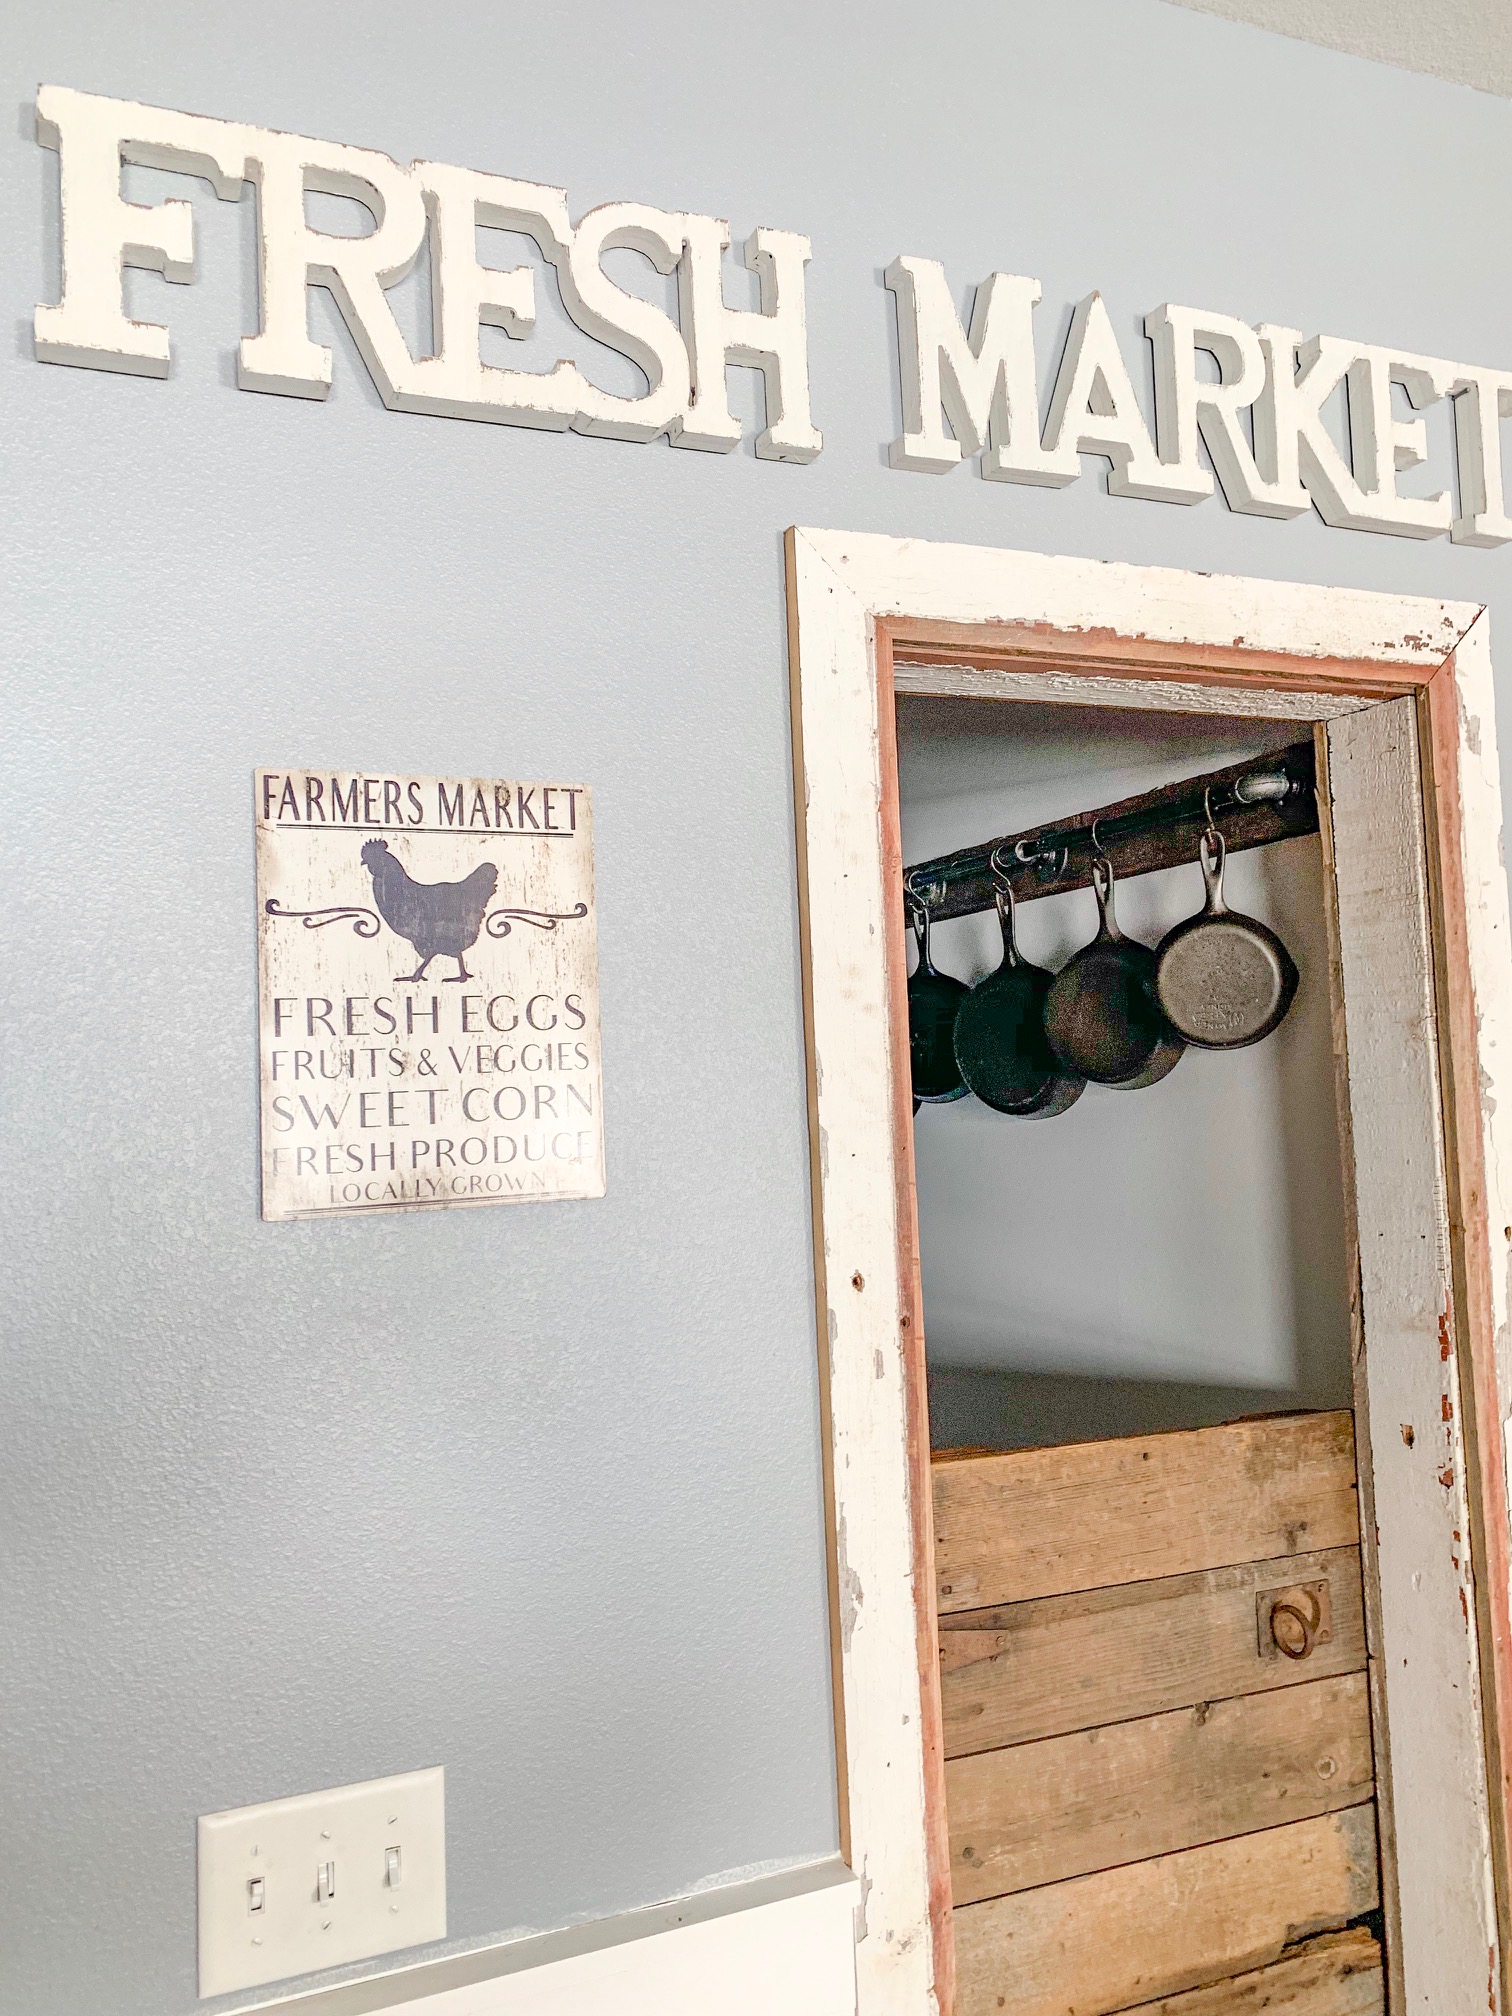
IMG_1125.JPG

Here is the view from outside our pantry.

While this was a quick and easy project, it really has been a game changer for kitchen storage. For those of you who use cast iron cookware, you know its bulky and some sizes can be hard to fit in drawers and cabinets. This storage solution took five skillets and one large stock pot out of our cupboards, freeing up space for further organization.

I hope this post brought some inspiration to your own kitchen organization! Thanks for stopping by the blog today!

Signoff.jpg