
DIY - Bug Repellent Mason Jar Lanterns
Hi friends! Today I have a really easy DIY for the outdoors! Gnats and mosquitoes can really put a damper on outside activities, and bug spray works great for an individual person but I wanted to find a solution for a larger area such as driveway/garage.
I did a bit of research and trial and error, and the results are these cute little mason jar lanterns. They are super easy to make, and extremely budget friendly. I have tested them out myself and can personally say they do actually work, and last quite a long time.
Step by step instructions are below, or feel free to click on any picture to pin this post for later!
First, gather your materials!

You will need:
-A mason jar of any size, complete with lid
-Rope wick
-Liquid bug repellent
I grabbed a few different jars that I had laying around, and then went to Target for the rest of the materials. They are currently having a decent sale on their patio/outdoor items so I was able to pick up the rope wick (came in a package of two) and the liquid bug repellent for under $10 total. I chose the ‘clean burn’ version of the liquid repellent, which has less smoke/flame but maintains the same effectiveness of the standard version. You could use any bug repellent/torch fuel that is designed to be burned in this manner.
Next, its time for assembly!
I had Adam use a drill bit to puncture a hole in the mason jar lid, and fed the rope wick through the opening. You could probably use a hole punch too, but I just didn’t have one on hand. Then I filled the jar about 1/4 of the way and trimmed the wick so it was just a couple inches tall. It took a few minutes for the wick to soak up enough of the liquid to ignite, but once it did I snapped this picture…

I really like that there is no smoke/soot coming from this ‘clean burning’ torch fuel, as that was one of my biggest hesitations to ever investing in the traditional ‘tiki torches’.
Last step…Enjoy!
I made a few different lanterns with a few different sizes and colors of mason jars, and set them out on the front porch when we were out there the other night. Not only did they look cute, but they served a great purpose too!

Quick safety note, these jars do get warm after being lit for a long period of time, so be sure to let them cool before handling them. Also, I like to put them in a metal tray or on concrete (or anything non-flammable) just in case they were to be tipped over.
That’s all I have for you today! I hope you are enjoying those long summer evenings and if you are having a biting insect problem like we were, you might give these lanterns a whirl! As always, thanks for stopping by the blog today!

Summer Front Porch Decor
Hello from Iowa, America’s heartland!
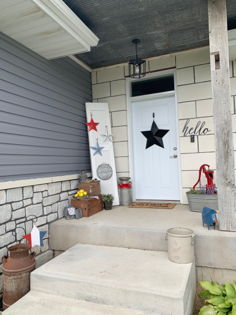
As we get ready to celebrate our country’s birthday in just a few short weeks, I thought I should dig out some patriotic decor and spruce up the front porch. Luckily, Target has metal stars in red, white, and blue in their dollar section currently and since I am there several days a week I was lucky enough to have an early pick and I was able to snag all three colors. These stars were the initial inspiration for my summer porch refresh, and the rest of it came together pretty quickly. I have a few photos pictured below that will hopefully bring you inspiration for your own outdoor decor.

This little lemonade setup was the first part of the porch that I decorated, and I mostly just grabbed things from my house that I thought could withstand the Iowa weather. The lemonade sign is recently from Hobby Lobby, which is having their final closeout prices on their spring items (there are some good deals!!).
Next, it was time to add the pop of patriotic colors…

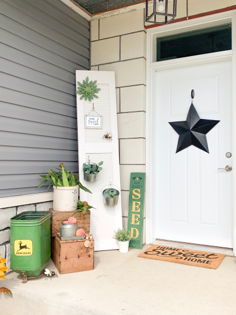
If you remember from my spring porch setup, this old bi-fold door was used to hang pots of succulents and I kept it in place for the metal stars I found at the Target dollar section.
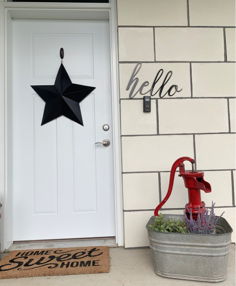
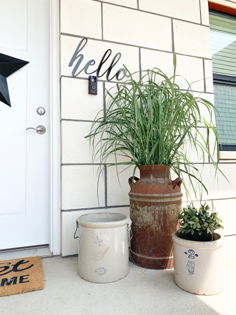
I kept the ‘hello’ sign, the black star, and the welcome mat from my Spring decor, and moved the water pump and wash tub to the right side of the door and added a few plants. Adam keeps saying that this is the year we will get a ‘real’ front door, and I’m holding him to it, so stay tuned for that!
Here are a few pictures of it all together!