Getting BOLD, with Paint!

Recently I was asked about my ‘bold’ paint colors in my home, and how I choose them. Determining colors for a room has never been a time consuming process for me (I am the person in the greeting card aisle that goes with the second or third one that I pick up), but I know this is not always the case for everyone. I have friends who have been wanting to paint their home for nearly a decade but cannot agree on a color or finish.

Today I am sharing my tips on how I make my (bold) paint choices, and maybe they will provide some inspiration to you as well!

The photo that prompted the bold paint color discussion!  Photo credit to Corridor Home Photos

The photo that prompted the bold paint color discussion! Photo credit to Corridor Home Photos

First, choose a high quality paint!

I like the paint and primer combination paints, especially if my project contains existing paint. These styles are a little bit more per gallon, but always have full coverage and eliminate the primer step. Personally, I like the Ovation, HGTV, and Valspar brands at Lowes, but this is just my preference.

Now, It’s time for the color!

I follow a few simple rules…

  1. Never try to match: If there is existing permanent decor (such as cabinets, flooring, trim, etc), never try to match it. I always go with a complimentary color instead.

  2. Work with what you have: Have a difficult color already on the wall? Don’t want to rent an extension ladder to re-do that vaulted ceiling? Pick something that compliments instead (see step 1). My first home came with a single wall that was deep chocolate brown, which was absolutely not my style. Instead of trying to cover that up, I added teal to a neighboring wall to brighten the space (throwback picture below…)

  3. Don’t sweat it: Paint is the most cost effective way to transform your home, and it can always be changed! If you are unsure which color to pick, go with your heart and change it later if you end up not liking it.

My VERY FIRST home, photo from most recent listing.  This home has been sold several times since I lived there, and none of the owners have changed a thing!  Not even the curtains!

My VERY FIRST home, photo from most recent listing. This home has been sold several times since I lived there, and none of the owners have changed a thing! Not even the curtains!

Now, I fully understand that some people prefer neutrals and there is nothing wrong with that! In fact, I really like neutral paint and decor, but it’s just not something I would choose for my own home. In my opinion, all white or neutral colors make for an interesting design challenge so the room does not come across as sterile or cold.

As much as I enjoy a good challenge I also need the decor at my home to be practical. I hate dusting, so arranging 800 pieces of furniture and decor to fill a neutral space is just not realistic. Adding a bold paint color helps decorate the room a bit. Again, just my personal preference!

Here are a few more BOLD paint choices from my current home:

BOLD slate color for the fireplace bump out.  Photo credit: Corridor Home Photos

BOLD slate color for the fireplace bump out. Photo credit: Corridor Home Photos

Barn red in the laundry room, and slate blue in the powder room!

Barn red in the laundry room, and slate blue in the powder room!

Well if you have made it this far you deserve a gold star, as this post somehow became quite lengthy! I guess I am passionate about my paints! Ha! If you have a bold paint choice in your home, I would love to see it! Tag me on Instagram or send me a message!

As always, thank you so much for continuing to support our small business! We will chat soon, big things coming to APS (wink wink).

Stay cool out there in this blazing heat!

-Rachael

DIY Gas Pipe Kitchen Shelving

Hi friends!

Today I have a fun DIY for the kitchen, gas pipe shelving! I know the open shelving trend has been around for a while now, and personally my kitchen cabinets are not organized enough to have the contents visible, but I do enjoy the open look. Recently, we installed gas pipe shelving for the kitchen at the farmhouse project (which is allllmost done!) and I took a few quick photos to show you the process, in case anyone else has been thinking of tackling this type of project. Y’all know I am a fan of all things budget friendly, and this project falls right in line with that! Let’s get to it….

PREP:

Honestly, the worst part about working with gas pipe, is taking all the stickers and adhesive off. The pipes are greasy, and I swear they use some extra adhesive to stick the purchase labels on them. For this project, we used the 1/2 inch version of pipe that can be found at any hardware store, and picked up the corresponding wall plates and end caps as well.

IMG_6811.JPG

After prepping all of the materials, it’s time to measure out and mark the wall. Traditional cabinets sit about 22 inches off of the counter top surface, so that is the height we used for the bottom shelf. A stud finder is a must, as these shelves will carry some weight!

For the top shelf, we just spaced it 12 inches higher, as that is the height I thought looked the best with the remaining wall space available. Each shelf gets two support pipes, and placement of each of the wall plates was marked in pencil on the corresponding stud.

INSTALL:

The next step is attaching the wall plates to the studs, and while the plates have four holes for screws to attach them, we have found it is best to use only two at this step since there is usually some amount of adjustment later on. The below picture is an example, as well as a photo of the type of screws that we use.

IMG_6817.JPG
IMG_6814.JPG

Once the wall plates are installed, it’s time to attach the gas pipe and end caps. This step is fairly straightforward, except make sure to not over-tighten the pipe to the wall plate.

Now it is time to level up the shelving, so the wood pieces lay flat and dishes don’t lean or fall. For this shelving we used a 6 foot level, but you can use whatever size works for your project. I would say the most tedious part of installing this type of shelving, is making sure they are level. Some wall plates will need to be adjusted by tightening or loosening the screws, or even moving them a quarter of an inch or so. I tend to be very particular for kitchen shelving, and less with shelving for other purposes, but it is up to your personal preference. Either way this step is not difficult, just a bit time consuming.

IMG_6819.JPG

Once all of the shelves are level, this is the time to add in the additional screws to the wall plates, if that is your preference.

The final step is adding the wood pieces to span the gas pipes, and complete the shelving. Another quick check of the level, and you are all done! Here is a picture of how this project turned out.

IMG_6827.JPG

We chose open shelving for the kitchen at the farmhouse project mostly due to the fact the kitchen is pretty small, and would look pretty cluttered with full upper and lower cabinets. There is still plenty of enclosed storage, for all those appliances or bulky items.

We have a different style of gas pipe shelving in our personal home, which is used to display my collection of vintage glass bottles. Overall, the process is the same.

Here is a photo of the other style:

IMG_1722.JPG

I just want to wrap up this post thanking each of you for being here and supporting us! I feel like 2020 has really thrown everyone’s plans for a whirlwind and we just have to learn to keep adapting to the changes and challenges presented to us (sometimes daily).

Also, I have been really itching to get back into the DIY’s lately (I feel we got away from them a bit over the last year) so feel free to shoot me a message or comment if you have something specific you have been looking for. I hope everyone is doing well, and I will chat with you again soon!

Cheers!

Rachael

Farmhouse Renovation: Month 5

If you are new here, we are in the process of renovating a c.1900 Iowa farmhouse that we purchased about 5 months ago, and to be honest I thought we would be pretty much done with this project by May 1st. Well, as you all know, a world-wide pandemic came along and threw everyone’s plans for 2020 out the window.

I was torn on even writing this update, I mean there are much more important things you could be reading right now. Ultimately I decided to proceed, to try and provide a sense of normalcy for myself and maybe a 5 minute break from reality for my readers.

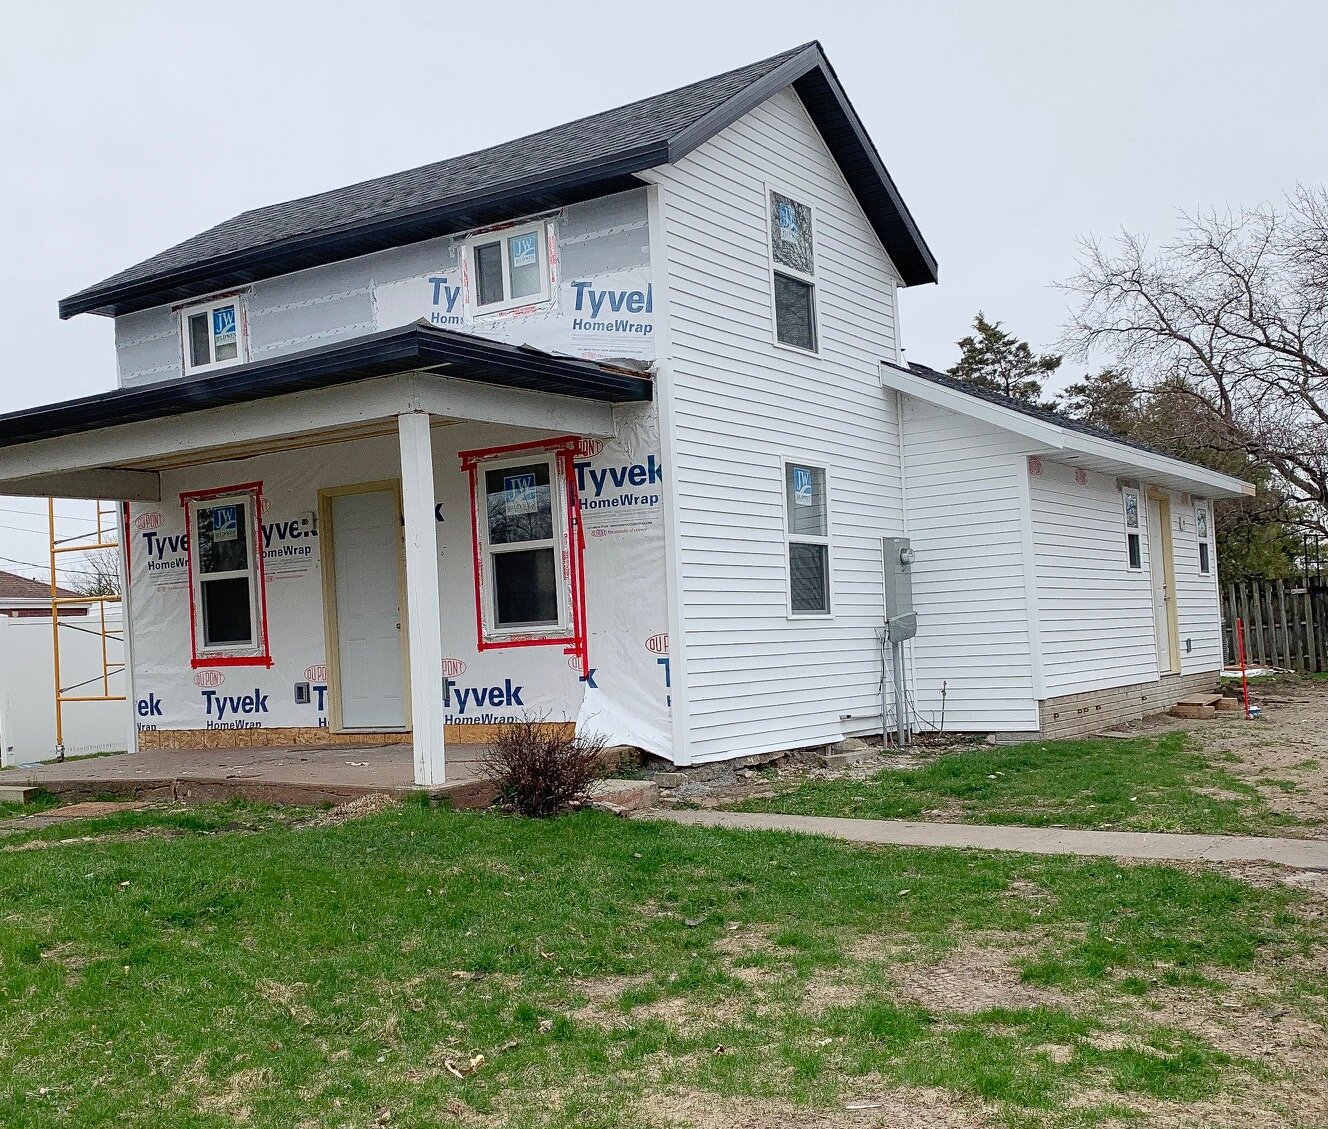
Over the last month, we have made huge progress on the outside of the house, installing new siding, sofitt and fascia. You will notice the black sofitt (overhang of the roof) on the old section of the house, and white on the new section. We also have white vertical siding for the front of the home, which is actually going up tomorrow, weather permitting. Here is a close up photo of the sofitt, so you can see the difference.

IMG_5945.JPG

I really wanted to do something different for the original section of the home, to make it stand out, and I think the contrast of the black sofitt is exactly what was needed. I really wanted to install vertical siding on the entire house, but it’s so much more expensive than horizontal, and wasn’t really in the budget. Either way, the home will look amazing with an all new exterior.

In fact, I dug up an old photo of the house that we took right after we bought it and I will add it below for comparison. There’s quite a difference from a few months ago!

IMG_5946.JPG
This was taken right after we closed on the house!

This was taken right after we closed on the house!

With the completion of the vertical siding on the front of the house this week, all that remains for exterior work is the front decking and posts. And of course some landscaping, but this is Iowa so we can’t do much of that until late May. Maybe some flower shops will be open by then!

Well that is all i have for this update. Again, thank you for taking time out of your day to stop by the blog, we really appreciate seeing all of your support. Wherever you are in the world, I hope you are staying safe and healthy.

Until next time,
Rachael

Sawhorse Table Refresh

Well hello friends!

It’s been a little while since I posted a decor refresh, and there’s no time like the present! February is when I normally dig out some of the faux greenery, mostly just to remind myself that spring is almost here. The temperatures have been steady in the 30’s lately, which might not sound warm depending on where you are located but trust me it’s pretty darn good for winter in Iowa!

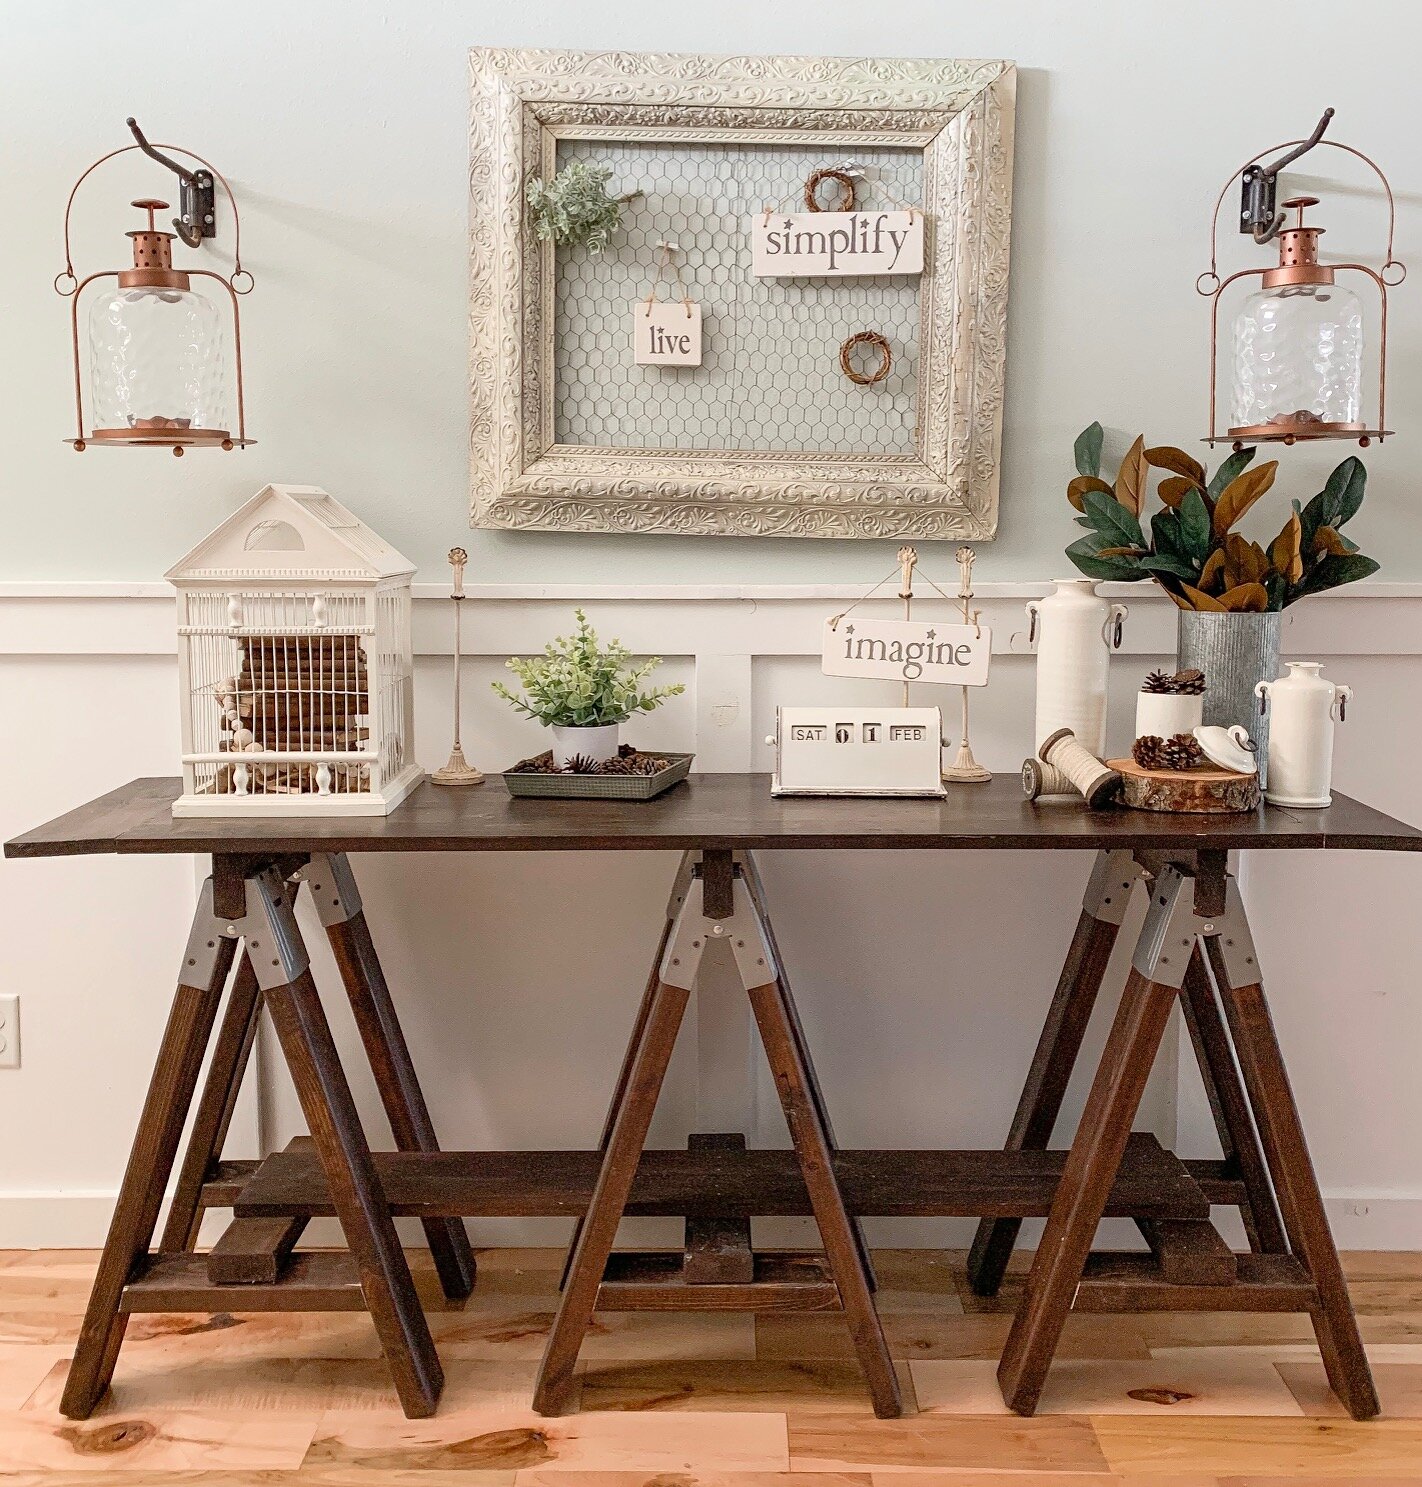
The table I am sharing today is in my entryway, it’s a sawhorse table that my husband Adam built several years ago. Here’s a few photos of what I did with it recently.

IMG_5431.JPG

These magnolia stems were considered holiday decor at Target, so I snagged them at the end of December for 70% off (y’all know I love a bargain!).

IMG_5433.JPG

Recently, a friend generously gave me this stack of old books and I stacked them in an old birdcage with some wooden beads. Simple! I also wanted to mention that little green plant in the background, they are currently at target for $5! They are quite nice quality for the price!

Here are a couple photos of the whole table put together…

IMG_5435.JPG
IMG_5437.JPG

This table came together nicely, minus the crooked frame on the wall but hey, we can’t have it all together ALL the time :)

That’s all I have for you today, thank you for stopping by the blog today and be sure to check back soon for my dining room refresh that I have in the works!

Stay warm out there!

-Rachael

DIY: Budget Friendly Pantry Organizing!

Hi friends! I’m writing to you from frigid Iowa, where it’s a whopping 1 degree today, but hey we are over halfway through January so this won’t last a whole lot longer! I haven’t posted a DIY for a while, so I wanted to share with you what I recently did with my pantry.

I normally take everything out of my pantry once or twice a year just to make sure nothing is expired or forgotten about, and as I was getting ready to do that again recently I did a few searches on Pinterest and Instagram for inspiration on how to make the space a bit more visually appealing.

There were hundreds of gorgeous photos to choose from, but as I started researching the actual bins and containers for everything it became apparent that this was an EXPENSIVE task. I mean, $14 for a clear plastic tray to put on a shelf?! $25 for a set of 4 glass canisters?! There was just no way I was going to spend that kind of money or organize this space.

Starting Point

Our pantry is a walk-in space, that has a knack for collecting random items due to it’s proximity to the kitchen. The problem with this catch-all space, is that it only has a half door, so all of the random items are on display for every visitor to see. Let me show you what I mean…

From this angle, you can’t see the mess inside!

From this angle, you can’t see the mess inside!

The mess!!!

The mess!!!

Ok, now you know what I was up against! I knew there had to be a more budget friendly way to spruce this up, so I put my thinking cap on.

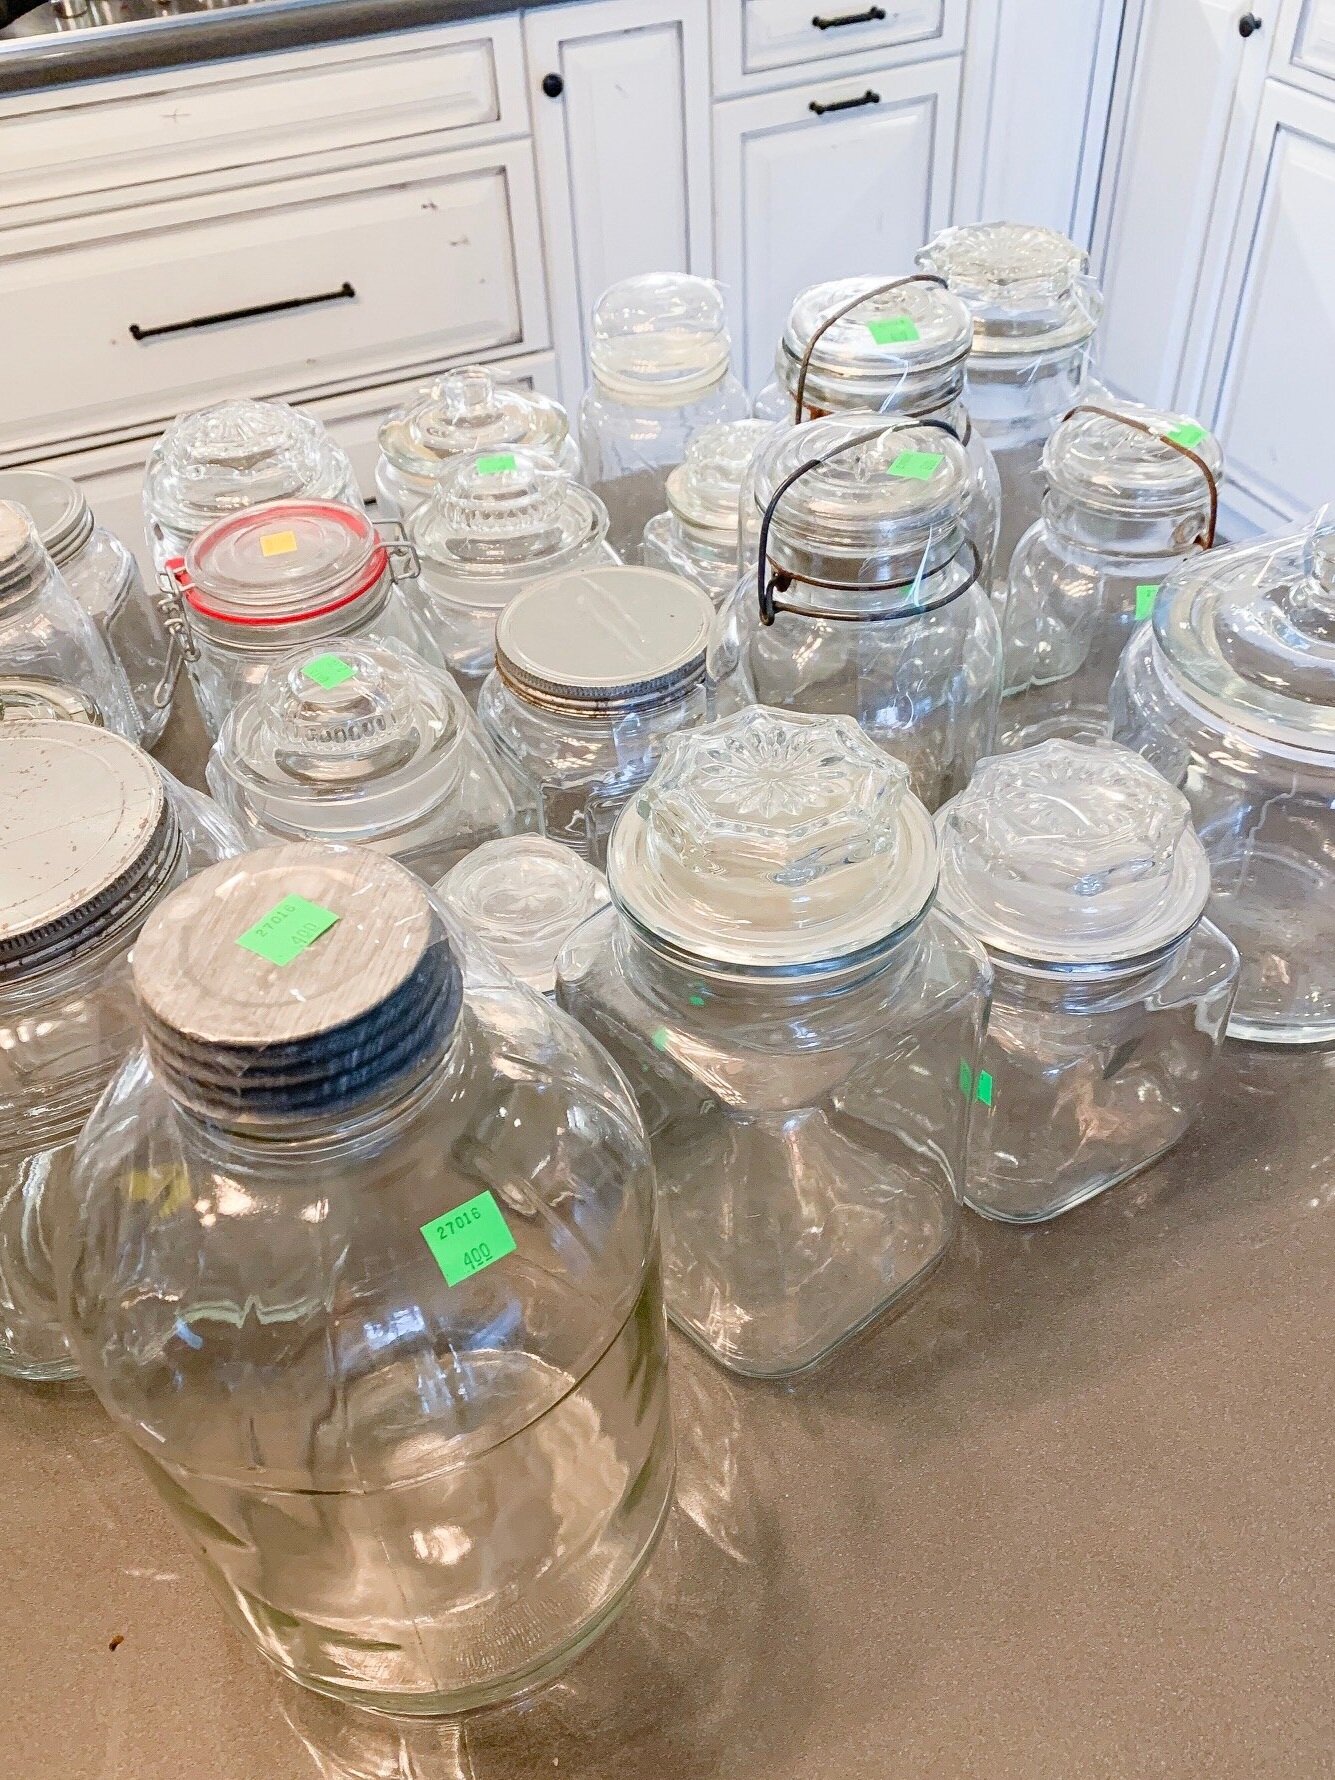
First up, I needed some glass containers. A lot of them. I didn’t really care if they all matched, and I wasn’t going to buy a dozen from Amazon at $5 a piece, so I went down to my local thrift store for some vintage jars and canisters.

IMG_5203.jpg

Next up, I needed some labels for these jars and Amazon seemed to have quite the selection. I ordered a set of labels that was around $14 for 50+ stickers from a shop on Amazon called ‘The Talented Kitchen’.

I started the tedious process of emptying boxes and containers into the jars (after washing them of course!) and tossing all the expired items. I even found out what a very rotten avocado looks like, yikes! Here are a couple close up photos of the jars with labels…

IMG_5267.JPG
IMG_5268.JPG

These turned out really nice, and I was able to toss all the half packages of items! Bonus feature of the clear glass jars is the ability to see the amount readily available, making that grocery list a breeze!

Last up, I needed some clear bins for random things, and Amazon had some outrageous prices on clear storage containers so I went with what my local Target had instead. I included a couple pictures of the bins below, the larger one was $4 and the smaller one was $1.

IMG_5274.jpg
IMG_5270.JPG

All Finished!

Here are a couple photos of the finished project, I am not entirely certain that I have everything in the exact place that I want it, but it works for now.

IMG_5251.JPG
IMG_5250.JPG
IMG_5253.JPG

I am really excited how this turned out, as it is no longer an eyesore to anyone walking by the area. Also, I was pretty impressed that I accomplished this project for significantly less cost than originally thought. Next up, I need to repeat this process for the spice cabinet as I currently cannot find anything in there!

That is all I have for you today, thanks so much for stopping by the blog and I would love to see some of your own pantry transformations, feel free to tag me on your photos on Instagram (@aps_design) or Facebook (apsdesignblog).

Cheers!!

Rachael

Repurposing : The #1 Budget Friendly Decorating Hack

I often get asked about decorating in general, and the cost associated with it. It’s no secret I am an epic bargain hunter, and I think that’s why repurposing old items is my favorite budget friendly decorating hack. The possibilities are only limited by your search terms on Pinterest!

Don’t like an old cabinet or buffet taking up space in your garage? Add some new paint and hardware and turn it into a decor display cabinet or changing table in a nursery. Looking for inexpensive ‘new to you’ furniture? Check out your local thrift store or salvage yard, and then spruce it up a bit.

Today I have a few examples of repurposed items currently on display in my home, and I will share the cost of the items and the updates that I did to them. Feel free to pin any images for later reference!

First up, my medicine cabinet turned decor cabinet! I found this beauty at a local thrift store, and I believe the price was only $10 (it was even on sale!). I completely updated it for only $5, and it now sits as a permanent fixture on my entryway wall, and I simply change out the decor for different seasons. For details on how I updated the cabinet, click here.

Total cost: $15

Medicine Cabinet, original condition

Medicine Cabinet, original condition

c0edd002344cffd1a190c0d93ee6e9d7.jpeg
61b629c2be992f0a4cde38b896f5be6b.jpeg

Next, I have an old shutter style hinge door on my front porch that I simply use hooks to hang different decor on depending on the season. This item was FREE, on a local facebook marketplace group. All I did was clean it up and bit and do a small amount of sanding. Here are a couple examples of how I have used it so far, and the photo on the left is how it looks currently.

Total cost: $0

41818817d8985fa0c01dc2d005b50001.jpeg
c7d39c325a8db0d22febb31f53a45ad9.jpeg

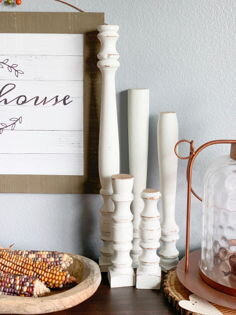
I’m not afraid to get a little dirty and bust out the chalk paint when necessary, and this comes in handy when an item needs a fresh look. A perfect example is a set of 3 spindles I picked up at a salvage store, and I was determined to make them look like candlesticks. I had Adam cut them at different heights, for a total of 5 candlesticks made from the 3 spindles. At $2 a piece, my cost was $6 total. A little chalk paint and sanding later, I have 5 pretty versatile pieces of decor and you will see them in my home during every season. For the full tutorial, click here.

Total cost: $6

IMG_0556.jpg
72180625e2e09fc44735d0b5648560a7.jpeg

Lastly, I have a deep love for decorating with old farm items. These might look like junk to the untrained eye, but the history in each piece is what calls my heart to them. For example, this chicken feeder from a local flea market sits on my dining room table almost year round, filled with various seasonal decor. I sometimes find myself wondering how many chickens ate from this trough over the years and what other stories this item holds, not to mention it makes a great centerpiece because it doesn’t obstruct views of people sitting at the table!

Total Cost $10

7bc5c3be65b2a17a0337531036ca3948.jpeg

I hope today I could show you that having a vast assortment of decor and/or decorating your home for each season doesn’t have to be expensive. In fact, I get such enjoyment searching for that bargain and then bringing new life to old items. How do you decorate with repurposed items in your home? I would love to hear all about it!

I hope October is treating you well, wherever you are!

Signoff.jpg

Fall Front Porch Decor Guide

Ok, we made it to September, which means Fall decor is in full swing!

I have the pumpkin bread in the oven, harvest candles burning, and a huge bale of straw on the front porch. It’s just not officially Fall until a bale of straw is on the front porch!

Our porch is west-facing, and has quite a bit of afternoon sun & heat throughout September. For this reason, I have initially decorated with only faux items as any live flowers or pumpkins would be scorched by the elements. I imagine around the beginning of October I will be able to add some Fall mums and pumpkins to the mix. For now, I will share what I have done so far so you can hopefully find some inspiration for your own porch!

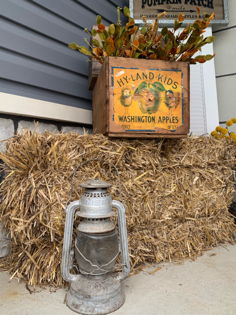
As I mentioned above, a bale of straw is a must! I picked up one at a local farm and fleet store for $5. If you wanted a super simple front porch setup, and didn’t have time to round up other decor, a simple stack of three bales of straw would work perfectly!

10e92e66358603552256d087b322b80f.jpeg

Here I have my bale of straw sitting on end, matched up with some other items I shopped from my garage!

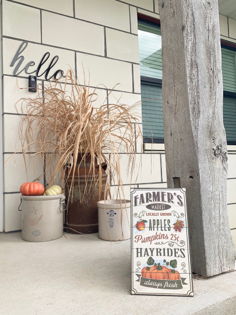
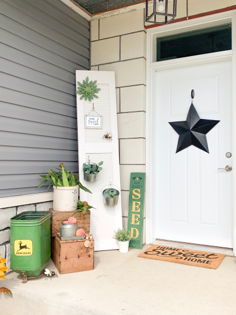
Next up, I grabbed some trimmed dead grasses and stuck them in a rusted metal milk jug that usually resides on my porch year round. I also had a few faux pumpkins and put them in a crock along with a fold out sign. The vertical barn beam is the front pillar to our house (neat, right?!).

895b8c9b5448ed2aa1f9ff0bf04a42d8.jpeg

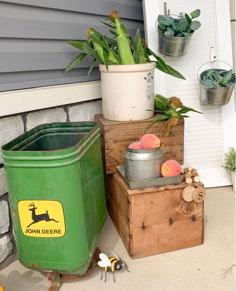
If you have been following along for a bit, you might remember the thrift-ed set of white shutter-style closet doors that I picked up this spring, and how I used them on the porch to hang buckets of succulents. Well, that set of closet doors remains in place, only this time with a few Fall items….as pictured below!

37dd5432f190a903cc32fbd12a4ec9b7.jpeg

We are still in the process of getting a black door, but for now I have to work with what I have! I found the door hanger in the holiday section of a local craft store, and I am extra excited about the fact that it doesn’t make any noise when it blows in the wind!

My last important piece of porch decor is this metal sunflower, which is one of my all time favorite outdoor items. Around November I will have to retire this guy until next Summer, but for now he stay’s put!

847e348cdc44357c989d5930e0ce0393.jpeg

Well friends, that’s all I have going on for the front porch this time around! As I mentioned above, I will be adding some live flowers and pumpkins as the days get cooler, and I will be sure to post an update. Until then, happy decorating for Fall and thank you for stopping by the blog today!

-Rachael

Fall Decor Preview

I love Summer, and believe me I am not rushing it along, but September is by far my favorite month of the year and we are just days away from being there. Often as hot as August, the weather in September is much more manageable with cooler nights and less humidity. It’s the best of both Summer and Fall, all wrapped into one!

My home always shows my excitement for Fall decor, and this year will be no different! I definitely have more Fall/Autumn items than any other season, which requires some creative storage but also quite a bit of time for setup. Each year I do everything differently, and that’s all part of the fun! We have an event here the first weekend in September, so my goal is to have everything decorated by then. Fall decor takes a bit of work, but is so versatile and lasts all the way through Thanksgiving. I will just add a few pumpkins/gourds in October and boom! Done!

I have a few areas of my home already set up for Fall, and today I am sharing them to hopefully bring you some inspiration when it’s time to decorate your own home. I will note that I don’t change anything out for Halloween, but that is just my own preference. This year I am really feeling inspired by the neutral tones and I tried to incorporate them as much as possible on my front entryway table. Here are a few photos.

cc0fede4bb5f50af56626c91481b20b6.jpeg
207e213d5451d00e8efa35fe46438c54.jpeg

I tried to keep this area fairly simple, as it is highly trafficked by the 1 year old and items are pulled down constantly to be played with. I haven’t really embraced neutral white or brown decor for Fall in the past, but I am experimenting and incorporating it this year. Decorating is an ever evolving hobby!

Next up is my dining room buffet!

9e692115049c1420dac15c956f92d2a5.jpeg

I brought in a bit more color to this nook of the home, as this buffet sits right next to the dining room table and that will undoubtedly have some bright displays when I am done with it.

I have recently discovered a company that takes antique pieces and re-purposes them into candles, and I had to have one. This bucket candle is filled with ‘Fall Harvest’ and it’s fitting in just perfectly with my Fall decor!

8c9a6188de44aff9b6ee9296d297fe52.jpeg
8455c339252c837e8f9165eec75c5f0e.jpeg

That’s all the Fall decor I have ready to go as of today! I hope some of this can inspire you for your own decorating this season, and as always feel free to share your photos with us either here or on Instagram.

Thanks for stopping by the blog today! We really appreciate it!

Happy Decorating!

-Rachael

The Final Summer Porch Refresh!

If you have been following along you might be aware that sweet corn season officially started this week here in Iowa, and I might be just a teeny bit excited about that! In fact, I had to incorporate the first delivery of corn into my final Summer porch refresh of the year. That’s correct, the next time I redo this space it will be with pumpkins!

But for now, I had to take down the 4th of July decor and I wanted to incorporate a few farming pieces to set up for the future harvest season. As a collector of all things random and old, I happened to have everything I needed stored in the garage (which has kind of unintentionally become my decor locker, just don’t tell Adam). This John Deere seed planter from an old tractor is a great example…

74906d4031a1b99e1e184eb495f70cb0.jpeg

The fresh ears of corn in this photo are from our local CSA/farm share program that is delivered weekly throughout the spring and summer. For more information about farm shares, you can see my full post here.

Here are a couple more photos of this newly refreshed space!

3a82275f7f885595fa0b0334e6447638.jpeg

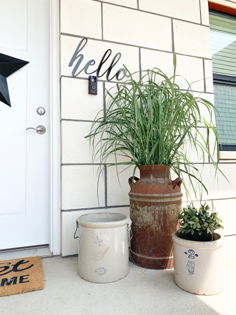
For the other side of the door I snagged some of the decorative grass from my front landscaping that is currently out of control, and stuffed it into an old rusty milk can that i picked up at a garage sale a couple years back. The black metal ‘hello’ sign will stay for now, but I might take it down for the winter months, as it gets pretty cold here and I don’t want it damaged or warped in any way.

8c410791a4ce8682d44f2dfbf638e95a.jpeg

Here’s a front shot of the whole front porch, which is one of my more favorite area’s to decorate at my home. Now, if only I can light a fire under Adam and have him replace the construction door that’s been there for 4 years next month! It’s the little things….

8f61029b17d664610d873b31d0628ba2.jpeg

That’s all I have for you today, thank you for stopping by the blog and I hope I have been able to inspire you on your own decorating adventure! As always, feel free to share your projects and questions either here or over on Instagram.

Happy Summer!

Rachael

DIY - Bug Repellent Mason Jar Lanterns

Hi friends! Today I have a really easy DIY for the outdoors! Gnats and mosquitoes can really put a damper on outside activities, and bug spray works great for an individual person but I wanted to find a solution for a larger area such as driveway/garage.

I did a bit of research and trial and error, and the results are these cute little mason jar lanterns. They are super easy to make, and extremely budget friendly. I have tested them out myself and can personally say they do actually work, and last quite a long time.

Step by step instructions are below, or feel free to click on any picture to pin this post for later!

First, gather your materials!

39d5c6caec345345caf76207bd316d60.jpeg

You will need:

-A mason jar of any size, complete with lid

-Rope wick

-Liquid bug repellent

I grabbed a few different jars that I had laying around, and then went to Target for the rest of the materials. They are currently having a decent sale on their patio/outdoor items so I was able to pick up the rope wick (came in a package of two) and the liquid bug repellent for under $10 total. I chose the ‘clean burn’ version of the liquid repellent, which has less smoke/flame but maintains the same effectiveness of the standard version. You could use any bug repellent/torch fuel that is designed to be burned in this manner.

Next, its time for assembly!

I had Adam use a drill bit to puncture a hole in the mason jar lid, and fed the rope wick through the opening. You could probably use a hole punch too, but I just didn’t have one on hand. Then I filled the jar about 1/4 of the way and trimmed the wick so it was just a couple inches tall. It took a few minutes for the wick to soak up enough of the liquid to ignite, but once it did I snapped this picture…

09614116a003b8b8a9975b5c181ee841.jpeg

I really like that there is no smoke/soot coming from this ‘clean burning’ torch fuel, as that was one of my biggest hesitations to ever investing in the traditional ‘tiki torches’.

Last step…Enjoy!

I made a few different lanterns with a few different sizes and colors of mason jars, and set them out on the front porch when we were out there the other night. Not only did they look cute, but they served a great purpose too!

774b681c09ec47a67ba71e2907d36c80.jpeg

Quick safety note, these jars do get warm after being lit for a long period of time, so be sure to let them cool before handling them. Also, I like to put them in a metal tray or on concrete (or anything non-flammable) just in case they were to be tipped over.

That’s all I have for you today! I hope you are enjoying those long summer evenings and if you are having a biting insect problem like we were, you might give these lanterns a whirl! As always, thanks for stopping by the blog today!

Signoff.jpg