Repurposing : The #1 Budget Friendly Decorating Hack
I often get asked about decorating in general, and the cost associated with it. It’s no secret I am an epic bargain hunter, and I think that’s why repurposing old items is my favorite budget friendly decorating hack. The possibilities are only limited by your search terms on Pinterest!
Don’t like an old cabinet or buffet taking up space in your garage? Add some new paint and hardware and turn it into a decor display cabinet or changing table in a nursery. Looking for inexpensive ‘new to you’ furniture? Check out your local thrift store or salvage yard, and then spruce it up a bit.
Today I have a few examples of repurposed items currently on display in my home, and I will share the cost of the items and the updates that I did to them. Feel free to pin any images for later reference!
First up, my medicine cabinet turned decor cabinet! I found this beauty at a local thrift store, and I believe the price was only $10 (it was even on sale!). I completely updated it for only $5, and it now sits as a permanent fixture on my entryway wall, and I simply change out the decor for different seasons. For details on how I updated the cabinet, click here.
Total cost: $15

Medicine Cabinet, original condition


Next, I have an old shutter style hinge door on my front porch that I simply use hooks to hang different decor on depending on the season. This item was FREE, on a local facebook marketplace group. All I did was clean it up and bit and do a small amount of sanding. Here are a couple examples of how I have used it so far, and the photo on the left is how it looks currently.
Total cost: $0

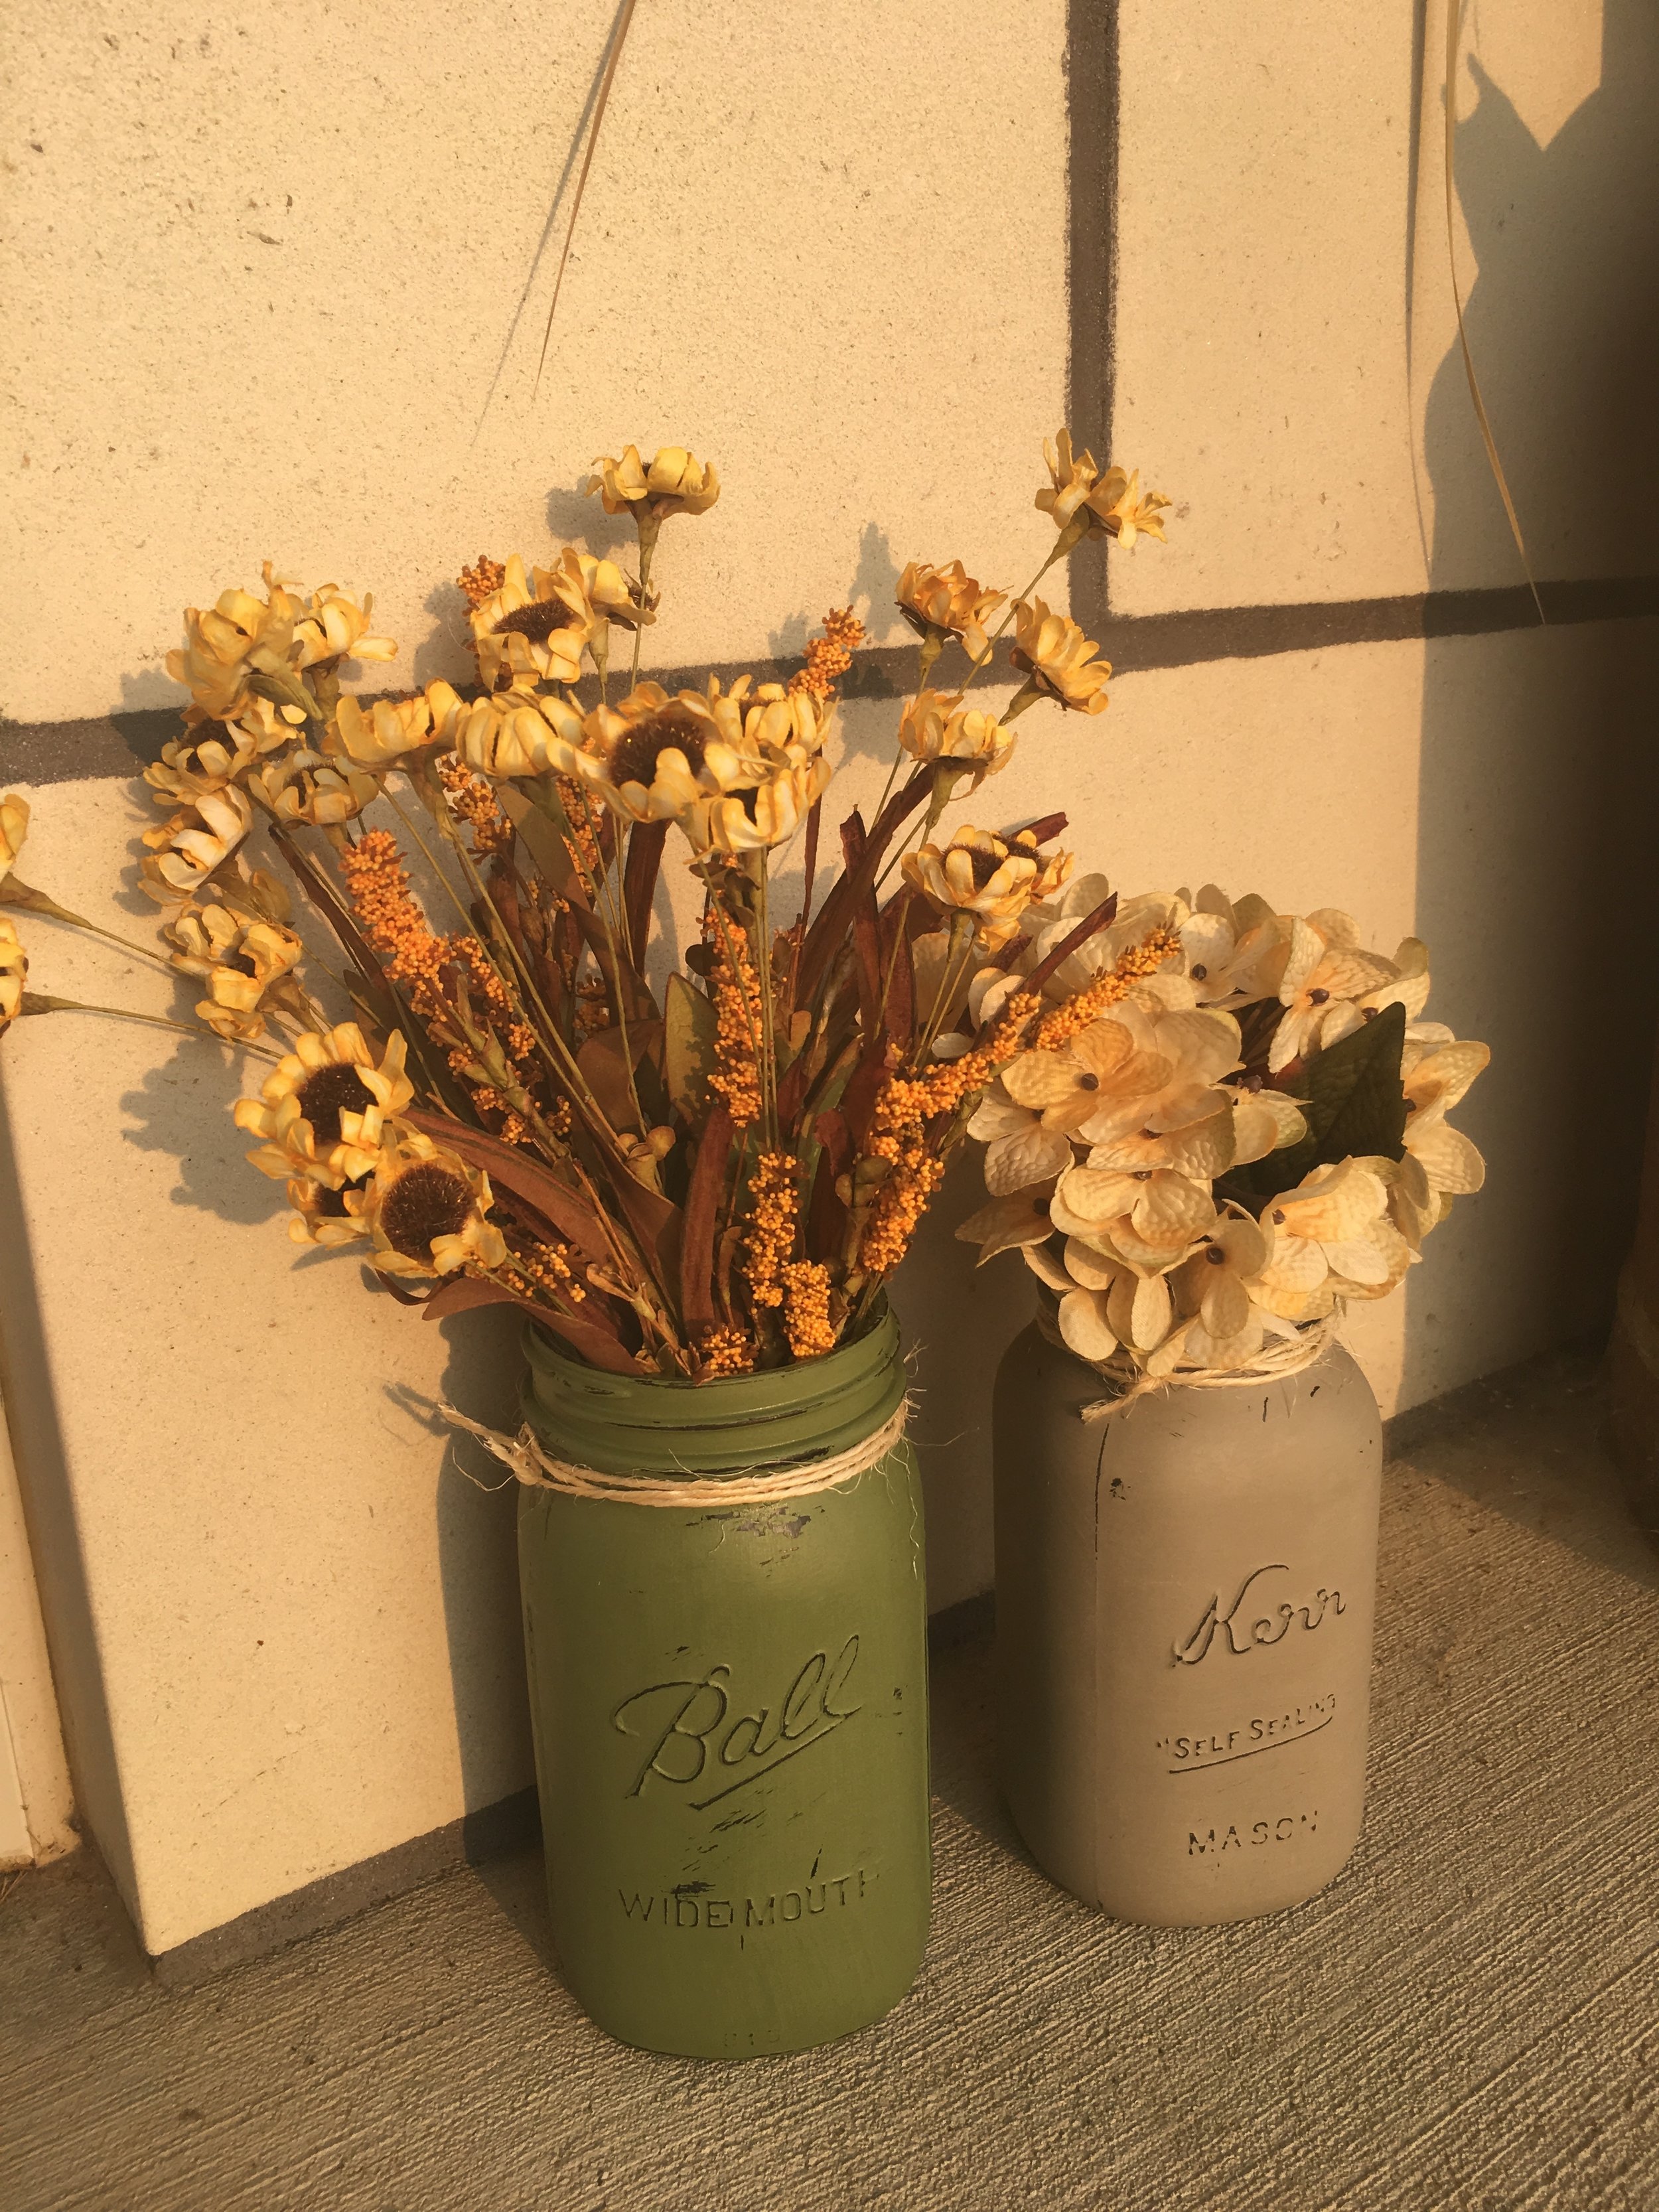
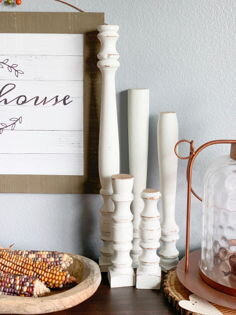
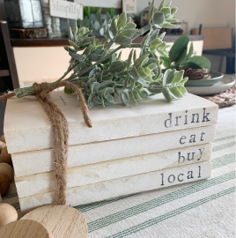
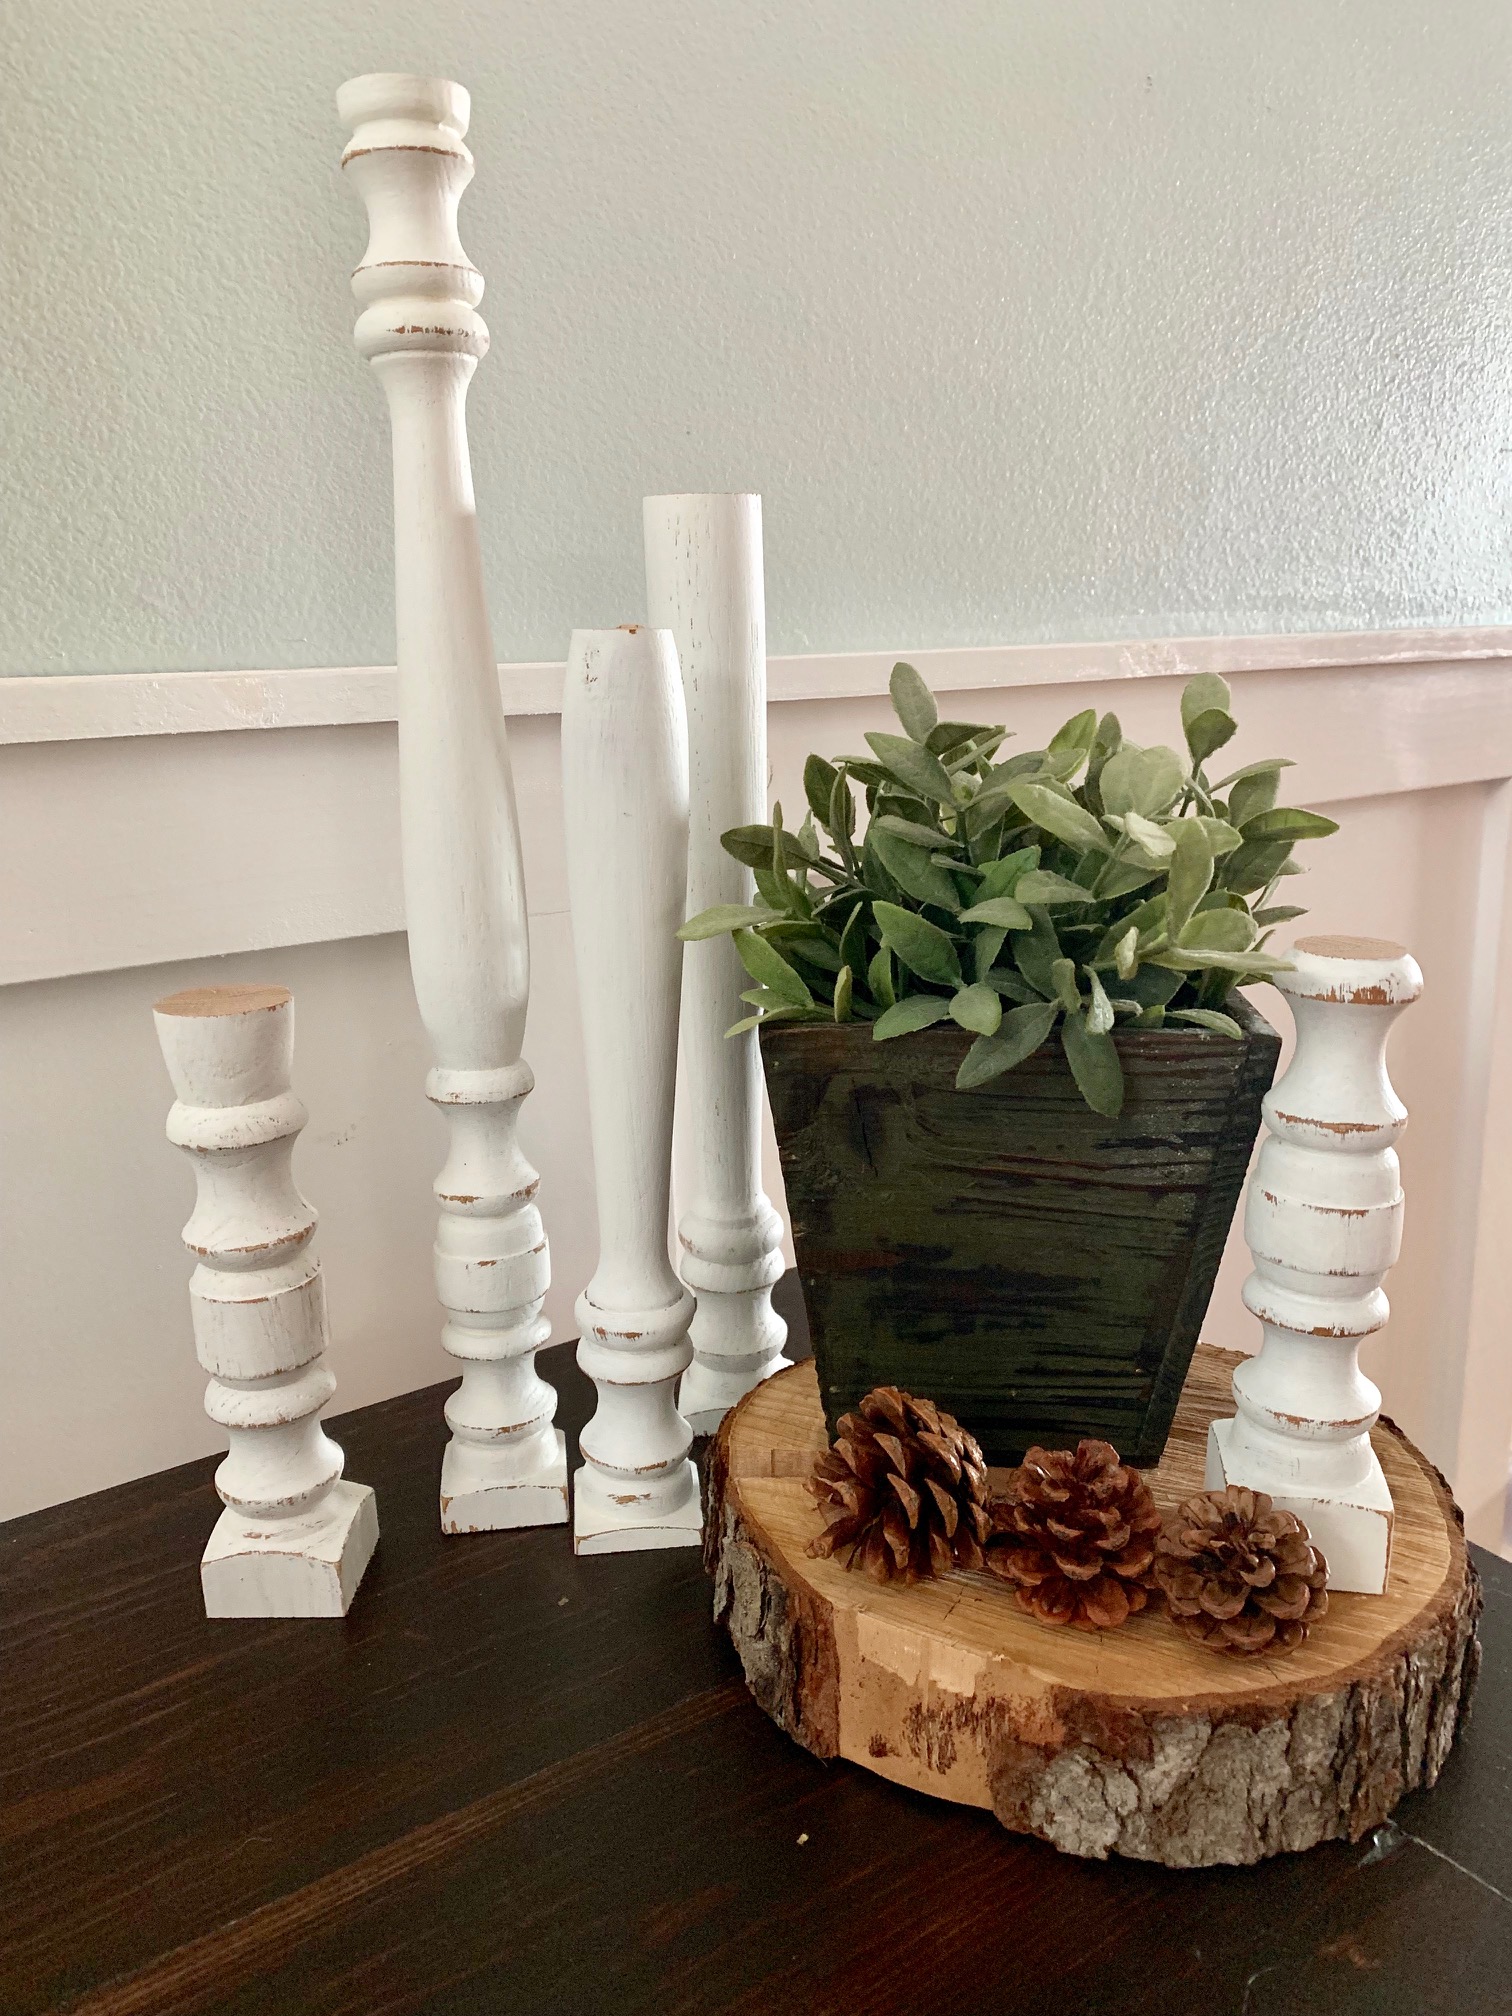
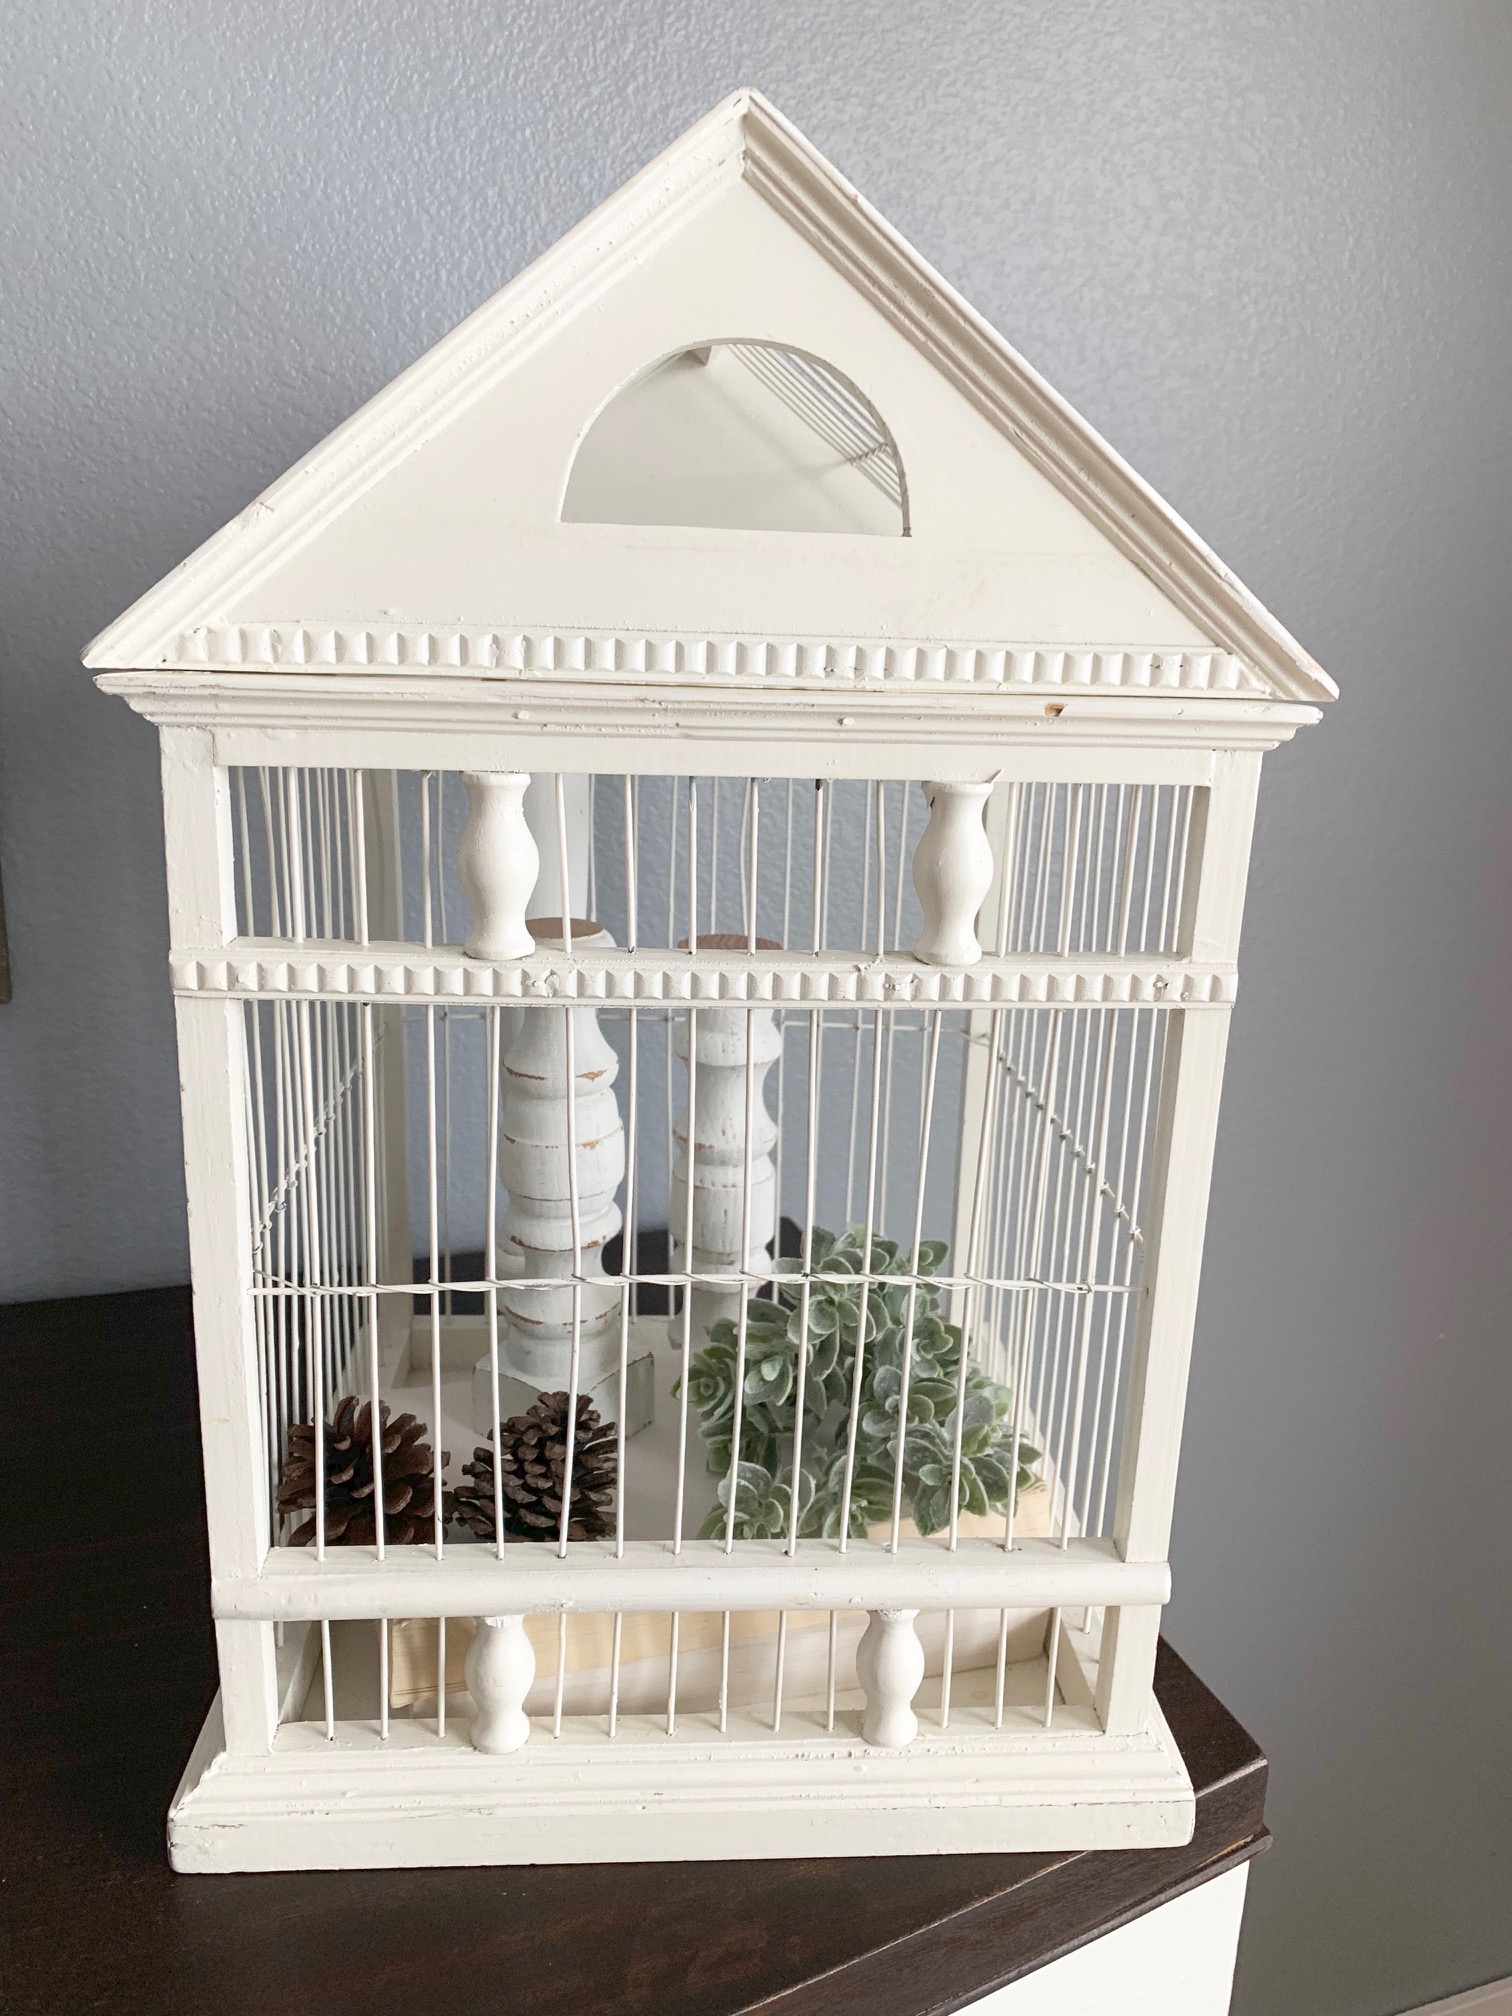
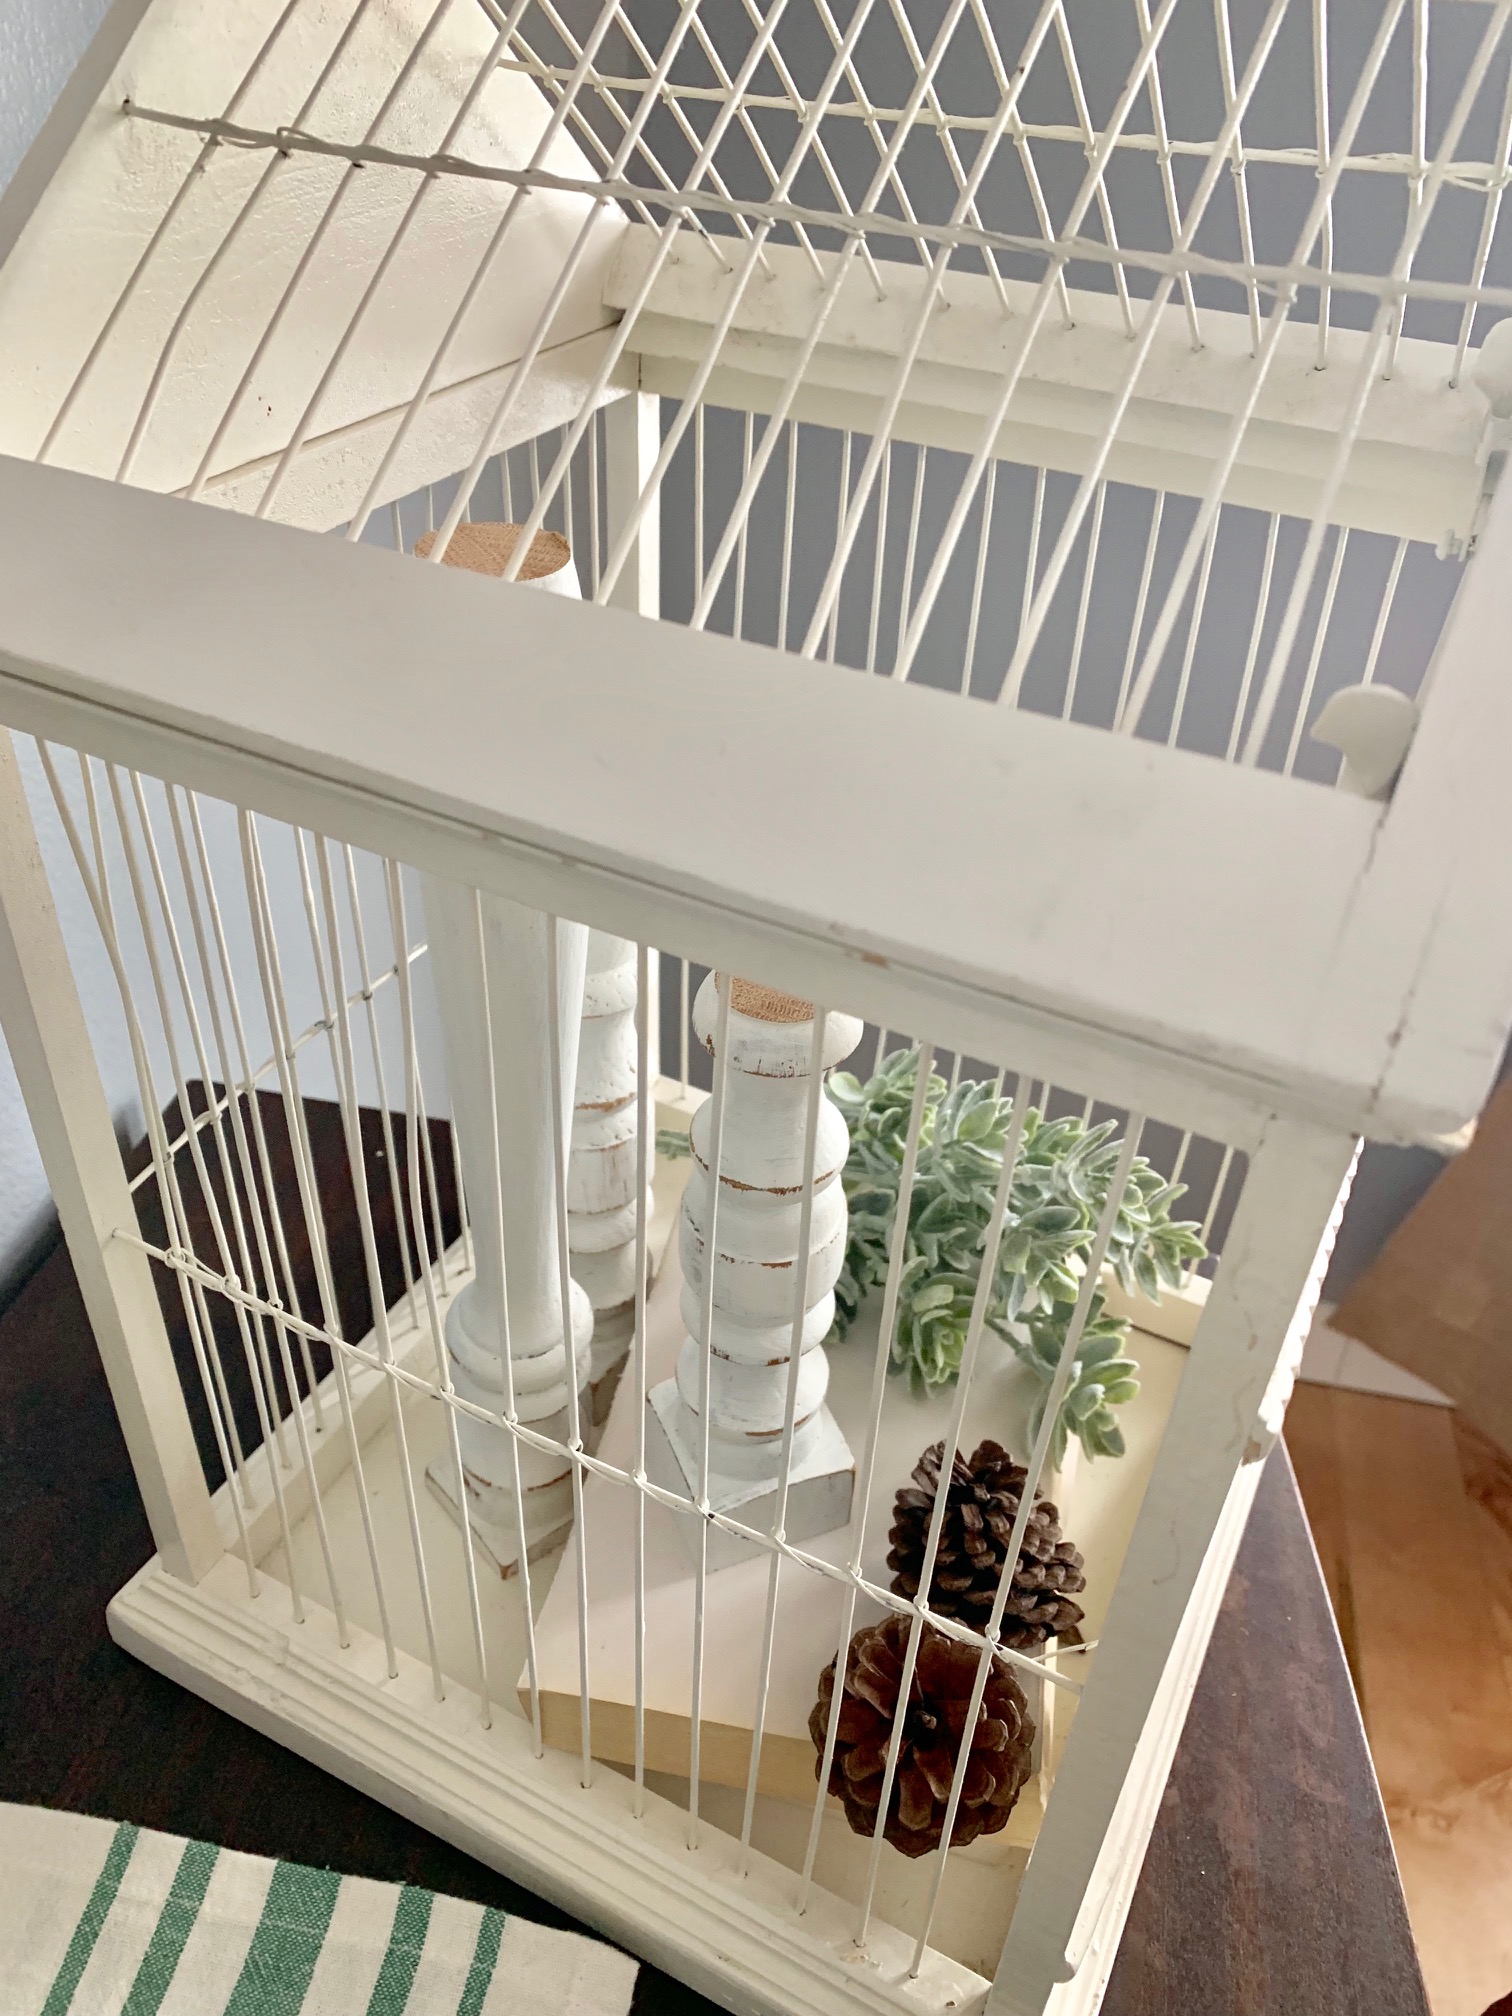
I’m not afraid to get a little dirty and bust out the chalk paint when necessary, and this comes in handy when an item needs a fresh look. A perfect example is a set of 3 spindles I picked up at a salvage store, and I was determined to make them look like candlesticks. I had Adam cut them at different heights, for a total of 5 candlesticks made from the 3 spindles. At $2 a piece, my cost was $6 total. A little chalk paint and sanding later, I have 5 pretty versatile pieces of decor and you will see them in my home during every season. For the full tutorial, click here.
Total cost: $6

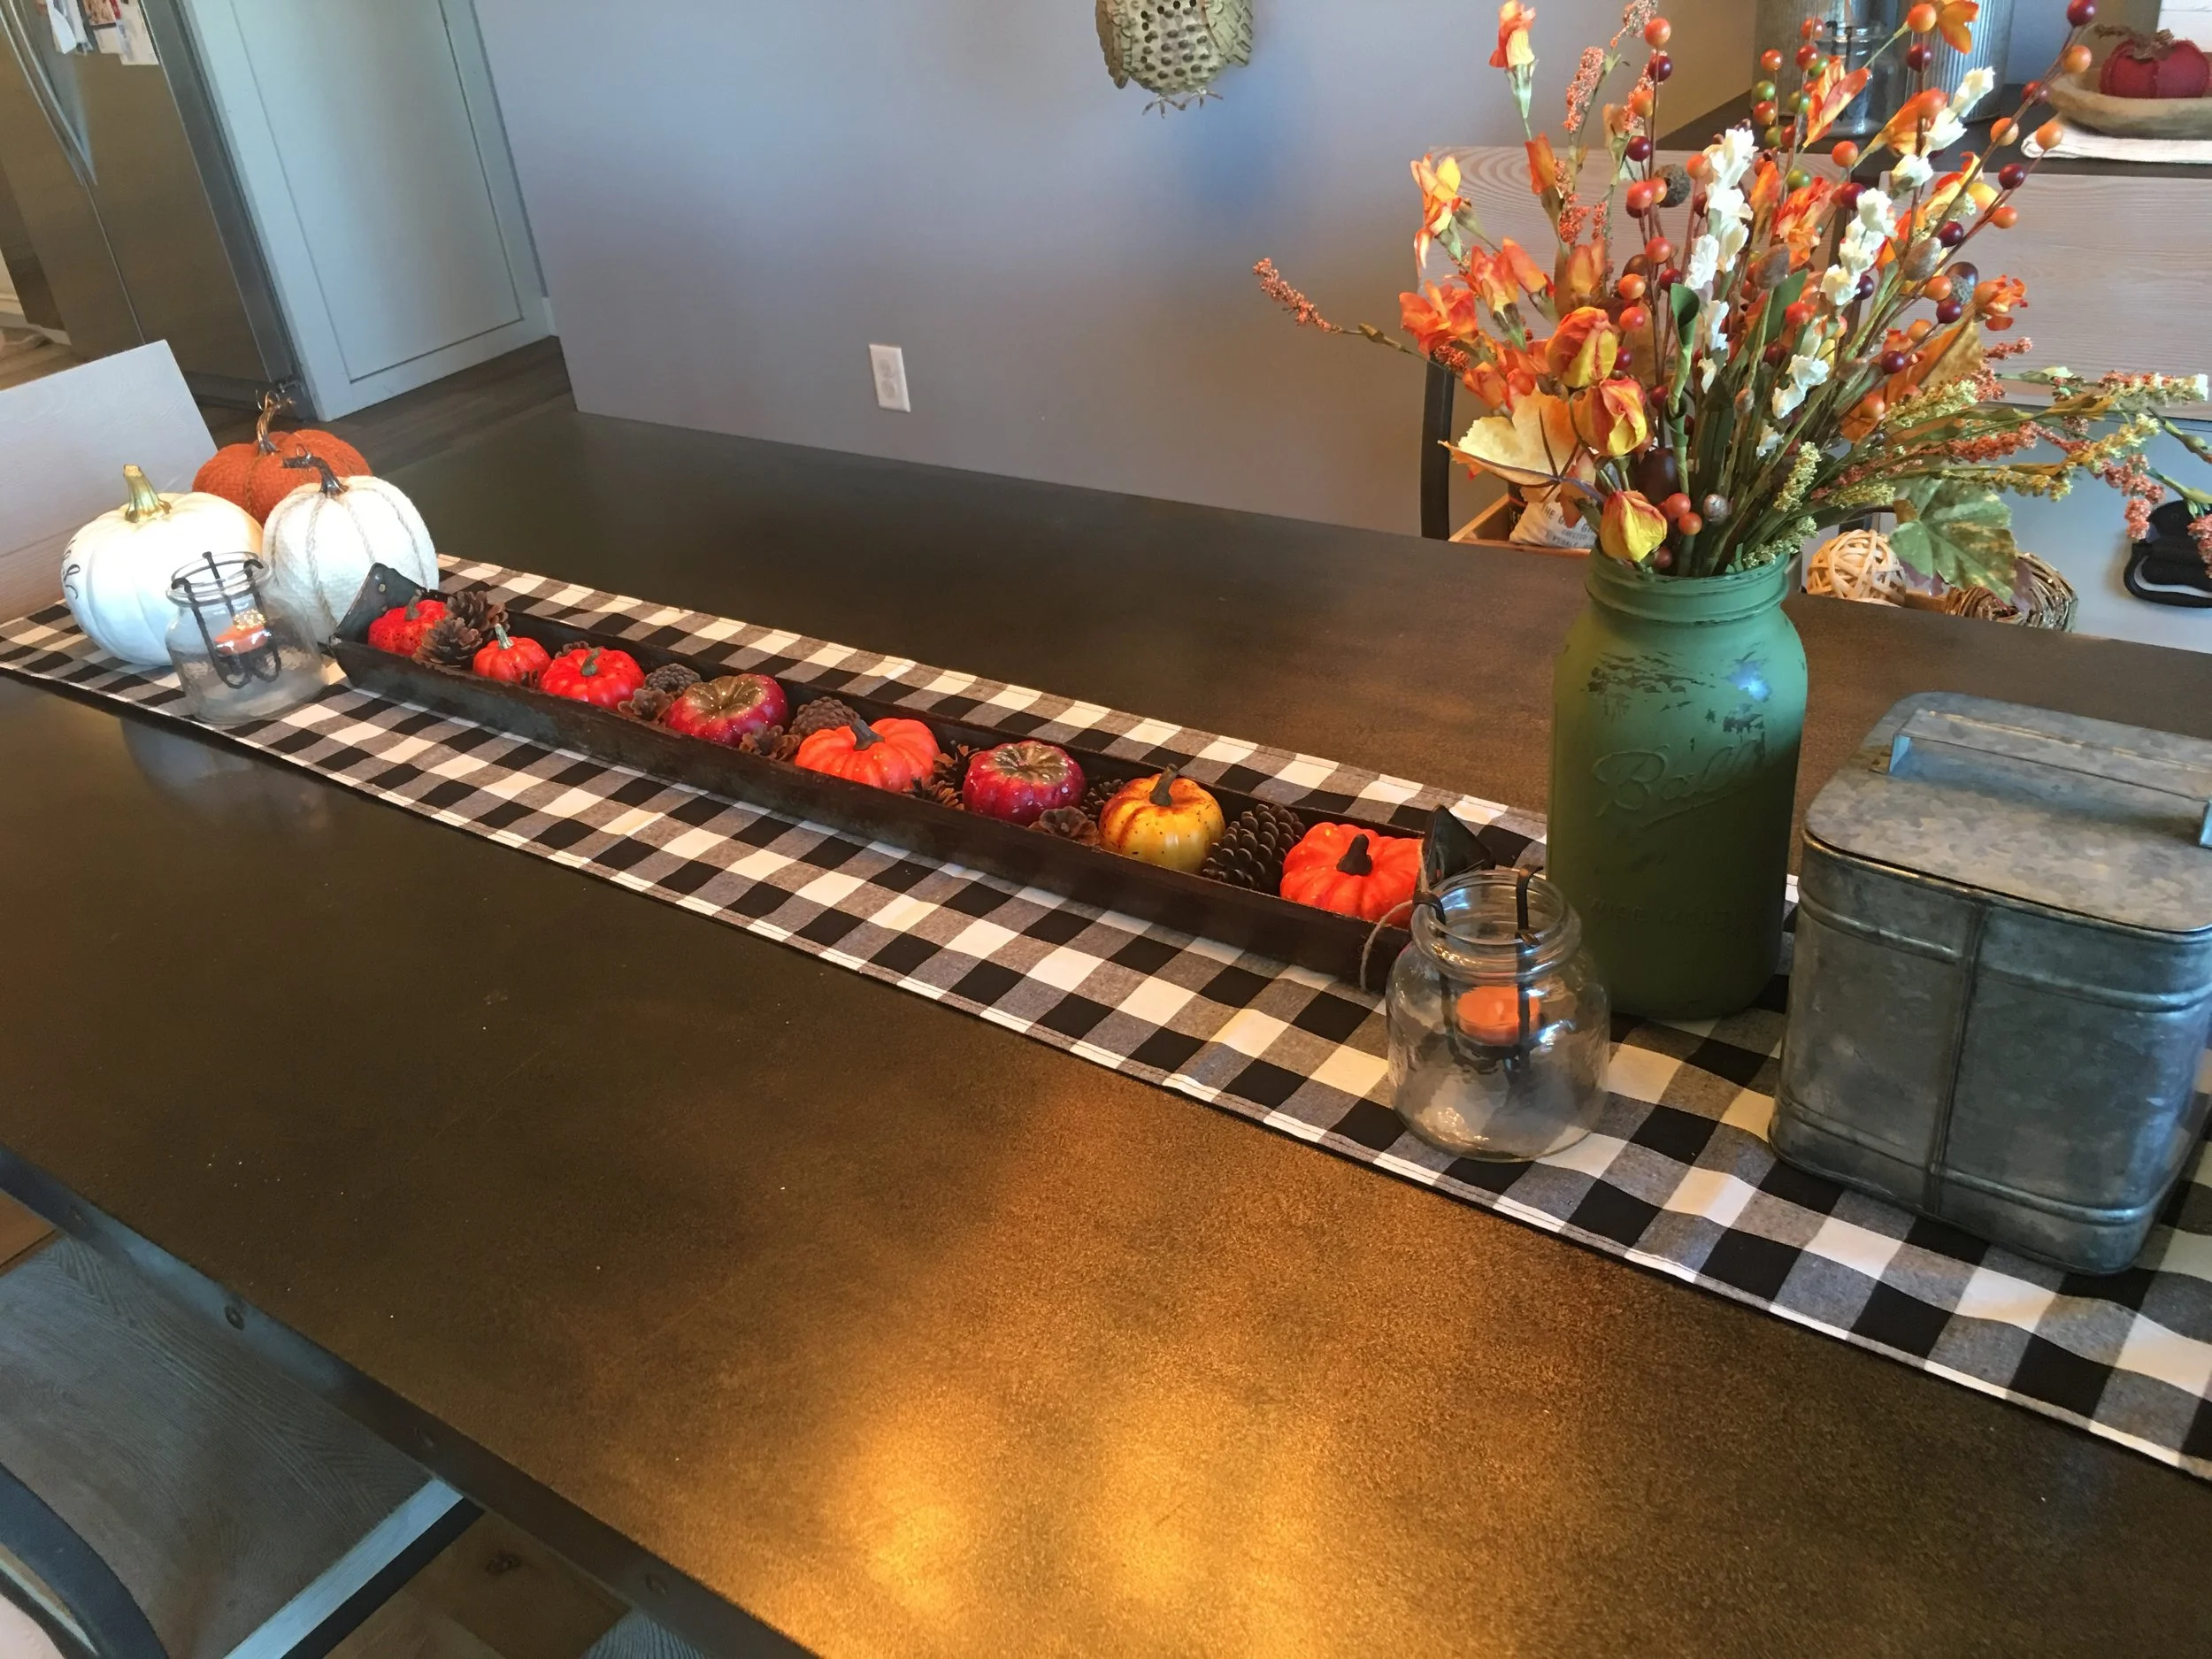
Lastly, I have a deep love for decorating with old farm items. These might look like junk to the untrained eye, but the history in each piece is what calls my heart to them. For example, this chicken feeder from a local flea market sits on my dining room table almost year round, filled with various seasonal decor. I sometimes find myself wondering how many chickens ate from this trough over the years and what other stories this item holds, not to mention it makes a great centerpiece because it doesn’t obstruct views of people sitting at the table!
Total Cost $10

I hope today I could show you that having a vast assortment of decor and/or decorating your home for each season doesn’t have to be expensive. In fact, I get such enjoyment searching for that bargain and then bringing new life to old items. How do you decorate with repurposed items in your home? I would love to hear all about it!
I hope October is treating you well, wherever you are!

Fall Decor Preview
I love Summer, and believe me I am not rushing it along, but September is by far my favorite month of the year and we are just days away from being there. Often as hot as August, the weather in September is much more manageable with cooler nights and less humidity. It’s the best of both Summer and Fall, all wrapped into one!
My home always shows my excitement for Fall decor, and this year will be no different! I definitely have more Fall/Autumn items than any other season, which requires some creative storage but also quite a bit of time for setup. Each year I do everything differently, and that’s all part of the fun! We have an event here the first weekend in September, so my goal is to have everything decorated by then. Fall decor takes a bit of work, but is so versatile and lasts all the way through Thanksgiving. I will just add a few pumpkins/gourds in October and boom! Done!
I have a few areas of my home already set up for Fall, and today I am sharing them to hopefully bring you some inspiration when it’s time to decorate your own home. I will note that I don’t change anything out for Halloween, but that is just my own preference. This year I am really feeling inspired by the neutral tones and I tried to incorporate them as much as possible on my front entryway table. Here are a few photos.


I tried to keep this area fairly simple, as it is highly trafficked by the 1 year old and items are pulled down constantly to be played with. I haven’t really embraced neutral white or brown decor for Fall in the past, but I am experimenting and incorporating it this year. Decorating is an ever evolving hobby!
Next up is my dining room buffet!

I brought in a bit more color to this nook of the home, as this buffet sits right next to the dining room table and that will undoubtedly have some bright displays when I am done with it.
I have recently discovered a company that takes antique pieces and re-purposes them into candles, and I had to have one. This bucket candle is filled with ‘Fall Harvest’ and it’s fitting in just perfectly with my Fall decor!


That’s all the Fall decor I have ready to go as of today! I hope some of this can inspire you for your own decorating this season, and as always feel free to share your photos with us either here or on Instagram.
Thanks for stopping by the blog today! We really appreciate it!
Happy Decorating!
-Rachael
The Final Summer Porch Refresh!
If you have been following along you might be aware that sweet corn season officially started this week here in Iowa, and I might be just a teeny bit excited about that! In fact, I had to incorporate the first delivery of corn into my final Summer porch refresh of the year. That’s correct, the next time I redo this space it will be with pumpkins!
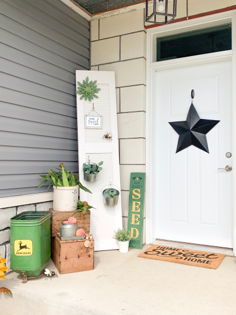
But for now, I had to take down the 4th of July decor and I wanted to incorporate a few farming pieces to set up for the future harvest season. As a collector of all things random and old, I happened to have everything I needed stored in the garage (which has kind of unintentionally become my decor locker, just don’t tell Adam). This John Deere seed planter from an old tractor is a great example…

The fresh ears of corn in this photo are from our local CSA/farm share program that is delivered weekly throughout the spring and summer. For more information about farm shares, you can see my full post here.
Here are a couple more photos of this newly refreshed space!
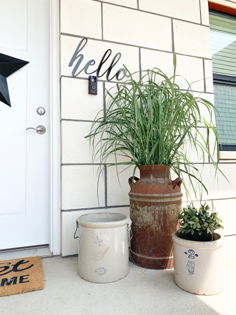
For the other side of the door I snagged some of the decorative grass from my front landscaping that is currently out of control, and stuffed it into an old rusty milk can that i picked up at a garage sale a couple years back. The black metal ‘hello’ sign will stay for now, but I might take it down for the winter months, as it gets pretty cold here and I don’t want it damaged or warped in any way.
Here’s a front shot of the whole front porch, which is one of my more favorite area’s to decorate at my home. Now, if only I can light a fire under Adam and have him replace the construction door that’s been there for 4 years next month! It’s the little things….

That’s all I have for you today, thank you for stopping by the blog and I hope I have been able to inspire you on your own decorating adventure! As always, feel free to share your projects and questions either here or over on Instagram.
Happy Summer!
Rachael
Collaboration with Glyn-Mawr Winery
Today is the day! I can finally reveal my latest project, and I am so very excited!
Recently, I had a local business reach out and request some of my personalized book sets for their winery and tasting room that has a small merchandise area stocked with items from nearby artisans. Prior to this meeting I had never been to Glyn-Mawr Winery or their tasting room/storefront ‘the local’, but I quickly fell in love with their farmhouse and country style decor (and might have picked up something for my laundry room remodel). I snapped a few quick photos, and you will see what I’m talking about!


Here are a couple examples of the book sets I made for their shop…

The entire town has a 4th of July antique festival, full of vendors and food trucks and the like, and if you are local to eastern Iowa it’s definitely worth the drive. Weather permitting, I will be there myself tomorrow, so feel free to stop by and say hello!
Thank you for stopping by the blog today, and have a safe 4th of July!

The Kitchen Reveal You Don't Want To Miss!
Sometimes there are home improvement projects that linger, for years. This would be one of those projects. Our kitchen was 95% finished for the last two years, all but for some 6 or 8 back splash tiles and decor. Well, since this winter is approximately 15 months long, we had time to finally get a few things done around here and this project was one of them!
A little background info:
the home we currently live in was designed on a piece of notebook paper by my husband. We eventually had to have an architect develop the house plans off of our drawing (because let’s face it, we know nothing about truss systems for roof structures) but the floor plan stayed the same. Now we had previously built additions to homes, and remodeled existing structures, but building the entire home from scratch was a new endeavor. Oh, and did I mention we had never designed a kitchen… (yikes!).
So off we went with our notebook paper drawing to meet a local cabinet maker and have him help us come up with something. He told us what worked logistically for wiring and plumbing, and showed us some basic layouts he had in production. I knew I wanted something different and unique and by the time we left our first meeting I am pretty certain he thought I was nuts.
Fast forward to that next summer, and we were laying tile and painting the walls in preparation for the cabinet maker to bring and assemble the cabinets. I don’t have many pictures from this point in time (maybe because we were literally building our home during the night and working during the day), but this photo below shows you the basic outline of our cabinet system (excuse the contractor lighting and pizza box).

The next step was to add counter tops and appliances, which then made this kitchen functional. We were on a time crunch, so finishing touches and decorating took the back burner. We just needed our kitchen to pass the final building inspection and we could worry about the rest later.
Originally, I was interested in concrete counter tops but my husband talked me out of it. We cook A LOT at our house, and he was afraid that we needed a stronger material that could take a beating without showing any signs of wear. I am happy to report that after three years of constant use, these quartz counter tops have held up perfectly and have zero imperfections.
We did add a stainless steel back splash behind the stove area pretty early on, and then gradually finished the rest of that wall with subway tile, as you can see pictured below.
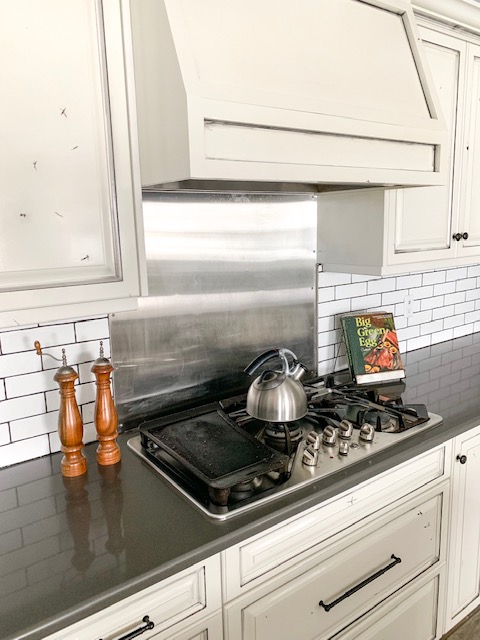
One of the first comments people usually make when they see our kitchen for the first time is that our cabinets look ‘beat up’. Well, I think this is where our custom cabinet maker thought I was nuts, but I wasn’t going to budge on the distressed look. The material is knotty alder, and we chose all of the wood that had the greatest amount of natural knots and ‘imperfections’. Then, combined with black glaze and iron knobs and pulls, this kitchen has the appearance that the cabinets are older or re-purposed, when in fact they are brand new. I know this is a unique look, and it’s not for everyone, but it really came together in the end and I couldn’t be happier with how it turned out.
Ok, fast forward a couple of years to present time, and the last of the subway tile was installed over the kitchen sink. During the notebook paper design phase, I had pictured a window for this space but it was not feasible since the garage was on the other side of the wall. I still decided to put a window in this space, but just had to be a bit more creative.
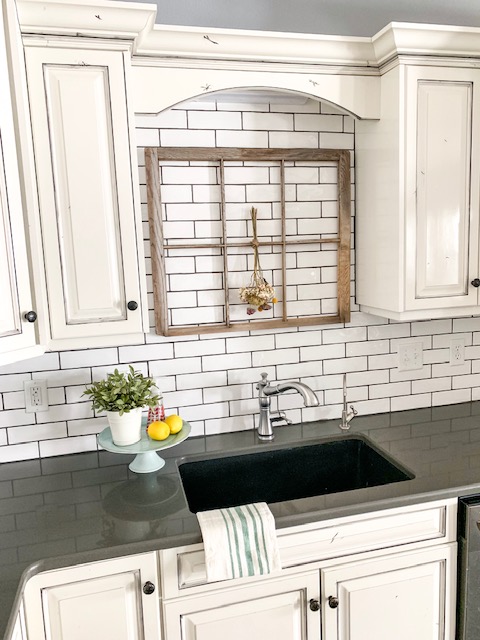
I found an old farmhouse window at a salvage barn for $5, and I immediately knew it would work for this space. All of the glass was removed, which was perfect since it would make cleaning a breeze. This window frame is very light, and thus I was able to install it easily with command strips. Plus, I didn’t really want to drill into the fresh tile! (yikes!) And while I love our sink, I would have preferred a copper farm sink but that just wasn’t in the budget for this house (maybe next time!).
Here are a couple more photos/angles of our kitchen:


Well I could go on and on about this kitchen, it really is the focal part of our home and I am so excited that it is finished. This was a huge lingering project that I can finally cross off of our list, all thanks to our epic long winter this year. If you have any other questions about the materials or process, feel free to leave a comment here or catch me on Instagram. As always, thanks for stopping by the blog today! We really appreciate your support!

DIY Candlesticks
Hello! I hope January is treating you well, wherever you are located. Iowa is gearing up for a major winter storm, and while the snow is pretty, it generates some long days and nights of snow removal. If you find yourself snowed in, I have a super easy winter craft to share with you today, and if you are fortunate enough to have great weather then pin this post for a rainy day!
Candlesticks are new to my personal decor, although I have seen people use them for years and always admired their versatility. I had planned on purchasing some the next time I saw a good deal (I never pay full price for anything) but recently I went to a thrift store and saw they had old staircase spindles for $2 a piece, so I picked up a few and decided to try making my own. I think they turned out really well, and I wanted to share how I made them since it was SO easy! Let’s get to it!

Here are the staircase spindles straight from the thrift store, very budget friendly at $2 a piece!
The first step is to wipe them down of any dust or grease, I used a bleach wipe but you could use anything you have on hand.

Next, I used some white chalk paint that I had on hand to paint the spindles, using two coats. Make sure to take a brush and wipe out any excess paint within the details/grooves in the woodwork.

Then, grab a piece of sandpaper and sand down/distress to your taste.
Clean off the spindles using a lint free cloth, and apply a VERY thin layer of wax to seal, wipe off excess with another lint free cloth.

After these dry completely, preferably overnight, cut them to desired sizes. I was able to get 5 different sized candlesticks out of these three spindles.
Now for the fun part! Decorate!
I had fun styling these candlesticks with greenery and even put them in a birdcage that I had on hand. Next fall I plan to use them to hold pumpkins, and maybe even ornaments next Christmas. These are such a versatile piece of decor, I can’t believe I didn’t have any until now, but better late than never!.
My (No-Cost) Entryway Table Decor
Hi all! I have (quite unexpectedly) found myself in the middle of a January heat wave here in Iowa, and that has brought about inspiration to purge all things winter, clean, and organize. Now depending on where you are from, you might not think 50 degrees is a heat wave, but to an Iowan this kind of weather calls for opening windows and doing some spring cleaning!
Now if you follow me on Instagram, you know that recently I tackled the large entryway table to my home and cleared all Christmas decor and started fresh. This table has always been challenging to decorate, partially because it is so large and also due to the rest of my entryway being so bare, making it the focal point for all visitors.
Also, being that I was in a cleaning and purging mood, I didn’t want to have to leave and purchase any decor items and interrupt my motivation so I decided to style the table with only items I had on hand. If you have been following along for a bit you might remember that I took this same ‘no-cost’ approach to my front porch this holiday season and that blog post received the highest traffic of any that I have written, so I know you all enjoy my re-purposing and budget friendly take on decorating! If you missed that post, I will link it here.
OK, let’s get to it!
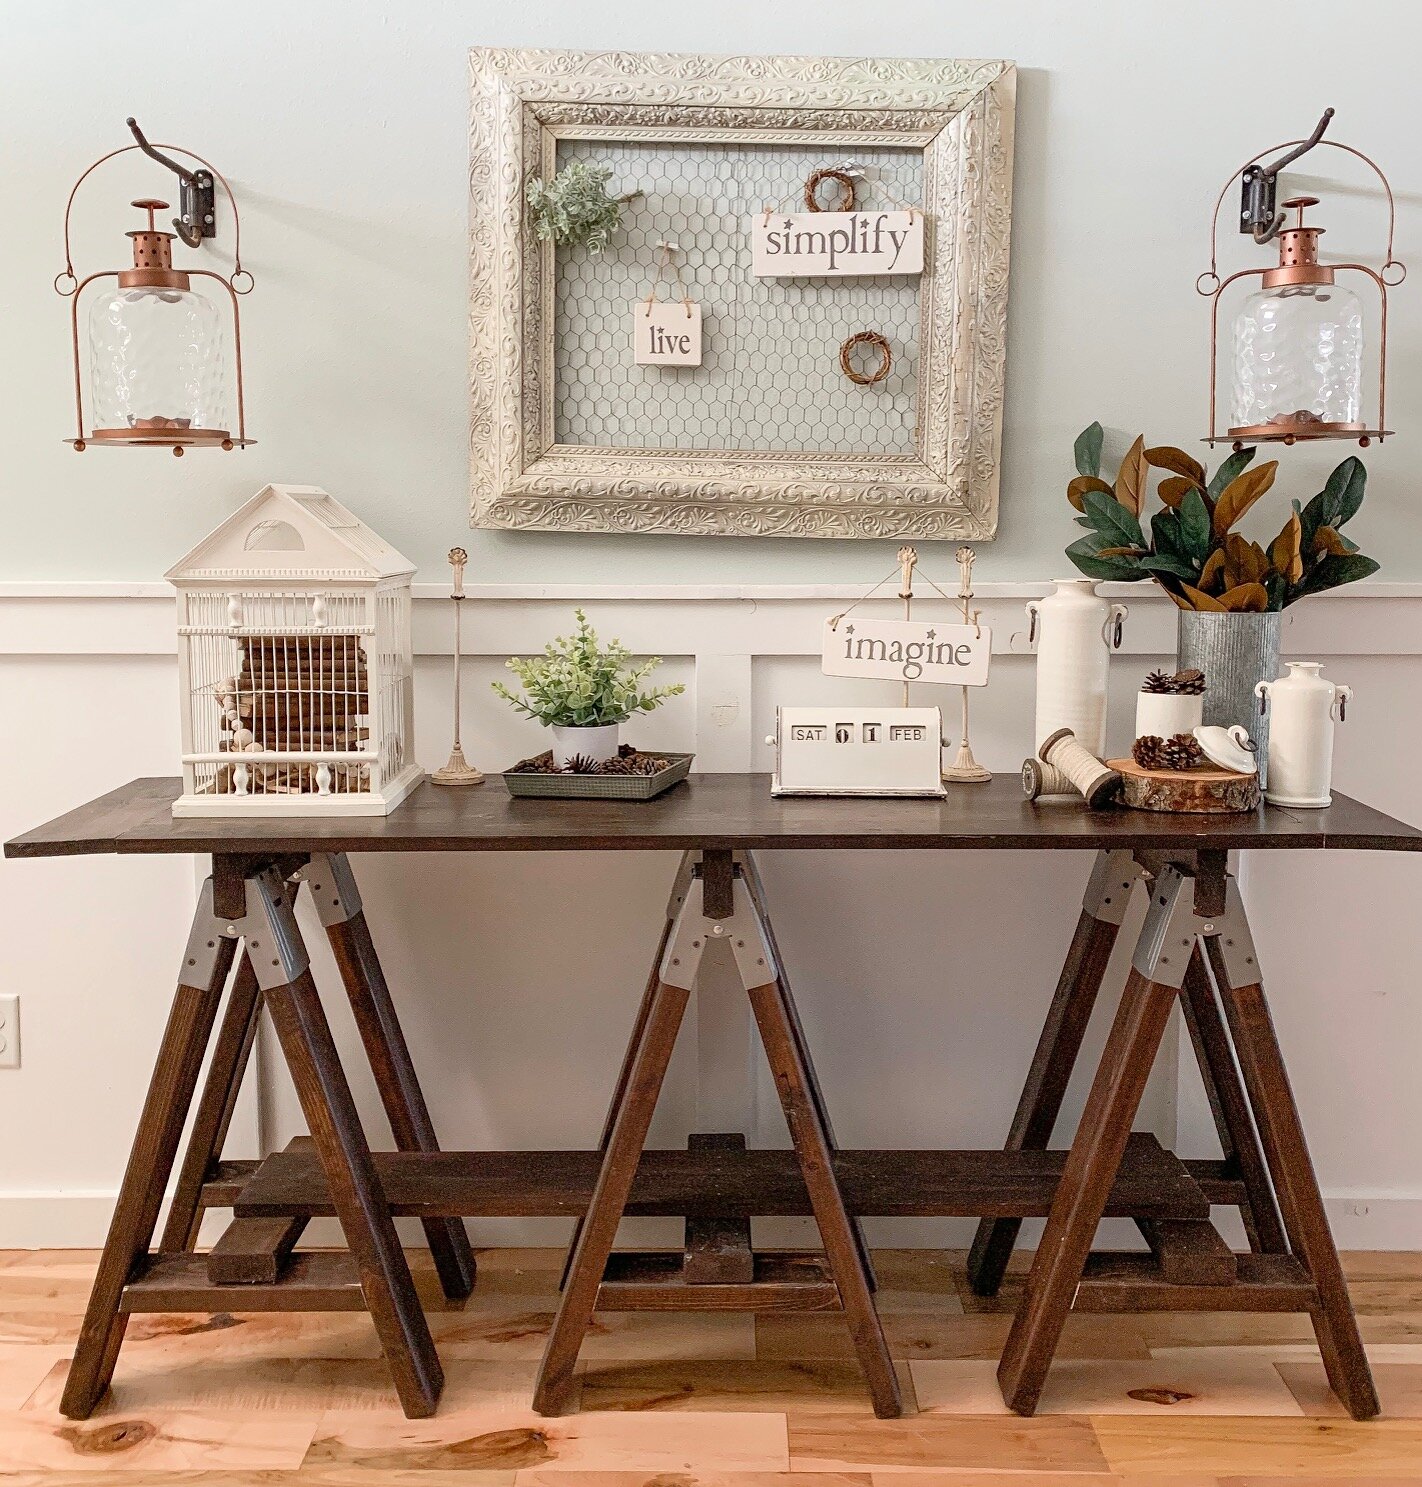
I tackled this large table in sections, pictured below is the right hand side of the table.

Here we have a vintage birdcage that we used as a card holder at our wedding, as well as an old spool (from a friend’s basement clean out), a tray of pine combs, and some twine. Easy!
Up above the birdcage, and on both sides of the table, I have these copper lanterns I purchased years ago at Hobby Lobby, and they are both hanging on iron hooks that were in an old carriage house that we tore down after it sustained wind damage beyond repair. These hooks held the bridles and other equipment for the horses that resided in the barn. You can see an up close picture below.

Next up, the left side of the table!

This end has quite a collection of miscellaneous items! I have absolutely no idea where the basket is from, I have had it for so many years. I filled it with a metal canister I previously picked up at a thrift store, a distressed mason jar that I made, some wood slices and a wooden sign that I had laying around.
Now for the finishing touches and final picture!

Here is the finished table! In the middle I added some additional wooden signs, a small bit of greenery, an old re-purposed shutter and a metal ‘hello’ sign (it’s an entryway after all!).
This metal sign I picked up at JDH Iron Designs down in Waco, Texas when I was there almost two years ago to see the Magnolia Market. If you followed along on the HGTV show Fixer Upper, you might remember that Jimmy Don and JDH Iron Designs made all of the metal signs that were featured in the market and in the finished homes. My sign is even autographed by Jimmy Don! If you ever make it down to Waco I highly recommend visiting his shop. (Not a sponsored post, I just really like his work!)
The actual sawhorse table was built by Adam and APS Construction, I think it might have been the very first piece of furniture he made.
Well, I’m off to take advantage of this warm weather and tackle a few more things outdoors before it returns to January around here! I hope this post has provided you some inspiration for decorating your own home and I will see you guys soon!

6 Low Cost Tips to Decorate Your Farmhouse for Fall
Fall is upon us here in the Midwest and that means it’s time to spruce up the front porch and put out décor! Here are my 6 totally EASY and budget friendly tips :
Get a bale of straw from your local farm store, these are usually around $5 and you can re-use for future years if stored in a cool/dry place

This one is from Theisens!
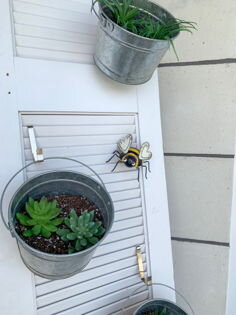
2. Grab a couple items around your house that you can repurpose, maybe an old milk can or crate, a bird cage, or wooden tray you were using for something else. Gather all these items together to make it easy to see what you have to work with. REMEMBER: If you are putting items outside make sure they won’t be damaged by the weather or sun!

Old milk can that I found at a flea market, stuffed with some dried grass!
3. Buy re-useable décor at the end of the season and save it for next year! My favorite locations for discounts on décor are Hobby Lobby and Target, often items will be up to 90% off after the holiday!

4. Take advantage of what nature has provided! Pine cones, dried flowers, dried grasses, branches…the possibilities are endless, and FREE!

Wood slices from a wedding!
5. Rummage/Estate sales: I am always surprised at what people are parting with at rummage, garage, or estate sales. Check your local facebook groups or craigslist!

This apple crate was less than $5 at a local estate sale!
6. FREE Printable Décor! Join APS Design’s mailing list for your free FARMHOUSE printable, take it to your local print shop for larger sizes or just print it at home!

No time for thrift shopping or scavenging your woods?
No problem! Check out these budget friendly fall items that can be shipped right to your door!
Boom! Done!

Take me to the online things! <——
Disclaimer: the above link contains affiliate links which means I may receive a small commission if an item is purchased, however this never results in an increased cost of the product. The commission earned from affiliate links help pay the fees to keep this blog running.
Now, lets put it all together!