
A New Deck For A Local Restaurant
Hey there!
It’s a stormy summer day here in Iowa, but I wanted to update on a recent project that Adam and APS Construction completed. A local restaurant reached out, needing a large deck constructed to accommodate more guests for outdoor seating. Adam and crew got to work (in the blazing 100 degree heat!) and about a week later the project was completed.
Here are a few photos!


With this large new deck, there’s plenty of room for activities!

If you are local to Marion Iowa, you can enjoy a beverage or sandwich on this beautiful outdoor patio, located at Goldfinch Tap! I know we will be visiting soon!


Try to stay cool out there! I will be back soon with more project updates.
-Rachael
Farmhouse Renovation: Weeks 3 & 4
Well we have officially owned the farmhouse project for 4 weeks now, and I am impressed with how much we have been able to accomplish despite the colder than normal temperatures. Almost everything that is temperature dependent is finished, and once we get the new structure framed and closed in, it wont matter if the weather turns cold again.
For those of you who are interested in the details…
With temperatures in single digits and low teens during week 3, concrete was not able to be poured so we used this time to frame up the footings and line up the appropriate inspections.
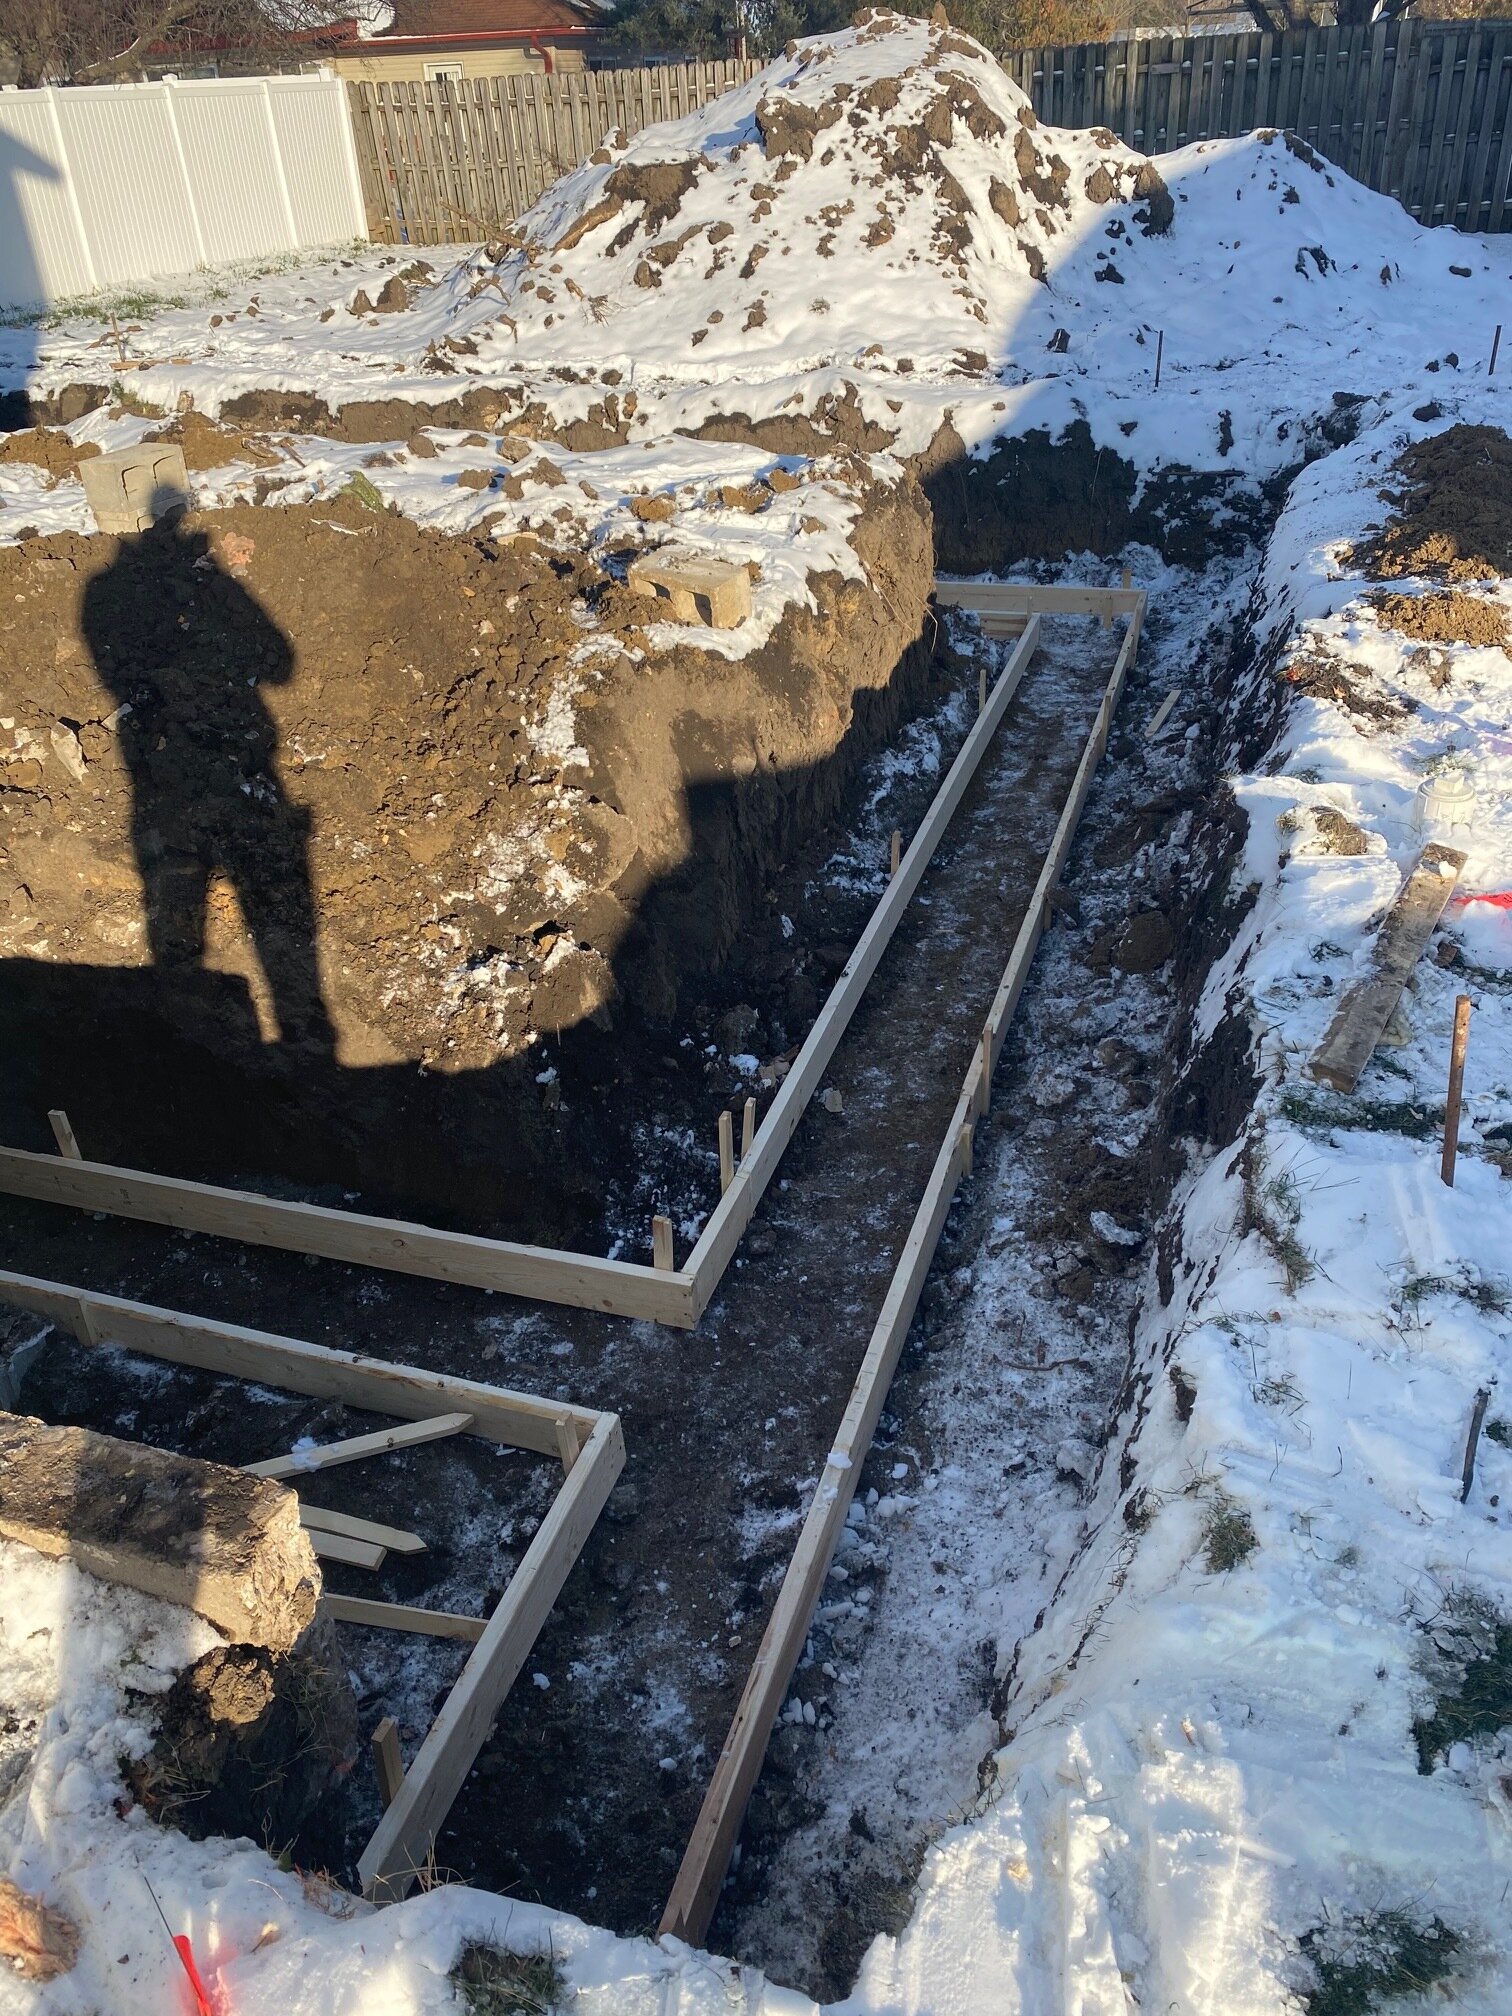
Things finally warmed up for week 4! We are obviously starting from scratch here, with 16 in wide and 8 in deep concrete footings. Adam does all his own concrete work, but I think even he was ‘over it’ by the time this foundation was poured.
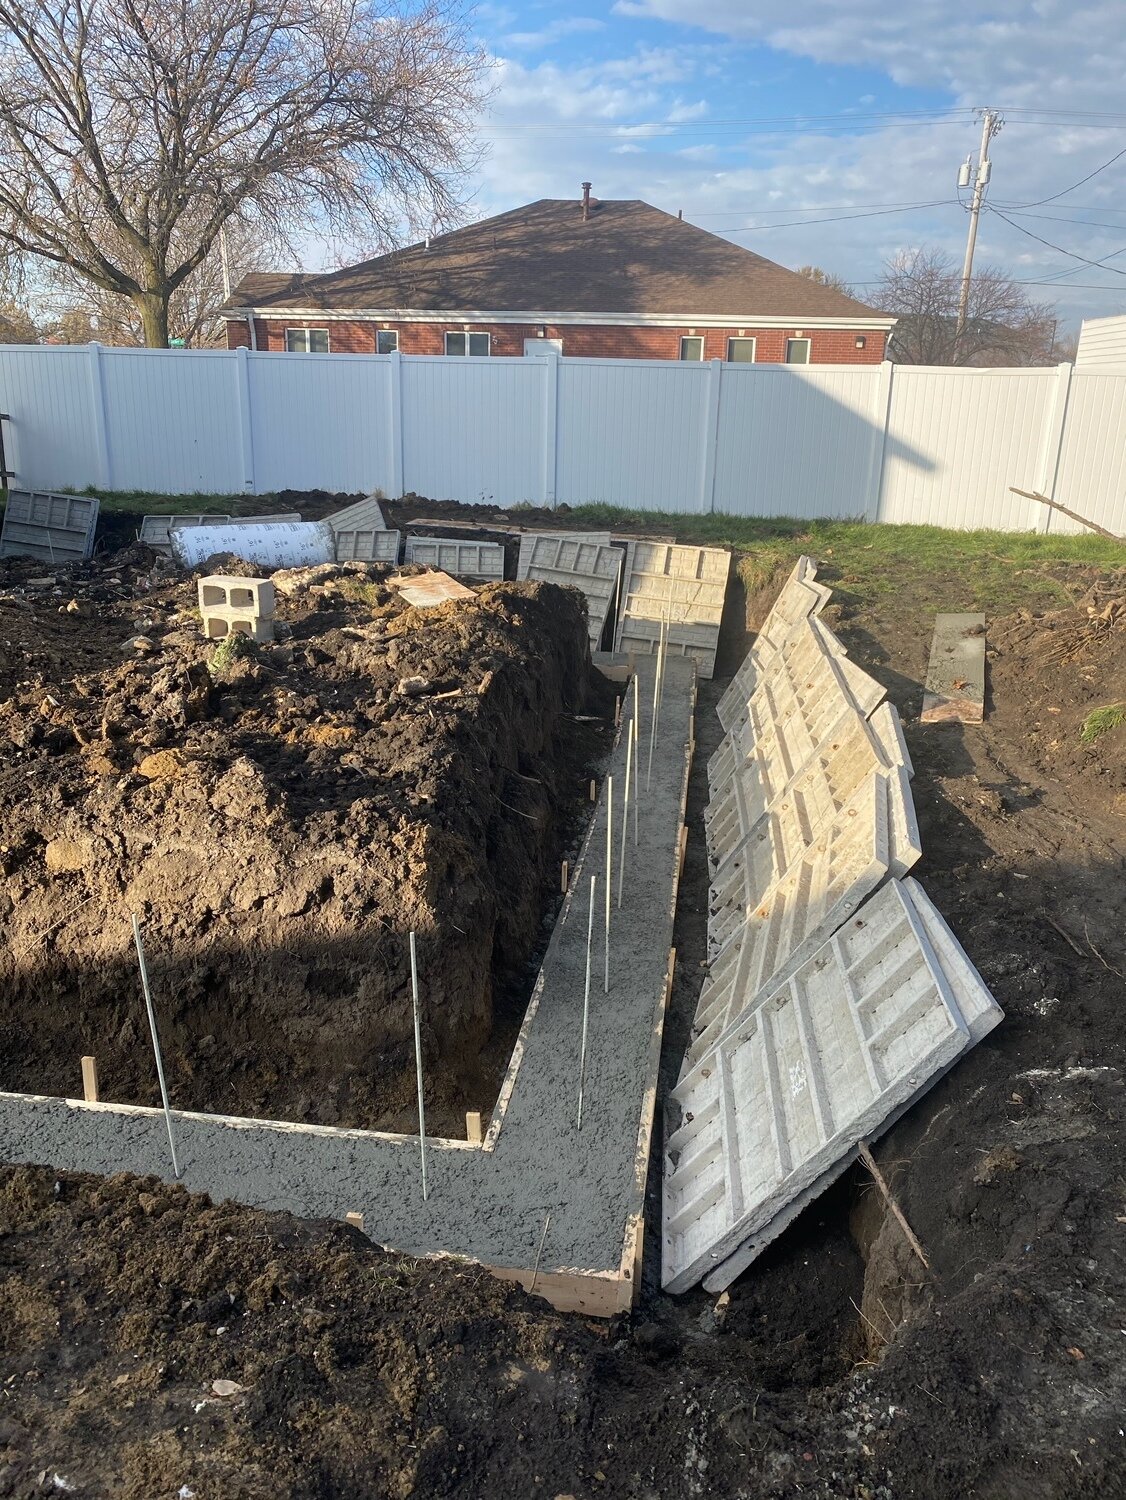

Next up, we have the 4 ft concrete walls that will serve as the foundation for the structure we will eventually be adding to the home. As you can see from the photos, we are adding quite a bit of square footage to this home! I think even the city is impressed (ha!).


It’s definitely been nice that Iowa has given us a break with the cold weather so we could finish some of the temperature dependent parts of this project, and hopefully the weather will hold out one more week so we can get the floor poured. Thanks for stopping by the blog today and joining us for this crazy journey!
Cheers!
-Rachael
The Boathouse Project
We are in Summer’s home stretch, and the Iowa heat and humidity have certainly been oppressive at times! That, combined with a tornado, made this outdoor client project particularly challenging, so we were really excited to finish it last week. Here are some of the pictures and details of “The Boathouse”.

The details:
-14ft by 26 ft building
-364 sq feet
-10ft 2x4 walls with active dormer
-200 amp electrical service
-8/12 pitch roof with asphalt shingles
We have had several comments that this building looks like it could be a tiny home, and plumbing aside it really could be! The poured concrete walls and polished floors make this building bug and critter free…not just your typical back yard shed! Here’s a peek inside at all the lofted space.
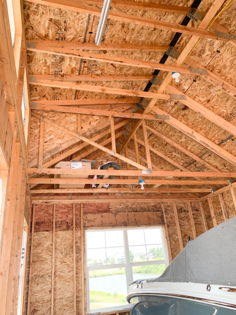
The 10 foot walls provide a lot of extra space for storage racks or shelving in the future. And the 9 ft tall garage door helps with backing in a large boat full of lake accessories. For the below picture, keep in mind that Adam is 6ft 4in tall!

We have a couple more outdoor client projects lined up for the late Summer/early Fall, however they are not as labor intensive as this was. It’s always exciting to see a project come together, and this one was no exception! For now, we are on to the next as we need to squeeze out every last day of Summer that we can…( Maybe someday I could have something similar to this boathouse as my very own she shed! A girl can dream! haha).
Unitl next time friends!
Rachael & Adam
DIY - Bug Repellent Mason Jar Lanterns
Hi friends! Today I have a really easy DIY for the outdoors! Gnats and mosquitoes can really put a damper on outside activities, and bug spray works great for an individual person but I wanted to find a solution for a larger area such as driveway/garage.
I did a bit of research and trial and error, and the results are these cute little mason jar lanterns. They are super easy to make, and extremely budget friendly. I have tested them out myself and can personally say they do actually work, and last quite a long time.
Step by step instructions are below, or feel free to click on any picture to pin this post for later!
First, gather your materials!

You will need:
-A mason jar of any size, complete with lid
-Rope wick
-Liquid bug repellent
I grabbed a few different jars that I had laying around, and then went to Target for the rest of the materials. They are currently having a decent sale on their patio/outdoor items so I was able to pick up the rope wick (came in a package of two) and the liquid bug repellent for under $10 total. I chose the ‘clean burn’ version of the liquid repellent, which has less smoke/flame but maintains the same effectiveness of the standard version. You could use any bug repellent/torch fuel that is designed to be burned in this manner.
Next, its time for assembly!
I had Adam use a drill bit to puncture a hole in the mason jar lid, and fed the rope wick through the opening. You could probably use a hole punch too, but I just didn’t have one on hand. Then I filled the jar about 1/4 of the way and trimmed the wick so it was just a couple inches tall. It took a few minutes for the wick to soak up enough of the liquid to ignite, but once it did I snapped this picture…

I really like that there is no smoke/soot coming from this ‘clean burning’ torch fuel, as that was one of my biggest hesitations to ever investing in the traditional ‘tiki torches’.
Last step…Enjoy!
I made a few different lanterns with a few different sizes and colors of mason jars, and set them out on the front porch when we were out there the other night. Not only did they look cute, but they served a great purpose too!

Quick safety note, these jars do get warm after being lit for a long period of time, so be sure to let them cool before handling them. Also, I like to put them in a metal tray or on concrete (or anything non-flammable) just in case they were to be tipped over.
That’s all I have for you today! I hope you are enjoying those long summer evenings and if you are having a biting insect problem like we were, you might give these lanterns a whirl! As always, thanks for stopping by the blog today!

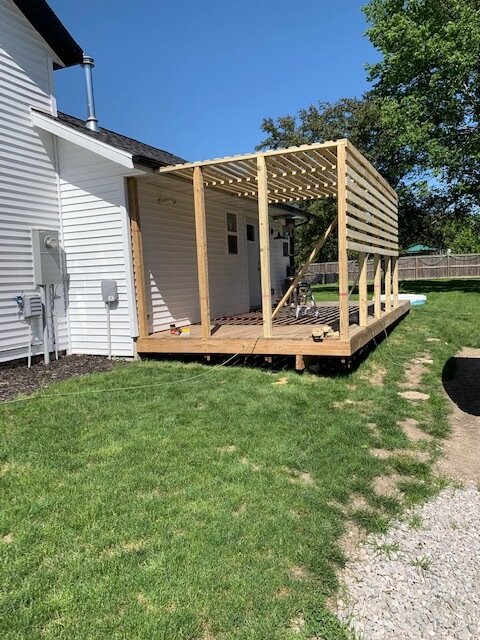
The 'Great Outdoors' Project
Winter has arrived in full force here in the Midwest, and that means all outdoor projects have to be wrapped up. If Iowa wasn’t such an extreme weather state maybe we could work outside into December, but once the air hoses and tools start to freeze/not function properly, we call it quits for the (outdoor) season.
We did get to finish up one last project for the year, one which completes a series of outdoor renovations at a particular client’s home. This home is situated next to a golf course and has stunning views of the surrounding landscape, however the grading of the back yard and limited outdoor space made enjoying this little slice of heaven challenging.
The projects at this location included a new and expanded deck, new retaining wall and extensive dirt work/grading, as well as a complete overhaul of an existing screened in area to make it weather proof and fully functional addition to their home. All of these renovations were completed by adam and aps construction.
The Raised Deck
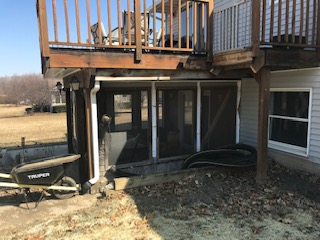
Original Deck Photos
As you can see, this deck was functional but small, and showed wear from the elements over the years. In the last picture, you can see the screened in area in its ‘before’ state as well.
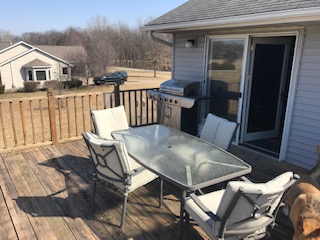
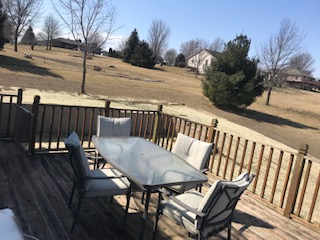
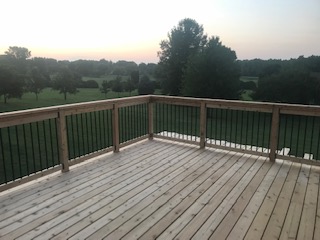
New deck photos
This project was completed with cedar boards and aluminum spindles, check out that view!


Retaining Wall and Yard Grading
This part of the project was very important, as it produced level yard space that could then be used for additional structures, fire pit, you name it! Here are a few before/after shots.
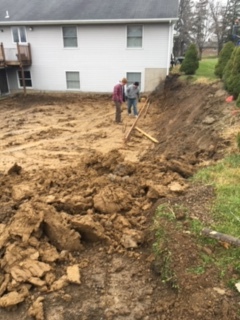
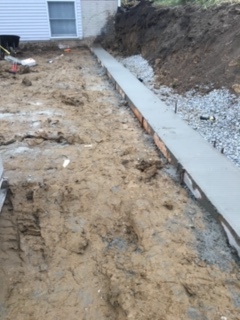
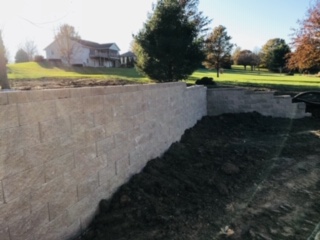
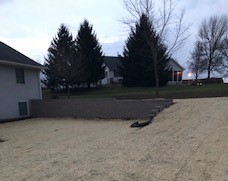
As you can see, not much of this part of the yard was usable due to the terrain, but that is no longer a problem!
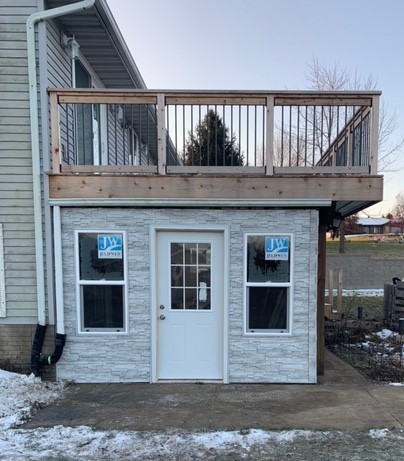
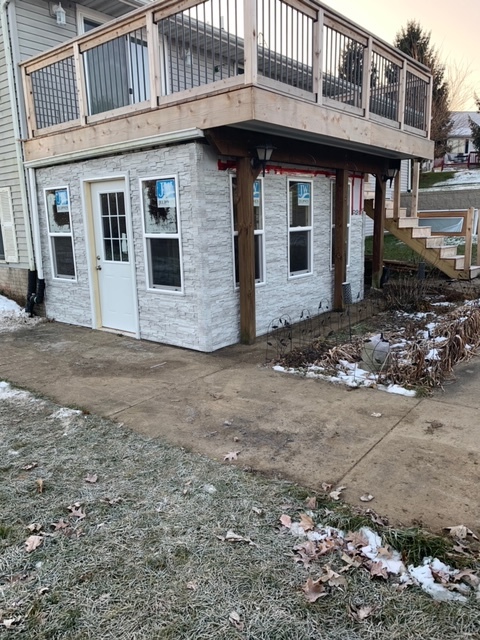
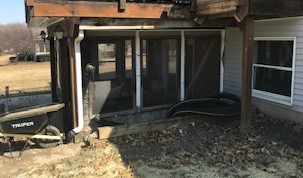
Screened in porch overhaul
original photos
The final leg of this outdoor project was to update the existing screened in porch/patio area underneath the raised deck. this room was not being used to its full potential, since it was at the mercy of the harsh Iowa weather.
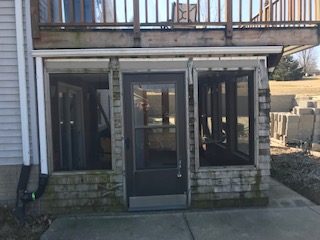

New and improved four seasons room
With new framing, insulation, windows, doors, and stacked stone vinyl siding, this room is now ready for the elements and can be used to enjoy the golf course views and Iowa sunsets year round.