The Final Porch Photo

It’s been about a week since we visited our home for the last time, picked up the final items, and took one last photo on the front porch.

The last porch pic!

The last porch pic!

It’s been a bittersweet experience, leaving the first home we built together from the ground up, our child’s first home, our beloved dog Mia’s last home.

We are excited to move on to our acreage and spread out…to watch the summer sunset’s with sweet tea and fireflies…to chase chickens, play in the creek, and enjoy the wildlife. I mean, first we have to build a house out there, but we will get started on that soon.

Whatever it is, the way you tell your story online can make all the difference.

We have plenty of exciting projects this summer, and I can’t wait to start sharing them with you. Now that we have a bit more time (and aren’t in the middle of moving) I will be catching up.

We’ll chat soon!

-Rachael

Turning Ideas Into Reality - Introducing APS Homes LLC

It all starts with an idea…

For me, it was the idea that something was missing from our current businesses, APS Construction and Design.

As you are most likely aware, my husband Adam and I have spent the better part of the last decade building and remodeling/rehabbing homes in our community. We really enjoy what we do, and the people we meet along the way, but during our latest major rehab/remodel (the farmhouse project) I realized something was missing.

We execute every part of our projects, and take pride doing so. And I mean every part. From permits, to landfill runs to lumberyard trips and everything in between. We track down every faucet, paint color, cabinet and door handle, while watching every sale and store special to get our clients the best product at the best price. Should we hire some of the tasks out, like moving equipment trailers in the middle of the night? Absolutely. But for now we just don’t, and maybe that will change in the future.

The missing link was buying and selling properties, as we always had to hire someone to handle that.

And that was the beginning of APS Homes LLC. Amidst all the chaos of 2020, I also became a real estate licensee for the state of Iowa.

Now we can truly handle every aspect of our projects, and give our clients the seamless experience they deserve. So heres to adding ‘real estate’ to our list of services, and stay tuned for even more fun things to wrap up 2020.

Cheers to new things!

-Rachael

PS. You can find me at www.apshomesiowa.com or @apshomesiowa on Instagram

IMG_7246.jpg

Getting BOLD, with Paint!

Recently I was asked about my ‘bold’ paint colors in my home, and how I choose them. Determining colors for a room has never been a time consuming process for me (I am the person in the greeting card aisle that goes with the second or third one that I pick up), but I know this is not always the case for everyone. I have friends who have been wanting to paint their home for nearly a decade but cannot agree on a color or finish.

Today I am sharing my tips on how I make my (bold) paint choices, and maybe they will provide some inspiration to you as well!

The photo that prompted the bold paint color discussion!  Photo credit to Corridor Home Photos

The photo that prompted the bold paint color discussion! Photo credit to Corridor Home Photos

First, choose a high quality paint!

I like the paint and primer combination paints, especially if my project contains existing paint. These styles are a little bit more per gallon, but always have full coverage and eliminate the primer step. Personally, I like the Ovation, HGTV, and Valspar brands at Lowes, but this is just my preference.
Now, It’s time for the color!

I follow a few simple rules…

  1. Never try to match: If there is existing permanent decor (such as cabinets, flooring, trim, etc), never try to match it. I always go with a complimentary color instead.

  2. Work with what you have: Have a difficult color already on the wall? Don’t want to rent an extension ladder to re-do that vaulted ceiling? Pick something that compliments instead (see step 1). My first home came with a single wall that was deep chocolate brown, which was absolutely not my style. Instead of trying to cover that up, I added teal to a neighboring wall to brighten the space (throwback picture below…)

  3. Don’t sweat it: Paint is the most cost effective way to transform your home, and it can always be changed! If you are unsure which color to pick, go with your heart and change it later if you end up not liking it.

My VERY FIRST home, photo from most recent listing.  This home has been sold several times since I lived there, and none of the owners have changed a thing!  Not even the curtains!

My VERY FIRST home, photo from most recent listing. This home has been sold several times since I lived there, and none of the owners have changed a thing! Not even the curtains!

Now, I fully understand that some people prefer neutrals and there is nothing wrong with that! In fact, I really like neutral paint and decor, but it’s just not something I would choose for my own home. In my opinion, all white or neutral colors make for an interesting design challenge so the room does not come across as sterile or cold.

As much as I enjoy a good challenge I also need the decor at my home to be practical. I hate dusting, so arranging 800 pieces of furniture and decor to fill a neutral space is just not realistic. Adding a bold paint color helps decorate the room a bit. Again, just my personal preference!

Here are a few more BOLD paint choices from my current home:

BOLD slate color for the fireplace bump out.  Photo credit: Corridor Home Photos

BOLD slate color for the fireplace bump out. Photo credit: Corridor Home Photos

Barn red in the laundry room, and slate blue in the powder room!

Barn red in the laundry room, and slate blue in the powder room!

Well if you have made it this far you deserve a gold star, as this post somehow became quite lengthy! I guess I am passionate about my paints! Ha! If you have a bold paint choice in your home, I would love to see it! Tag me on Instagram or send me a message!

As always, thank you so much for continuing to support our small business! We will chat soon, big things coming to APS (wink wink).

Stay cool out there in this blazing heat!

-Rachael

DIY - Bug Repellent Mason Jar Lanterns

Hi friends! Today I have a really easy DIY for the outdoors! Gnats and mosquitoes can really put a damper on outside activities, and bug spray works great for an individual person but I wanted to find a solution for a larger area such as driveway/garage.

I did a bit of research and trial and error, and the results are these cute little mason jar lanterns. They are super easy to make, and extremely budget friendly. I have tested them out myself and can personally say they do actually work, and last quite a long time.

Step by step instructions are below, or feel free to click on any picture to pin this post for later!

First, gather your materials!

39d5c6caec345345caf76207bd316d60.jpeg

You will need:

-A mason jar of any size, complete with lid

-Rope wick

-Liquid bug repellent

I grabbed a few different jars that I had laying around, and then went to Target for the rest of the materials. They are currently having a decent sale on their patio/outdoor items so I was able to pick up the rope wick (came in a package of two) and the liquid bug repellent for under $10 total. I chose the ‘clean burn’ version of the liquid repellent, which has less smoke/flame but maintains the same effectiveness of the standard version. You could use any bug repellent/torch fuel that is designed to be burned in this manner.

Next, its time for assembly!

I had Adam use a drill bit to puncture a hole in the mason jar lid, and fed the rope wick through the opening. You could probably use a hole punch too, but I just didn’t have one on hand. Then I filled the jar about 1/4 of the way and trimmed the wick so it was just a couple inches tall. It took a few minutes for the wick to soak up enough of the liquid to ignite, but once it did I snapped this picture…

09614116a003b8b8a9975b5c181ee841.jpeg

I really like that there is no smoke/soot coming from this ‘clean burning’ torch fuel, as that was one of my biggest hesitations to ever investing in the traditional ‘tiki torches’.

Last step…Enjoy!

I made a few different lanterns with a few different sizes and colors of mason jars, and set them out on the front porch when we were out there the other night. Not only did they look cute, but they served a great purpose too!

774b681c09ec47a67ba71e2907d36c80.jpeg

Quick safety note, these jars do get warm after being lit for a long period of time, so be sure to let them cool before handling them. Also, I like to put them in a metal tray or on concrete (or anything non-flammable) just in case they were to be tipped over.

That’s all I have for you today! I hope you are enjoying those long summer evenings and if you are having a biting insect problem like we were, you might give these lanterns a whirl! As always, thanks for stopping by the blog today!

Signoff.jpg

Homemade Insect Repellent

Hello friends! It’s finally sunny and dry here in Iowa, which has been in a bit of a cold and wet weather system for a while now. Hopefully it will stay sunny so my plants and grass can dry out!

Today I am bringing you a homemade recipe for natural insect repellent, which is just as necessary as sunscreen during the warmer months! I often joke the mosquito should be the state bird of Iowa! But in all seriousness, the diseases that mosquitoes and ticks carry make me cringe at just the thought, especially with a very curious 1 year old that will not accept being indoors when the weather is nice. In addition, traditional bug spray often has harsh chemicals that I would prefer to keep off of my child and pets.
So, after a bit of research and some testing (because it has to actually work!) I found a bug spray recipe that I really like. Bonus is this recipe is super budget friendly and I already had everything on hand except for the $1 spray bottle.
Hot As Fire Sale.png

I have been using this recipe for about a month now, and I regularly spray the covered porch area where my child plays (deck furniture/pillows/etc) prior to her being out there and so far I have not had any issues with pests. When the whole family is outside, I apply to myself and the dog, and usually just give a spritz to my child’s clothing and that seems to work well. Since it’s all natural I don’t mind if it was on her skin, but she normally has sunscreen on and I would prefer not to have a greasy mix of the two!

Well, nap time is almost over and that means it’s time to get ready to head back outside. Thanks for stopping by the blog today and feel free to pin this recipe for future use! Hopefully you can enjoy the sunshine wherever you are located!

Signoff.jpg

The Kitchen Reveal You Don't Want To Miss!

Sometimes there are home improvement projects that linger, for years. This would be one of those projects. Our kitchen was 95% finished for the last two years, all but for some 6 or 8 back splash tiles and decor. Well, since this winter is approximately 15 months long, we had time to finally get a few things done around here and this project was one of them!

A little background info:

the home we currently live in was designed on a piece of notebook paper by my husband. We eventually had to have an architect develop the house plans off of our drawing (because let’s face it, we know nothing about truss systems for roof structures) but the floor plan stayed the same. Now we had previously built additions to homes, and remodeled existing structures, but building the entire home from scratch was a new endeavor. Oh, and did I mention we had never designed a kitchen… (yikes!).

So off we went with our notebook paper drawing to meet a local cabinet maker and have him help us come up with something. He told us what worked logistically for wiring and plumbing, and showed us some basic layouts he had in production. I knew I wanted something different and unique and by the time we left our first meeting I am pretty certain he thought I was nuts.

Fast forward to that next summer, and we were laying tile and painting the walls in preparation for the cabinet maker to bring and assemble the cabinets. I don’t have many pictures from this point in time (maybe because we were literally building our home during the night and working during the day), but this photo below shows you the basic outline of our cabinet system (excuse the contractor lighting and pizza box).

IMG_4543.jpg

The next step was to add counter tops and appliances, which then made this kitchen functional. We were on a time crunch, so finishing touches and decorating took the back burner. We just needed our kitchen to pass the final building inspection and we could worry about the rest later.

Originally, I was interested in concrete counter tops but my husband talked me out of it. We cook A LOT at our house, and he was afraid that we needed a stronger material that could take a beating without showing any signs of wear. I am happy to report that after three years of constant use, these quartz counter tops have held up perfectly and have zero imperfections.

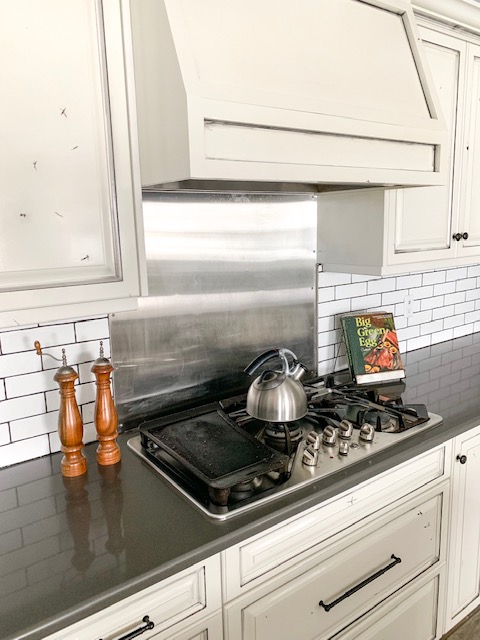
We did add a stainless steel back splash behind the stove area pretty early on, and then gradually finished the rest of that wall with subway tile, as you can see pictured below.

IMG_1205.JPG

One of the first comments people usually make when they see our kitchen for the first time is that our cabinets look ‘beat up’. Well, I think this is where our custom cabinet maker thought I was nuts, but I wasn’t going to budge on the distressed look. The material is knotty alder, and we chose all of the wood that had the greatest amount of natural knots and ‘imperfections’. Then, combined with black glaze and iron knobs and pulls, this kitchen has the appearance that the cabinets are older or re-purposed, when in fact they are brand new. I know this is a unique look, and it’s not for everyone, but it really came together in the end and I couldn’t be happier with how it turned out.

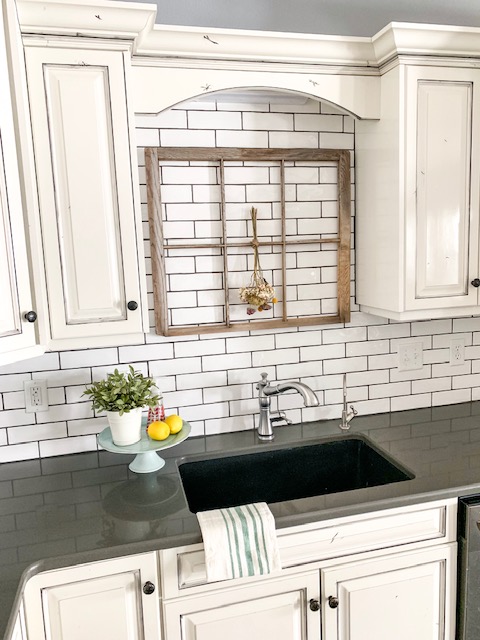
Ok, fast forward a couple of years to present time, and the last of the subway tile was installed over the kitchen sink. During the notebook paper design phase, I had pictured a window for this space but it was not feasible since the garage was on the other side of the wall. I still decided to put a window in this space, but just had to be a bit more creative.

IMG_1201.JPG

I found an old farmhouse window at a salvage barn for $5, and I immediately knew it would work for this space. All of the glass was removed, which was perfect since it would make cleaning a breeze. This window frame is very light, and thus I was able to install it easily with command strips. Plus, I didn’t really want to drill into the fresh tile! (yikes!) And while I love our sink, I would have preferred a copper farm sink but that just wasn’t in the budget for this house (maybe next time!).

Here are a couple more photos/angles of our kitchen:

IMG_1192.JPG
IMG_1197.JPG
IMG_1206 (1).JPG

Well I could go on and on about this kitchen, it really is the focal part of our home and I am so excited that it is finished. This was a huge lingering project that I can finally cross off of our list, all thanks to our epic long winter this year. If you have any other questions about the materials or process, feel free to leave a comment here or catch me on Instagram. As always, thanks for stopping by the blog today! We really appreciate your support!

Signoff.jpg

Hanging Cast Iron Cookware

Hi friends!

Today I have a quick post for all the cast iron cookware lovers out there. We love using this cookware at our home but find it impossible to have enough room to store all of the heavy/bulky pieces. My husband has wanted to hang up a pot rack over the island for years, but I didn’t want all the heavy cookware to block the view of the rest of the living area. Finally, during one of the 800 snow days this month, we came to an agreement on how to hang and store our cast iron pots and pans.

Our pantry was the obvious location, due to it’s proximity to the stove and vast amount of unused space. We also needed the pans out of reach of our 1 year old, so hanging them on the wall seemed to be the best choice. Adam found a barn wood 2x4 in the garage and fastened it to the wall in the pantry, and then added the gas pipe and fittings. For those of you that don’t happen to have a ton of gas pipe sitting around in your garage, you can buy them from any hardware store. We used 1/2in size, but you could use larger if desired. The only downside to working with gas pipe (besides the grease) is all the adhesive and stickers that have to be removed. If you follow us on Instagram, you saw my struggles with this the other night on stories.

IMG_1122.JPG

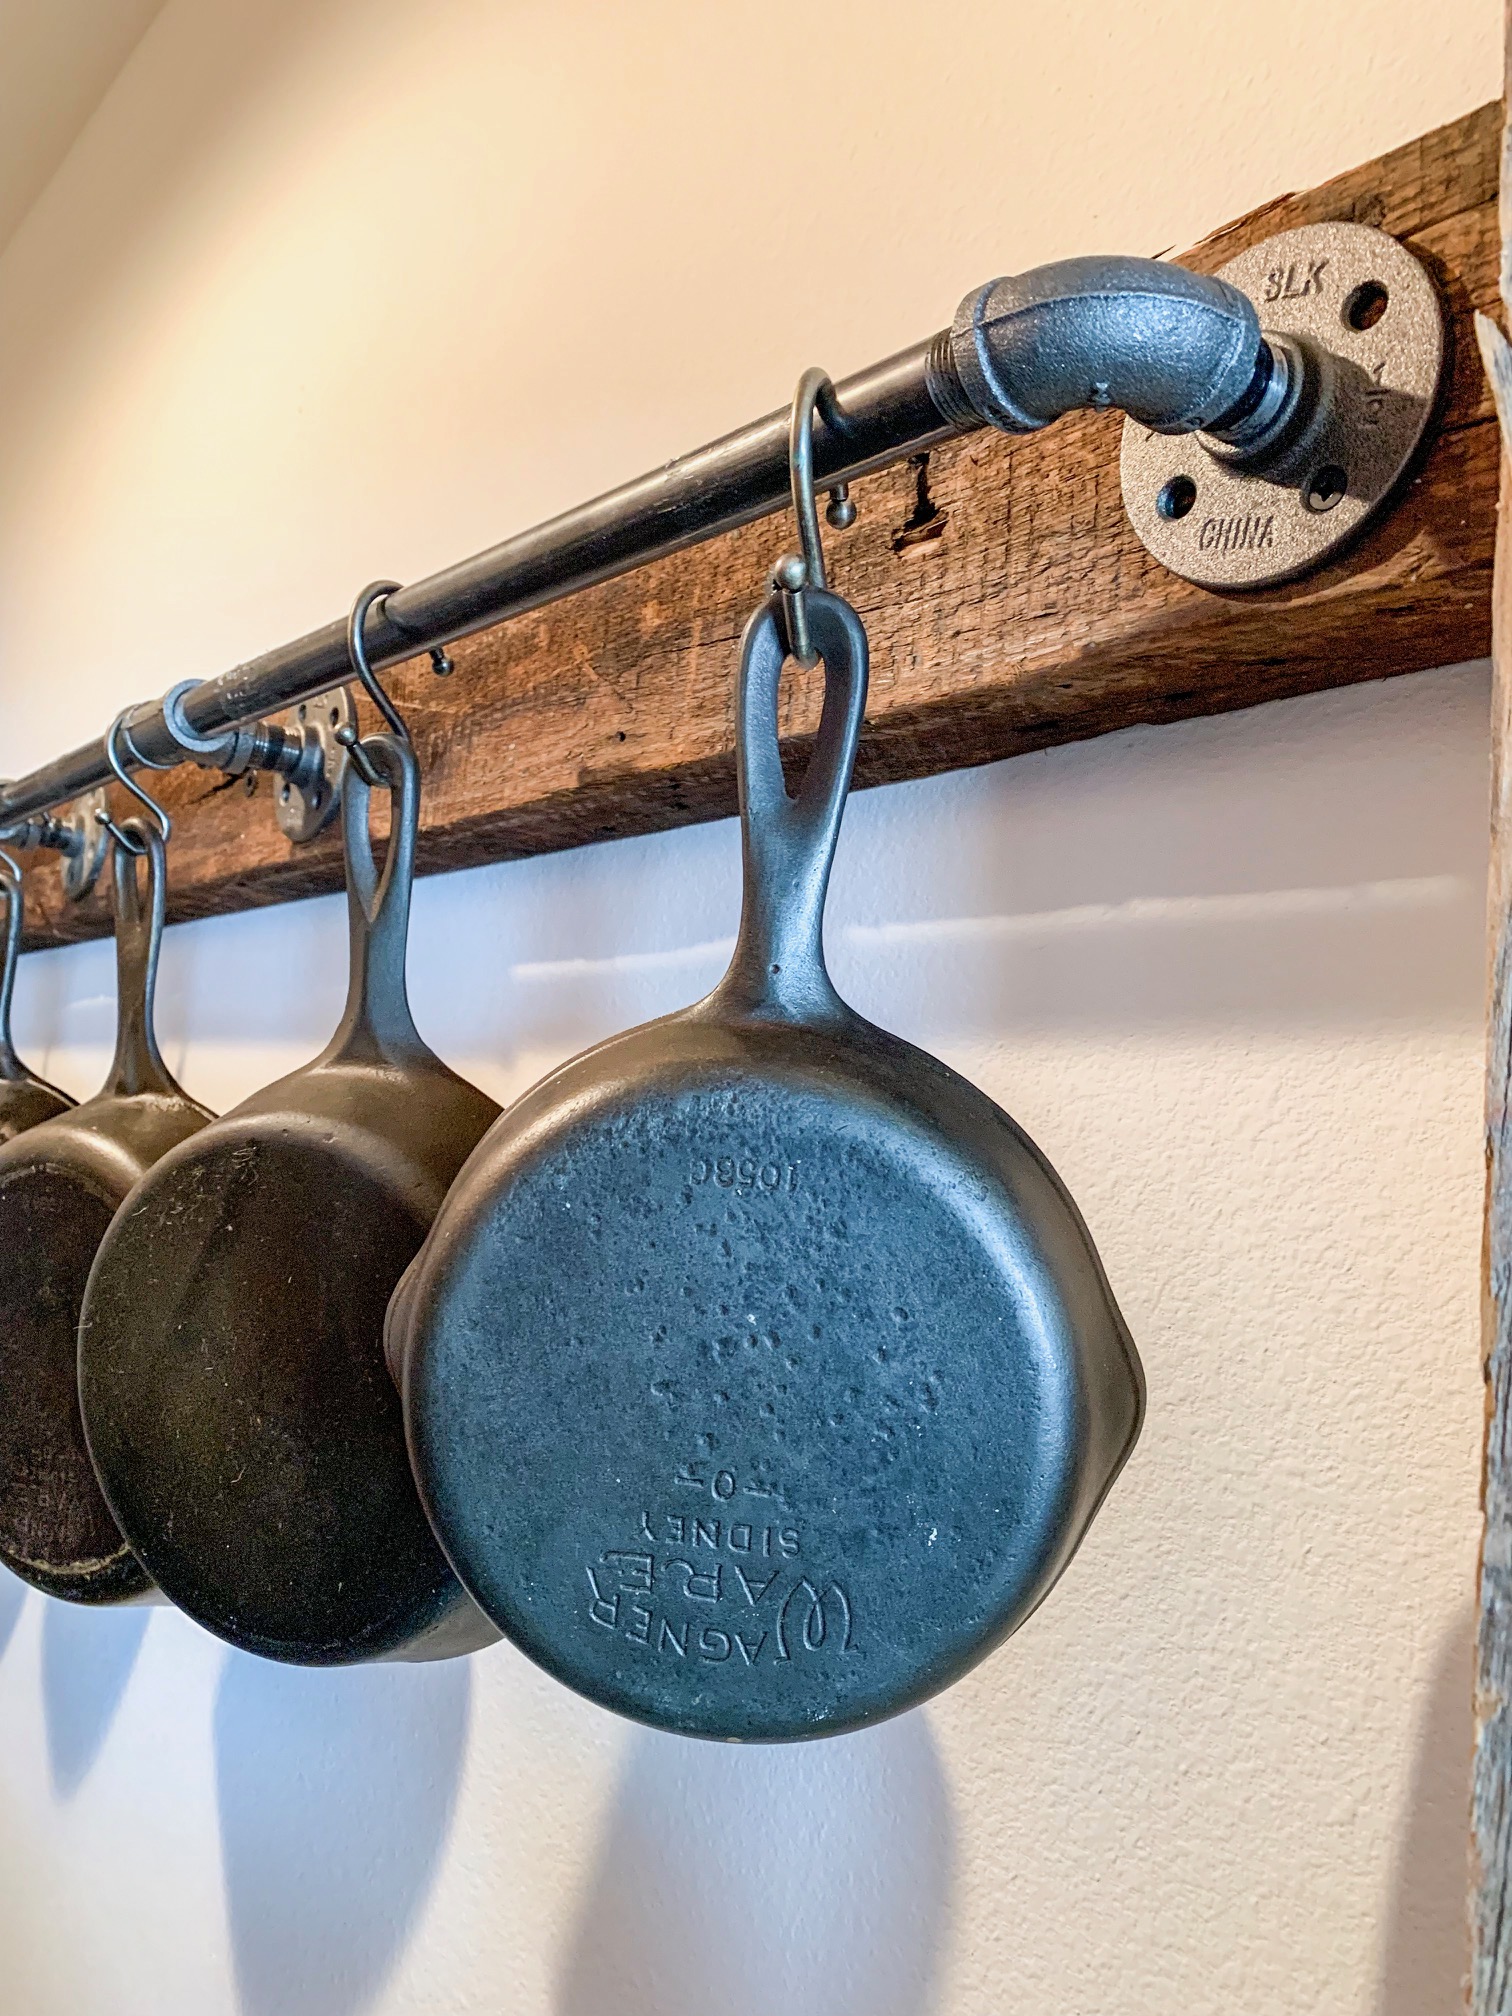
Here is a close up photo of the gas pipe hardware. I had some old shower curtain hooks from a previous residence that I used to hang up the pots and pans, but I’m sure you could find something more aesthetically pleasing on Amazon. In the future I plan to hang up another identical rack below this one, and use it for hang baskets for potatoes and veggies from the garden (to get them off of the kitchen counters).

IMG_1125.JPG

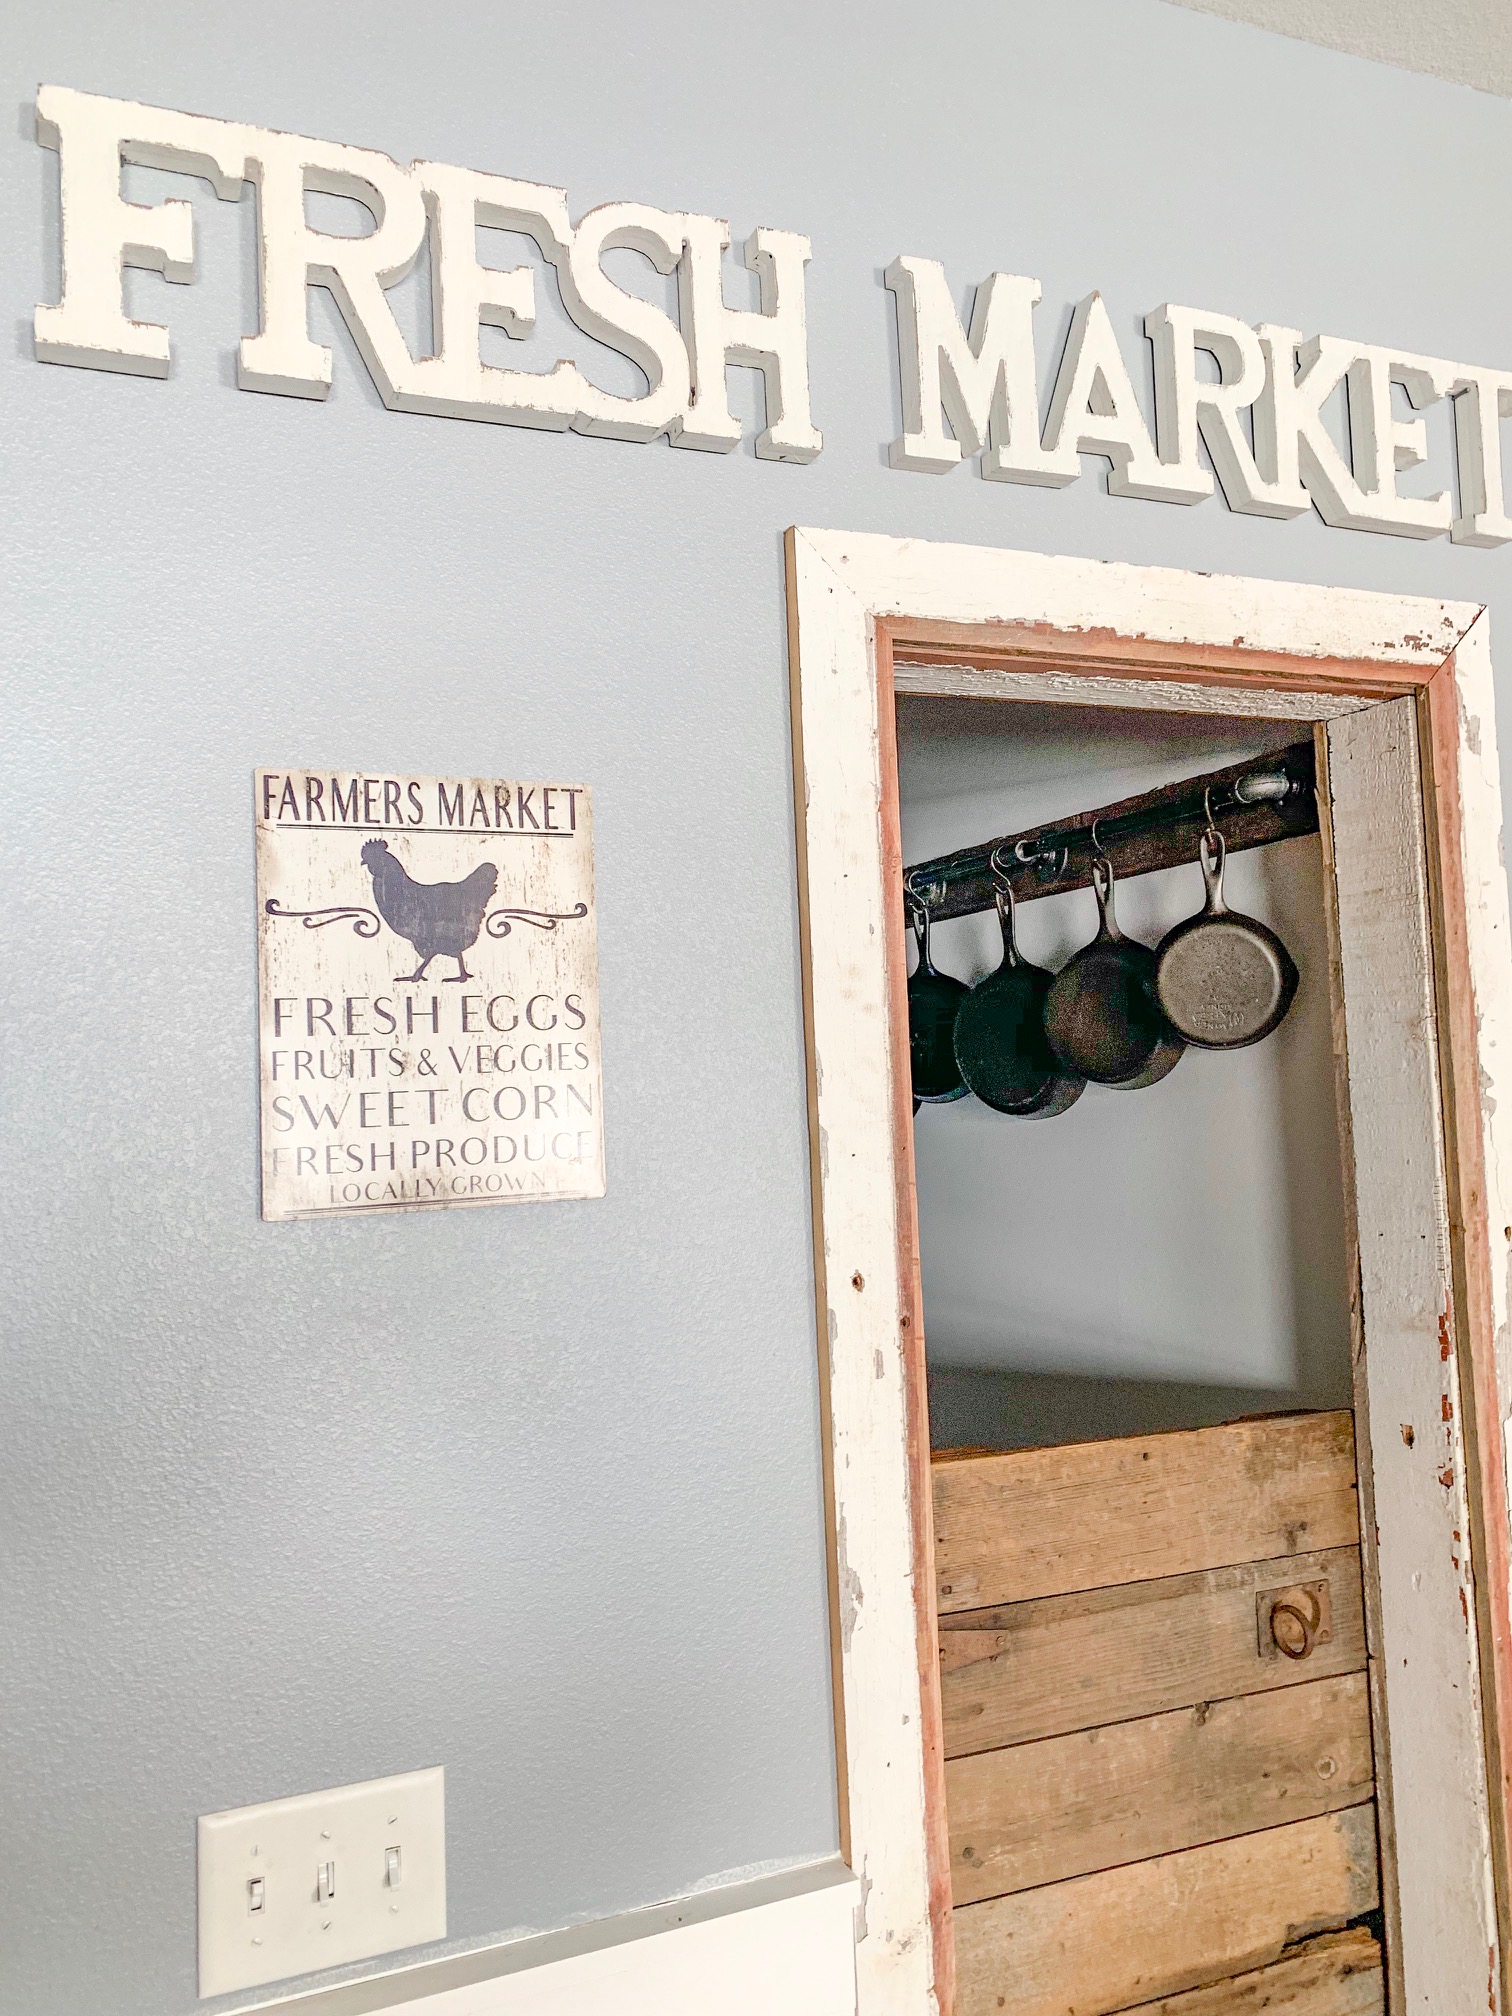
Here is the view from outside our pantry.

While this was a quick and easy project, it really has been a game changer for kitchen storage. For those of you who use cast iron cookware, you know its bulky and some sizes can be hard to fit in drawers and cabinets. This storage solution took five skillets and one large stock pot out of our cupboards, freeing up space for further organization.

I hope this post brought some inspiration to your own kitchen organization! Thanks for stopping by the blog today!

Signoff.jpg

DIY Laundry Detergent

Hi friends! Today I want to share a quick post on my DIY laundry detergent. If you have been following along you know that I love all things budget friendly, and when it comes to cleaners and detergents I prefer as few chemicals as possible for my family. Now I also believe there is a time and a place for bleach, and I am not opposed to busting out the heavy duty cleaners if needed, I just prefer not to use those for laundry.

Let’s get to it! This recipe is SO simple, and makes a large amount!

Here are the ingredients:

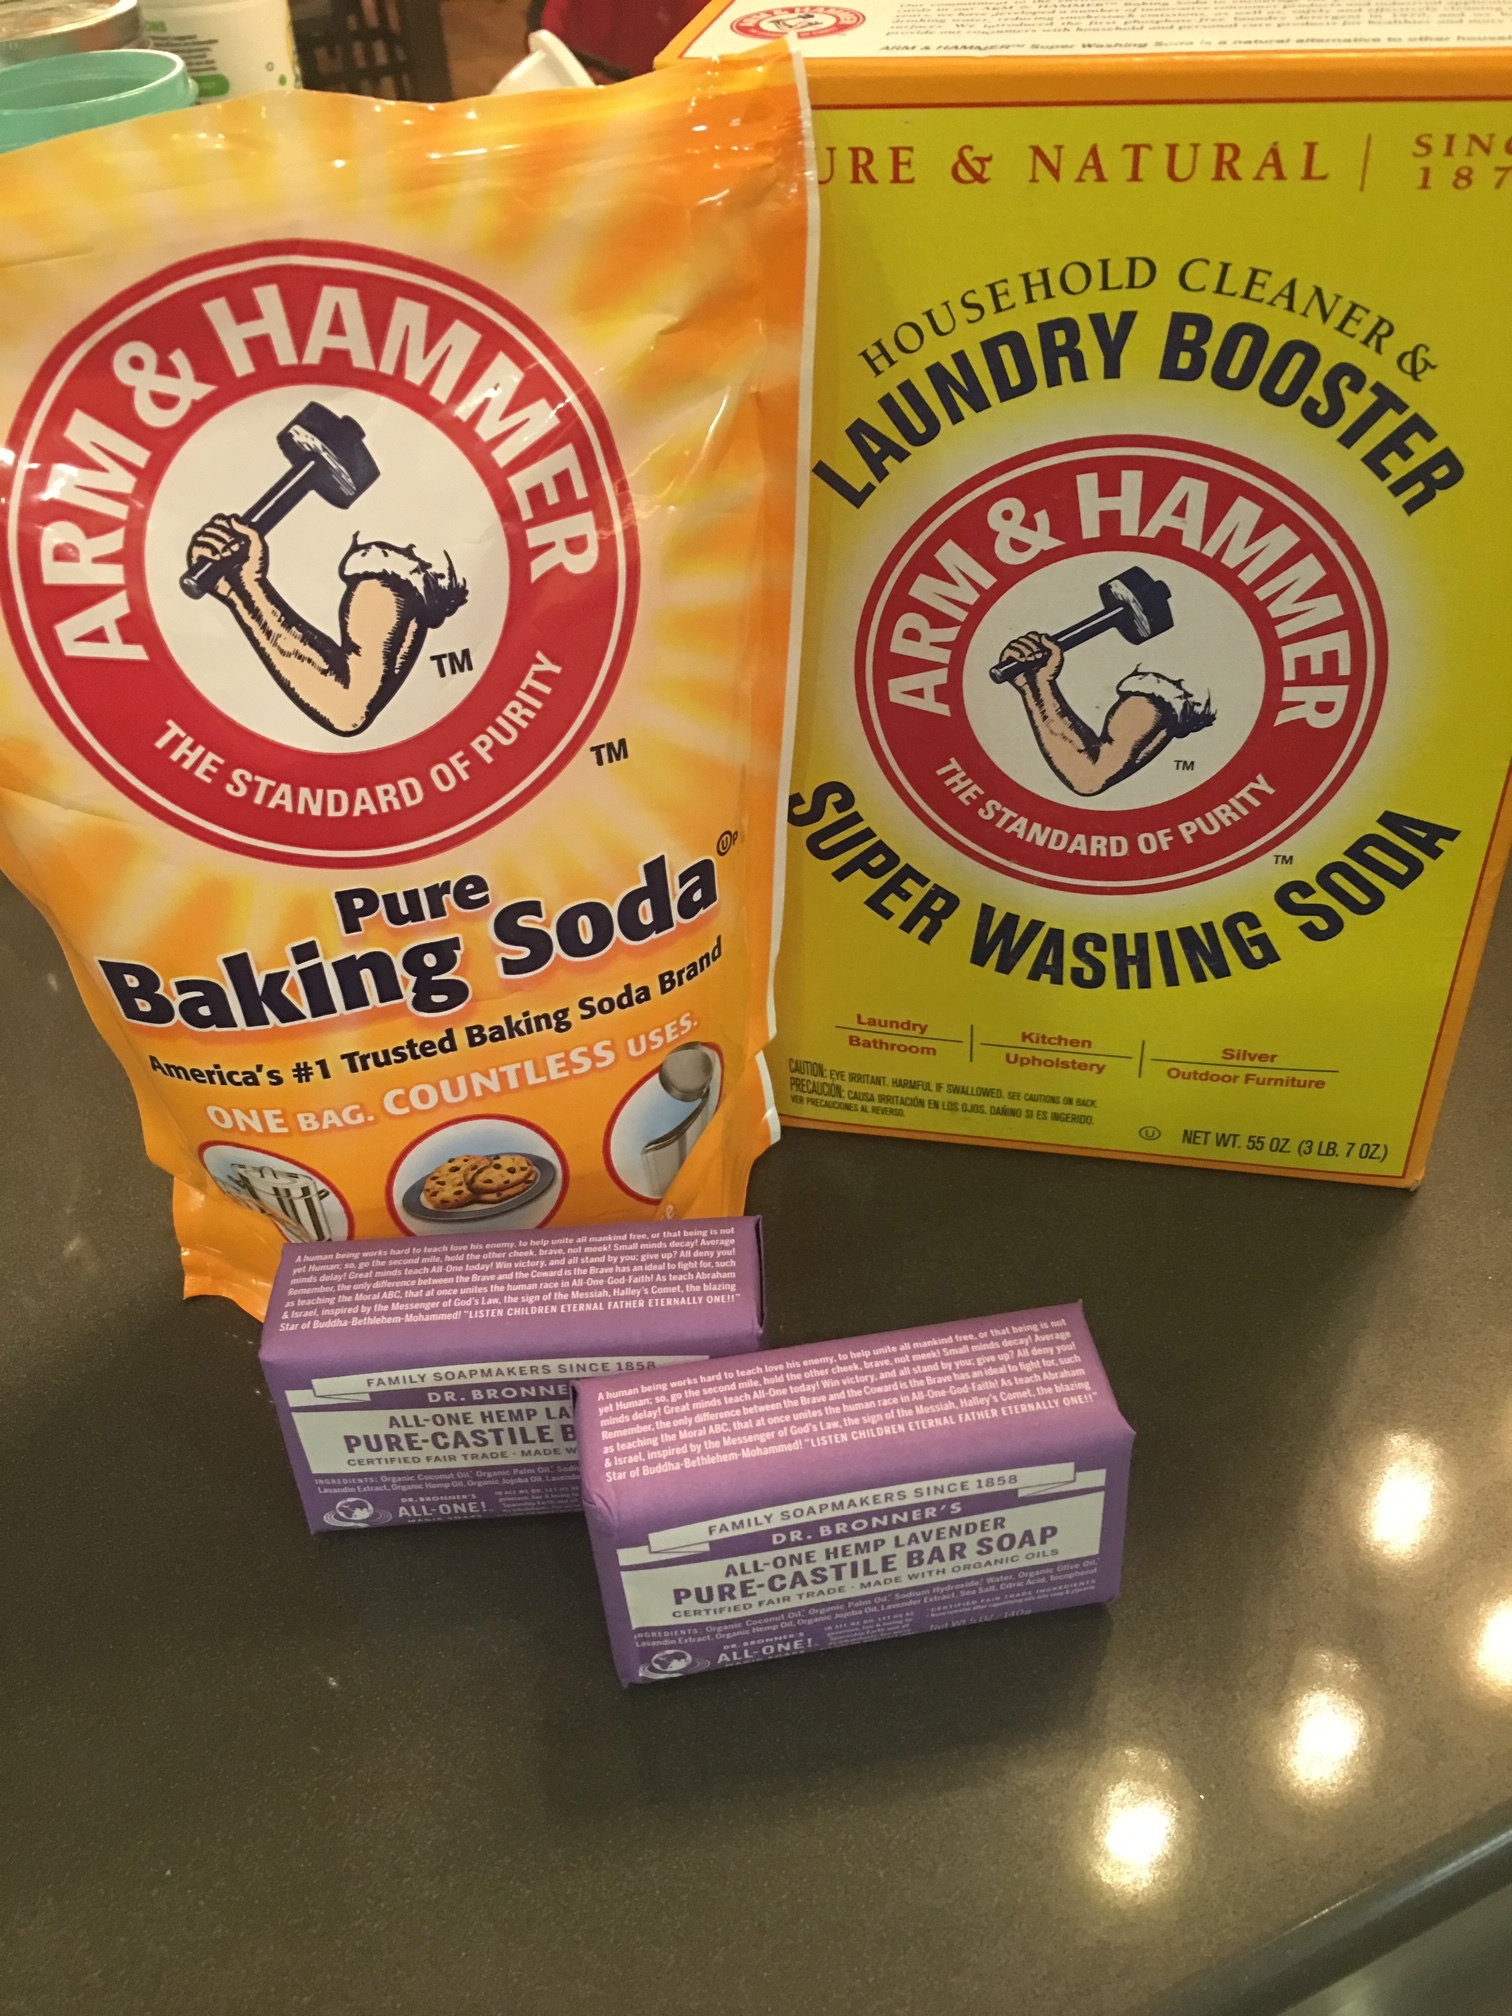
IMG_5237.JPG

8 cups Baking Soda

6 cups Super Washing Soda

2 bars castile soap (grated)

I like to use one bar of peppermint and one of lavender, but this time I only had lavender on hand.

Mix the baking and washing soda together in a large bucket, grate the bars of soap and mix again.

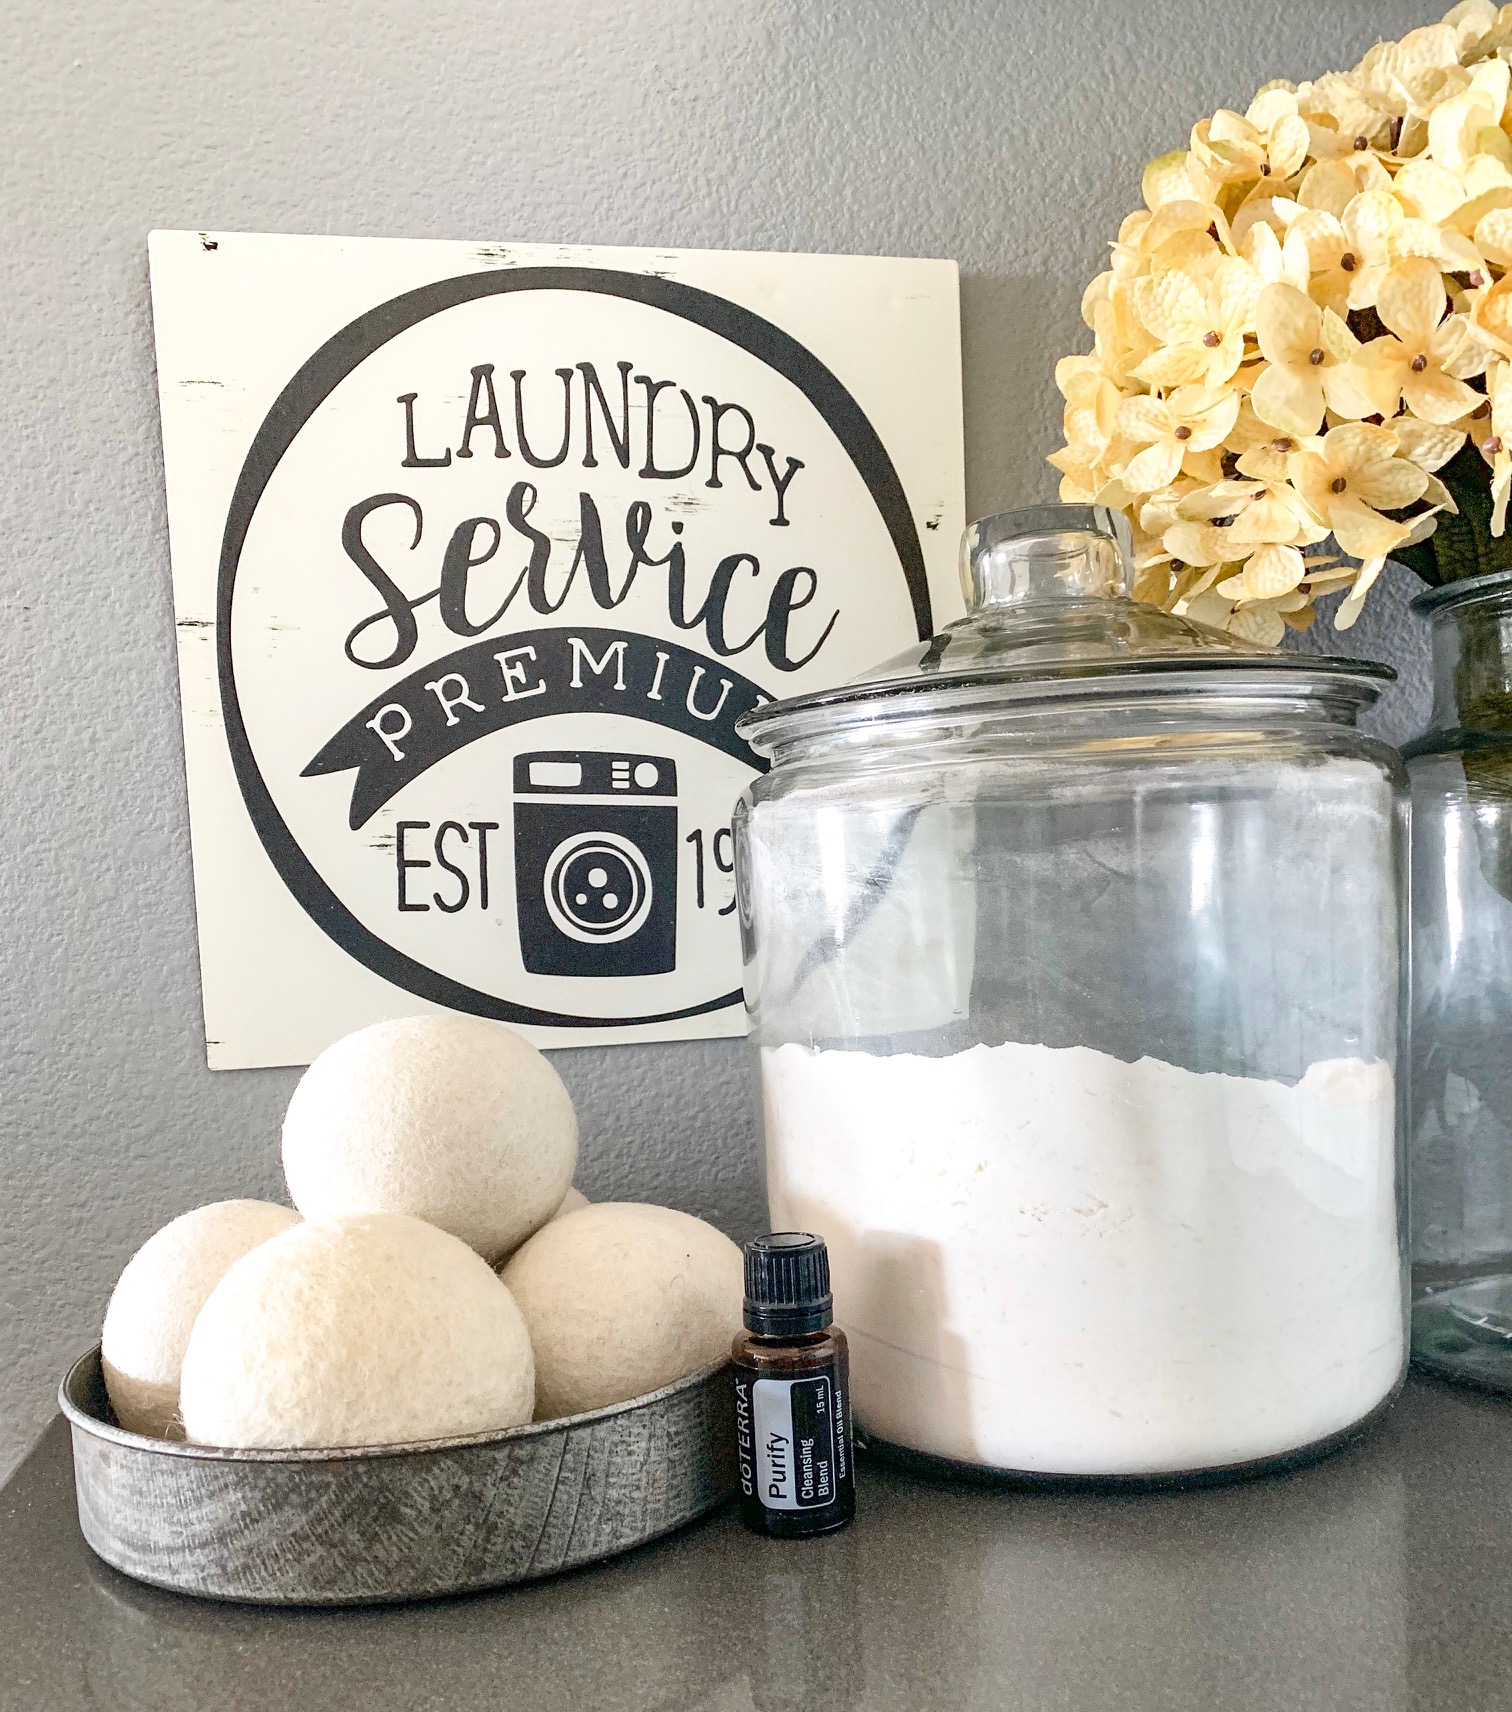
That’ts it! I use 1/8 cup per load. Not only does this clean your clothes and smell amazing, but it also cleans your washing machine! I store my detergent in a large glass jar, pictured below.

I also have been using wool dryer balls for YEARS (in place of fabric sheets) and never had to replace them! I use them with or without a drop of essential oil (for scent) and I have found that the more dryer balls I put in with my clothes, the faster they dry. This saves energy as the machine runs for a shorter amount of time.

IMG_0775.JPG

This little DIY laundry routine has really cut down the cost of washing/drying laundry in our family, and I hope it can bring some inspiration to yours! Have you tried this homemade detergent? Let me know how you like it!

Looking for the products I used for this post?

These are affiliate links, to see my full disclosure click here.

Signoff.jpg

Bring it, 2019!

I have never been a person who makes resolutions for the new year, but recently I have caught on to the idea of having a ‘word’ for a focal point behind fresh ideas and goals.

This year, i’m going with the word ‘visibility’.

For those of you who may be new to our community, 2018 was a big year for APS as we branched out into the tech world and constructed this fancy website that you are currently viewing. While APS Construction and APS Design are not new businesses, the idea of documenting and publishing content to a website was (and still is) very new to us.

The suggestion to create a website came up about a year ago, and to be honest I tried to ignore it for as long as I could, as the thought of taking the time to learn the behind-the-scenes technical details seemed daunting. But the need for a way to organize and showcase our work to better serve our clients was not going to go away, so in August I tackled this project head on. And while this website is still a work in progress and receives almost daily updates and tweaks, it certainly is nice to be able to send a client here to view past projects instead of trying to scroll through thousands of photos on a phone.

We have some big plans in store for the coming year, and increasing our visibility will be in the background of all of them. Soon you will be able to find APS Design’s ‘blog’ portion on Apple News, I will share the official link for anyone interested when everything is done being approved by Apple.

I can also share that I am in the final stages of developing a ‘commerce’ portion of this site, where customers can easily purchase the personalized book sets that you might have seen on our Instagram or Pinterest accounts. This should hopefully streamline the process and make things easier on both ends, but first I have to get through the legal side of things and draft ‘terms of service’ and register to collect state sales tax and all of that fun stuff.

As other activities become more finalized I will be sharing them, and as always I will be posting our current client and DIY projects to give you some inspiration for your own farmhouse. We don’t know all that 2019 has in store for us, but we are ready to work hard and see where this journey takes us.

Signoff.jpg

The Epic Barn Beam Bed Frame!

Hi all! We are in the home stretch leading up to Christmas and many of you are probably already on break for the holidays (this season seemed like it flew by faster than previous years). I have one final post for you before we transition into full Christmas mode at my house, which will consist of a few days computer-free to enjoy this time with family. So if you are sitting in an airport waiting to travel to your holiday gathering, or maybe need a 5 minute ‘break’ from all things Christmas, I have just the post for you!


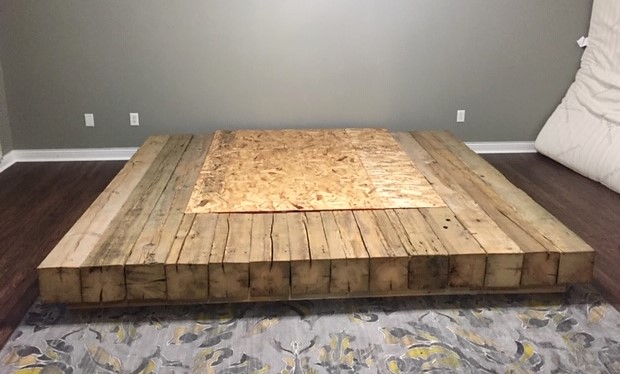
Recently, we finished up a client project that turned out to be the biggest piece of furniture we have ever created, thus the title of this post. This bed frame required long hours of prep, assembly, take down, haul to its final location, and reassembly, but as you will see it was well worth it and turned out stunning!

The materials for this project included authentic reclaimed barn beams and these were SOLID 8x8 beams, which made them very heavy.

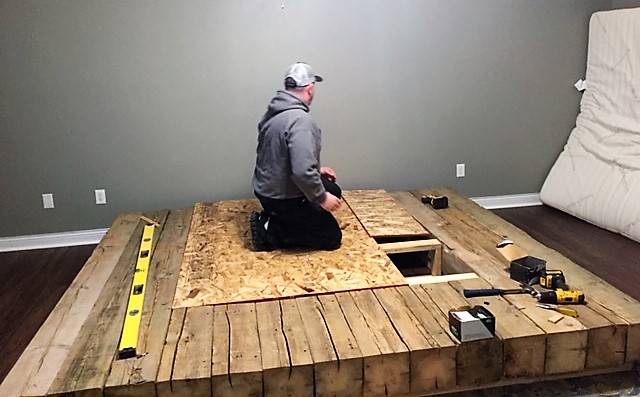
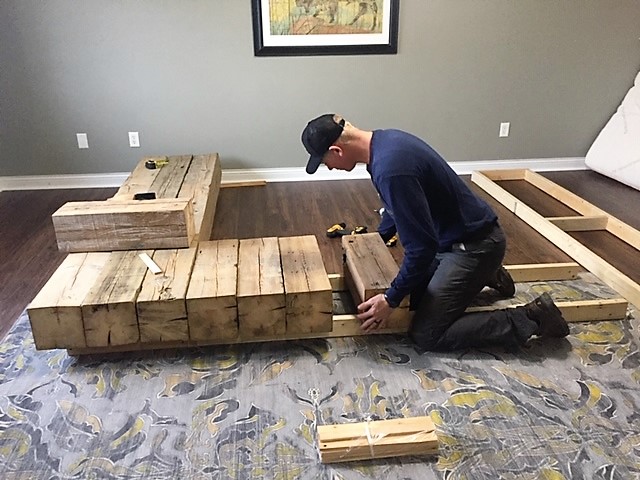
Prior to use, the beams had to be cut, sanded and assembled at our shop to ensure they all fit together properly and weren’t warped by the last 100 years of extreme temperatures of Midwest weather. a simple frame was assembled to keep the beams up off the floor in the client’s room.

Next, each beam was secured in place. To eliminate some of the weight of this piece, an alternate framing technique was used to comply with floor joist specifications and it was completely covered by the mattress and otherwise not visible once assembled.

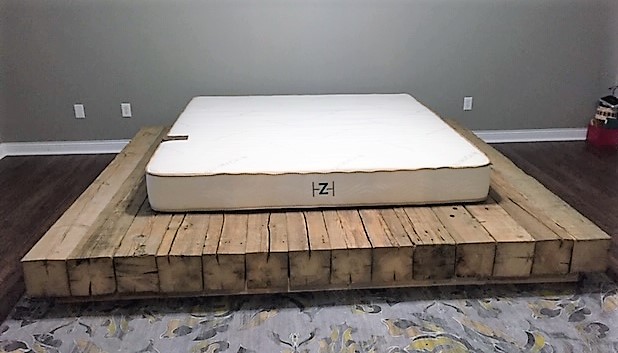
Here the frame is being finished up and mattress added.

To show you just how big this bed frame is, the mattress pictured is king size!

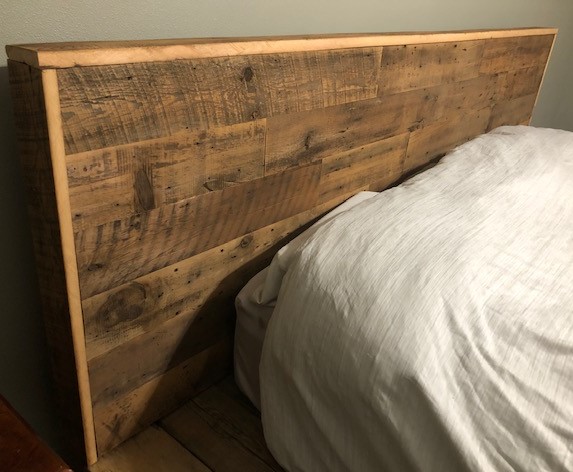
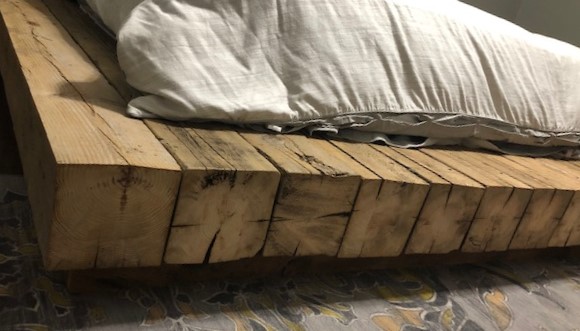
Pictured below are some up close photos of the wood details on the headboard and beams, each of which are unique. There is just something about the look of authentic barn wood that cannot be recreated with other materials.

The finished project photos!

IMG_4653 (1).jpeg

This bed frame turned out truly stunning!

I absolutely love how it all came together. A sincere thank you to the client who chose us to make this item for her!

Signoff.jpg