Getting BOLD, with Paint!
Recently I was asked about my ‘bold’ paint colors in my home, and how I choose them. Determining colors for a room has never been a time consuming process for me (I am the person in the greeting card aisle that goes with the second or third one that I pick up), but I know this is not always the case for everyone. I have friends who have been wanting to paint their home for nearly a decade but cannot agree on a color or finish.
Today I am sharing my tips on how I make my (bold) paint choices, and maybe they will provide some inspiration to you as well!

The photo that prompted the bold paint color discussion! Photo credit to Corridor Home Photos
First, choose a high quality paint!
I like the paint and primer combination paints, especially if my project contains existing paint. These styles are a little bit more per gallon, but always have full coverage and eliminate the primer step. Personally, I like the Ovation, HGTV, and Valspar brands at Lowes, but this is just my preference.
Now, It’s time for the color!
I follow a few simple rules…
Never try to match: If there is existing permanent decor (such as cabinets, flooring, trim, etc), never try to match it. I always go with a complimentary color instead.
Work with what you have: Have a difficult color already on the wall? Don’t want to rent an extension ladder to re-do that vaulted ceiling? Pick something that compliments instead (see step 1). My first home came with a single wall that was deep chocolate brown, which was absolutely not my style. Instead of trying to cover that up, I added teal to a neighboring wall to brighten the space (throwback picture below…)
Don’t sweat it: Paint is the most cost effective way to transform your home, and it can always be changed! If you are unsure which color to pick, go with your heart and change it later if you end up not liking it.

My VERY FIRST home, photo from most recent listing. This home has been sold several times since I lived there, and none of the owners have changed a thing! Not even the curtains!
Now, I fully understand that some people prefer neutrals and there is nothing wrong with that! In fact, I really like neutral paint and decor, but it’s just not something I would choose for my own home. In my opinion, all white or neutral colors make for an interesting design challenge so the room does not come across as sterile or cold.
As much as I enjoy a good challenge I also need the decor at my home to be practical. I hate dusting, so arranging 800 pieces of furniture and decor to fill a neutral space is just not realistic. Adding a bold paint color helps decorate the room a bit. Again, just my personal preference!
Here are a few more BOLD paint choices from my current home:

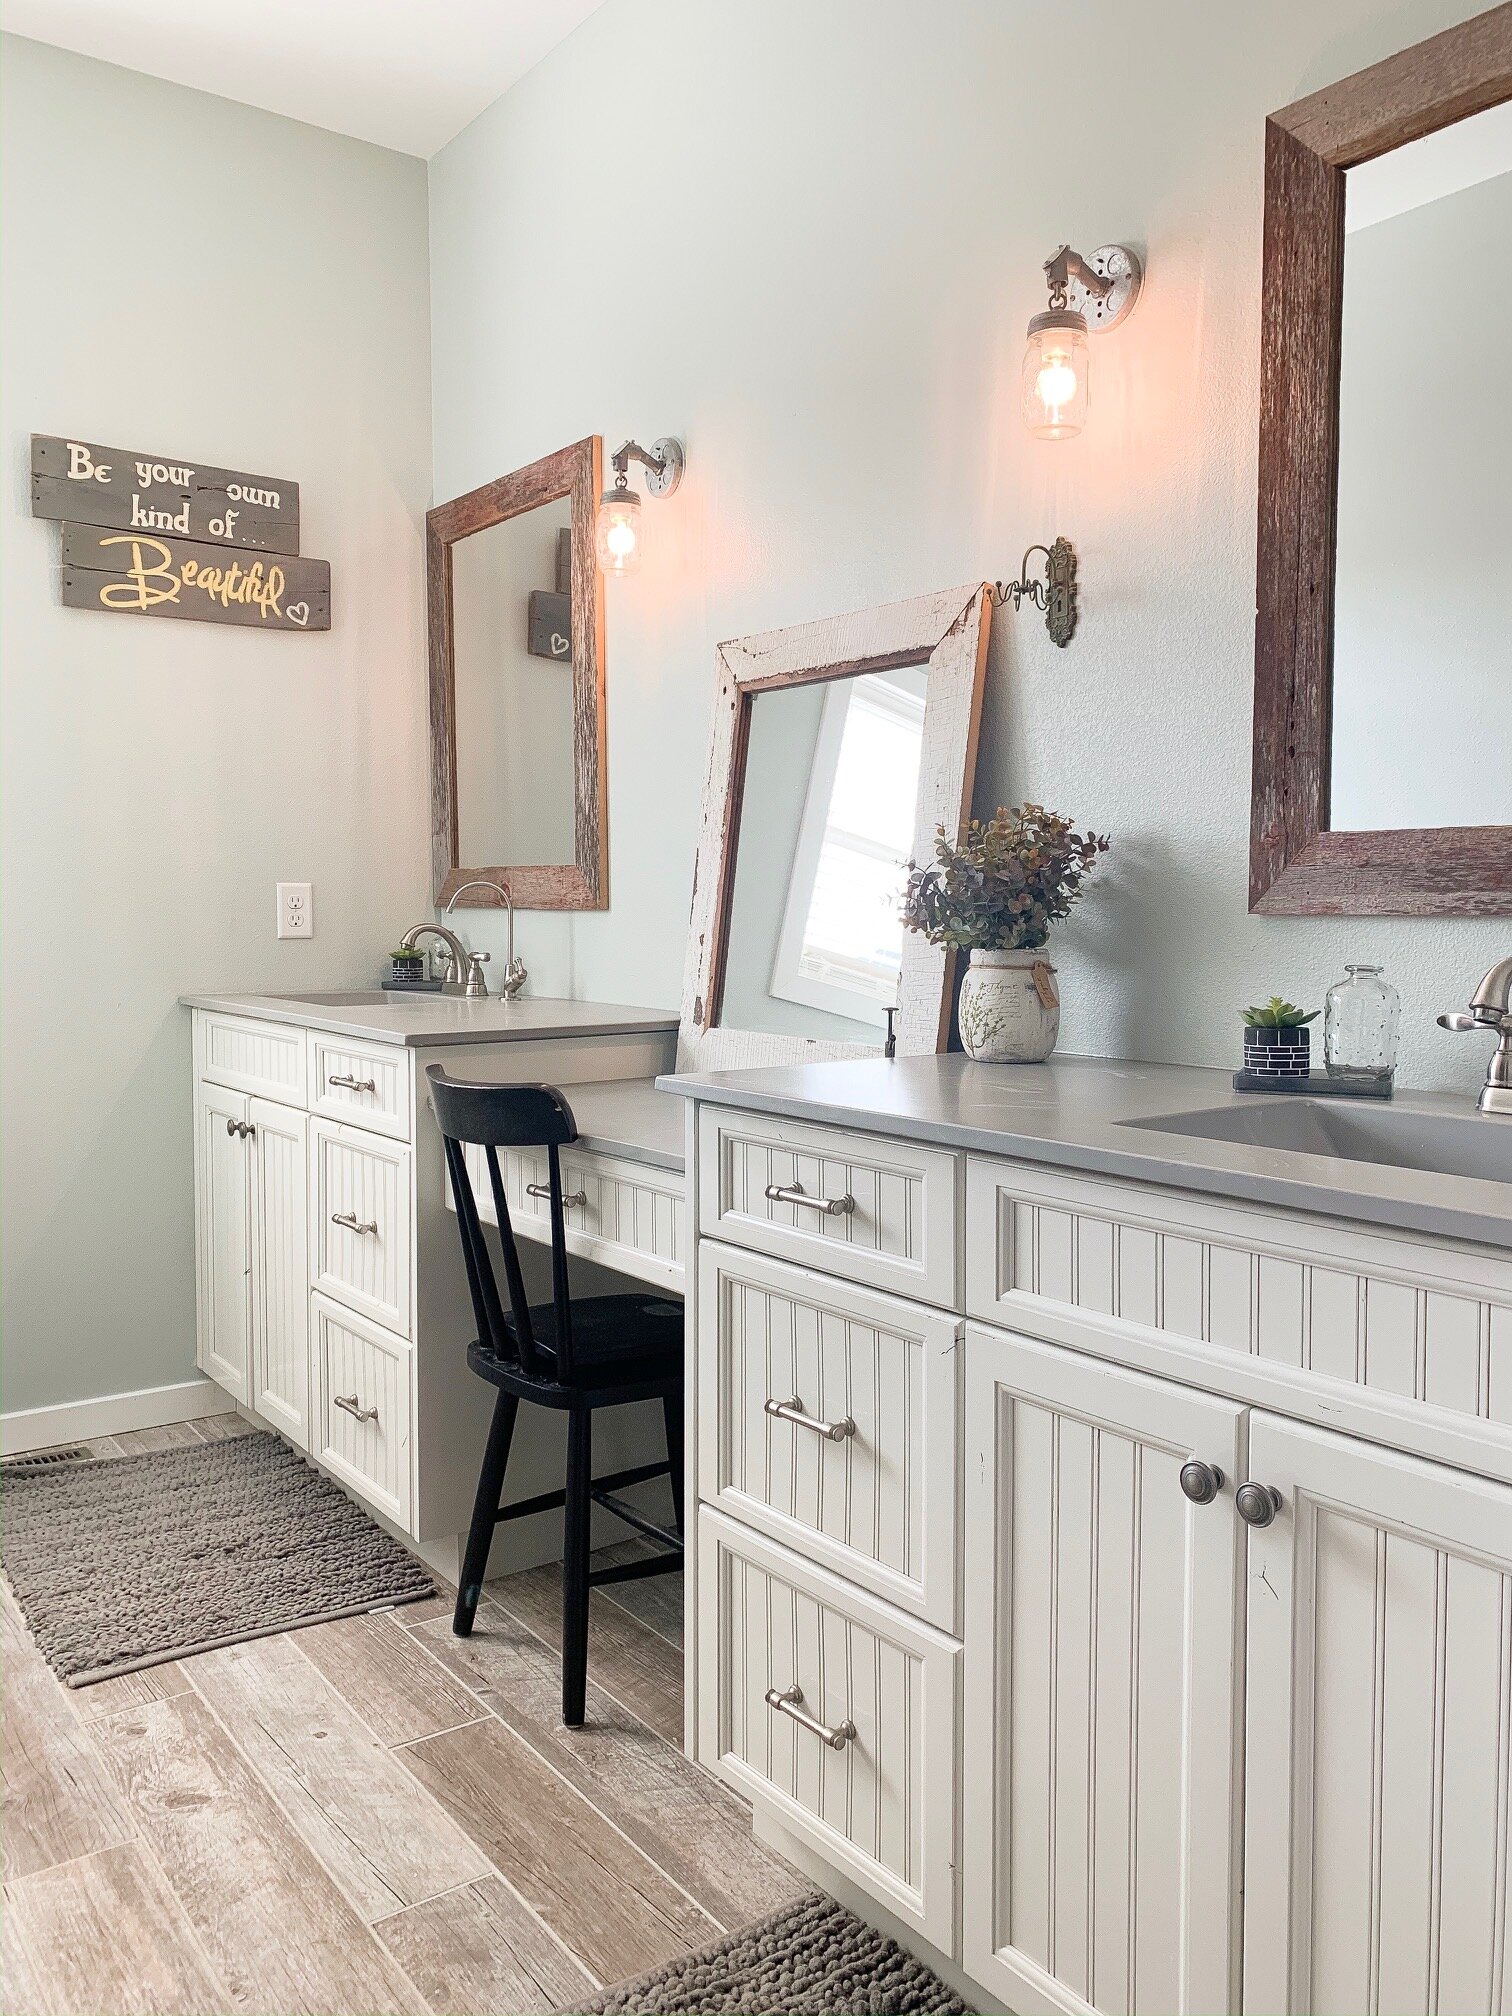
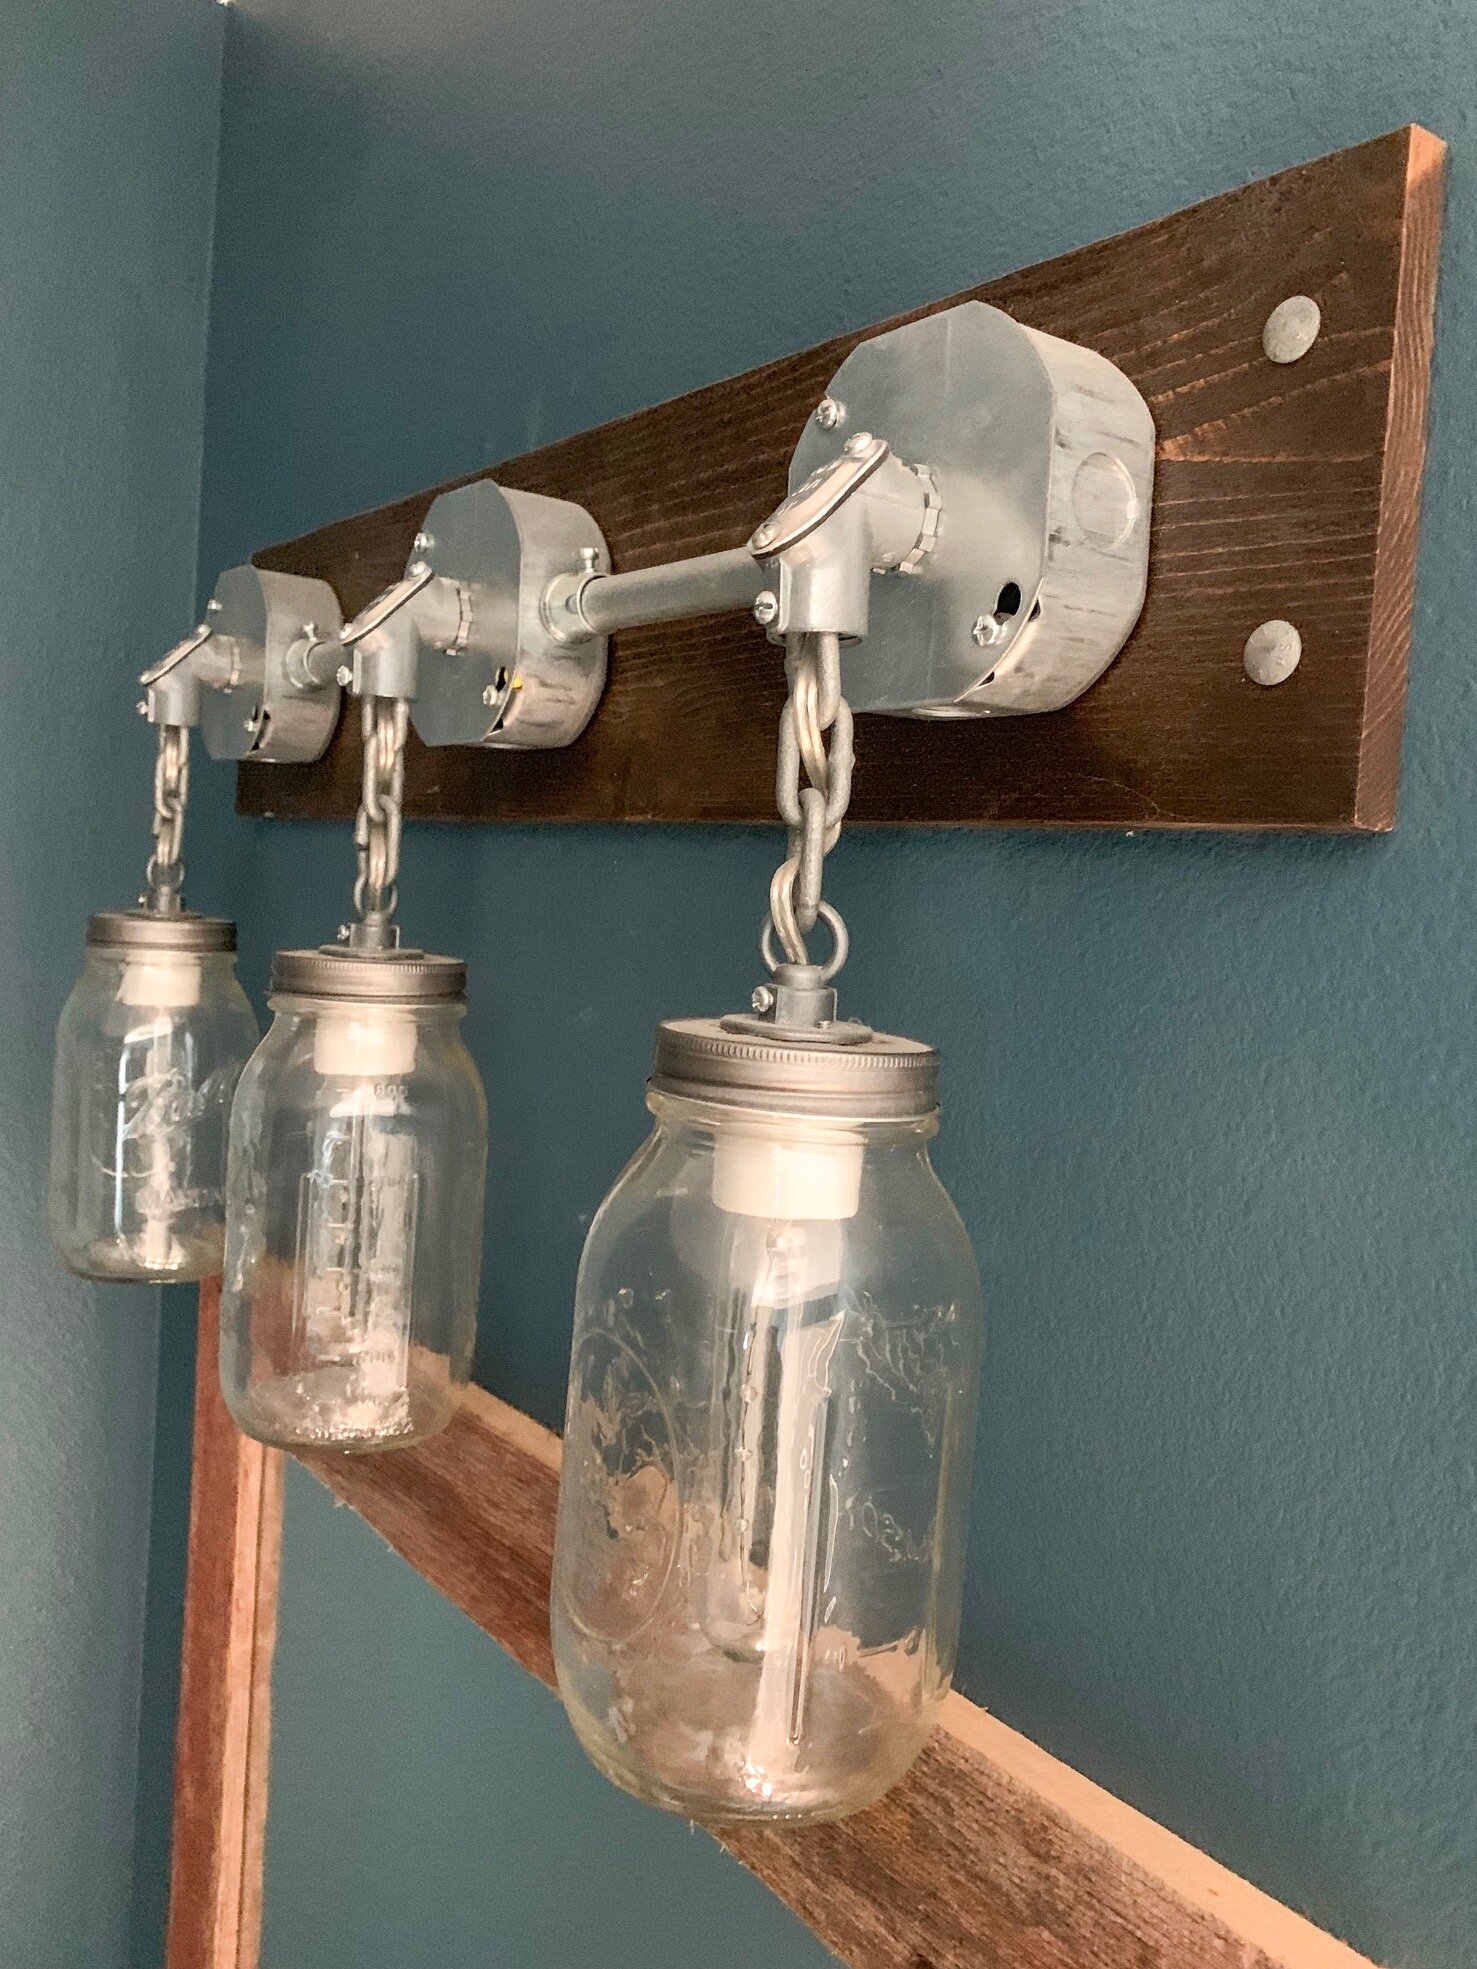
BOLD slate color for the fireplace bump out. Photo credit: Corridor Home Photos

Barn red in the laundry room, and slate blue in the powder room!
Well if you have made it this far you deserve a gold star, as this post somehow became quite lengthy! I guess I am passionate about my paints! Ha! If you have a bold paint choice in your home, I would love to see it! Tag me on Instagram or send me a message!
As always, thank you so much for continuing to support our small business! We will chat soon, big things coming to APS (wink wink).
Stay cool out there in this blazing heat!
-Rachael
Rustic Home Accents
Hello friends!
It’s a hot and humid 1000 degree day here in Iowa, and I am suddenly finding time for all of my indoor tasks, such as updating this website! You will notice quite a few big changes to our site in the coming weeks, but for now most of the layout is remaining the same. I am not very skilled in the tech world, and don’t have a large budget for a website person, so it’s just me figuring things out by trial and error :)
Anyway enough on that, I wanted to pop in and put together a post about the most asked about items of my home, the various rustic home accents. I have several locally sourced items, and they are often the talking points of conversations with visitors. Now you might be wondering why any of this matters, and I will explain…
Adding a unique home accent can be both functional and decorative, all while setting your home apart from the rest…
-Have you ever driven through a neighborhood of similar style homes and had one stand out?
-On the contrary, have you been to several open houses or showings in a row and then been unable to recall what the inside of the home looked like the next day?
Let me show you what I am talking about…
This beam pictured is on my front porch and came from a barn that was taken down several years ago. It serves as a decorative item, and it also functional and holds up the front porch to my house.

Here are a few photos of other rustic home accents I have throughout my house…

An old window frame above my kitchen sink! In an ideal world there would have been a real window here, but since the floor plan of the house didn’t allow for one, this is the next best thing!

Is a home even complete without a giant rusty pig? :)

Floor to ceiling barn wood flag…because, America
Spare bathroom light fixture, and you can see the barn wood mirror beneath!

The pantry door is an old trap door to the attic space of a c.1920 carriage house

Our custom kitchen cabinets are new, but they were made to look old by using wood with imperfections
Ok, that’s not even all of them, but y’all get the idea! Unique items really make a home stand out in a crowd, and while some of these items were expensive (hello cabinets!), many of them were thrifted, free, or purchased for very minimal cost. Budget friendly is my way of life :)
That’s all I have for you today! Do you decorate with rustic home accents? Feel free to shoot me a message, I would love to see them!
Until next time-
Rachael
DIY Gas Pipe Kitchen Shelving
Hi friends!
Today I have a fun DIY for the kitchen, gas pipe shelving! I know the open shelving trend has been around for a while now, and personally my kitchen cabinets are not organized enough to have the contents visible, but I do enjoy the open look. Recently, we installed gas pipe shelving for the kitchen at the farmhouse project (which is allllmost done!) and I took a few quick photos to show you the process, in case anyone else has been thinking of tackling this type of project. Y’all know I am a fan of all things budget friendly, and this project falls right in line with that! Let’s get to it….
PREP:
Honestly, the worst part about working with gas pipe, is taking all the stickers and adhesive off. The pipes are greasy, and I swear they use some extra adhesive to stick the purchase labels on them. For this project, we used the 1/2 inch version of pipe that can be found at any hardware store, and picked up the corresponding wall plates and end caps as well.

After prepping all of the materials, it’s time to measure out and mark the wall. Traditional cabinets sit about 22 inches off of the counter top surface, so that is the height we used for the bottom shelf. A stud finder is a must, as these shelves will carry some weight!
For the top shelf, we just spaced it 12 inches higher, as that is the height I thought looked the best with the remaining wall space available. Each shelf gets two support pipes, and placement of each of the wall plates was marked in pencil on the corresponding stud.
INSTALL:
The next step is attaching the wall plates to the studs, and while the plates have four holes for screws to attach them, we have found it is best to use only two at this step since there is usually some amount of adjustment later on. The below picture is an example, as well as a photo of the type of screws that we use.


Once the wall plates are installed, it’s time to attach the gas pipe and end caps. This step is fairly straightforward, except make sure to not over-tighten the pipe to the wall plate.
Now it is time to level up the shelving, so the wood pieces lay flat and dishes don’t lean or fall. For this shelving we used a 6 foot level, but you can use whatever size works for your project. I would say the most tedious part of installing this type of shelving, is making sure they are level. Some wall plates will need to be adjusted by tightening or loosening the screws, or even moving them a quarter of an inch or so. I tend to be very particular for kitchen shelving, and less with shelving for other purposes, but it is up to your personal preference. Either way this step is not difficult, just a bit time consuming.

Once all of the shelves are level, this is the time to add in the additional screws to the wall plates, if that is your preference.
The final step is adding the wood pieces to span the gas pipes, and complete the shelving. Another quick check of the level, and you are all done! Here is a picture of how this project turned out.

We chose open shelving for the kitchen at the farmhouse project mostly due to the fact the kitchen is pretty small, and would look pretty cluttered with full upper and lower cabinets. There is still plenty of enclosed storage, for all those appliances or bulky items.
We have a different style of gas pipe shelving in our personal home, which is used to display my collection of vintage glass bottles. Overall, the process is the same.
Here is a photo of the other style:

I just want to wrap up this post thanking each of you for being here and supporting us! I feel like 2020 has really thrown everyone’s plans for a whirlwind and we just have to learn to keep adapting to the changes and challenges presented to us (sometimes daily).
Also, I have been really itching to get back into the DIY’s lately (I feel we got away from them a bit over the last year) so feel free to shoot me a message or comment if you have something specific you have been looking for. I hope everyone is doing well, and I will chat with you again soon!
Cheers!
Rachael
Book Shop Back Open!
You read that correctly!
My hand stamped book shop is back open on Etsy, following an extensive closure due to a shortage of materials related to COVID-19. These vintage-inspired book sets are stamped and personalized by me, and make a great gift for any occasion. Here are a few photos…


I purchase these books from second-hand stores, so they all sit in my garage for 24 hours before I do anything with them, please allow an additional day for processing for this reason. Also, if you are local, shoot me a message or email prior to your purchase so I can set up a pickup and avoid shipping charges.
I hope everyone is staying safe and healthy, and I will chat with you soon!
-Rachael
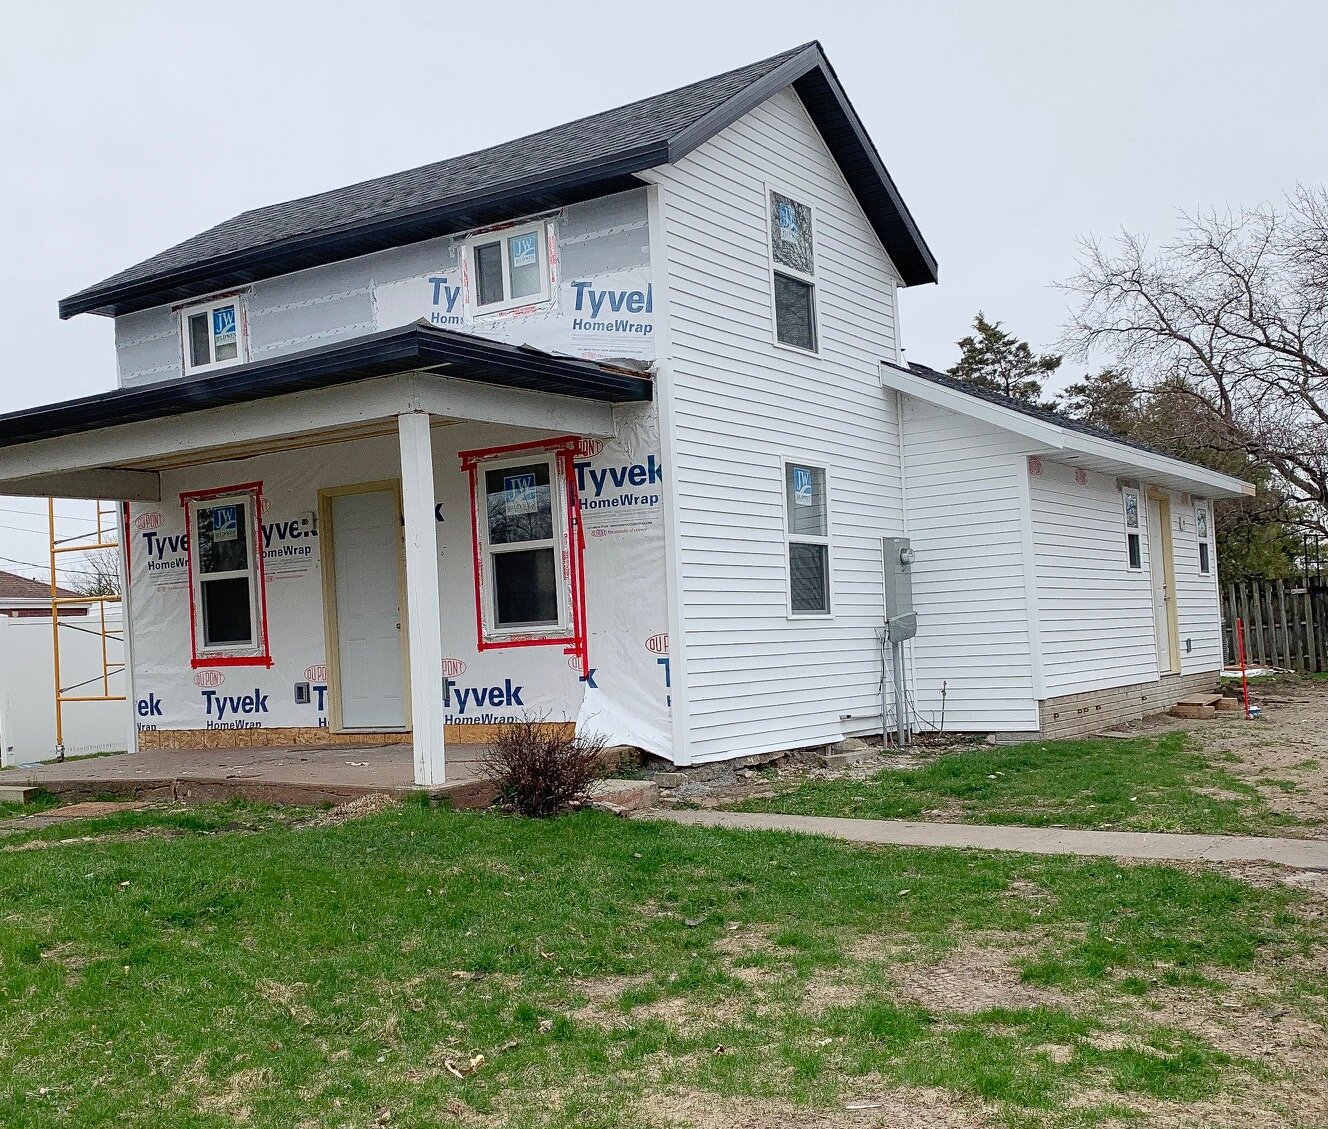
Farmhouse Renovation: Month 6 Update
It’s a new month, and that brings a new farmhouse update!
This will be the last update before the finished project reveal, which will be sometime in June. Originally we had planned on this project only taking 6 months, but as we know a pandemic had other plans. We have tried to remain as flexible as possible and just log some extra hours when we can (between essential jobs).
My favorite part of this month’s update is the vertical siding on the front of the home, which is something we have never done prior to this project. The cost of this type of siding is significantly greater than traditional horizontal siding, and I am not sure why other than increased demand due to current trends. Anyway, it looks great! Here’s a close up…

Another addition to the front porch is the tin ceiling, which will naturally rust over time and look older/more original. We also are in the process of installing a deck over the existing porch cement slab, which will level it up and overall just look nicer. Here are a couple photos of the front exterior.

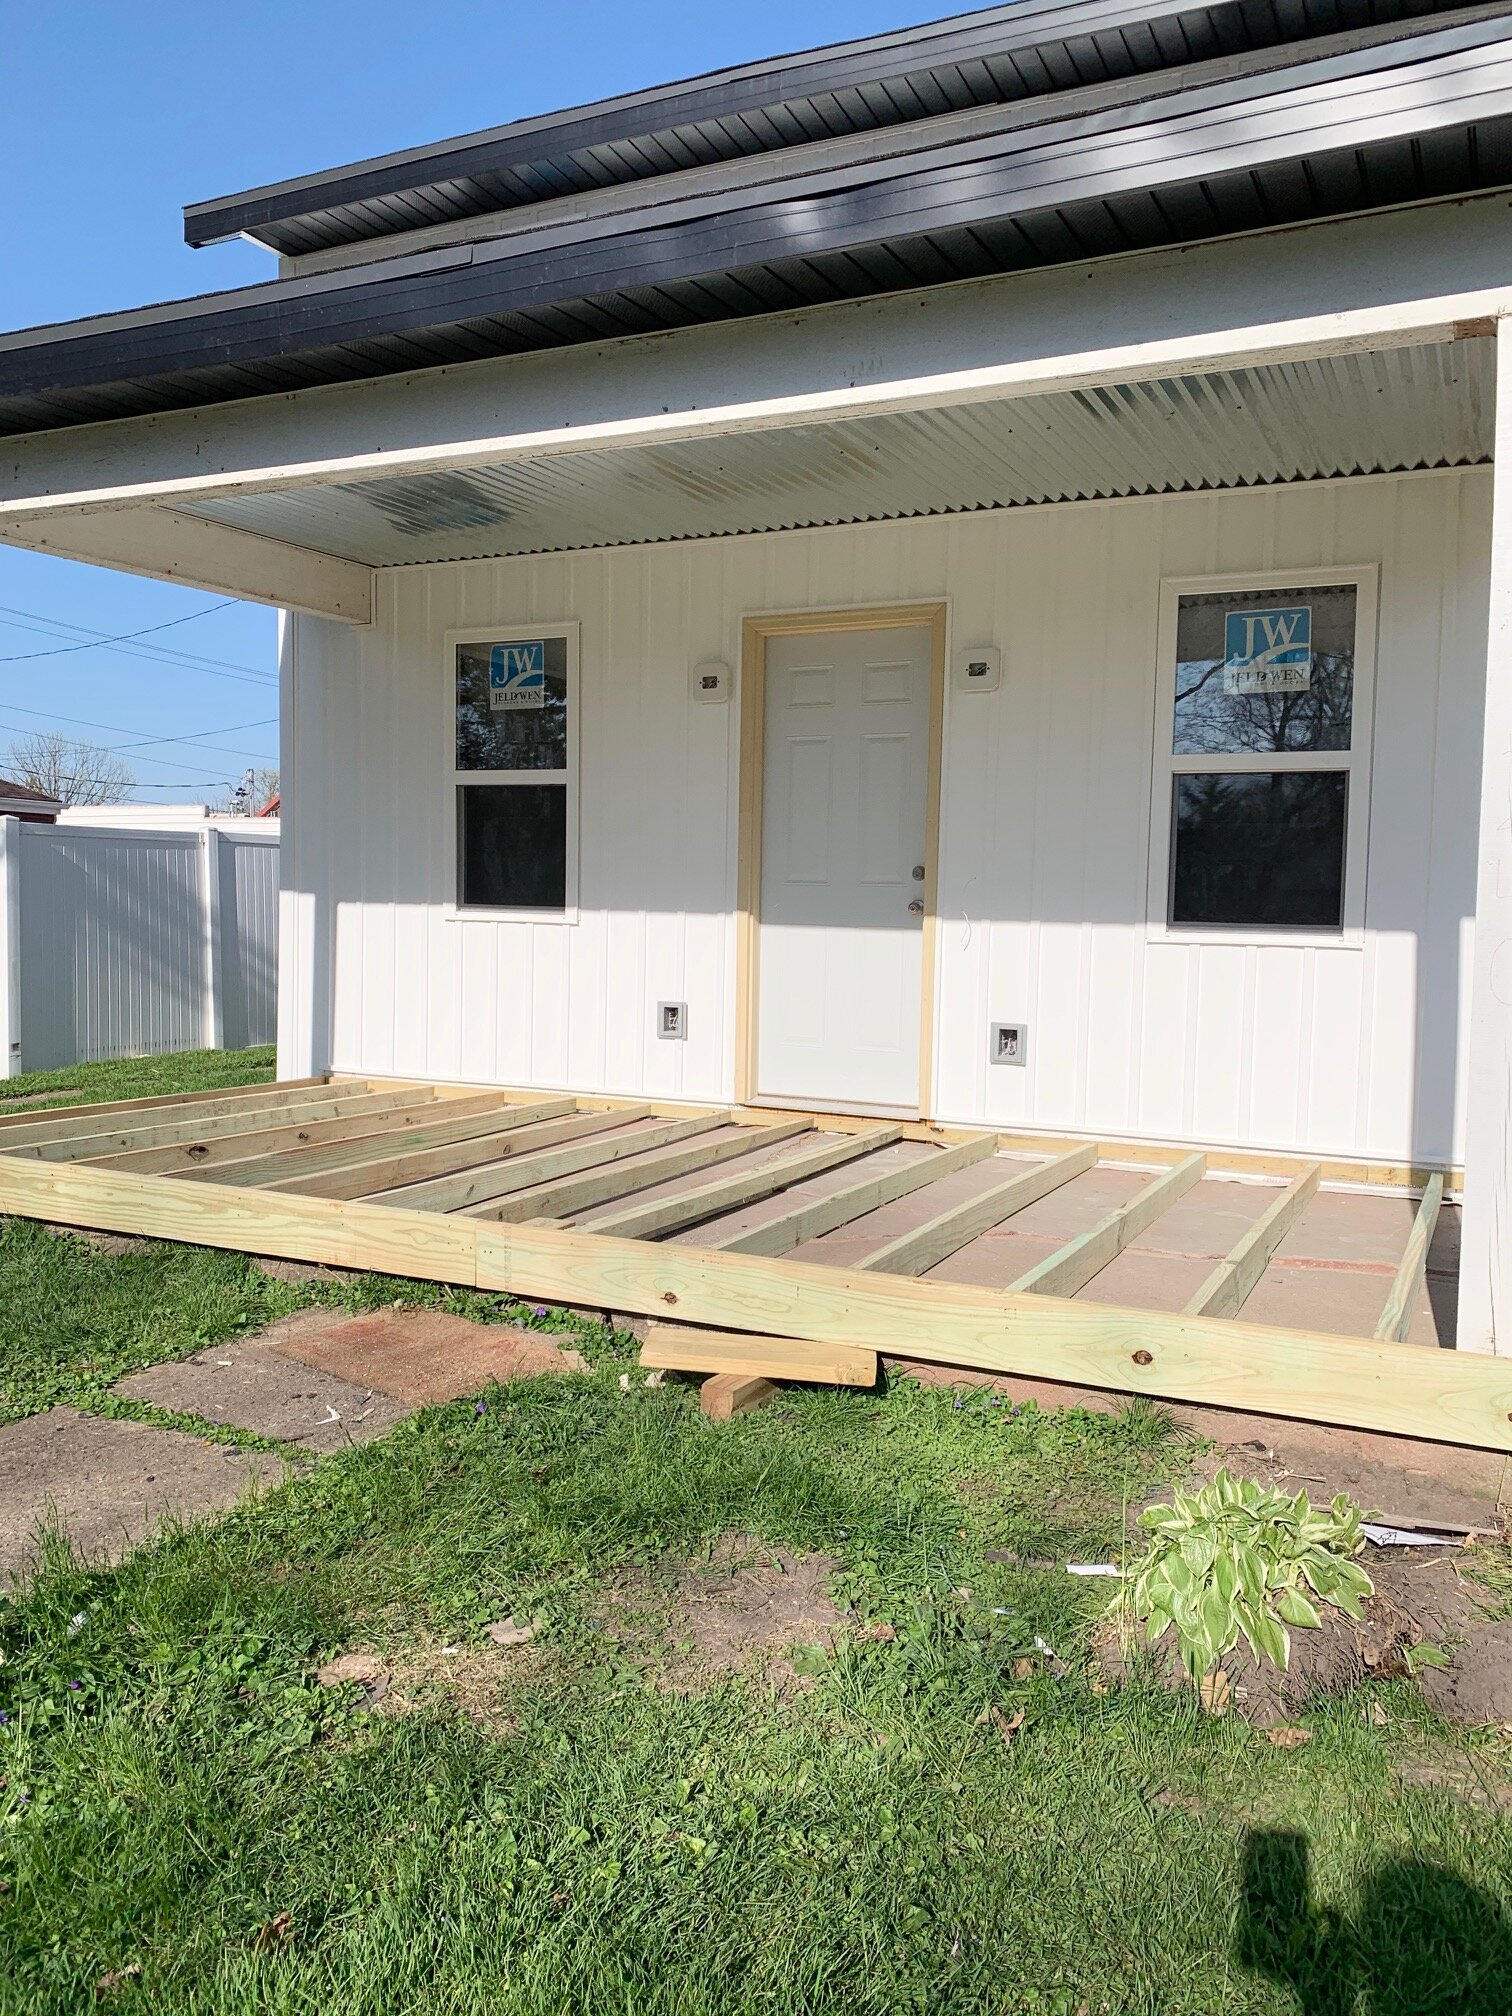
Note: Final door and frame are not installed yet!
Another exciting install this month was central air conditioning, which was never previously installed in the home. I’m not sure how anyone survived for the last 120 years of sweltering Iowa summers without central air, but we have officially solved that problem!

A/C for the win!
Equally exciting is the addition of attic access and blow in insulation. Iowa is an extreme weather state (extremely hot and extremley cold) so proper insulation is key to managable utility costs. Anyone else get excited about insulation? Just me? Ok…

Attic access in the hallway!
That’s all the photos I can share for now, as I need to save some for the final reveal. I’m really looking forward to these next few weeks of finishing touches, and I will probably have a few sneak peek’s over on Instagram.
I hope wherever you are reading this that you are able to stay safe and healthy during this unprecidented time. I am looking forward to finishing this project, for the simple fact of having one less iron in the fire during all of this uncertainty. As always, thank you for stopping by the blog today, it really does mean a lot!
Unitl next time,
Rachael
Farmhouse Renovation: Month 5
If you are new here, we are in the process of renovating a c.1900 Iowa farmhouse that we purchased about 5 months ago, and to be honest I thought we would be pretty much done with this project by May 1st. Well, as you all know, a world-wide pandemic came along and threw everyone’s plans for 2020 out the window.
I was torn on even writing this update, I mean there are much more important things you could be reading right now. Ultimately I decided to proceed, to try and provide a sense of normalcy for myself and maybe a 5 minute break from reality for my readers.
Over the last month, we have made huge progress on the outside of the house, installing new siding, sofitt and fascia. You will notice the black sofitt (overhang of the roof) on the old section of the house, and white on the new section. We also have white vertical siding for the front of the home, which is actually going up tomorrow, weather permitting. Here is a close up photo of the sofitt, so you can see the difference.
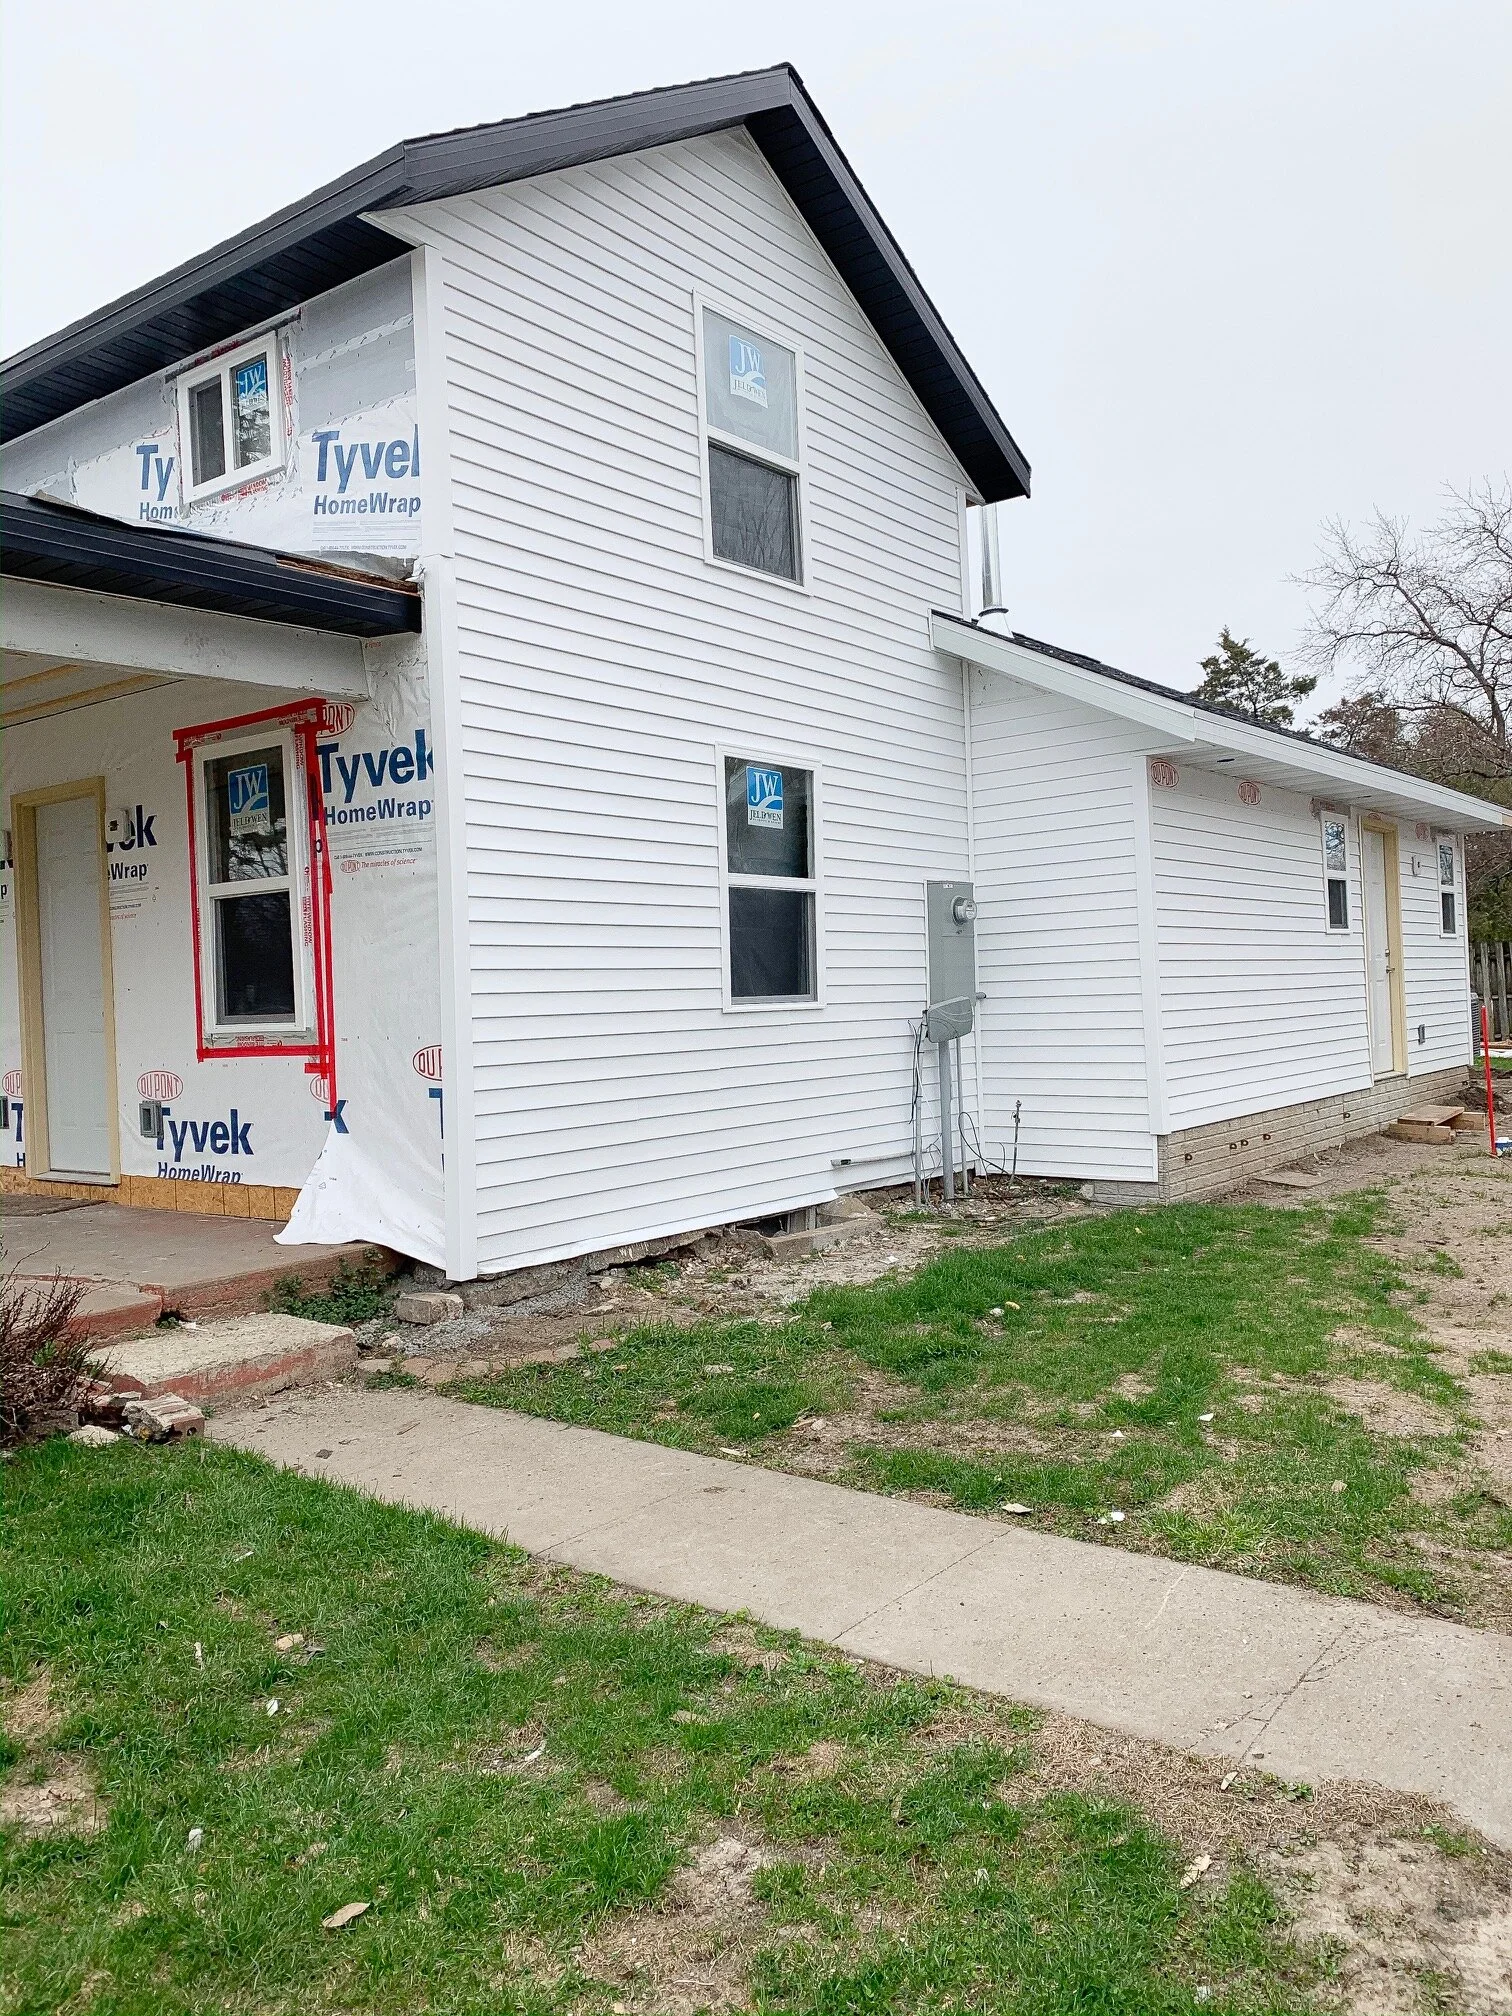
I really wanted to do something different for the original section of the home, to make it stand out, and I think the contrast of the black sofitt is exactly what was needed. I really wanted to install vertical siding on the entire house, but it’s so much more expensive than horizontal, and wasn’t really in the budget. Either way, the home will look amazing with an all new exterior.
In fact, I dug up an old photo of the house that we took right after we bought it and I will add it below for comparison. There’s quite a difference from a few months ago!

This was taken right after we closed on the house!