Preparing Our Home For It's Next Chapter
When we built this home, almost 6 years ago, it was the first APS build from the ground up. Sure we had done additions, renovations, and the like, but never an entire home start to finish. It was a really large project, for such a small crew (Me & Adam), but we learned so much along the way.
We learned to challenge our limits, or perceived limits.
We learned to work together, even after we had worked all day at our ‘regular’ jobs.
We learned the hard truths about timelines, deadlines, and budgets that only experience with home building can bring.
We learned what we would, and would not, do again next time. If there was a next time.
Well, as it turns out, there is a next time.
We love this home and wish we could bring it with us to our acreage that we purchased last year, but sadly that is not possible.
We spent countless hours fussing over every detail of this home…from light switches to water filtration systems. We spent even more time personalizing it, with backsplashes, wainscotting, reclaimed flooring, and much more.
Then came the realization that we needed to move, and with that the need to de-personalize. It took us 6 months to prepare our house for the next owner, and finally I can say that mission has been accomplished.
And while it might no-longer feel quite like ‘home’, this house will always hold a special place in my heart.
On to the next project….moving!!
We’ll chat soon
-Rachael
Below are a few photos of recent projects at our home.


Our First Renovation Video
Today I have something a little different!
I put together a video of our renovation project we did over the last year, that we titled ‘The Farmhouse Project’. It’s a pretty short video, but I think it captures the behind-the-scenes pretty well.
This is the first time I have ever tackled something like this, so it’s no professional production, but hey, we have to start somewhere! Just click on the photo below (or here) and it should take you to the video.
I hope you enjoy it!!
-Rachael

The Farmhouse Project - The Final Chapter
Hello there friends! I am writing to you from a nice 80 degree day here in Iowa, which is actually pretty nice considering it was 100 degrees all last week. I am not sure what is up with Iowa lately, but I guess 2020 has taught us to be ready for literally anything.
We just wrapped up a 9+ month renovation, the farmhouse project, and we are really excited how it turned out. We have a lot of new visitors here, so I will give a super quick recap.
Last October, we bought a tired but sturdy c.1900 home in the heart of our community. When I say tired, I mean it showed it’s age and was missing some modern amenities. Since then we tore off a section of the home, rebuilt it with added square footage, put in all new windows/doors/siding/sheeting/roof/hvac/electrical and added central air and a large deck. It took a little longer than planned, due to 2020’s challenges (complete with a ‘derecho’), but in the end it was all worth it.
Let’s get right to the photos (roughly in chronological order)

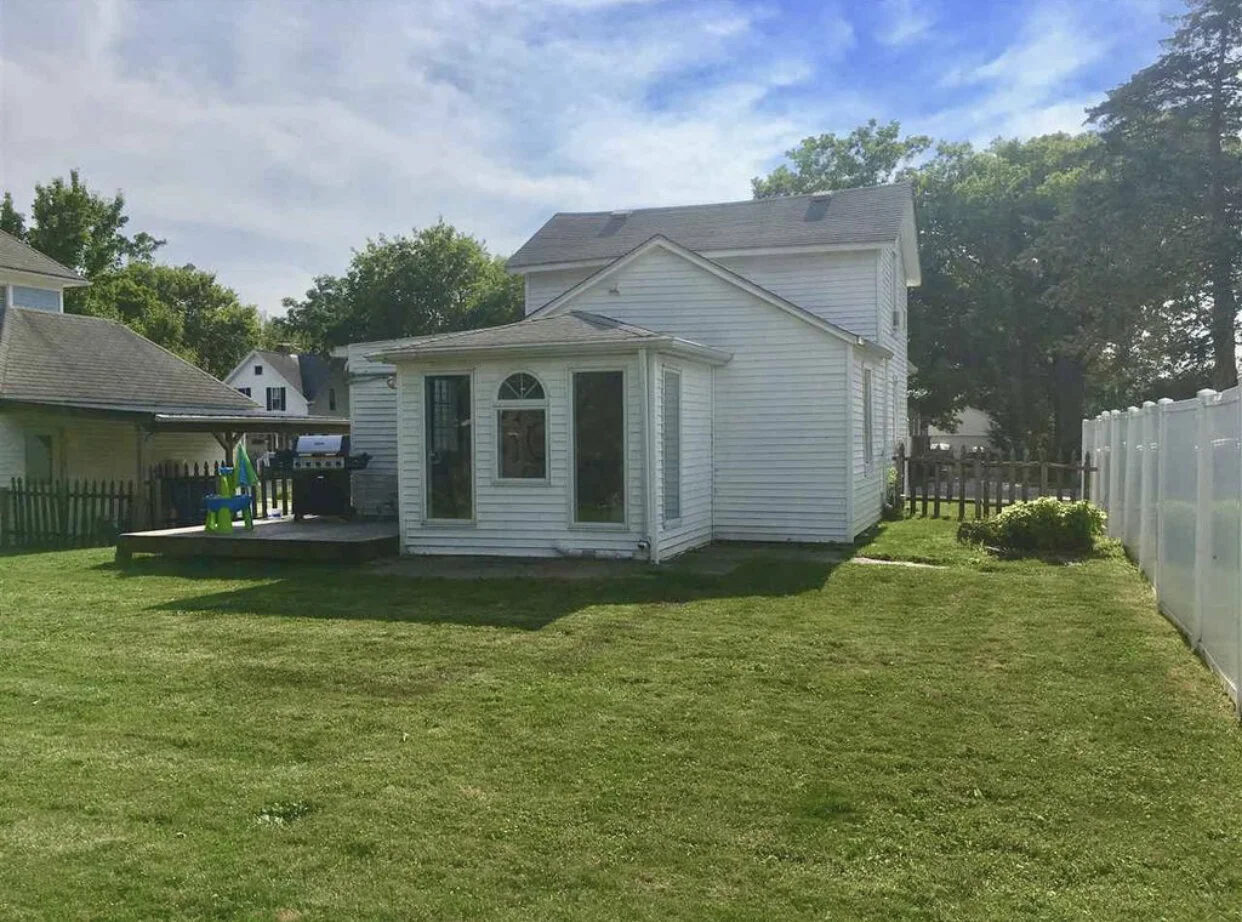
Photo from the listing when we bought it

Tore the back section off that needed new trusses

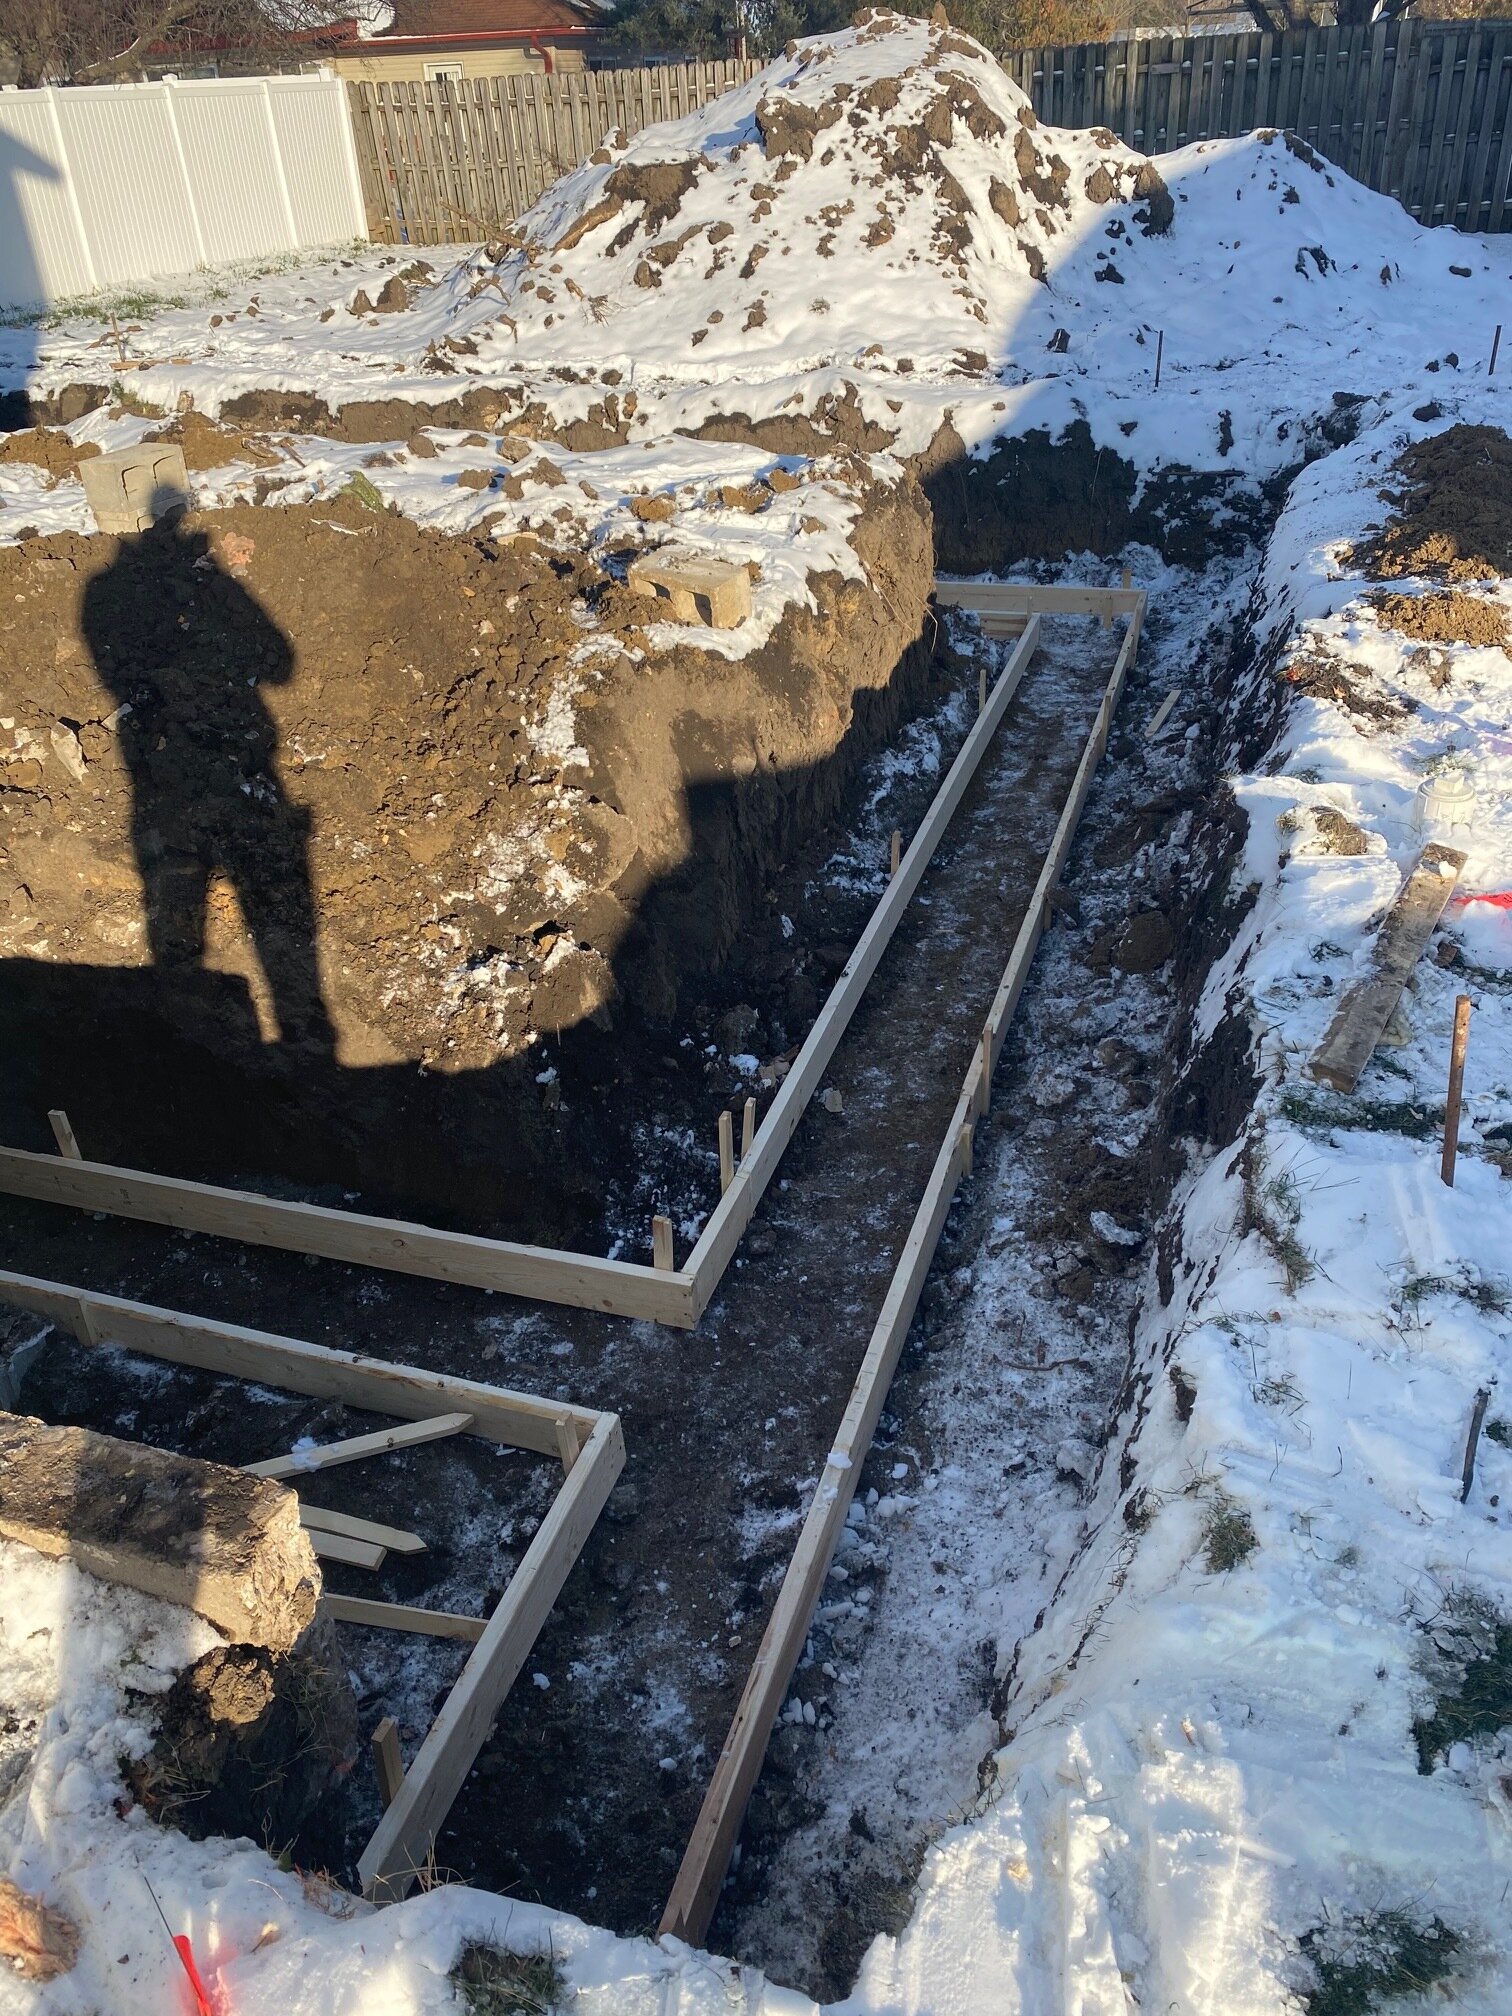
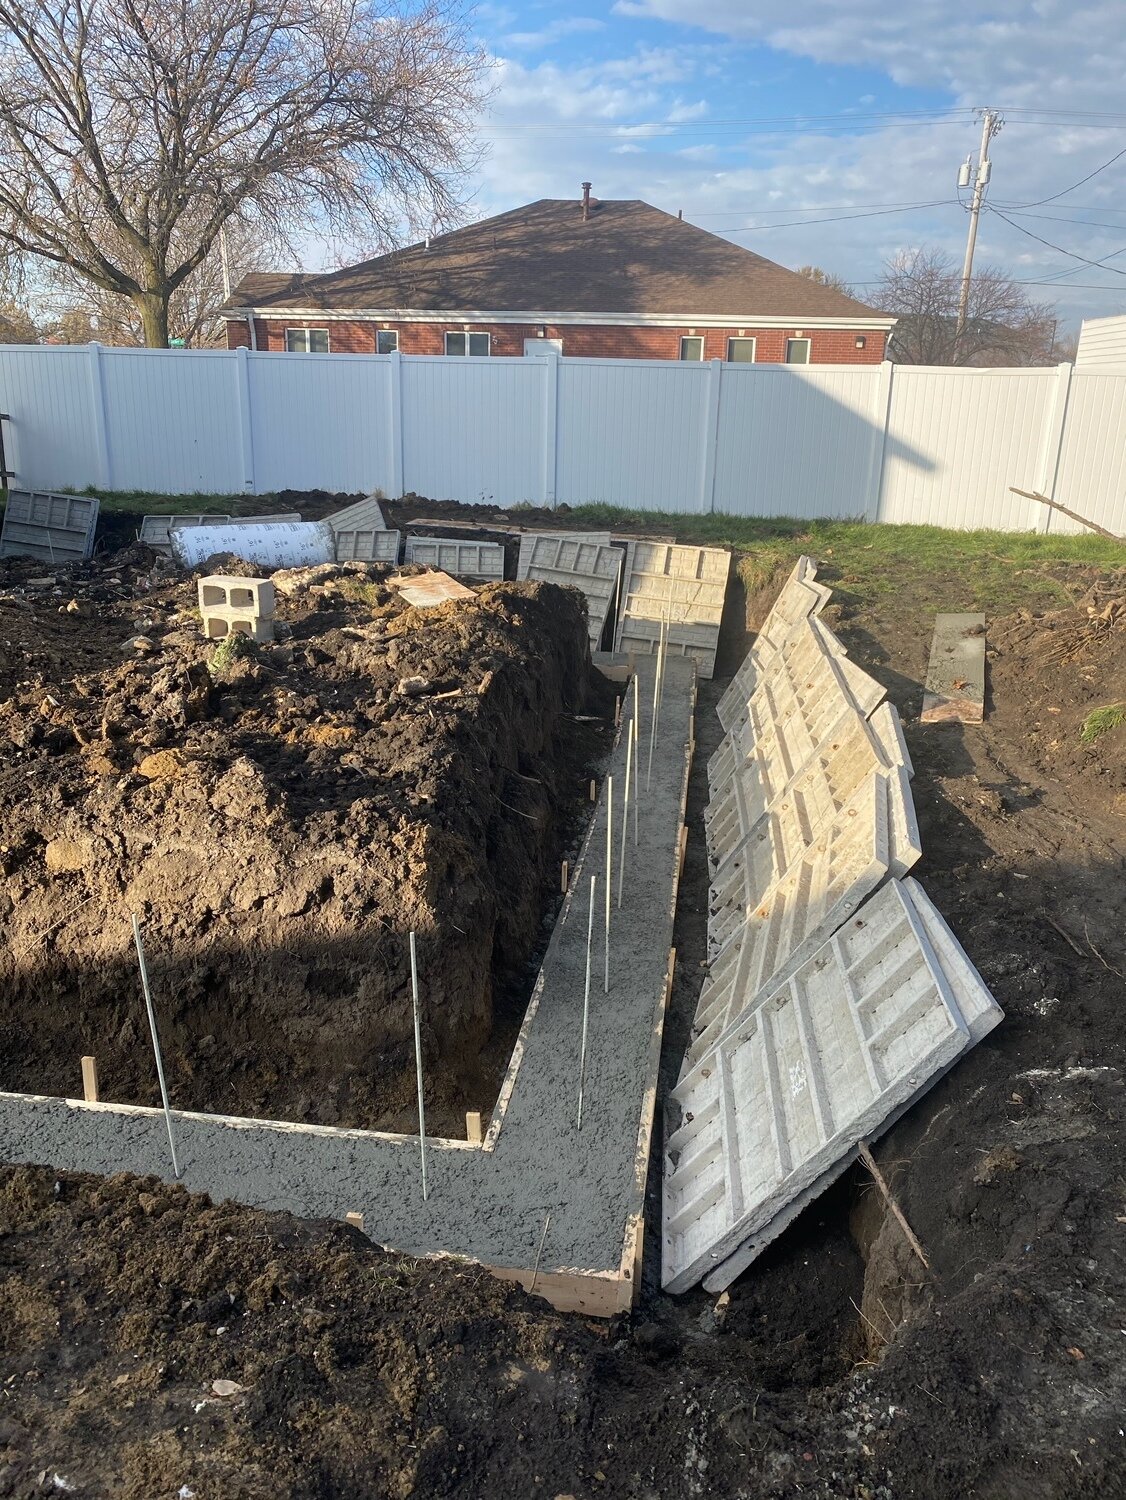
New Foundation!

Putting a large Addition Back On

Tearing off the siding and sheeting from the original section of the home

All put back together, complete with new windows

A very cold day! (view from front porch)

The kitchen ceiling no longer droops!

Vertical siding for the win!
As you can tell, we replaced almost everything at this home. Here are a couple fun before and after shots, I tried to take the ‘afters’ at the same angles for easier reference.
Let’s start with the kitchen…


Sink and stove in same position


There’s really nothing the same about this kitchen other than a few of the appliances, everything else is new. We kept the kitchen the same size and roughly the same layout, but this new space is much brighter with an added window and lots of lighting!
Here’s another before and after set…the upstairs bedrooms!

Bedroom 1 before…

Bedroom 1 after

Bedroom 1, second angle

Bedroom 1, second angle

Bedroom 2 Before

Bedroom 2 After
These bedrooms both received new windows, flooring, paint, doors, trim, electrical, and some drywall. The photos from the first bedroom show the new set of stairs and new railing as well. New stairs were essential, as the previous stairs were no where near the correct size, but there weren’t building codes 120 year ago!
The living room was part of the original structure that was kept intact during demolition, and we really wanted to keep as much of the home's character as possible. We tore off multiple layers of ceiling, added all new drywall, windows, electrical wiring and fixtures. We also took up the flooring and sanded down decades of carpet glue and stain. These next photos show the transformation of the living room, which is one of my favorite parts of the home.
We kept the same door in the same place, for reference.


Next up is the main bathroom, which was also serving as the laundry room. We moved the laundry into the (newly added) master closet, and this room got to return to single function status after it was torn down and rebuilt, of course.


Last but not least, the exterior. You might notice no window air conditioners in the after photos….that’s because this home finally has central air. I’m not sure how previous owners managed the sweltering Iowa summers for 120 years with no air!

Front view

Back View

New Back view, with deck! (and central air!)
It was a long 9 months, but it was all worth it in the end. Throughout the renovation process, we had neighbors stop by almost every single day and express how happy they were to see this older home in the heart of their community get the help it needed to see its next 120 years. We even had a person stop by that used to live in the home in the early 2000s, she was amazed at how far it had come since then.
These encounters with the community members were so heartwarming, and often the motivation we needed to get through another 16 hour or 100 degree day (or both!).
Last week it was time to see this house off to its new owners, and while it was almost sad to pass the keys along, it was also very rewarding. It’s in good hands.
Our ‘inspector’ even gave her final seal of approval!


What’s next for us?
Well as you can imagine this project took up most of our free time, but now that it’s completed we have a few other small things in the works, along with some storm damage repairs from our most recent natural disaster. In October we officially will own our acreage, which will bring on another list of projects. It’s going to be a down-to-the-wire finish for us to complete everything before winter but we wouldn’t have it any other way.
Stay safe out there and we will chat soon!
-Rachael
Rustic Home Accents
Hello friends!
It’s a hot and humid 1000 degree day here in Iowa, and I am suddenly finding time for all of my indoor tasks, such as updating this website! You will notice quite a few big changes to our site in the coming weeks, but for now most of the layout is remaining the same. I am not very skilled in the tech world, and don’t have a large budget for a website person, so it’s just me figuring things out by trial and error :)
Anyway enough on that, I wanted to pop in and put together a post about the most asked about items of my home, the various rustic home accents. I have several locally sourced items, and they are often the talking points of conversations with visitors. Now you might be wondering why any of this matters, and I will explain…
Adding a unique home accent can be both functional and decorative, all while setting your home apart from the rest…
-Have you ever driven through a neighborhood of similar style homes and had one stand out?
-On the contrary, have you been to several open houses or showings in a row and then been unable to recall what the inside of the home looked like the next day?
Let me show you what I am talking about…
This beam pictured is on my front porch and came from a barn that was taken down several years ago. It serves as a decorative item, and it also functional and holds up the front porch to my house.

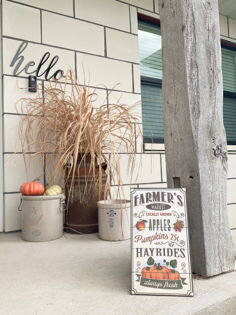
Here are a few photos of other rustic home accents I have throughout my house…

An old window frame above my kitchen sink! In an ideal world there would have been a real window here, but since the floor plan of the house didn’t allow for one, this is the next best thing!

Is a home even complete without a giant rusty pig? :)

Floor to ceiling barn wood flag…because, America
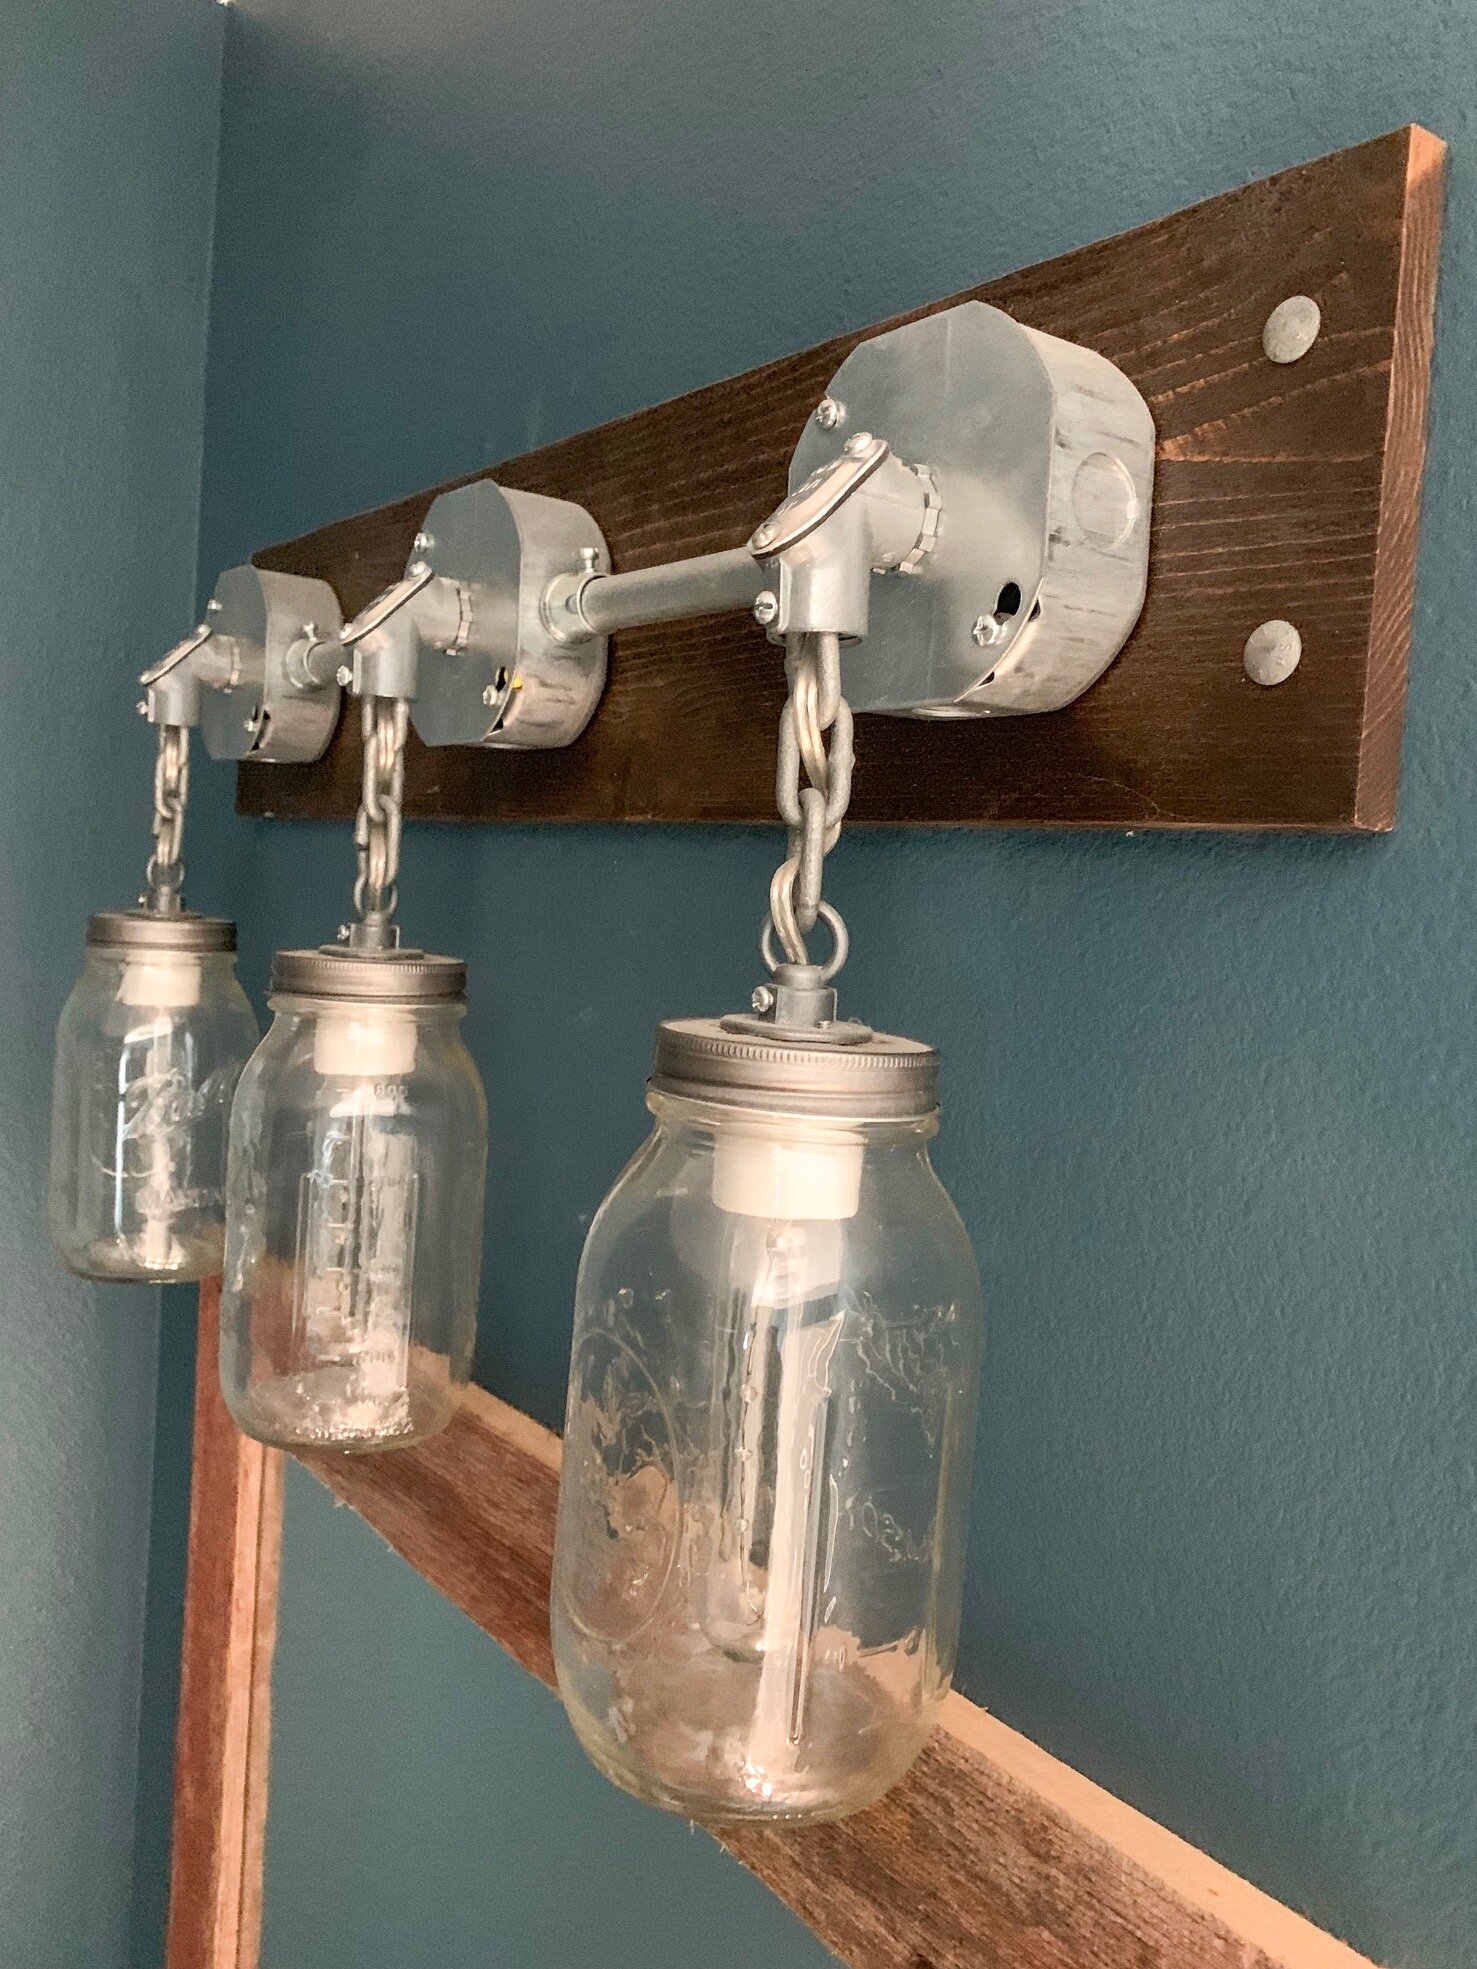
Spare bathroom light fixture, and you can see the barn wood mirror beneath!

The pantry door is an old trap door to the attic space of a c.1920 carriage house

Our custom kitchen cabinets are new, but they were made to look old by using wood with imperfections
Ok, that’s not even all of them, but y’all get the idea! Unique items really make a home stand out in a crowd, and while some of these items were expensive (hello cabinets!), many of them were thrifted, free, or purchased for very minimal cost. Budget friendly is my way of life :)
That’s all I have for you today! Do you decorate with rustic home accents? Feel free to shoot me a message, I would love to see them!
Until next time-
Rachael
Farmhouse Renovation: Month 5
If you are new here, we are in the process of renovating a c.1900 Iowa farmhouse that we purchased about 5 months ago, and to be honest I thought we would be pretty much done with this project by May 1st. Well, as you all know, a world-wide pandemic came along and threw everyone’s plans for 2020 out the window.
I was torn on even writing this update, I mean there are much more important things you could be reading right now. Ultimately I decided to proceed, to try and provide a sense of normalcy for myself and maybe a 5 minute break from reality for my readers.
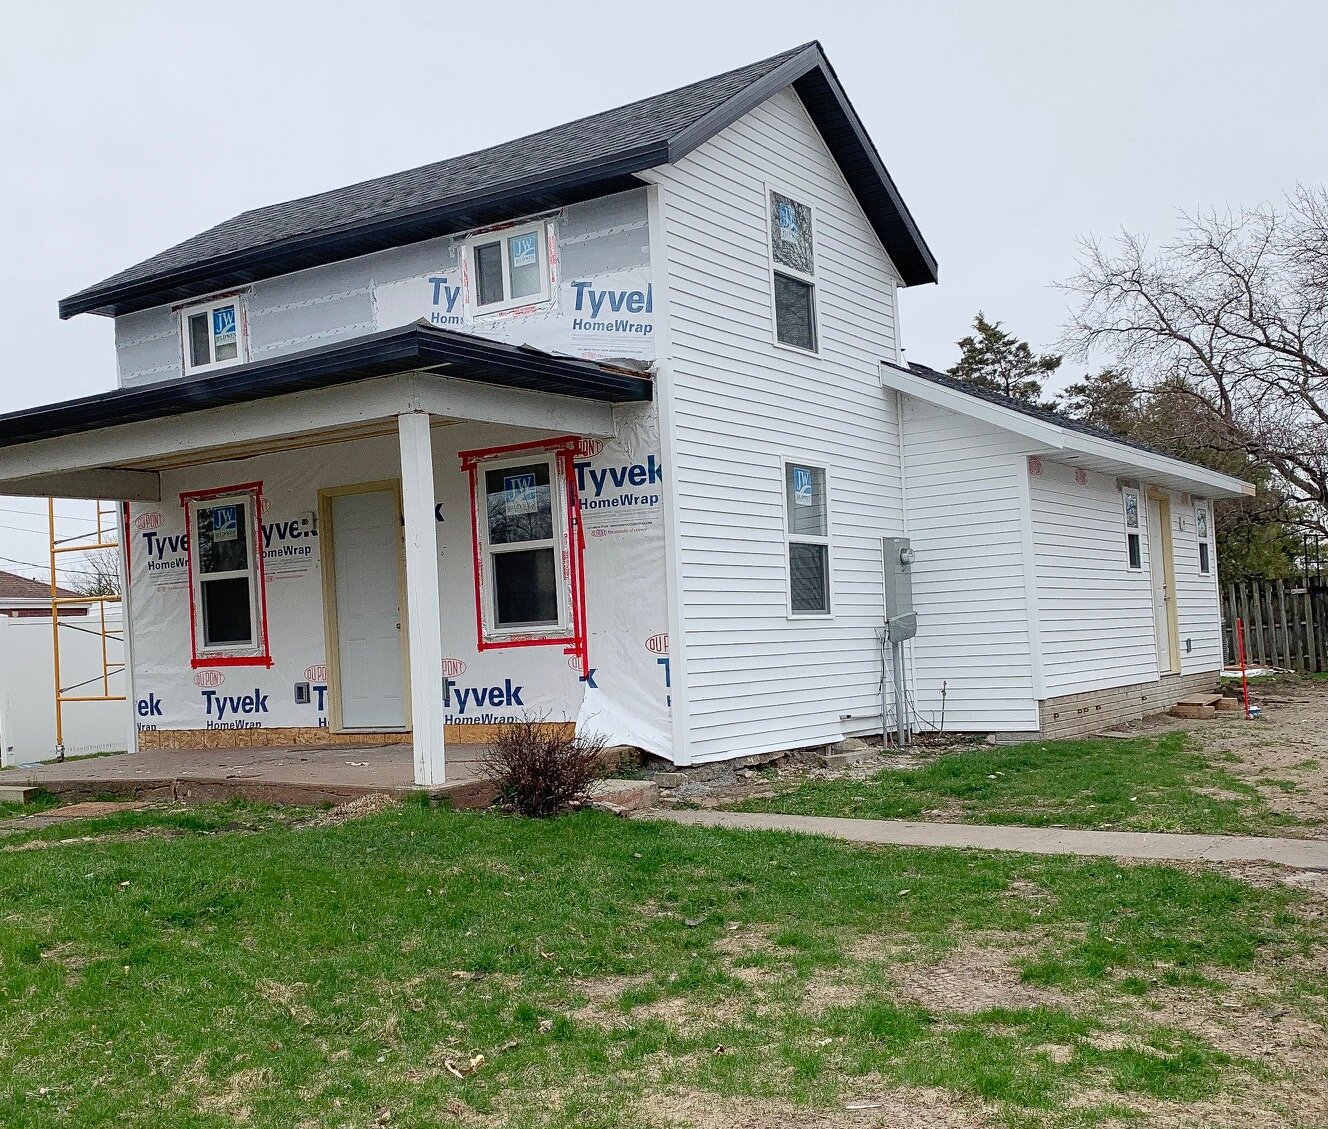
Over the last month, we have made huge progress on the outside of the house, installing new siding, sofitt and fascia. You will notice the black sofitt (overhang of the roof) on the old section of the house, and white on the new section. We also have white vertical siding for the front of the home, which is actually going up tomorrow, weather permitting. Here is a close up photo of the sofitt, so you can see the difference.
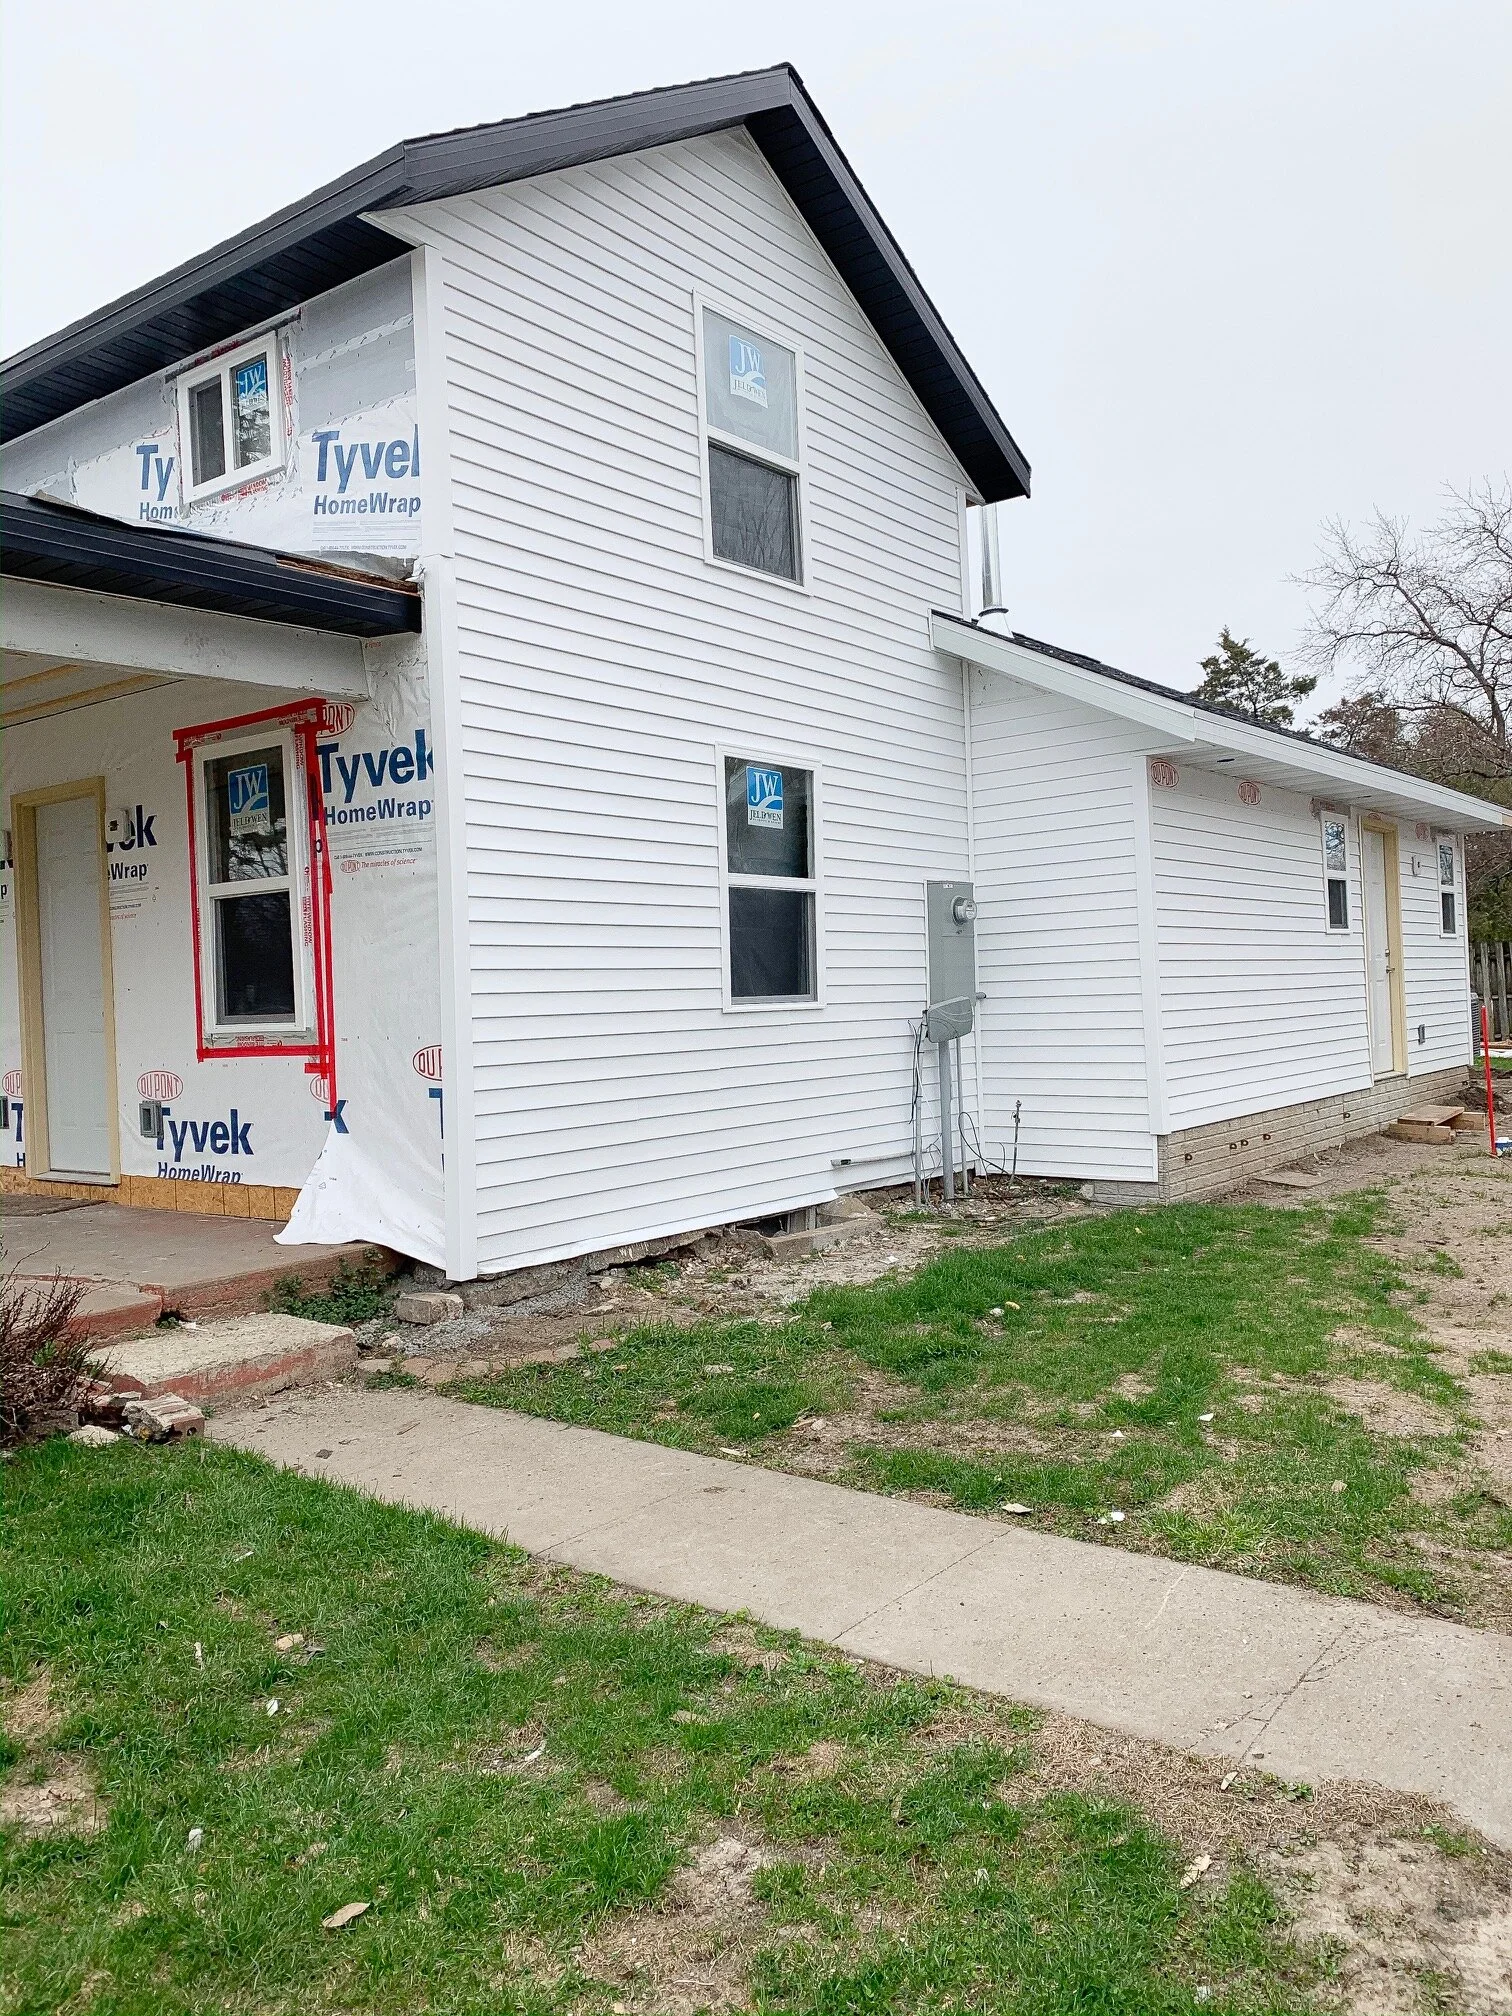
I really wanted to do something different for the original section of the home, to make it stand out, and I think the contrast of the black sofitt is exactly what was needed. I really wanted to install vertical siding on the entire house, but it’s so much more expensive than horizontal, and wasn’t really in the budget. Either way, the home will look amazing with an all new exterior.
In fact, I dug up an old photo of the house that we took right after we bought it and I will add it below for comparison. There’s quite a difference from a few months ago!

This was taken right after we closed on the house!
With the completion of the vertical siding on the front of the house this week, all that remains for exterior work is the front decking and posts. And of course some landscaping, but this is Iowa so we can’t do much of that until late May. Maybe some flower shops will be open by then!
Well that is all i have for this update. Again, thank you for taking time out of your day to stop by the blog, we really appreciate seeing all of your support. Wherever you are in the world, I hope you are staying safe and healthy.
Until next time,
Rachael
Farmhouse Renovation: Month 4 Update
If you are new here, we bought a c.1900 Iowa farmhouse roughly 4 months ago and promptly took a bulldozer to a large portion of it. Over the last couple of months we have completely updated what remained of the original structure, and added on a large addition (for some much needed square footage).
I have posted several updates thus far, but this is the one I have been waiting for!
This is the first update where the layout of the house is easy to understand, since the walls are complete with drywall. Not everyone can look at a room full of stick walls and picture the final product, and I have tried to take that into account when posting in the past, but now everything will be quite easy to picture!
Ok lets start in the kitchen….
Here’s a throwback photo of the previous kitchen. Adam is 6 foot 4 in tall and he could barely walk underneath the pendant light fixture in the middle of the room without hitting his head. This was due to a significant bow in the trusses, as they could not support the proper amount of weight. Also, check out how close the top of the door frame to the bathroom is…just an inch or two!

Below is a picture of the new kitchen, with a properly installed 8 foot ceiling! The opening on the far left is the same door to the bathroom pictured above, however this time around it has over a foot of clearance between the top of the door frame and the ceiling.

Moving on to the stairs….
You will notice that new the steps are no longer steep, and are also a normal size. In addition, we have a large window at the top of the stairs now, that provides a source of natural light but also serves as an added safety function, should someone need to evacuate out of the second floor for any reason.

I recently caught a photo of our mini inspector checking out the window at the top of the stairs…


The last photo I have for you is of the new master bathroom. The original structure had no master suite, so I have no before photo to share! And while this bathroom is not extravagant by any means, it adds value and much needed space.
Alright, that’s all I have for you today! I am excited to see what the next update brings, as we can start putting our personal touch on the project with paint and flooring, etc. Since we work on the farmhouse in our spare time, and both have other full time jobs and 2 year old child, sometimes things take longer to finish than we would prefer. It’s all about balance, and we are still figuring that out as we go.
Thank you for stopping by the blog today, and we look forward to catching up with you again soon! In the mean time, feel free to follow us on Instagram or Facebook :)
Until next time,
Rachael
Farmhouse Renovation: Month 2 Update
Two months!
It’s been a little over two months since we purchased a 1900’s farmhouse, and then promptly took a bulldozer to a large section of it. We have since added back a large addition (almost 600 sq feet), to replace the torn down section and add some space.

Out with the old…

In with the new!
Since our last update about two weeks ago, we have the addition completely closed in from the Iowa elements, thanks in part to some amazing December weather. Now if we could just request some daylight after 430 pm…ha!
Now that the new part is enclosed, we were able to open up the wall separating the original section from the new addition, and it was the first time I had seen the old part since we boarded it up! Here are a couple photos…
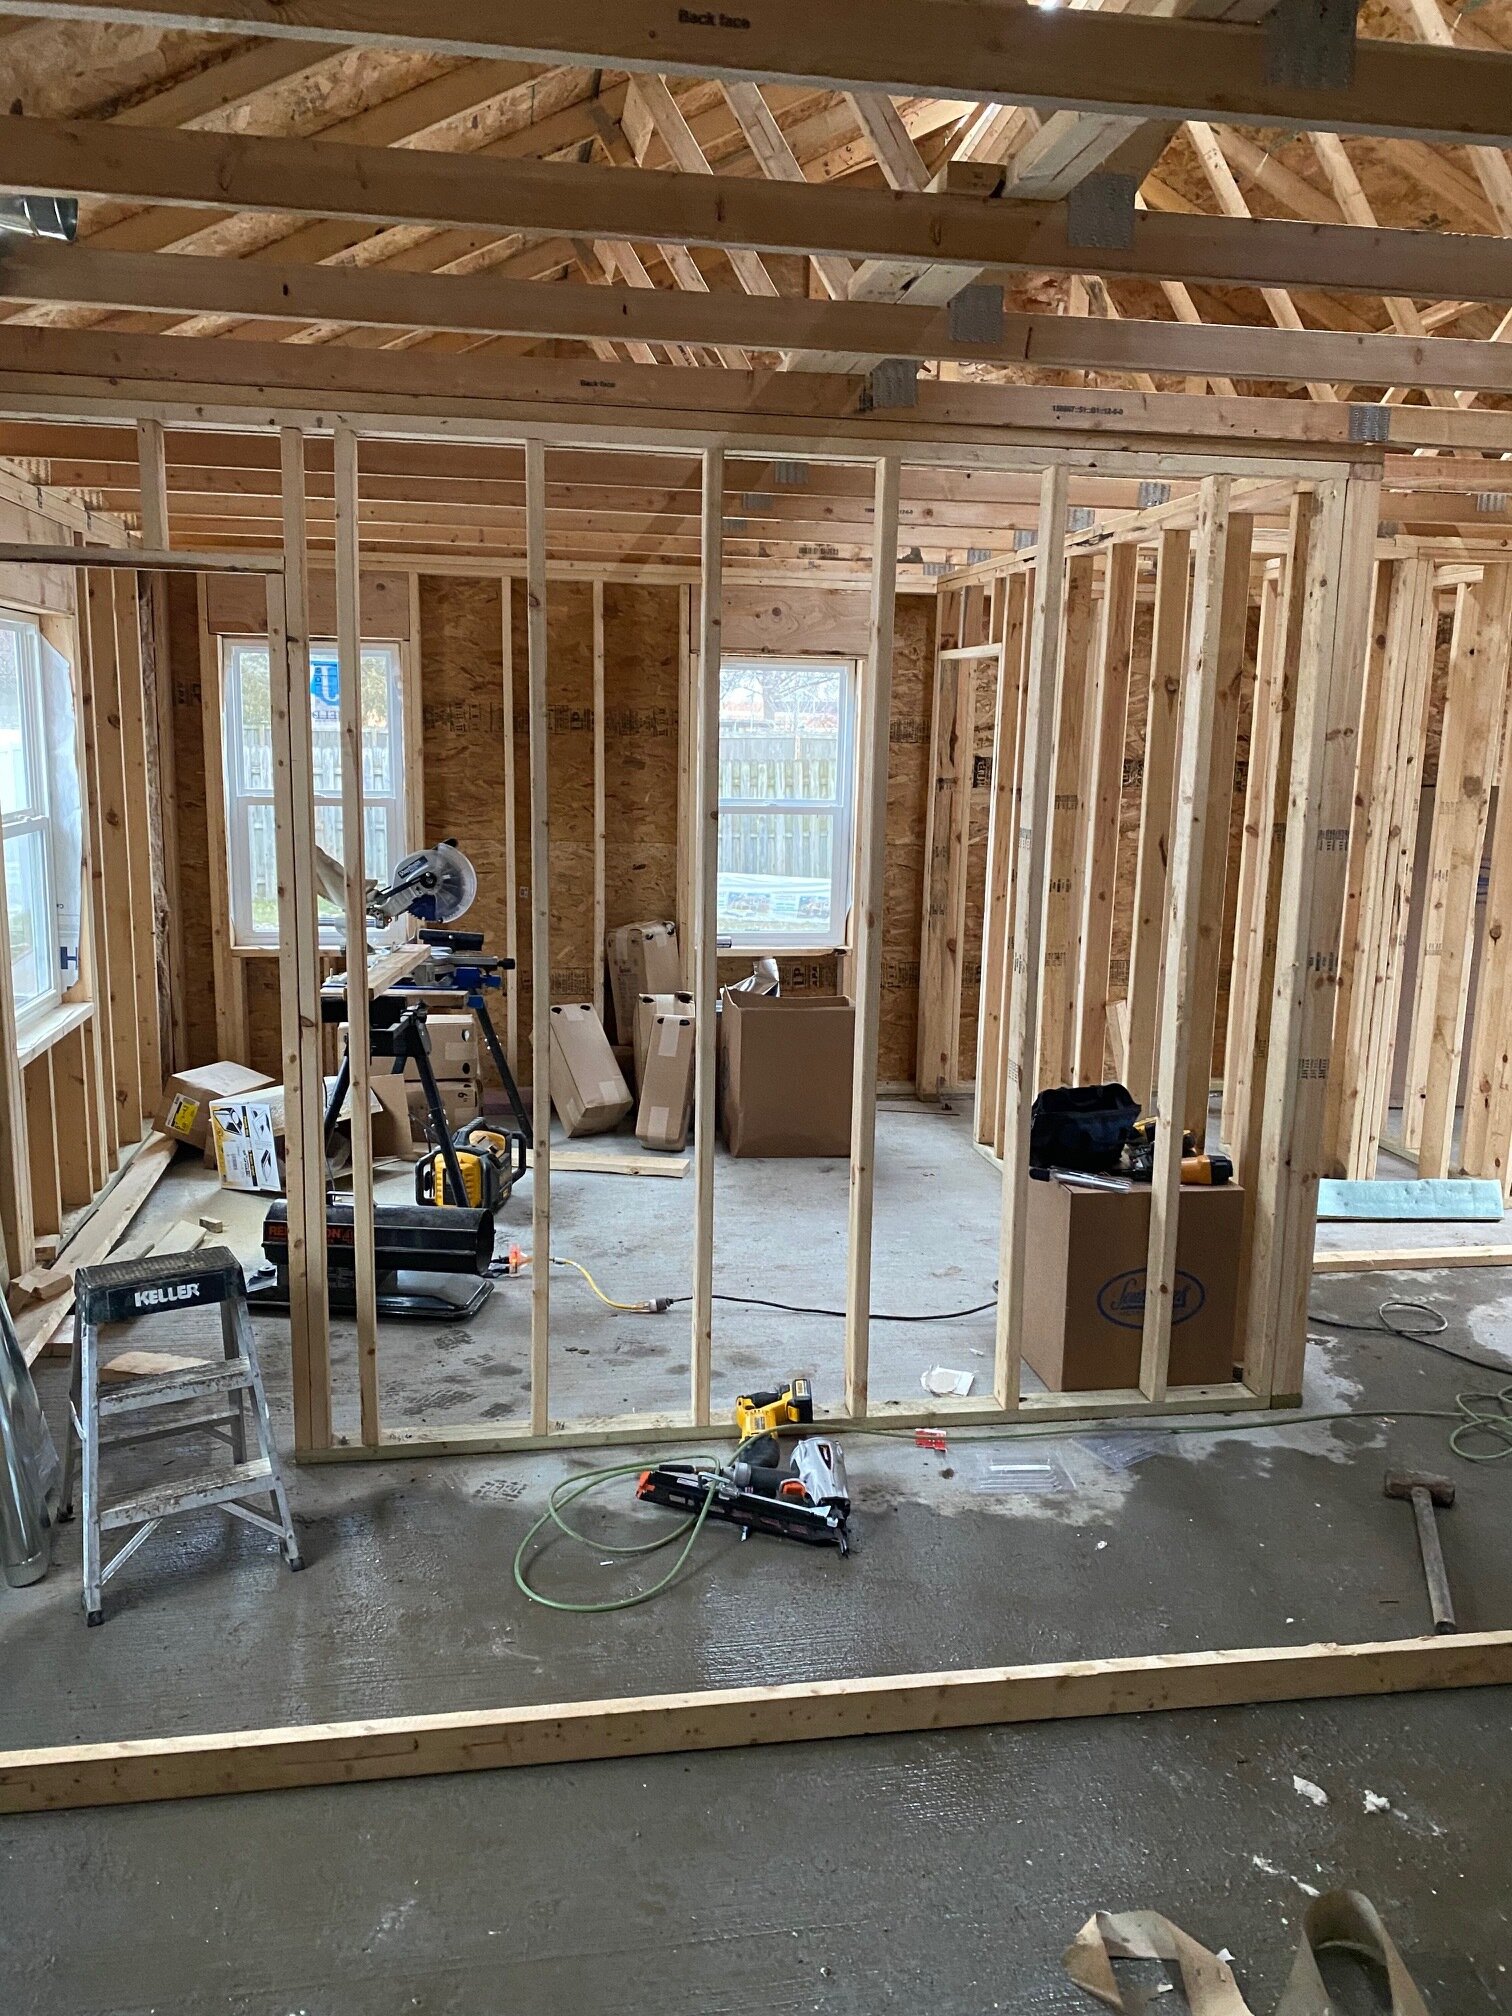
View inside the new part

Looking into the original part of the farmhouse
Opening up the walls and ceiling of the original section of the home presented it’s own challenges, including 120 years of dirt and grime. Oh and about 3 layers of ceiling in the old living room! Here are a couple before shots…


Tearing into this section was not exactly in the original plan, but in order to update the electrical correctly and put new heating and air duct work in we decided to take it all down. There’s always that one moment in the home improvement shows where something goes wrong, and the owners are left with a decision on how to proceed, and for us it was this ceiling and what was underneath it.
I already mentioned there were a ton of layers to the ceiling, and this left us with quite a mess, but a more alarming issue was how the second floor was being (sort of) supported. The picture below on the right shows ONE board, that is kind of in a notch, and that was what held the floor joists for the second floor. One board, folks!
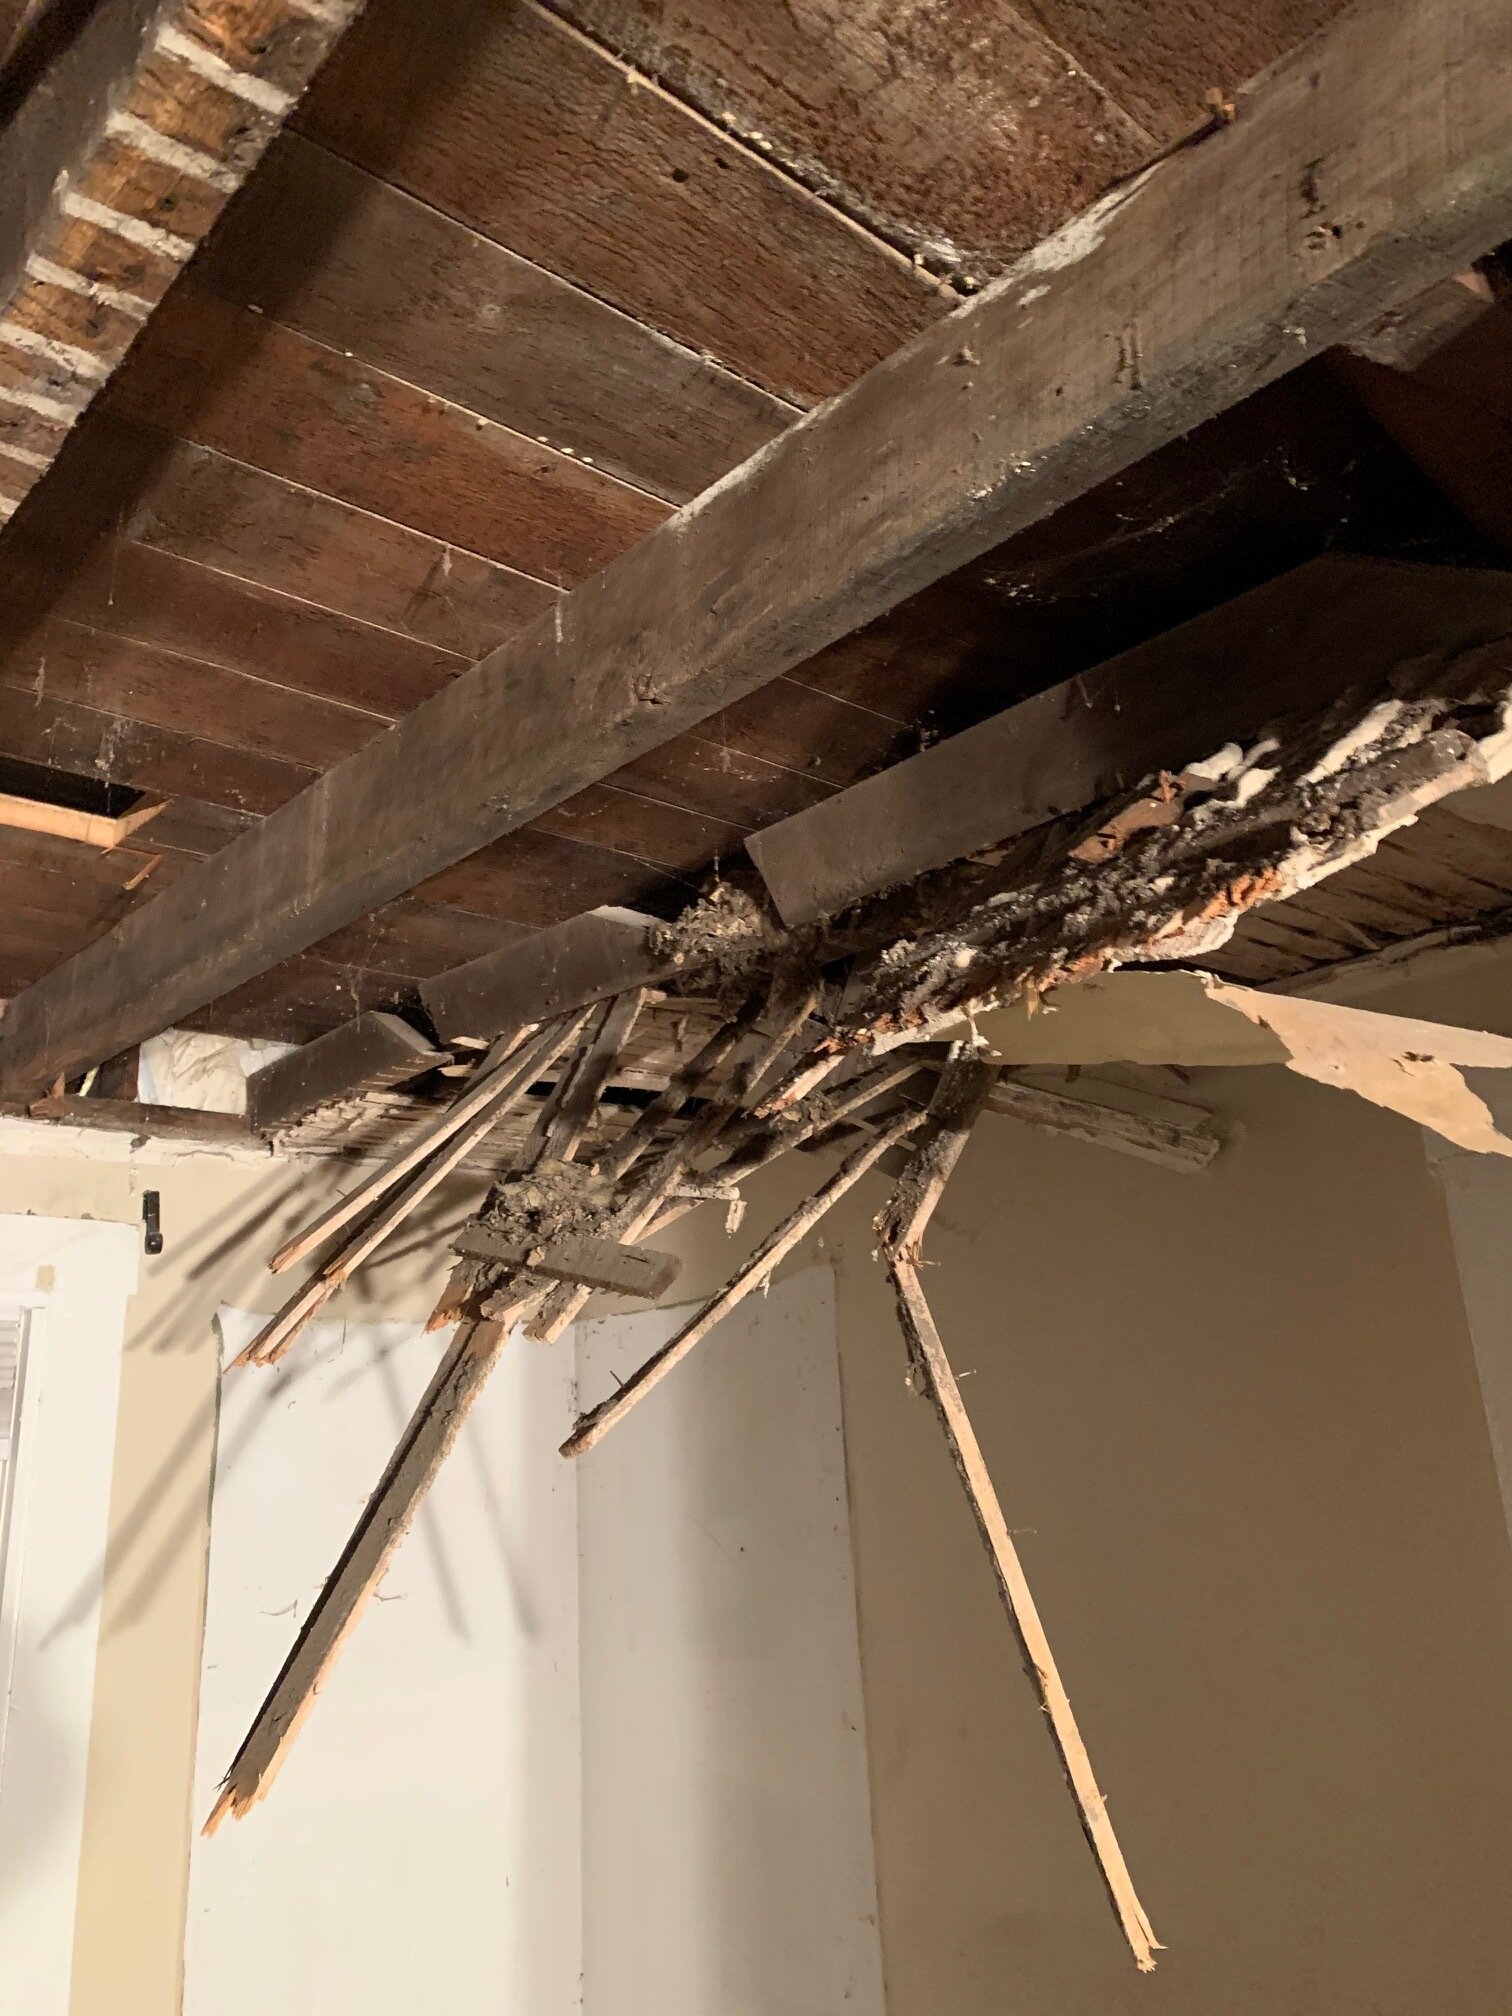
Lots of layers to the ceiling here!
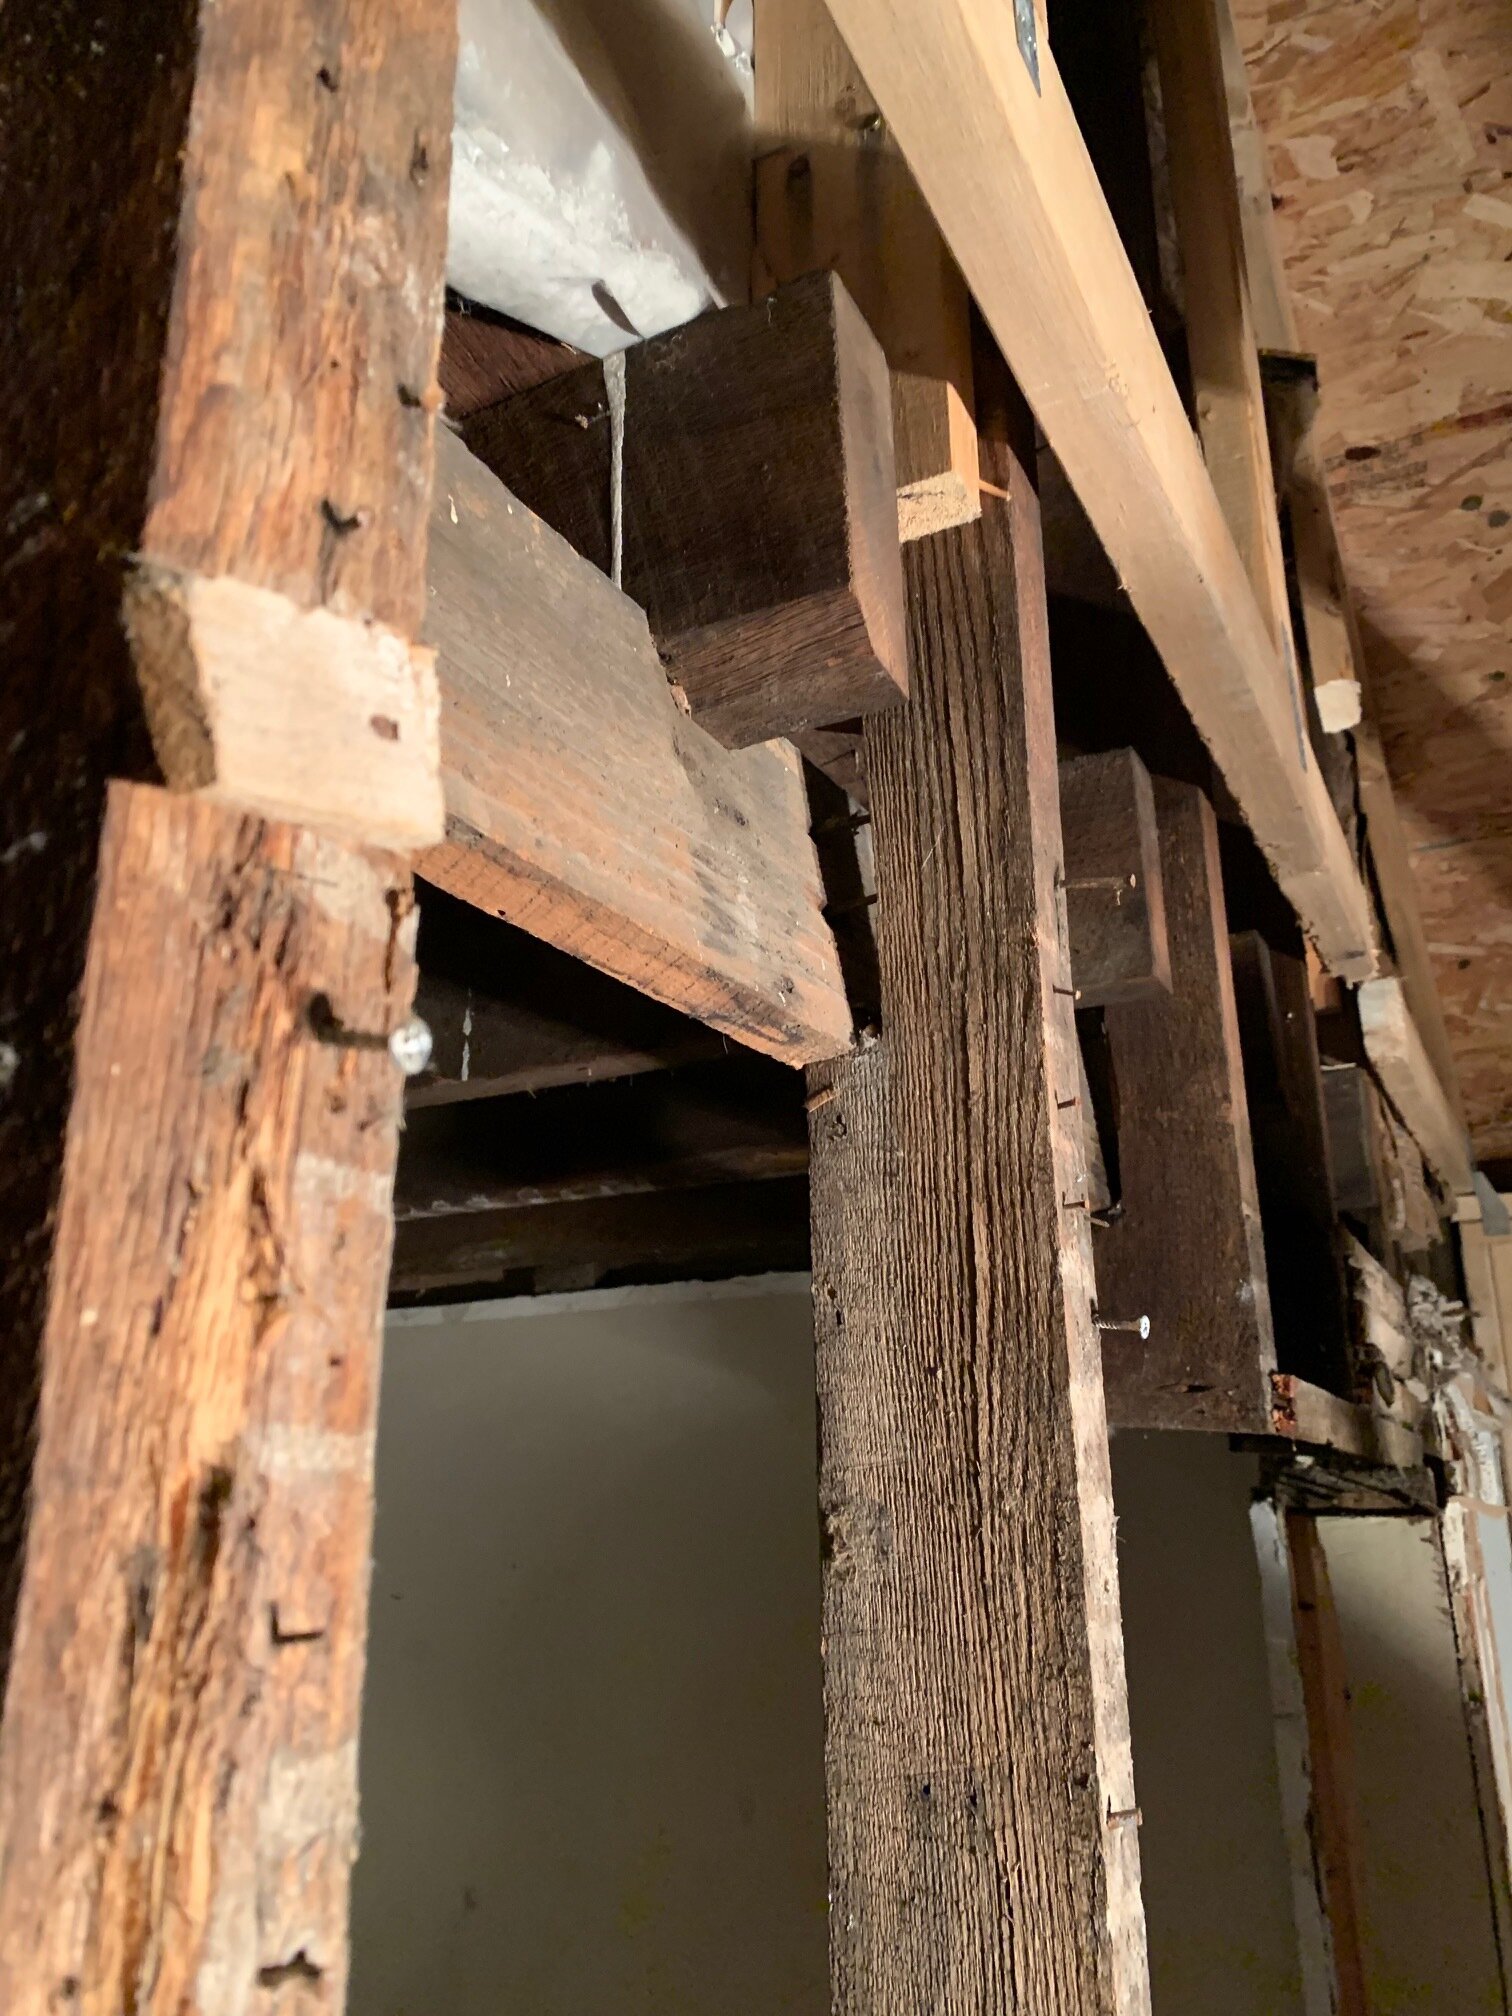
That one board might have made it the last 120 years, but Adam didn’t feel comfortable leaving it one more day, so we had to handle that immediately. Let’s just say that this load bearing wall will soon be almost 12 in thick to provide much needed support to the second floor. Definitely a scary moment, but I am glad we found it when we did!
In other news, you can see in the photo on the above left that there should be some original flooring upstairs underneath the carpet! The second floor will be where our daughter, who we call the ‘inspector’, will have her bedroom and play room. She likes to visit from time to time to sweep and pick up trash, and we will take any help we can get!

Inspector, doing some inspecting