The Joys of Investment Properties - 2020 Edition
Slight sarcasm in the title, if you couldn’t tell.
In all seriousness, investment properties are really not that much of a hassle, but we only have a select few as we manage all of them ourselves. Ordinarily, these properties don’t require any more or less maintenance than a personal home.
But, as we all know 2020 is not an ordinary year.
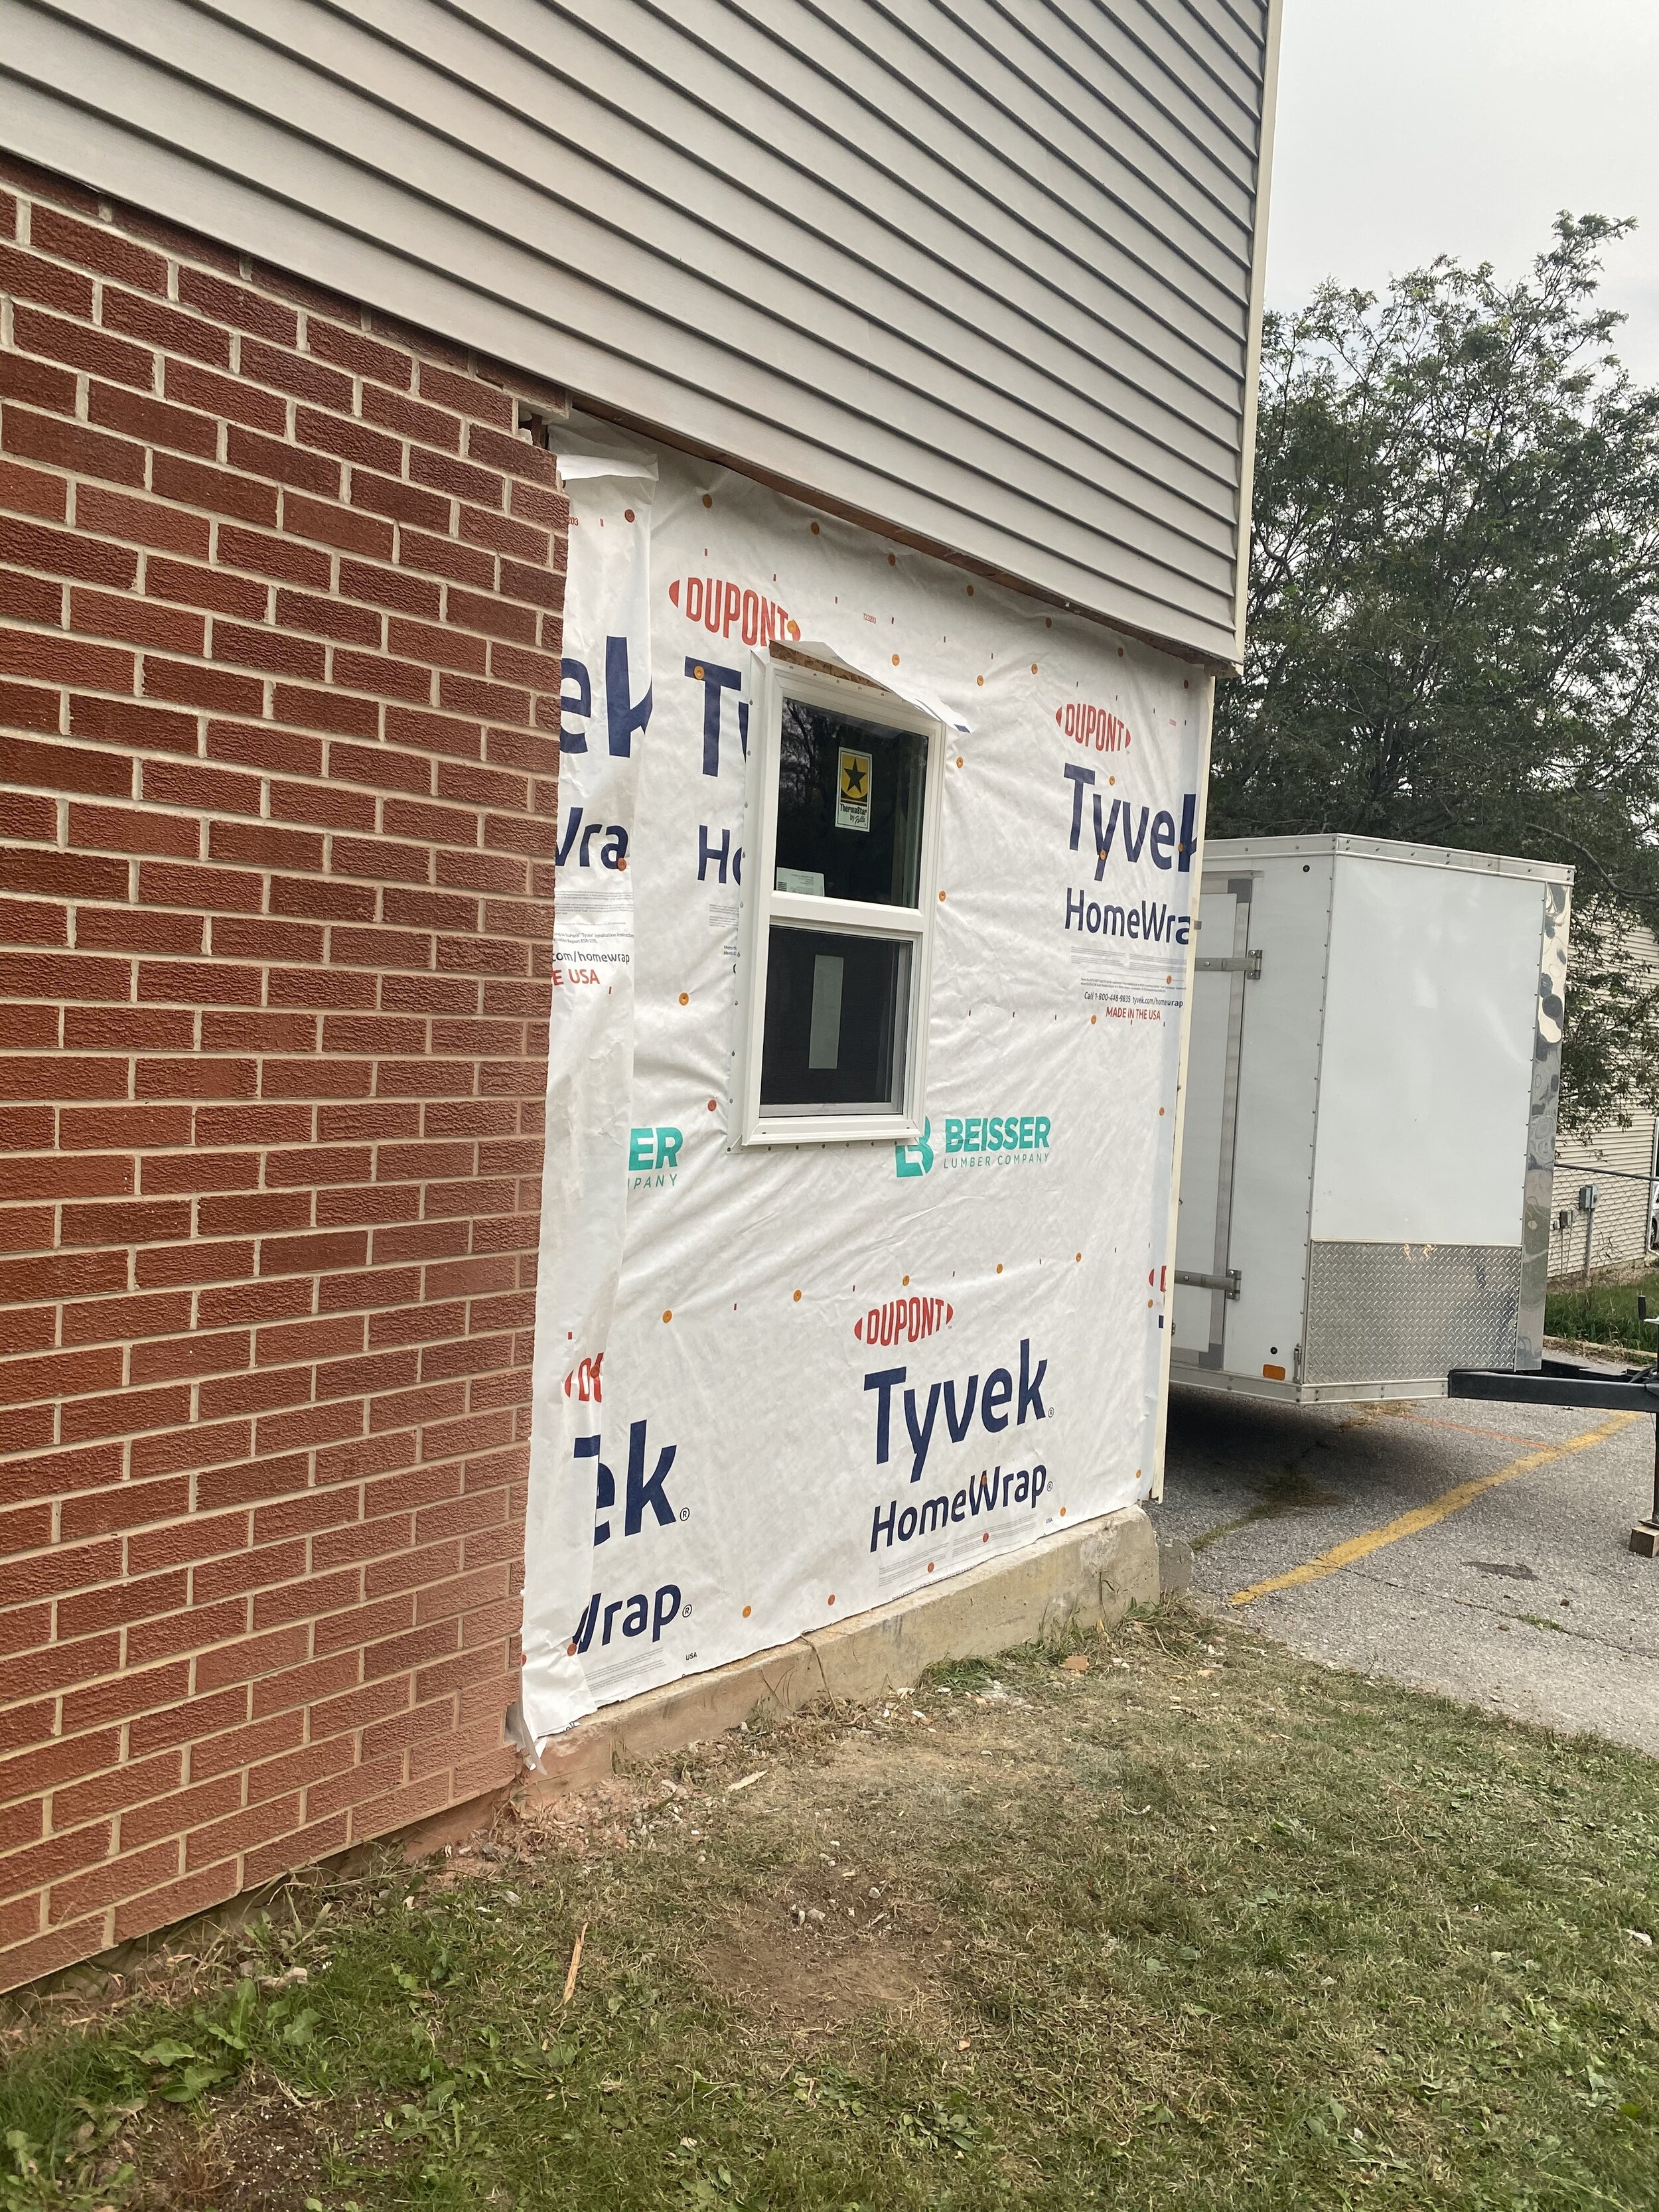
Last month there was a car accident that happened at an apartment building that we own in a neighboring town, and a car ended up crashing into the building. No one was hurt in the car or inside the apartment, which was obviously the first priority. There was, however, significant damage to the interior of the building.

Structural people immediately checked the building, and it was determined to not be a hazard (tenants could remain in the residence).
The interior damage was to the kitchen of the affected apartment, and as you can see below it was a total loss.


So after some cleanup, the exterior wall and window were replaced and sealed up.

The remainder of the project consisted of replacing appliances, flooring, drywall, paint, cabinets and countertops. It was definitely an unplanned event that required quite a bit of shuffling schedules and etc, but luckily we are (fairly) organized and could make the necessary changes. It was definitely a learning experience, but things happen!
I will leave you with some photos of the new kitchen, which definitely brings a fresh look to the apartment. I hope we can all make it off this rollercoaster ride known as 2020, but until then we just have to press on.
Bonus: no more microwave on the counter!
Cheers to new kitchens!
-Rachael


The Farmhouse Project - The Final Chapter
Hello there friends! I am writing to you from a nice 80 degree day here in Iowa, which is actually pretty nice considering it was 100 degrees all last week. I am not sure what is up with Iowa lately, but I guess 2020 has taught us to be ready for literally anything.
We just wrapped up a 9+ month renovation, the farmhouse project, and we are really excited how it turned out. We have a lot of new visitors here, so I will give a super quick recap.
Last October, we bought a tired but sturdy c.1900 home in the heart of our community. When I say tired, I mean it showed it’s age and was missing some modern amenities. Since then we tore off a section of the home, rebuilt it with added square footage, put in all new windows/doors/siding/sheeting/roof/hvac/electrical and added central air and a large deck. It took a little longer than planned, due to 2020’s challenges (complete with a ‘derecho’), but in the end it was all worth it.
Let’s get right to the photos (roughly in chronological order)

Photo from the listing when we bought it

Tore the back section off that needed new trusses

New Foundation!

Putting a large Addition Back On

Tearing off the siding and sheeting from the original section of the home

All put back together, complete with new windows

A very cold day! (view from front porch)

The kitchen ceiling no longer droops!

Vertical siding for the win!
As you can tell, we replaced almost everything at this home. Here are a couple fun before and after shots, I tried to take the ‘afters’ at the same angles for easier reference.
Let’s start with the kitchen…


Sink and stove in same position


There’s really nothing the same about this kitchen other than a few of the appliances, everything else is new. We kept the kitchen the same size and roughly the same layout, but this new space is much brighter with an added window and lots of lighting!
Here’s another before and after set…the upstairs bedrooms!

Bedroom 1 before…

Bedroom 1 after

Bedroom 1, second angle

Bedroom 1, second angle

Bedroom 2 Before

Bedroom 2 After
These bedrooms both received new windows, flooring, paint, doors, trim, electrical, and some drywall. The photos from the first bedroom show the new set of stairs and new railing as well. New stairs were essential, as the previous stairs were no where near the correct size, but there weren’t building codes 120 year ago!
The living room was part of the original structure that was kept intact during demolition, and we really wanted to keep as much of the home's character as possible. We tore off multiple layers of ceiling, added all new drywall, windows, electrical wiring and fixtures. We also took up the flooring and sanded down decades of carpet glue and stain. These next photos show the transformation of the living room, which is one of my favorite parts of the home.
We kept the same door in the same place, for reference.


Next up is the main bathroom, which was also serving as the laundry room. We moved the laundry into the (newly added) master closet, and this room got to return to single function status after it was torn down and rebuilt, of course.


Last but not least, the exterior. You might notice no window air conditioners in the after photos….that’s because this home finally has central air. I’m not sure how previous owners managed the sweltering Iowa summers for 120 years with no air!

Front view

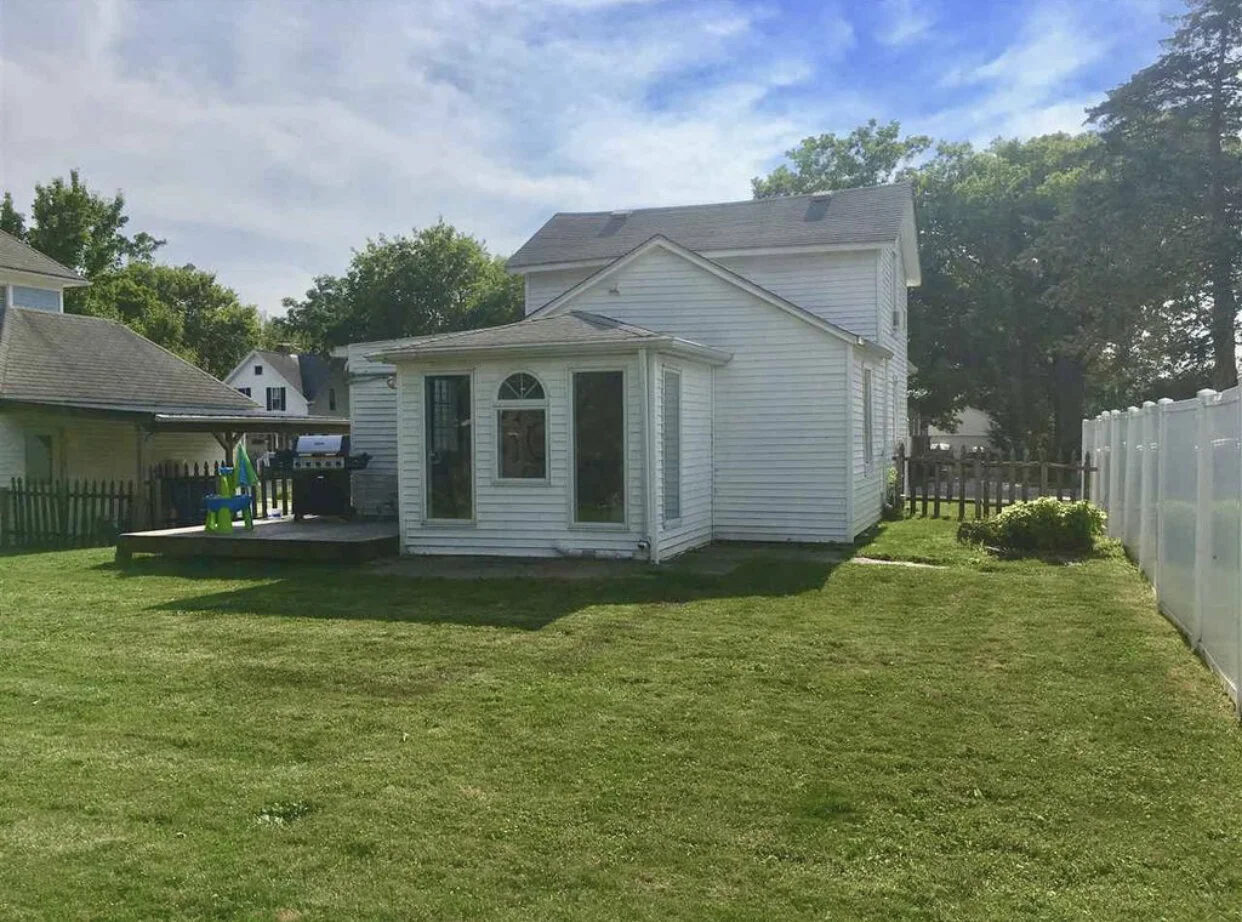
Back View

New Back view, with deck! (and central air!)
It was a long 9 months, but it was all worth it in the end. Throughout the renovation process, we had neighbors stop by almost every single day and express how happy they were to see this older home in the heart of their community get the help it needed to see its next 120 years. We even had a person stop by that used to live in the home in the early 2000s, she was amazed at how far it had come since then.
These encounters with the community members were so heartwarming, and often the motivation we needed to get through another 16 hour or 100 degree day (or both!).
Last week it was time to see this house off to its new owners, and while it was almost sad to pass the keys along, it was also very rewarding. It’s in good hands.
Our ‘inspector’ even gave her final seal of approval!


What’s next for us?
Well as you can imagine this project took up most of our free time, but now that it’s completed we have a few other small things in the works, along with some storm damage repairs from our most recent natural disaster. In October we officially will own our acreage, which will bring on another list of projects. It’s going to be a down-to-the-wire finish for us to complete everything before winter but we wouldn’t have it any other way.
Stay safe out there and we will chat soon!
-Rachael
DIY Gas Pipe Kitchen Shelving
Hi friends!
Today I have a fun DIY for the kitchen, gas pipe shelving! I know the open shelving trend has been around for a while now, and personally my kitchen cabinets are not organized enough to have the contents visible, but I do enjoy the open look. Recently, we installed gas pipe shelving for the kitchen at the farmhouse project (which is allllmost done!) and I took a few quick photos to show you the process, in case anyone else has been thinking of tackling this type of project. Y’all know I am a fan of all things budget friendly, and this project falls right in line with that! Let’s get to it….
PREP:
Honestly, the worst part about working with gas pipe, is taking all the stickers and adhesive off. The pipes are greasy, and I swear they use some extra adhesive to stick the purchase labels on them. For this project, we used the 1/2 inch version of pipe that can be found at any hardware store, and picked up the corresponding wall plates and end caps as well.

After prepping all of the materials, it’s time to measure out and mark the wall. Traditional cabinets sit about 22 inches off of the counter top surface, so that is the height we used for the bottom shelf. A stud finder is a must, as these shelves will carry some weight!
For the top shelf, we just spaced it 12 inches higher, as that is the height I thought looked the best with the remaining wall space available. Each shelf gets two support pipes, and placement of each of the wall plates was marked in pencil on the corresponding stud.
INSTALL:
The next step is attaching the wall plates to the studs, and while the plates have four holes for screws to attach them, we have found it is best to use only two at this step since there is usually some amount of adjustment later on. The below picture is an example, as well as a photo of the type of screws that we use.


Once the wall plates are installed, it’s time to attach the gas pipe and end caps. This step is fairly straightforward, except make sure to not over-tighten the pipe to the wall plate.
Now it is time to level up the shelving, so the wood pieces lay flat and dishes don’t lean or fall. For this shelving we used a 6 foot level, but you can use whatever size works for your project. I would say the most tedious part of installing this type of shelving, is making sure they are level. Some wall plates will need to be adjusted by tightening or loosening the screws, or even moving them a quarter of an inch or so. I tend to be very particular for kitchen shelving, and less with shelving for other purposes, but it is up to your personal preference. Either way this step is not difficult, just a bit time consuming.

Once all of the shelves are level, this is the time to add in the additional screws to the wall plates, if that is your preference.
The final step is adding the wood pieces to span the gas pipes, and complete the shelving. Another quick check of the level, and you are all done! Here is a picture of how this project turned out.

We chose open shelving for the kitchen at the farmhouse project mostly due to the fact the kitchen is pretty small, and would look pretty cluttered with full upper and lower cabinets. There is still plenty of enclosed storage, for all those appliances or bulky items.
We have a different style of gas pipe shelving in our personal home, which is used to display my collection of vintage glass bottles. Overall, the process is the same.
Here is a photo of the other style:

I just want to wrap up this post thanking each of you for being here and supporting us! I feel like 2020 has really thrown everyone’s plans for a whirlwind and we just have to learn to keep adapting to the changes and challenges presented to us (sometimes daily).
Also, I have been really itching to get back into the DIY’s lately (I feel we got away from them a bit over the last year) so feel free to shoot me a message or comment if you have something specific you have been looking for. I hope everyone is doing well, and I will chat with you again soon!
Cheers!
Rachael
DIY: Budget Friendly Pantry Organizing!
Hi friends! I’m writing to you from frigid Iowa, where it’s a whopping 1 degree today, but hey we are over halfway through January so this won’t last a whole lot longer! I haven’t posted a DIY for a while, so I wanted to share with you what I recently did with my pantry.
I normally take everything out of my pantry once or twice a year just to make sure nothing is expired or forgotten about, and as I was getting ready to do that again recently I did a few searches on Pinterest and Instagram for inspiration on how to make the space a bit more visually appealing.
There were hundreds of gorgeous photos to choose from, but as I started researching the actual bins and containers for everything it became apparent that this was an EXPENSIVE task. I mean, $14 for a clear plastic tray to put on a shelf?! $25 for a set of 4 glass canisters?! There was just no way I was going to spend that kind of money or organize this space.
Starting Point
Our pantry is a walk-in space, that has a knack for collecting random items due to it’s proximity to the kitchen. The problem with this catch-all space, is that it only has a half door, so all of the random items are on display for every visitor to see. Let me show you what I mean…

From this angle, you can’t see the mess inside!

The mess!!!
Ok, now you know what I was up against! I knew there had to be a more budget friendly way to spruce this up, so I put my thinking cap on.
First up, I needed some glass containers. A lot of them. I didn’t really care if they all matched, and I wasn’t going to buy a dozen from Amazon at $5 a piece, so I went down to my local thrift store for some vintage jars and canisters.
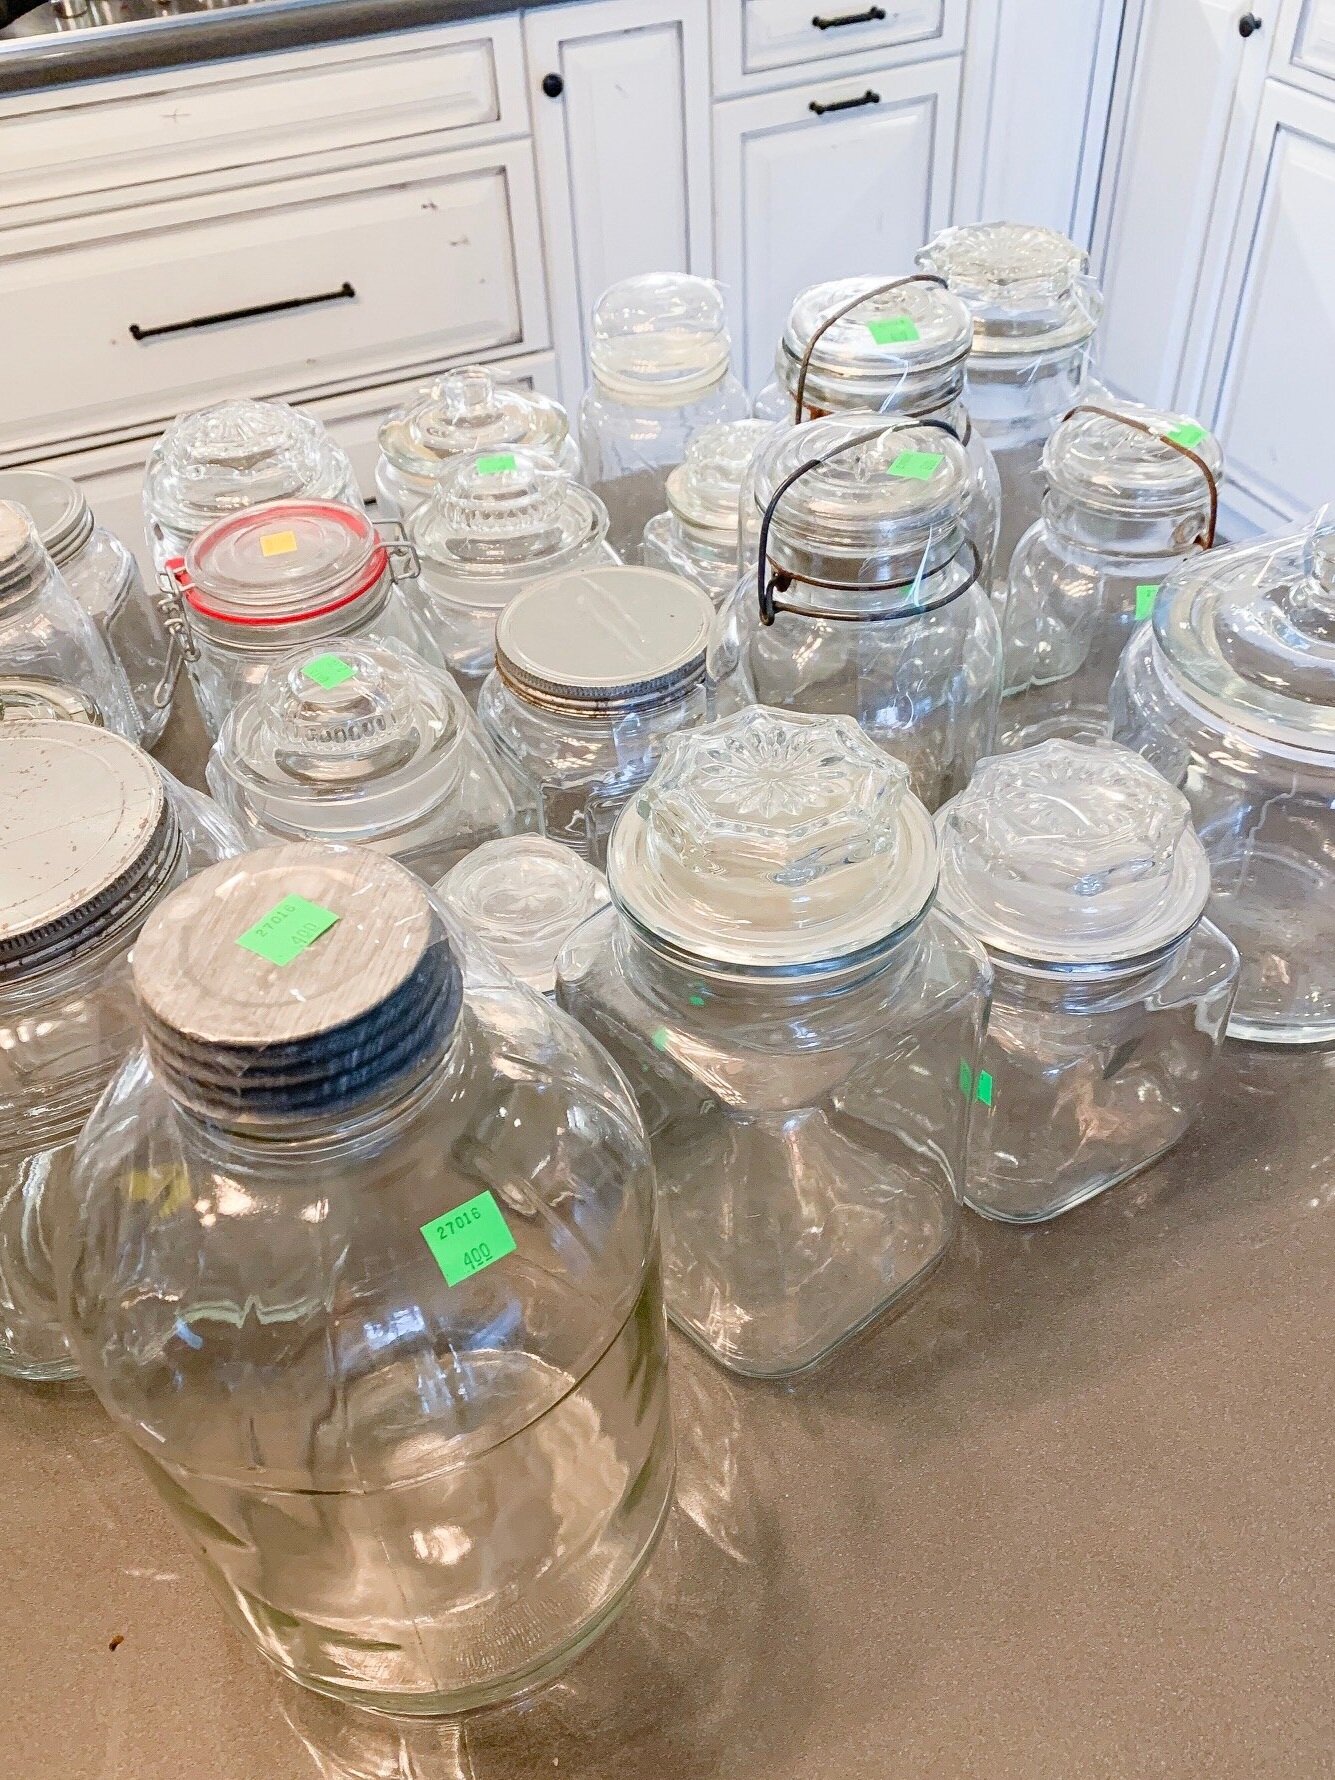
Next up, I needed some labels for these jars and Amazon seemed to have quite the selection. I ordered a set of labels that was around $14 for 50+ stickers from a shop on Amazon called ‘The Talented Kitchen’.
I started the tedious process of emptying boxes and containers into the jars (after washing them of course!) and tossing all the expired items. I even found out what a very rotten avocado looks like, yikes! Here are a couple close up photos of the jars with labels…


These turned out really nice, and I was able to toss all the half packages of items! Bonus feature of the clear glass jars is the ability to see the amount readily available, making that grocery list a breeze!
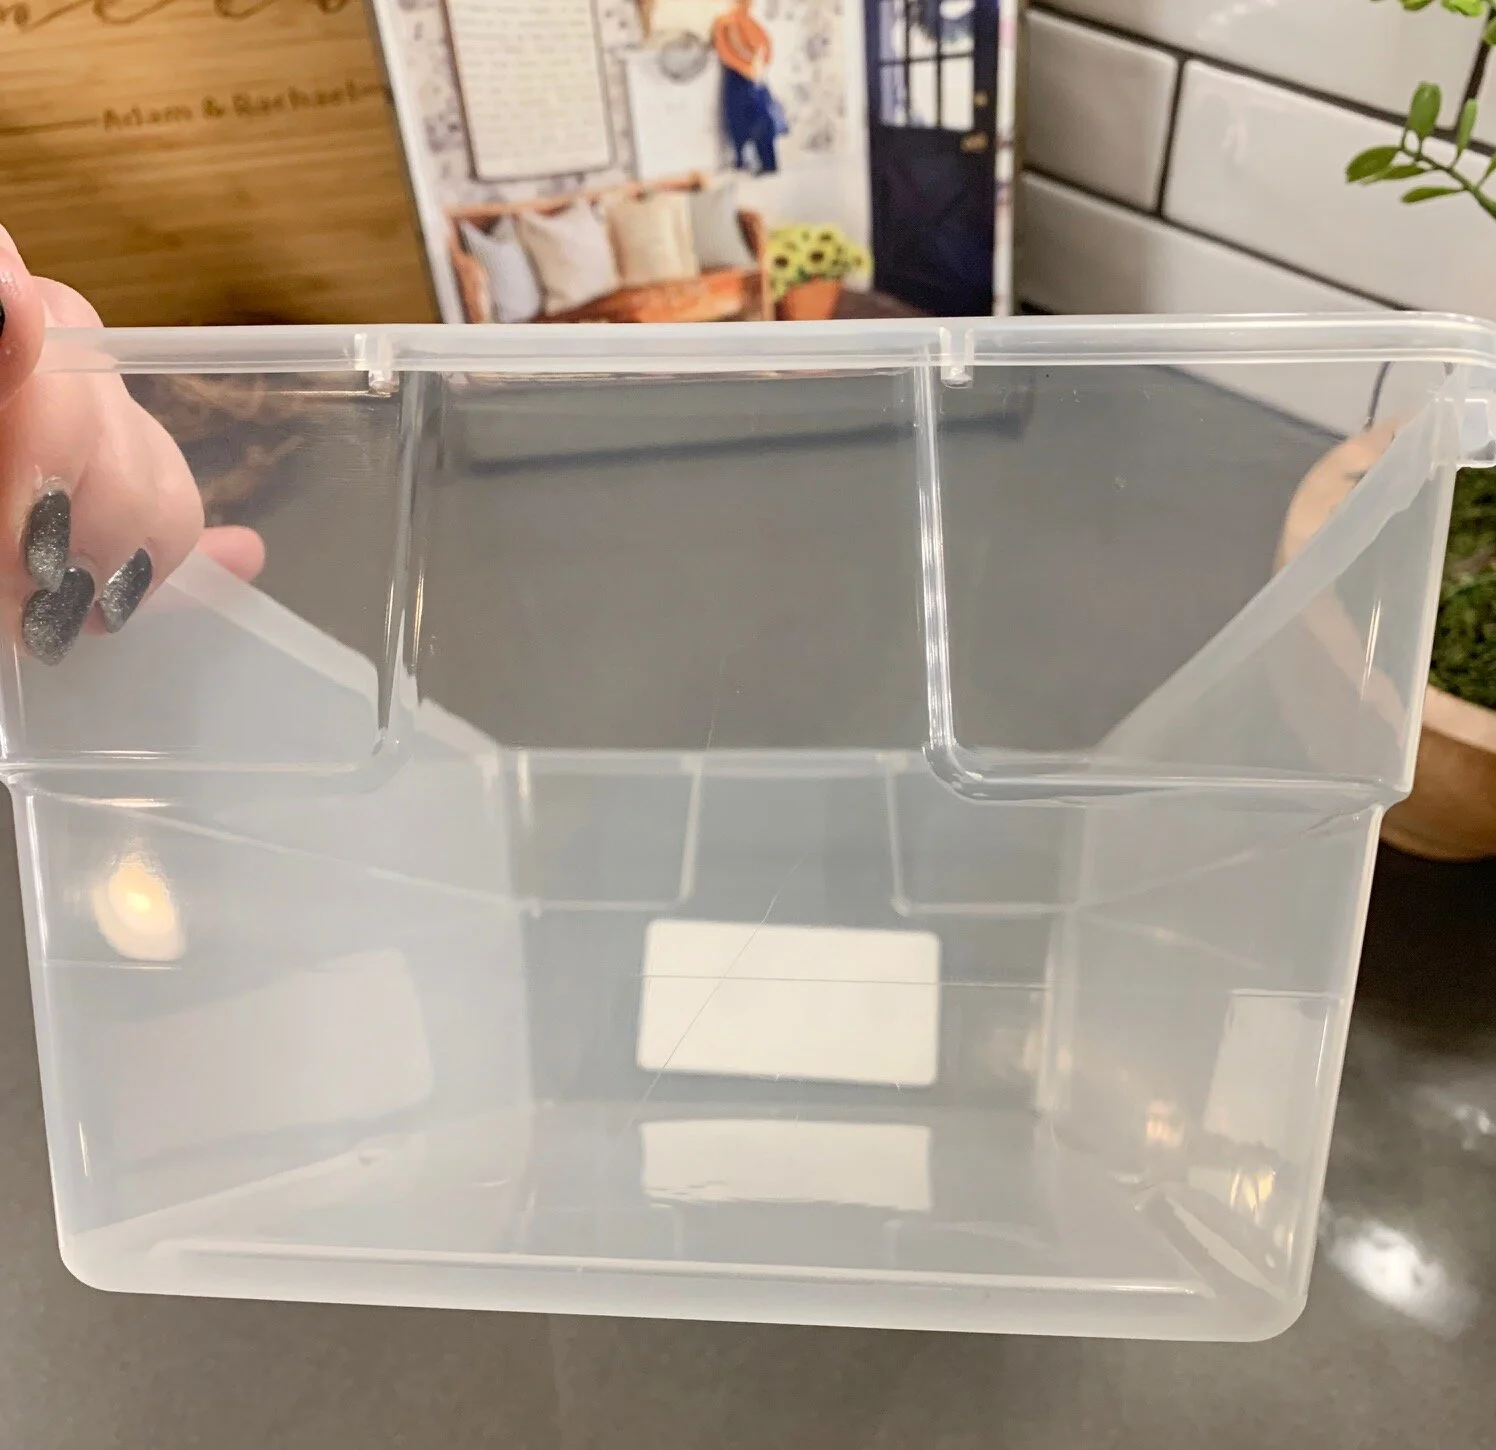
Last up, I needed some clear bins for random things, and Amazon had some outrageous prices on clear storage containers so I went with what my local Target had instead. I included a couple pictures of the bins below, the larger one was $4 and the smaller one was $1.

All Finished!
Here are a couple photos of the finished project, I am not entirely certain that I have everything in the exact place that I want it, but it works for now.


I am really excited how this turned out, as it is no longer an eyesore to anyone walking by the area. Also, I was pretty impressed that I accomplished this project for significantly less cost than originally thought. Next up, I need to repeat this process for the spice cabinet as I currently cannot find anything in there!
That is all I have for you today, thanks so much for stopping by the blog and I would love to see some of your own pantry transformations, feel free to tag me on your photos on Instagram (@aps_design) or Facebook (apsdesignblog).
Cheers!!
Rachael
Kitchen Christmas Refresh
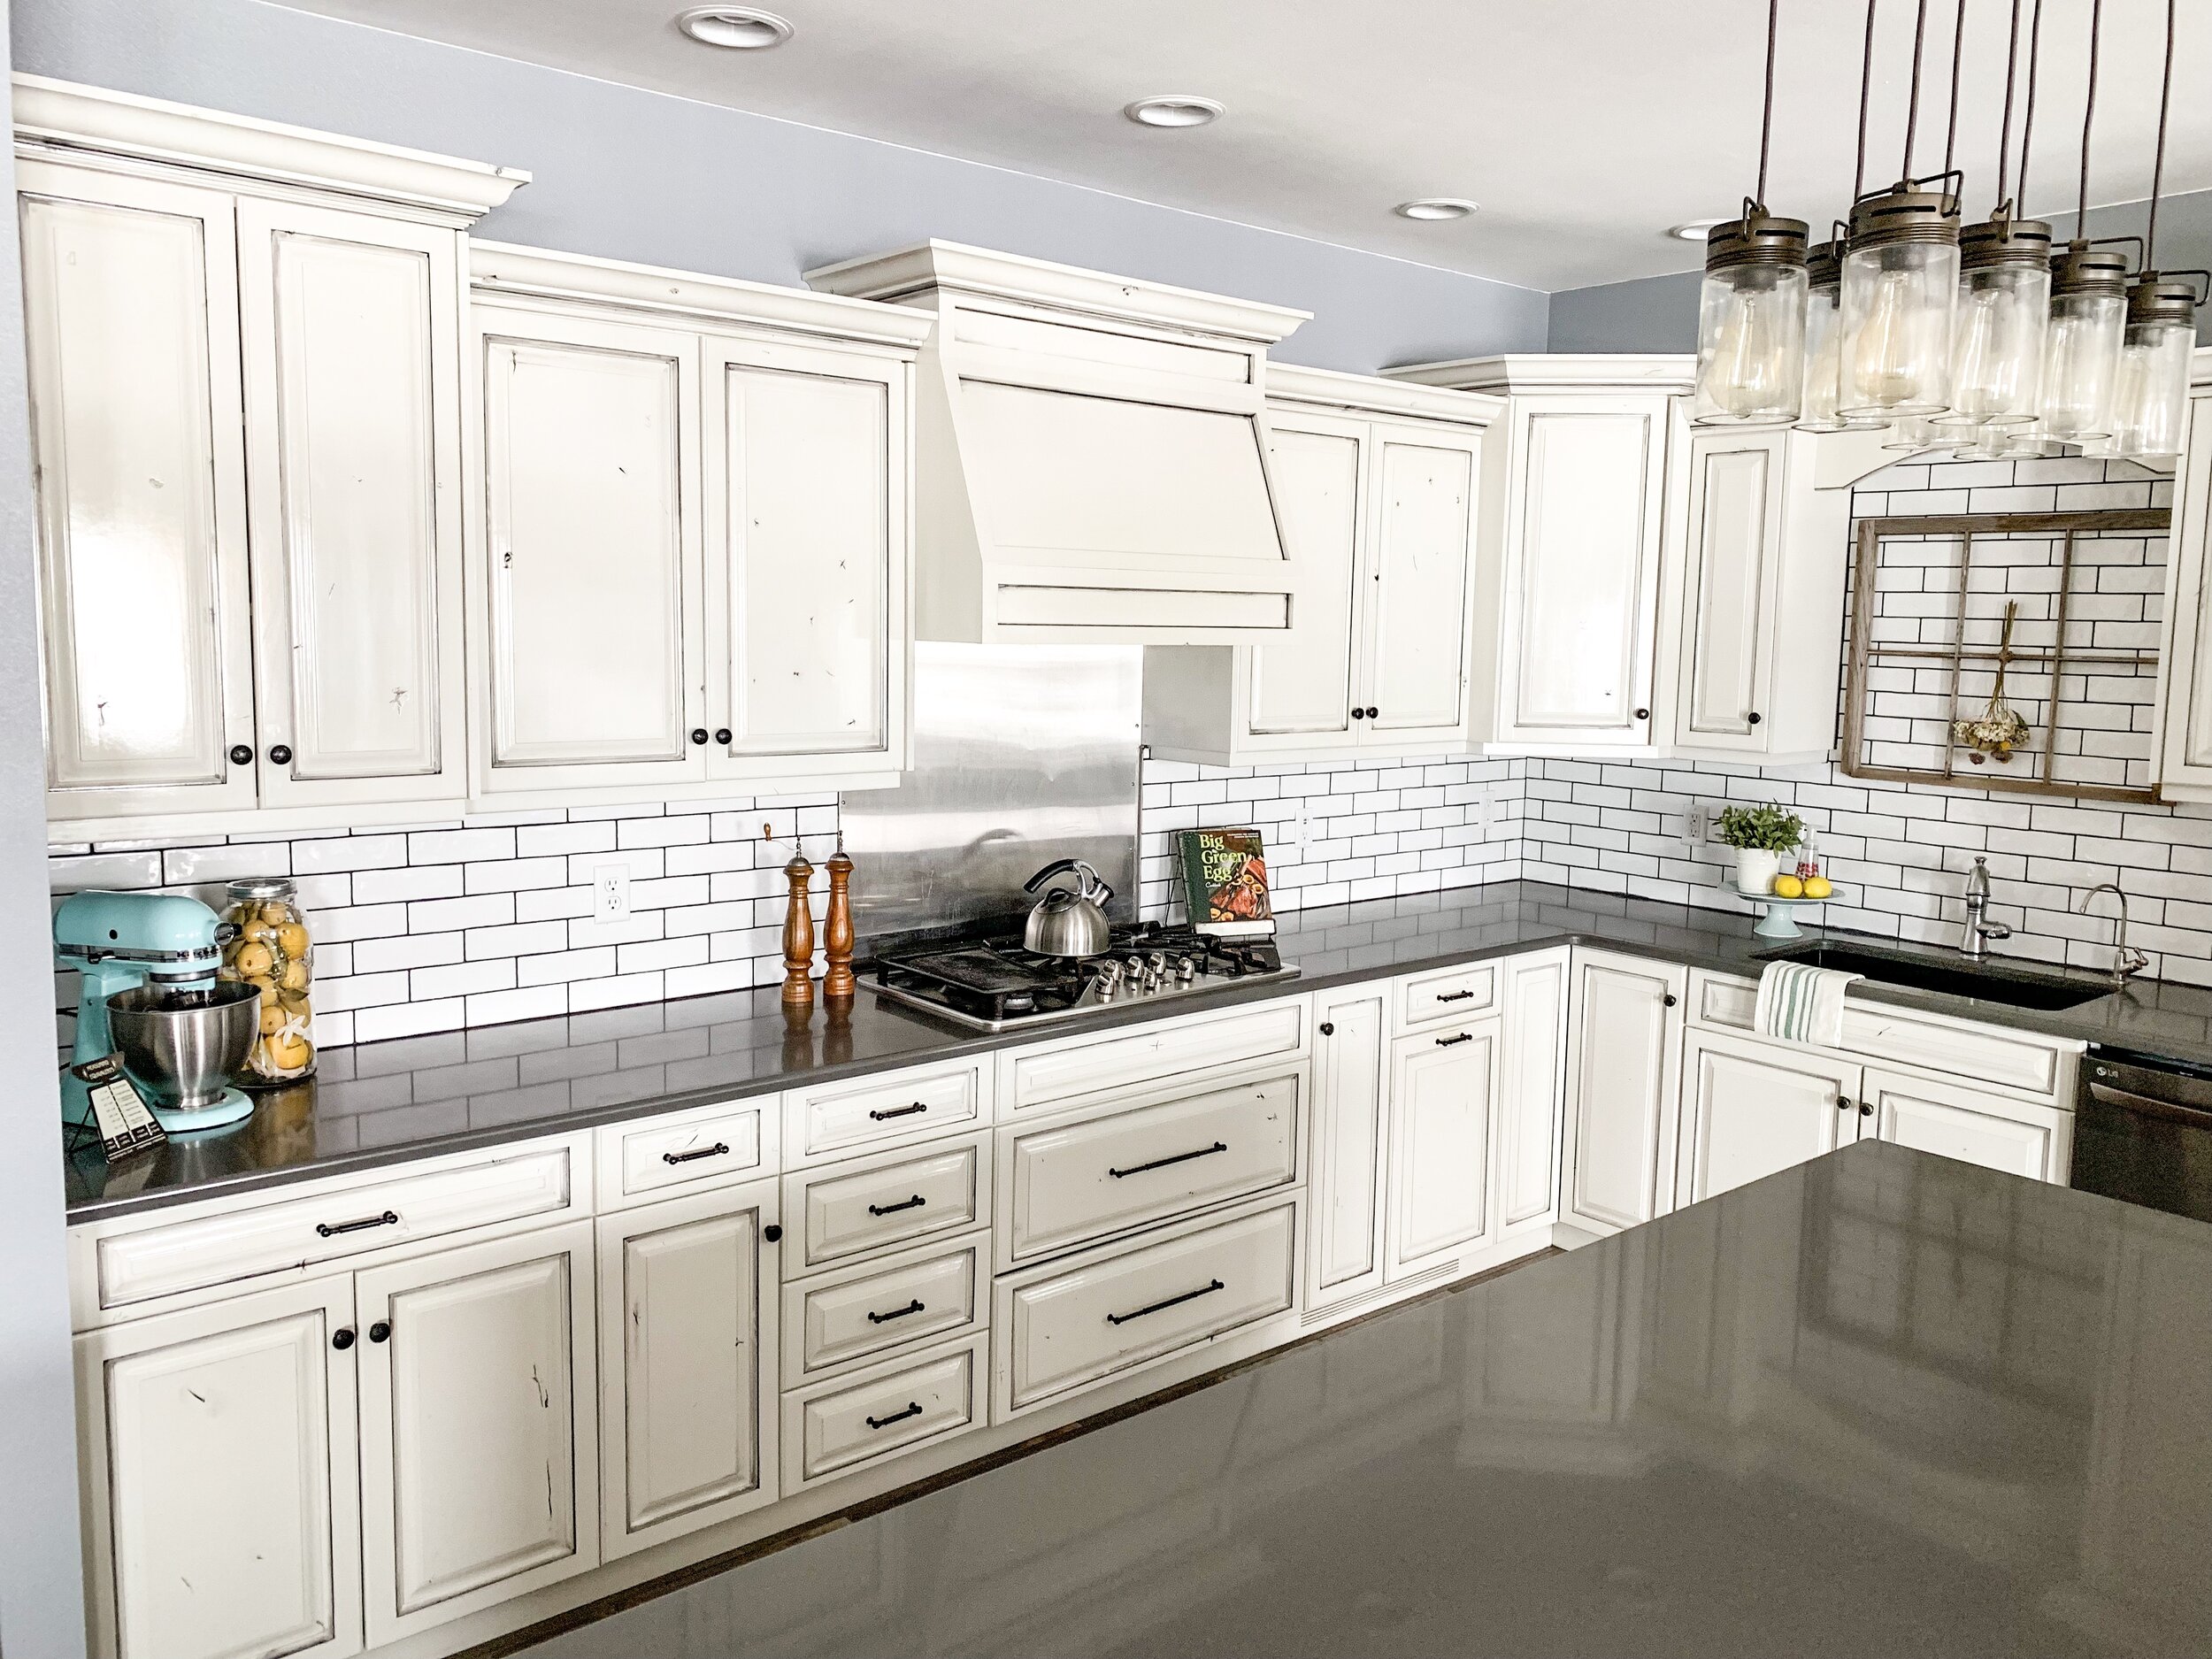
It’s that time of year, the most WONDERFUL time of the year! I know some people wait to decorate for Christmas, but I like to get it over with early and enjoy it for a couple of months. Last year I felt like everything got a little too cluttered/cramped around here so I am trying to keep it simple this go around.
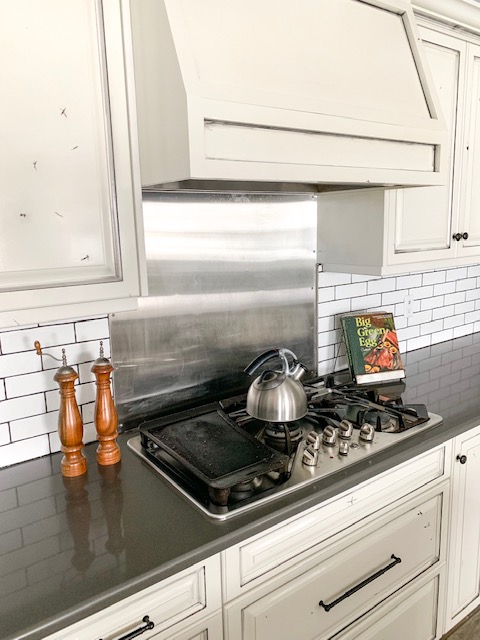
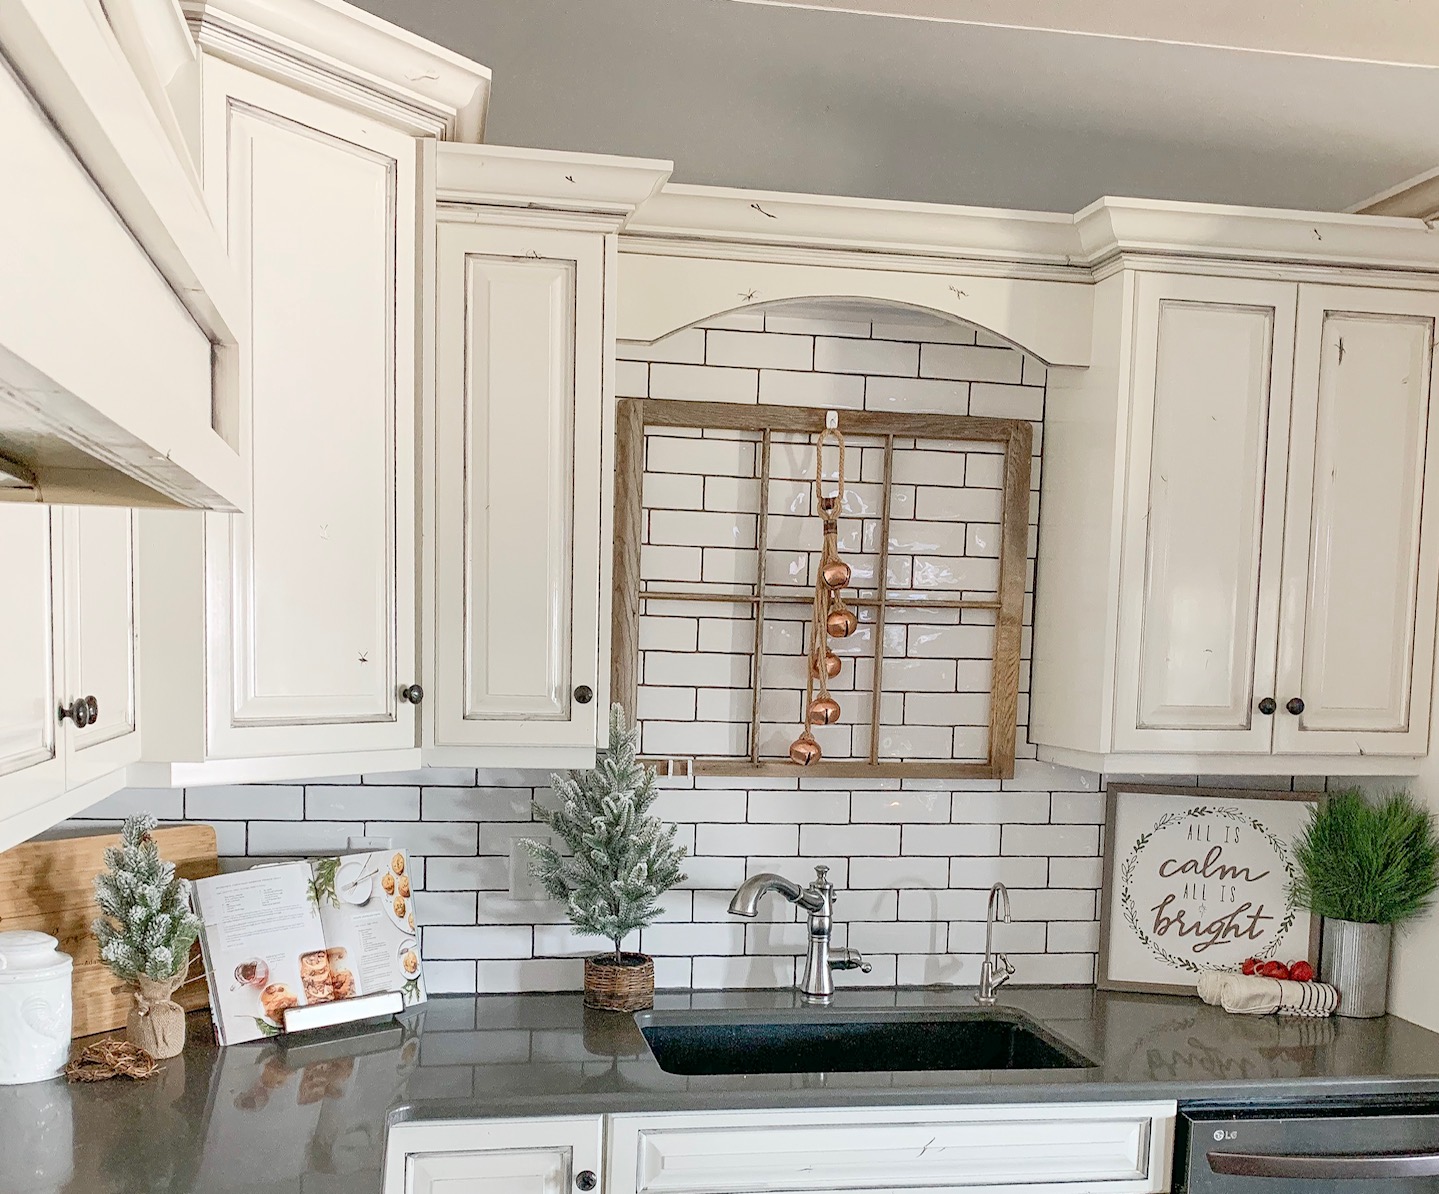
I really am feeling the green/white color scheme this year, so you will mostly see that style from me. I started in the kitchen, because that seemed the easiest!
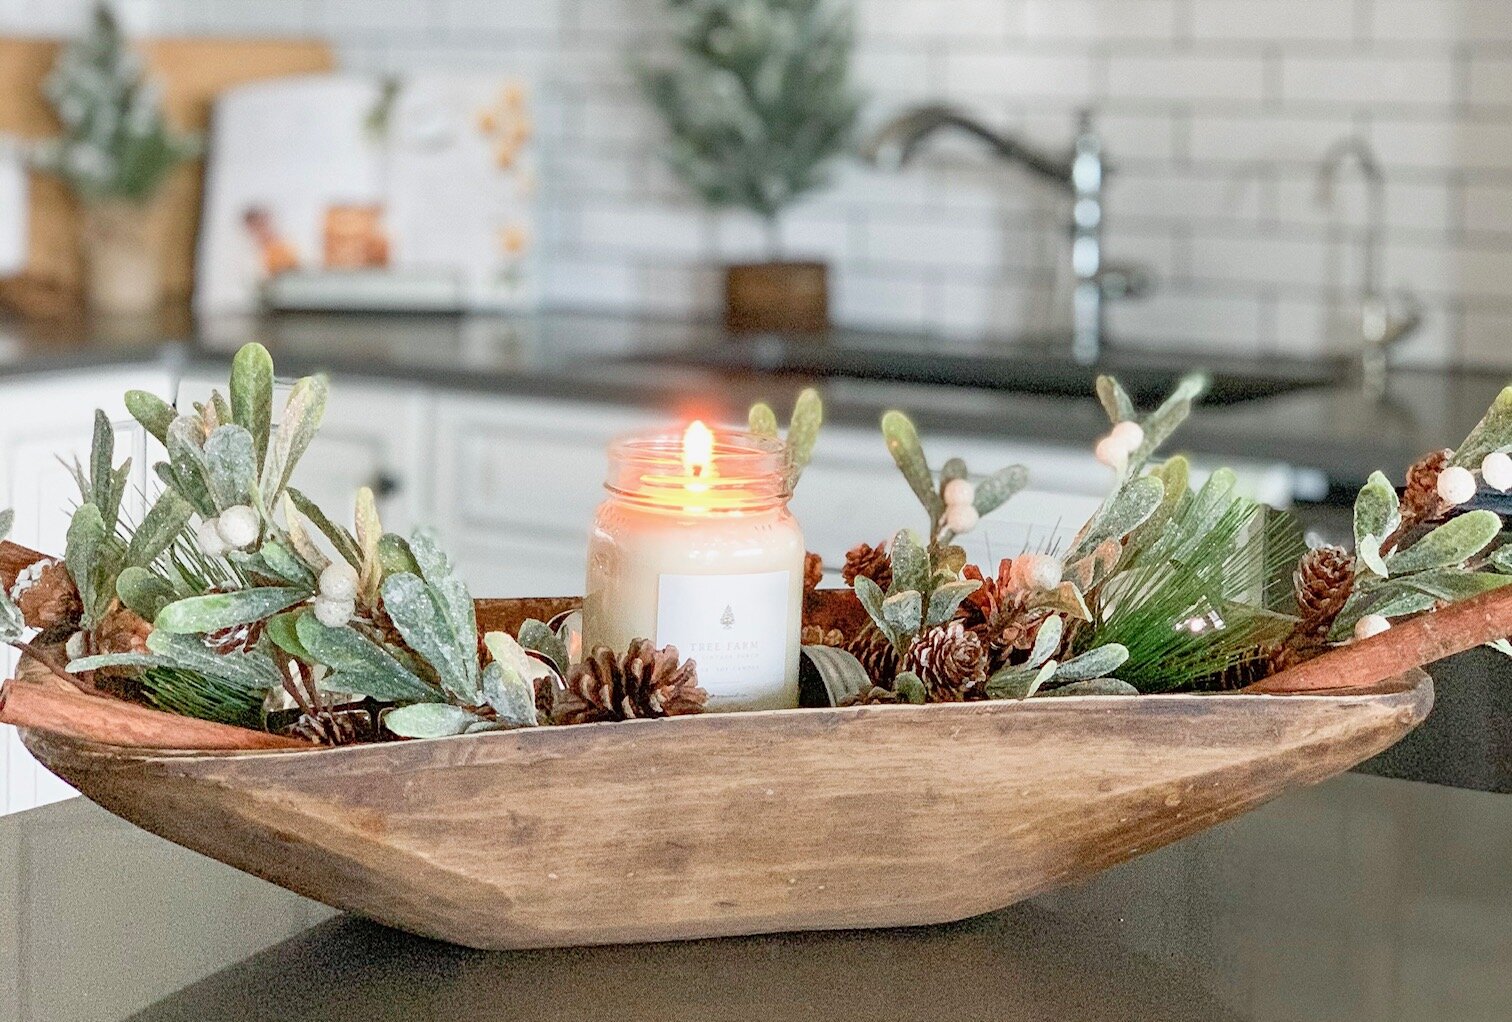
I picked this dough bowl up extremely cheap on a local Facebook site, and it has been sitting in my kitchen ever since. This season I added some faux greens and an amazing candle from my friends over at Antique Candle Co. (I am not an affiliate, I just really like their stuff!). This candle scent is ‘Tree Farm’ which works perfect for giving that real tree smell to a home.

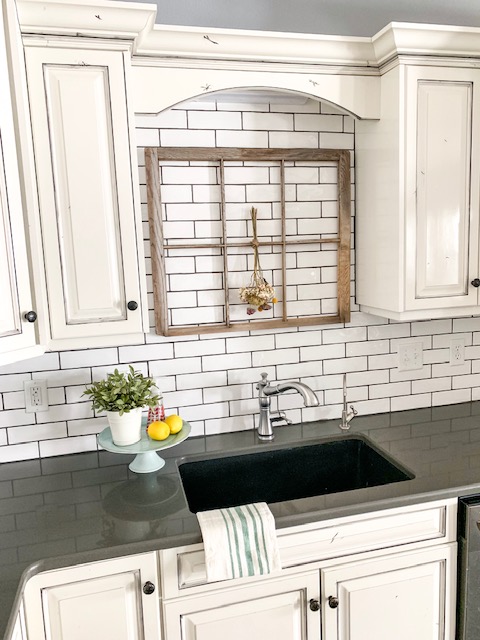
Now on to the sink area, and I struggled with what to put in the ‘window’. Originally, I wanted a wreath, but opted for the copper bells for the sake of simplicity.

It just wouldn’t be the Christmas season without home baked goodies in the company of friends and family. Both of us have close friends we consider family, thus our annual celebration ‘friendsmas’.

Lastly, a simple wreath over the range hood ties it all together! Here are a few additional photos that I took…

Dough bowl close up!