
A New Deck For A Local Restaurant
Hey there!
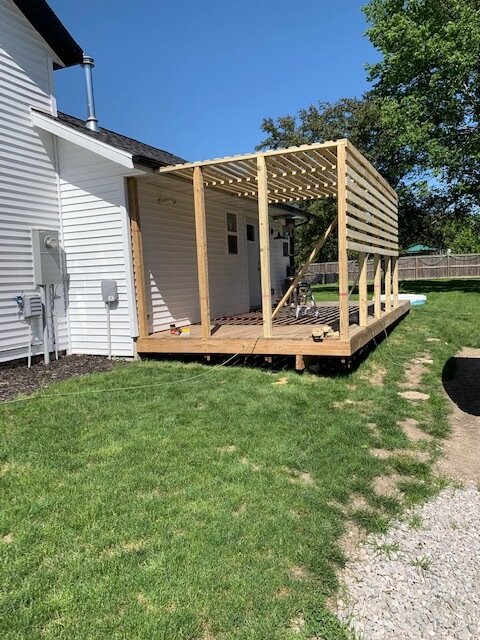
It’s a stormy summer day here in Iowa, but I wanted to update on a recent project that Adam and APS Construction completed. A local restaurant reached out, needing a large deck constructed to accommodate more guests for outdoor seating. Adam and crew got to work (in the blazing 100 degree heat!) and about a week later the project was completed.
Here are a few photos!


With this large new deck, there’s plenty of room for activities!

If you are local to Marion Iowa, you can enjoy a beverage or sandwich on this beautiful outdoor patio, located at Goldfinch Tap! I know we will be visiting soon!


Try to stay cool out there! I will be back soon with more project updates.
-Rachael
The Farmhouse Project - The Final Chapter
Hello there friends! I am writing to you from a nice 80 degree day here in Iowa, which is actually pretty nice considering it was 100 degrees all last week. I am not sure what is up with Iowa lately, but I guess 2020 has taught us to be ready for literally anything.
We just wrapped up a 9+ month renovation, the farmhouse project, and we are really excited how it turned out. We have a lot of new visitors here, so I will give a super quick recap.
Last October, we bought a tired but sturdy c.1900 home in the heart of our community. When I say tired, I mean it showed it’s age and was missing some modern amenities. Since then we tore off a section of the home, rebuilt it with added square footage, put in all new windows/doors/siding/sheeting/roof/hvac/electrical and added central air and a large deck. It took a little longer than planned, due to 2020’s challenges (complete with a ‘derecho’), but in the end it was all worth it.
Let’s get right to the photos (roughly in chronological order)

Photo from the listing when we bought it

Tore the back section off that needed new trusses

New Foundation!

Putting a large Addition Back On

Tearing off the siding and sheeting from the original section of the home

All put back together, complete with new windows

A very cold day! (view from front porch)

The kitchen ceiling no longer droops!

Vertical siding for the win!
As you can tell, we replaced almost everything at this home. Here are a couple fun before and after shots, I tried to take the ‘afters’ at the same angles for easier reference.
Let’s start with the kitchen…


Sink and stove in same position


There’s really nothing the same about this kitchen other than a few of the appliances, everything else is new. We kept the kitchen the same size and roughly the same layout, but this new space is much brighter with an added window and lots of lighting!
Here’s another before and after set…the upstairs bedrooms!

Bedroom 1 before…

Bedroom 1 after

Bedroom 1, second angle

Bedroom 1, second angle

Bedroom 2 Before

Bedroom 2 After
These bedrooms both received new windows, flooring, paint, doors, trim, electrical, and some drywall. The photos from the first bedroom show the new set of stairs and new railing as well. New stairs were essential, as the previous stairs were no where near the correct size, but there weren’t building codes 120 year ago!
The living room was part of the original structure that was kept intact during demolition, and we really wanted to keep as much of the home's character as possible. We tore off multiple layers of ceiling, added all new drywall, windows, electrical wiring and fixtures. We also took up the flooring and sanded down decades of carpet glue and stain. These next photos show the transformation of the living room, which is one of my favorite parts of the home.
We kept the same door in the same place, for reference.


Next up is the main bathroom, which was also serving as the laundry room. We moved the laundry into the (newly added) master closet, and this room got to return to single function status after it was torn down and rebuilt, of course.


Last but not least, the exterior. You might notice no window air conditioners in the after photos….that’s because this home finally has central air. I’m not sure how previous owners managed the sweltering Iowa summers for 120 years with no air!

Front view

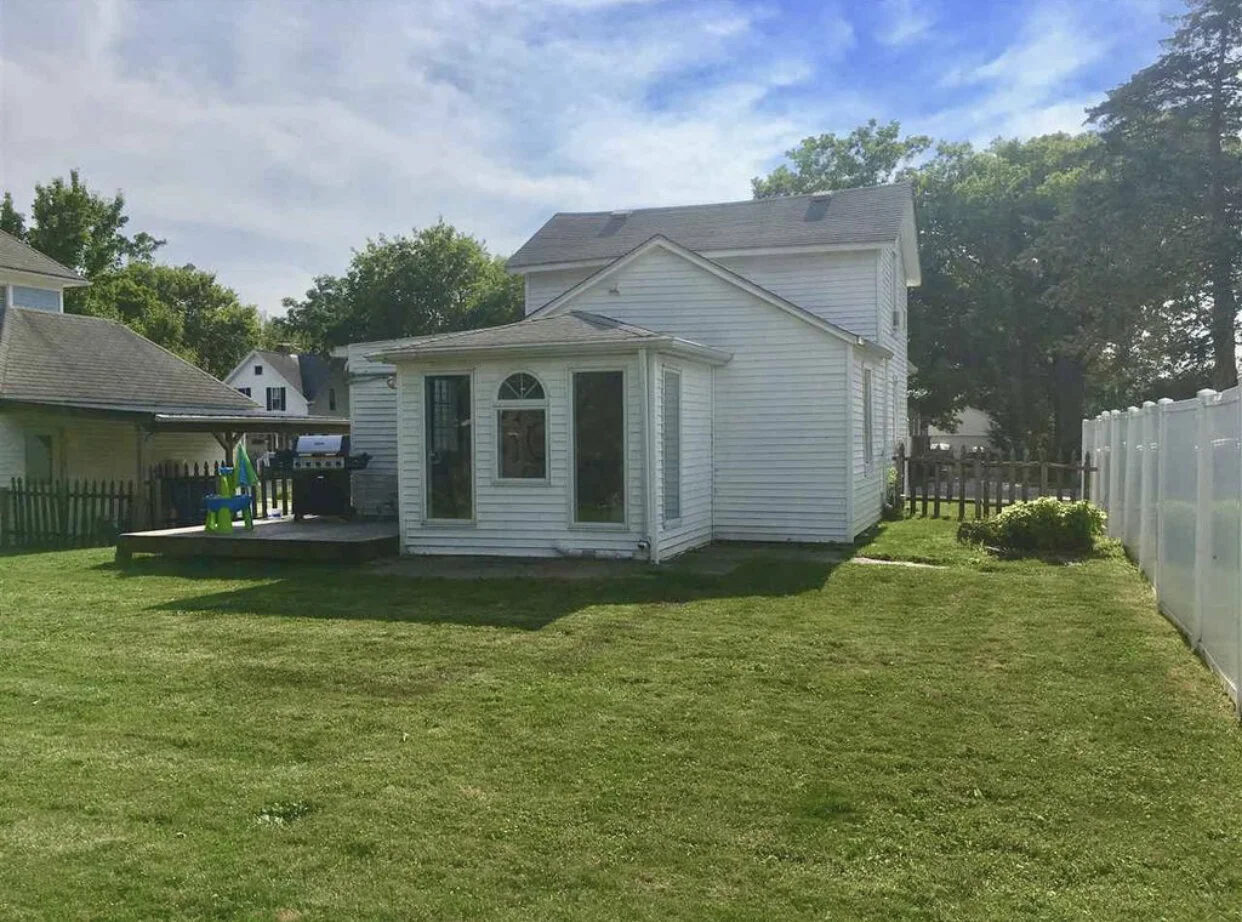
Back View

New Back view, with deck! (and central air!)
It was a long 9 months, but it was all worth it in the end. Throughout the renovation process, we had neighbors stop by almost every single day and express how happy they were to see this older home in the heart of their community get the help it needed to see its next 120 years. We even had a person stop by that used to live in the home in the early 2000s, she was amazed at how far it had come since then.
These encounters with the community members were so heartwarming, and often the motivation we needed to get through another 16 hour or 100 degree day (or both!).
Last week it was time to see this house off to its new owners, and while it was almost sad to pass the keys along, it was also very rewarding. It’s in good hands.
Our ‘inspector’ even gave her final seal of approval!


What’s next for us?
Well as you can imagine this project took up most of our free time, but now that it’s completed we have a few other small things in the works, along with some storm damage repairs from our most recent natural disaster. In October we officially will own our acreage, which will bring on another list of projects. It’s going to be a down-to-the-wire finish for us to complete everything before winter but we wouldn’t have it any other way.
Stay safe out there and we will chat soon!
-Rachael
The Boathouse Project
We are in Summer’s home stretch, and the Iowa heat and humidity have certainly been oppressive at times! That, combined with a tornado, made this outdoor client project particularly challenging, so we were really excited to finish it last week. Here are some of the pictures and details of “The Boathouse”.

The details:
-14ft by 26 ft building
-364 sq feet
-10ft 2x4 walls with active dormer
-200 amp electrical service
-8/12 pitch roof with asphalt shingles
We have had several comments that this building looks like it could be a tiny home, and plumbing aside it really could be! The poured concrete walls and polished floors make this building bug and critter free…not just your typical back yard shed! Here’s a peek inside at all the lofted space.
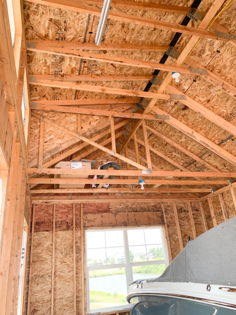
The 10 foot walls provide a lot of extra space for storage racks or shelving in the future. And the 9 ft tall garage door helps with backing in a large boat full of lake accessories. For the below picture, keep in mind that Adam is 6ft 4in tall!

We have a couple more outdoor client projects lined up for the late Summer/early Fall, however they are not as labor intensive as this was. It’s always exciting to see a project come together, and this one was no exception! For now, we are on to the next as we need to squeeze out every last day of Summer that we can…( Maybe someday I could have something similar to this boathouse as my very own she shed! A girl can dream! haha).
Unitl next time friends!
Rachael & Adam
The Epic Barn Beam Bed Frame!
Hi all! We are in the home stretch leading up to Christmas and many of you are probably already on break for the holidays (this season seemed like it flew by faster than previous years). I have one final post for you before we transition into full Christmas mode at my house, which will consist of a few days computer-free to enjoy this time with family. So if you are sitting in an airport waiting to travel to your holiday gathering, or maybe need a 5 minute ‘break’ from all things Christmas, I have just the post for you!
Recently, we finished up a client project that turned out to be the biggest piece of furniture we have ever created, thus the title of this post. This bed frame required long hours of prep, assembly, take down, haul to its final location, and reassembly, but as you will see it was well worth it and turned out stunning!
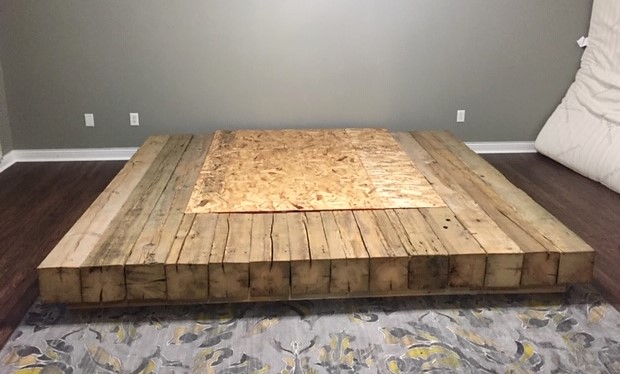
The materials for this project included authentic reclaimed barn beams and these were SOLID 8x8 beams, which made them very heavy.
Prior to use, the beams had to be cut, sanded and assembled at our shop to ensure they all fit together properly and weren’t warped by the last 100 years of extreme temperatures of Midwest weather. a simple frame was assembled to keep the beams up off the floor in the client’s room.
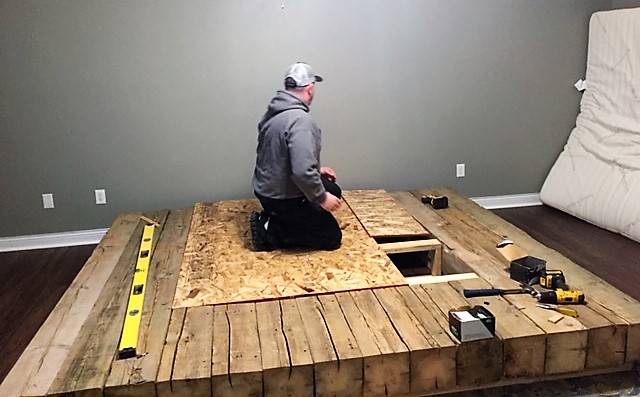
Next, each beam was secured in place. To eliminate some of the weight of this piece, an alternate framing technique was used to comply with floor joist specifications and it was completely covered by the mattress and otherwise not visible once assembled.


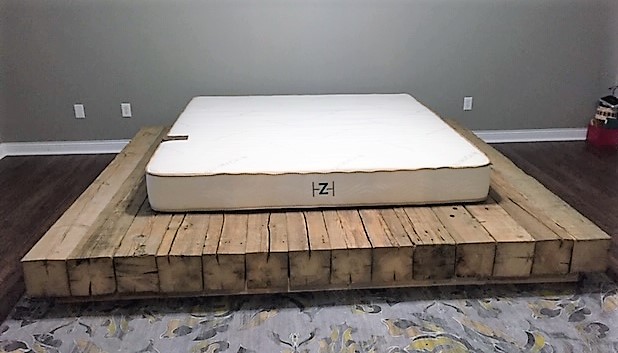
Here the frame is being finished up and mattress added.
To show you just how big this bed frame is, the mattress pictured is king size!
Pictured below are some up close photos of the wood details on the headboard and beams, each of which are unique. There is just something about the look of authentic barn wood that cannot be recreated with other materials.
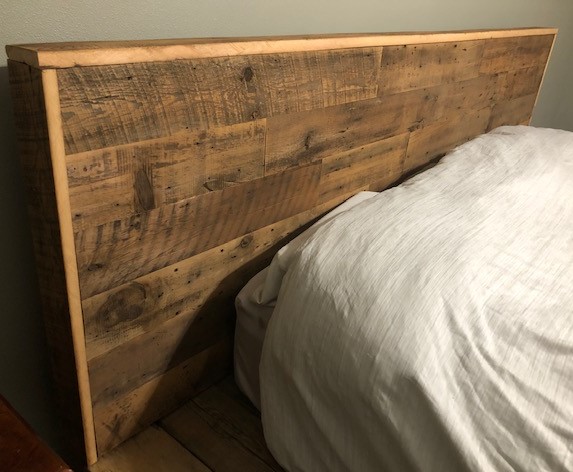

The finished project photos!

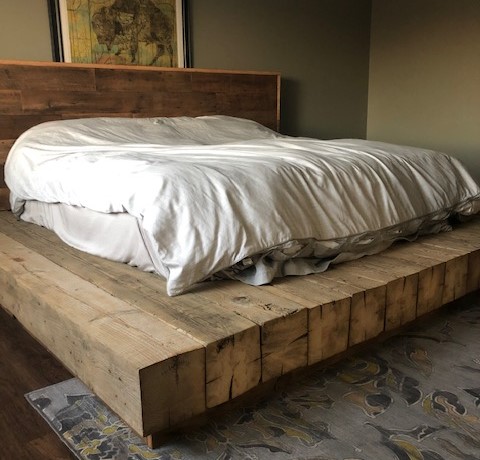
This bed frame turned out truly stunning!
I absolutely love how it all came together. A sincere thank you to the client who chose us to make this item for her!

The Friendship Fireplace Project!
Hey all, one week until Christmas Eve! Are you ready? (It’s OK, I’m not either!) I’m not too stressed about it either, there’s plenty of time left for that! All of that aside, I am excited to share with you a client project we recently finished up called ‘The Friendship Fireplace’. The street address for this home contains the word ‘Friendship’, thus that is how the project name was developed. We do a number of fireplace/mantel projects and have to keep them straight with unique titles!
The fireplace is often the focal point of the living room as well as the backdrop for family photos, and this homeowner wanted a total remodel of this space to bring it out of the 1970’s. To do that, we first had to start with a clean slate!

Aside from the fireplace itself, there was not any part of the original design that was worth keeping…it all had to go.
And as you can see we made a huge mess, but it was worth it!
Progress photos after some new framing, insulation, and cement wall board.


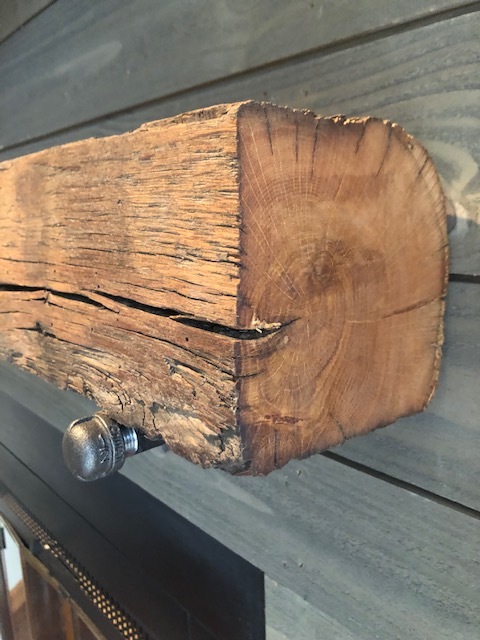
We needed to redefine this space, and the easiest way to accomplish that was to add a new texture or wall surface. The homeowner chose rough sawn weathered shiplap, which is pictured below. It’s a gorgeous light grey, and really makes this space ‘pop’!

These barn beam mantels are always my personal favorite. Every single one is unique, bringing a different century-old story into each home. This one was mounted with simple gas pipe wall plates and fittings.


And here’s a full length view, complete with fresh tile at the base of the new wall. This family will have a fresh new space to take all of their family photos and the mantel will surely be a talking point with guests for years to come!
We really appreciate the homeowner choosing our business to complete her fireplace remodel!
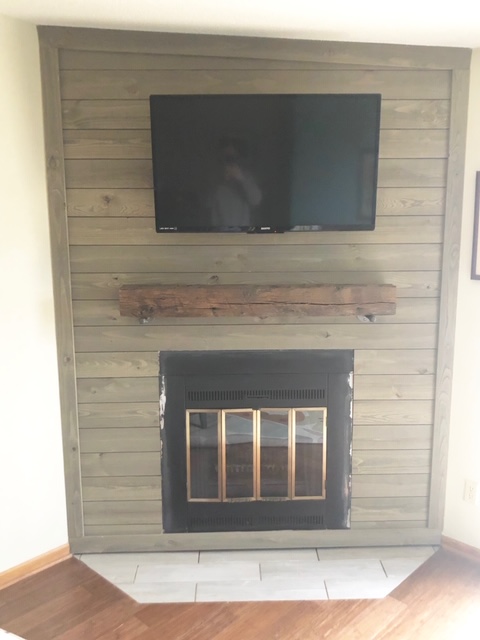
The fireplace insert remains in original condition, as the homeowner has plans to resurface that herself