


The Farmhouse Project - The Final Chapter
Hello there friends! I am writing to you from a nice 80 degree day here in Iowa, which is actually pretty nice considering it was 100 degrees all last week. I am not sure what is up with Iowa lately, but I guess 2020 has taught us to be ready for literally anything.
We just wrapped up a 9+ month renovation, the farmhouse project, and we are really excited how it turned out. We have a lot of new visitors here, so I will give a super quick recap.
Last October, we bought a tired but sturdy c.1900 home in the heart of our community. When I say tired, I mean it showed it’s age and was missing some modern amenities. Since then we tore off a section of the home, rebuilt it with added square footage, put in all new windows/doors/siding/sheeting/roof/hvac/electrical and added central air and a large deck. It took a little longer than planned, due to 2020’s challenges (complete with a ‘derecho’), but in the end it was all worth it.
Let’s get right to the photos (roughly in chronological order)

Photo from the listing when we bought it

Tore the back section off that needed new trusses

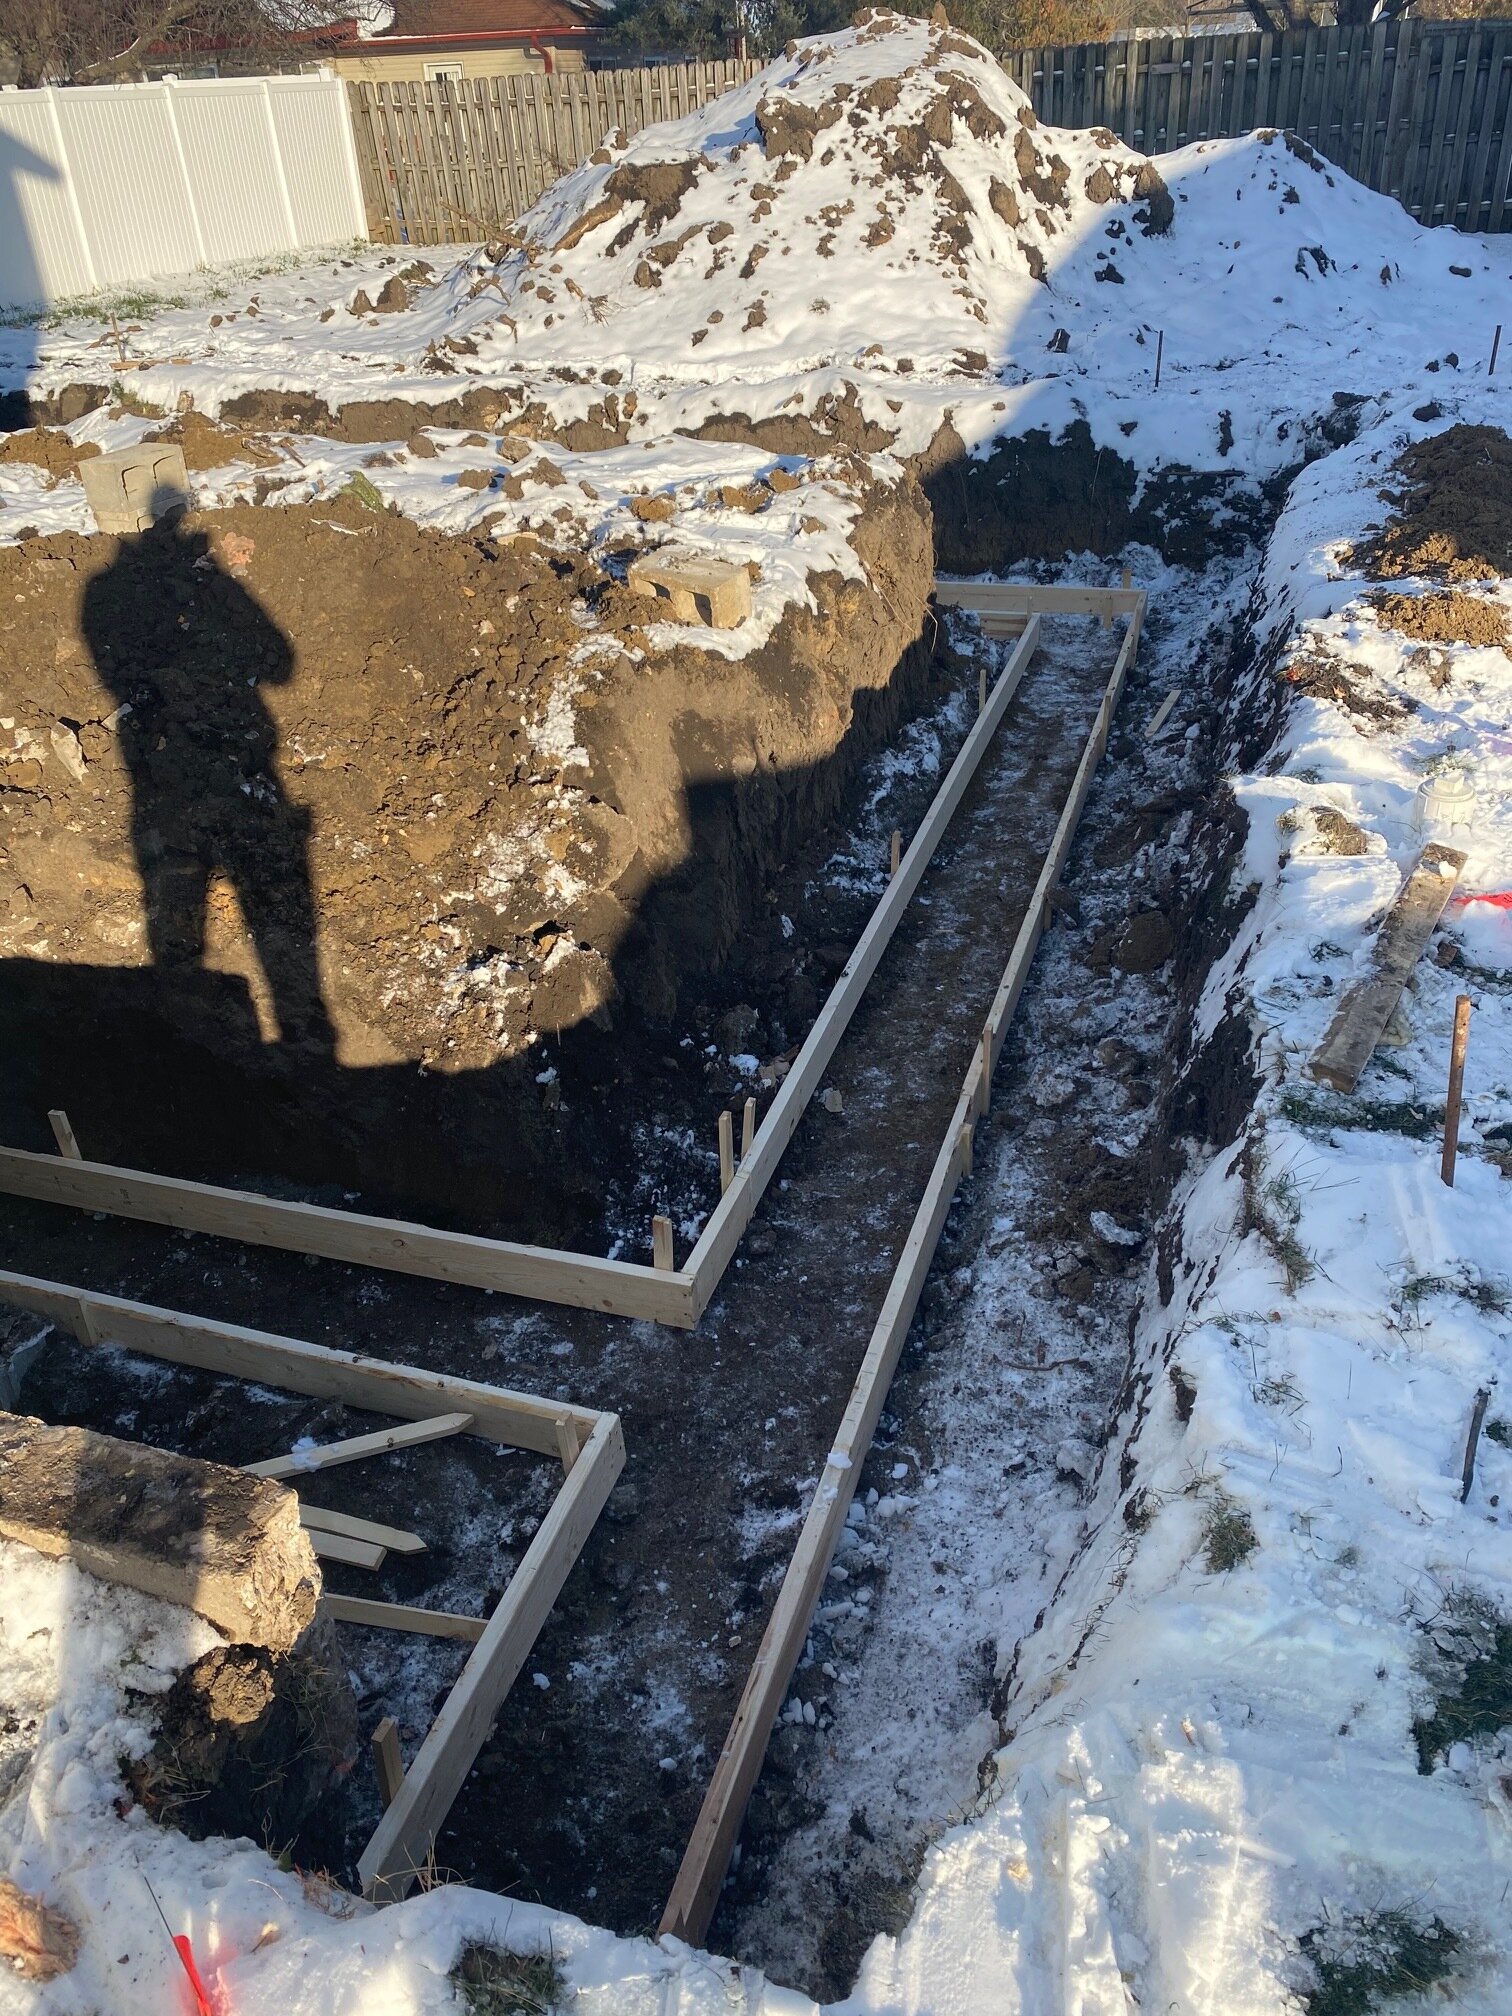
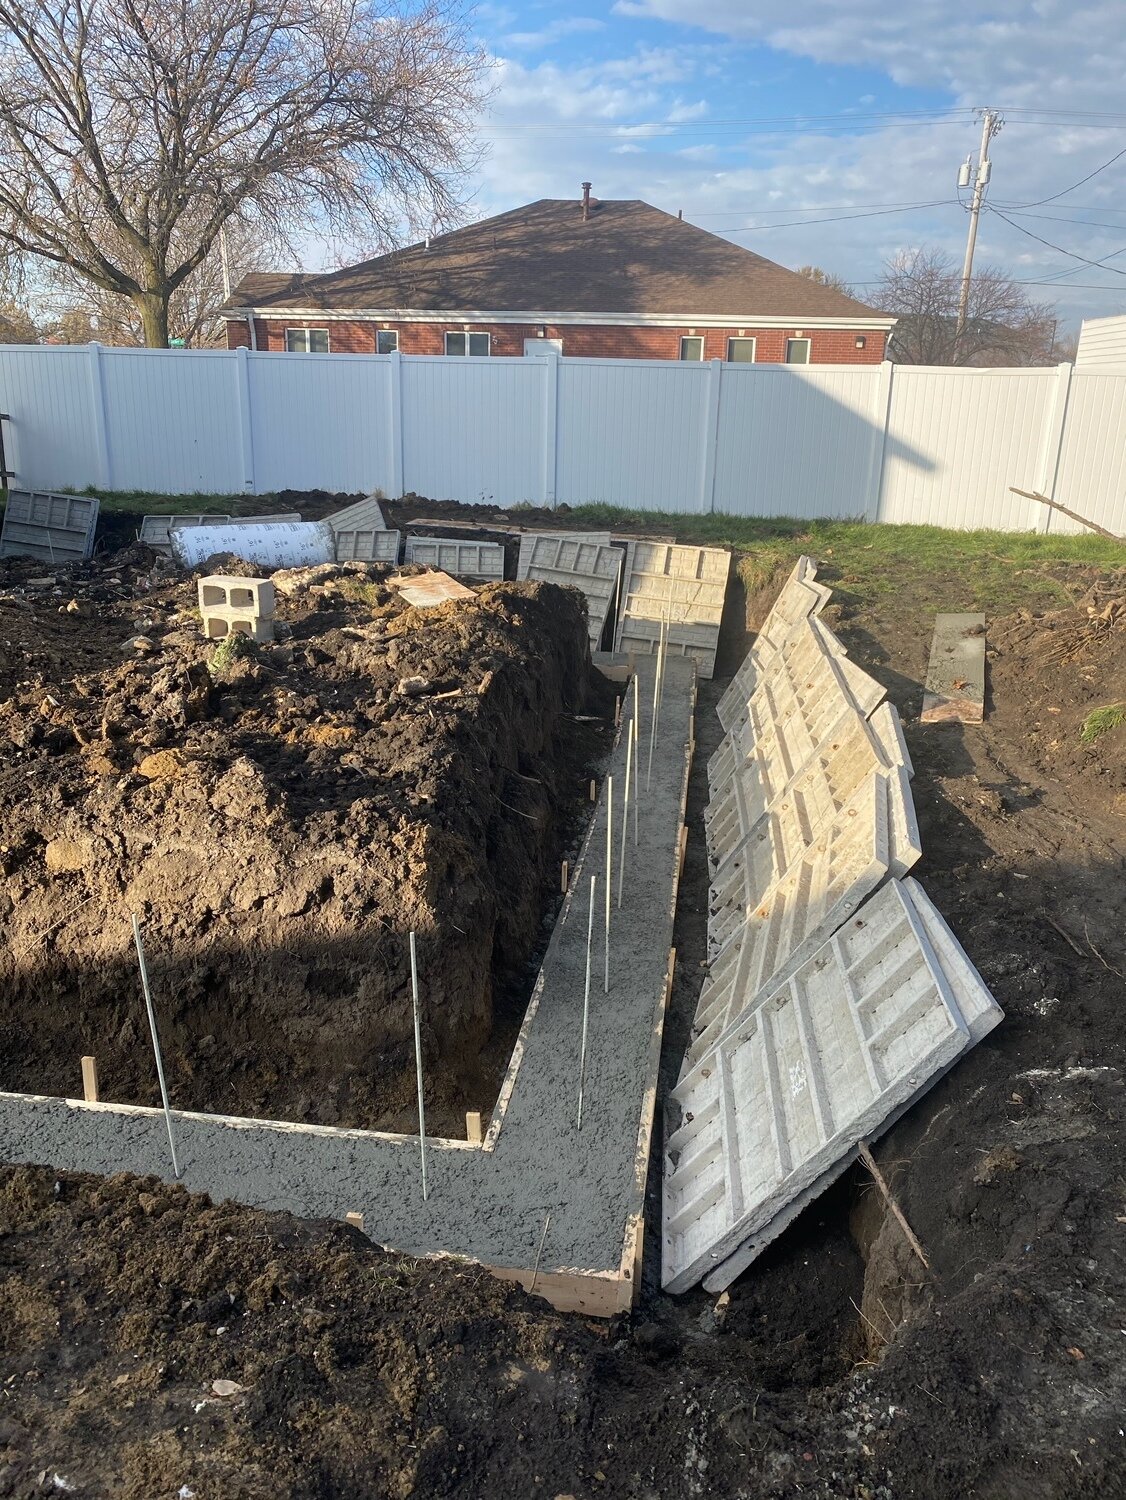
New Foundation!

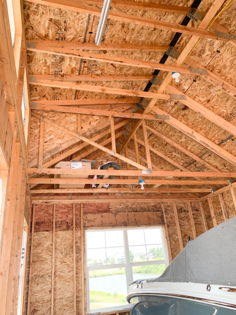
Putting a large Addition Back On

Tearing off the siding and sheeting from the original section of the home

All put back together, complete with new windows

A very cold day! (view from front porch)

The kitchen ceiling no longer droops!

Vertical siding for the win!
As you can tell, we replaced almost everything at this home. Here are a couple fun before and after shots, I tried to take the ‘afters’ at the same angles for easier reference.
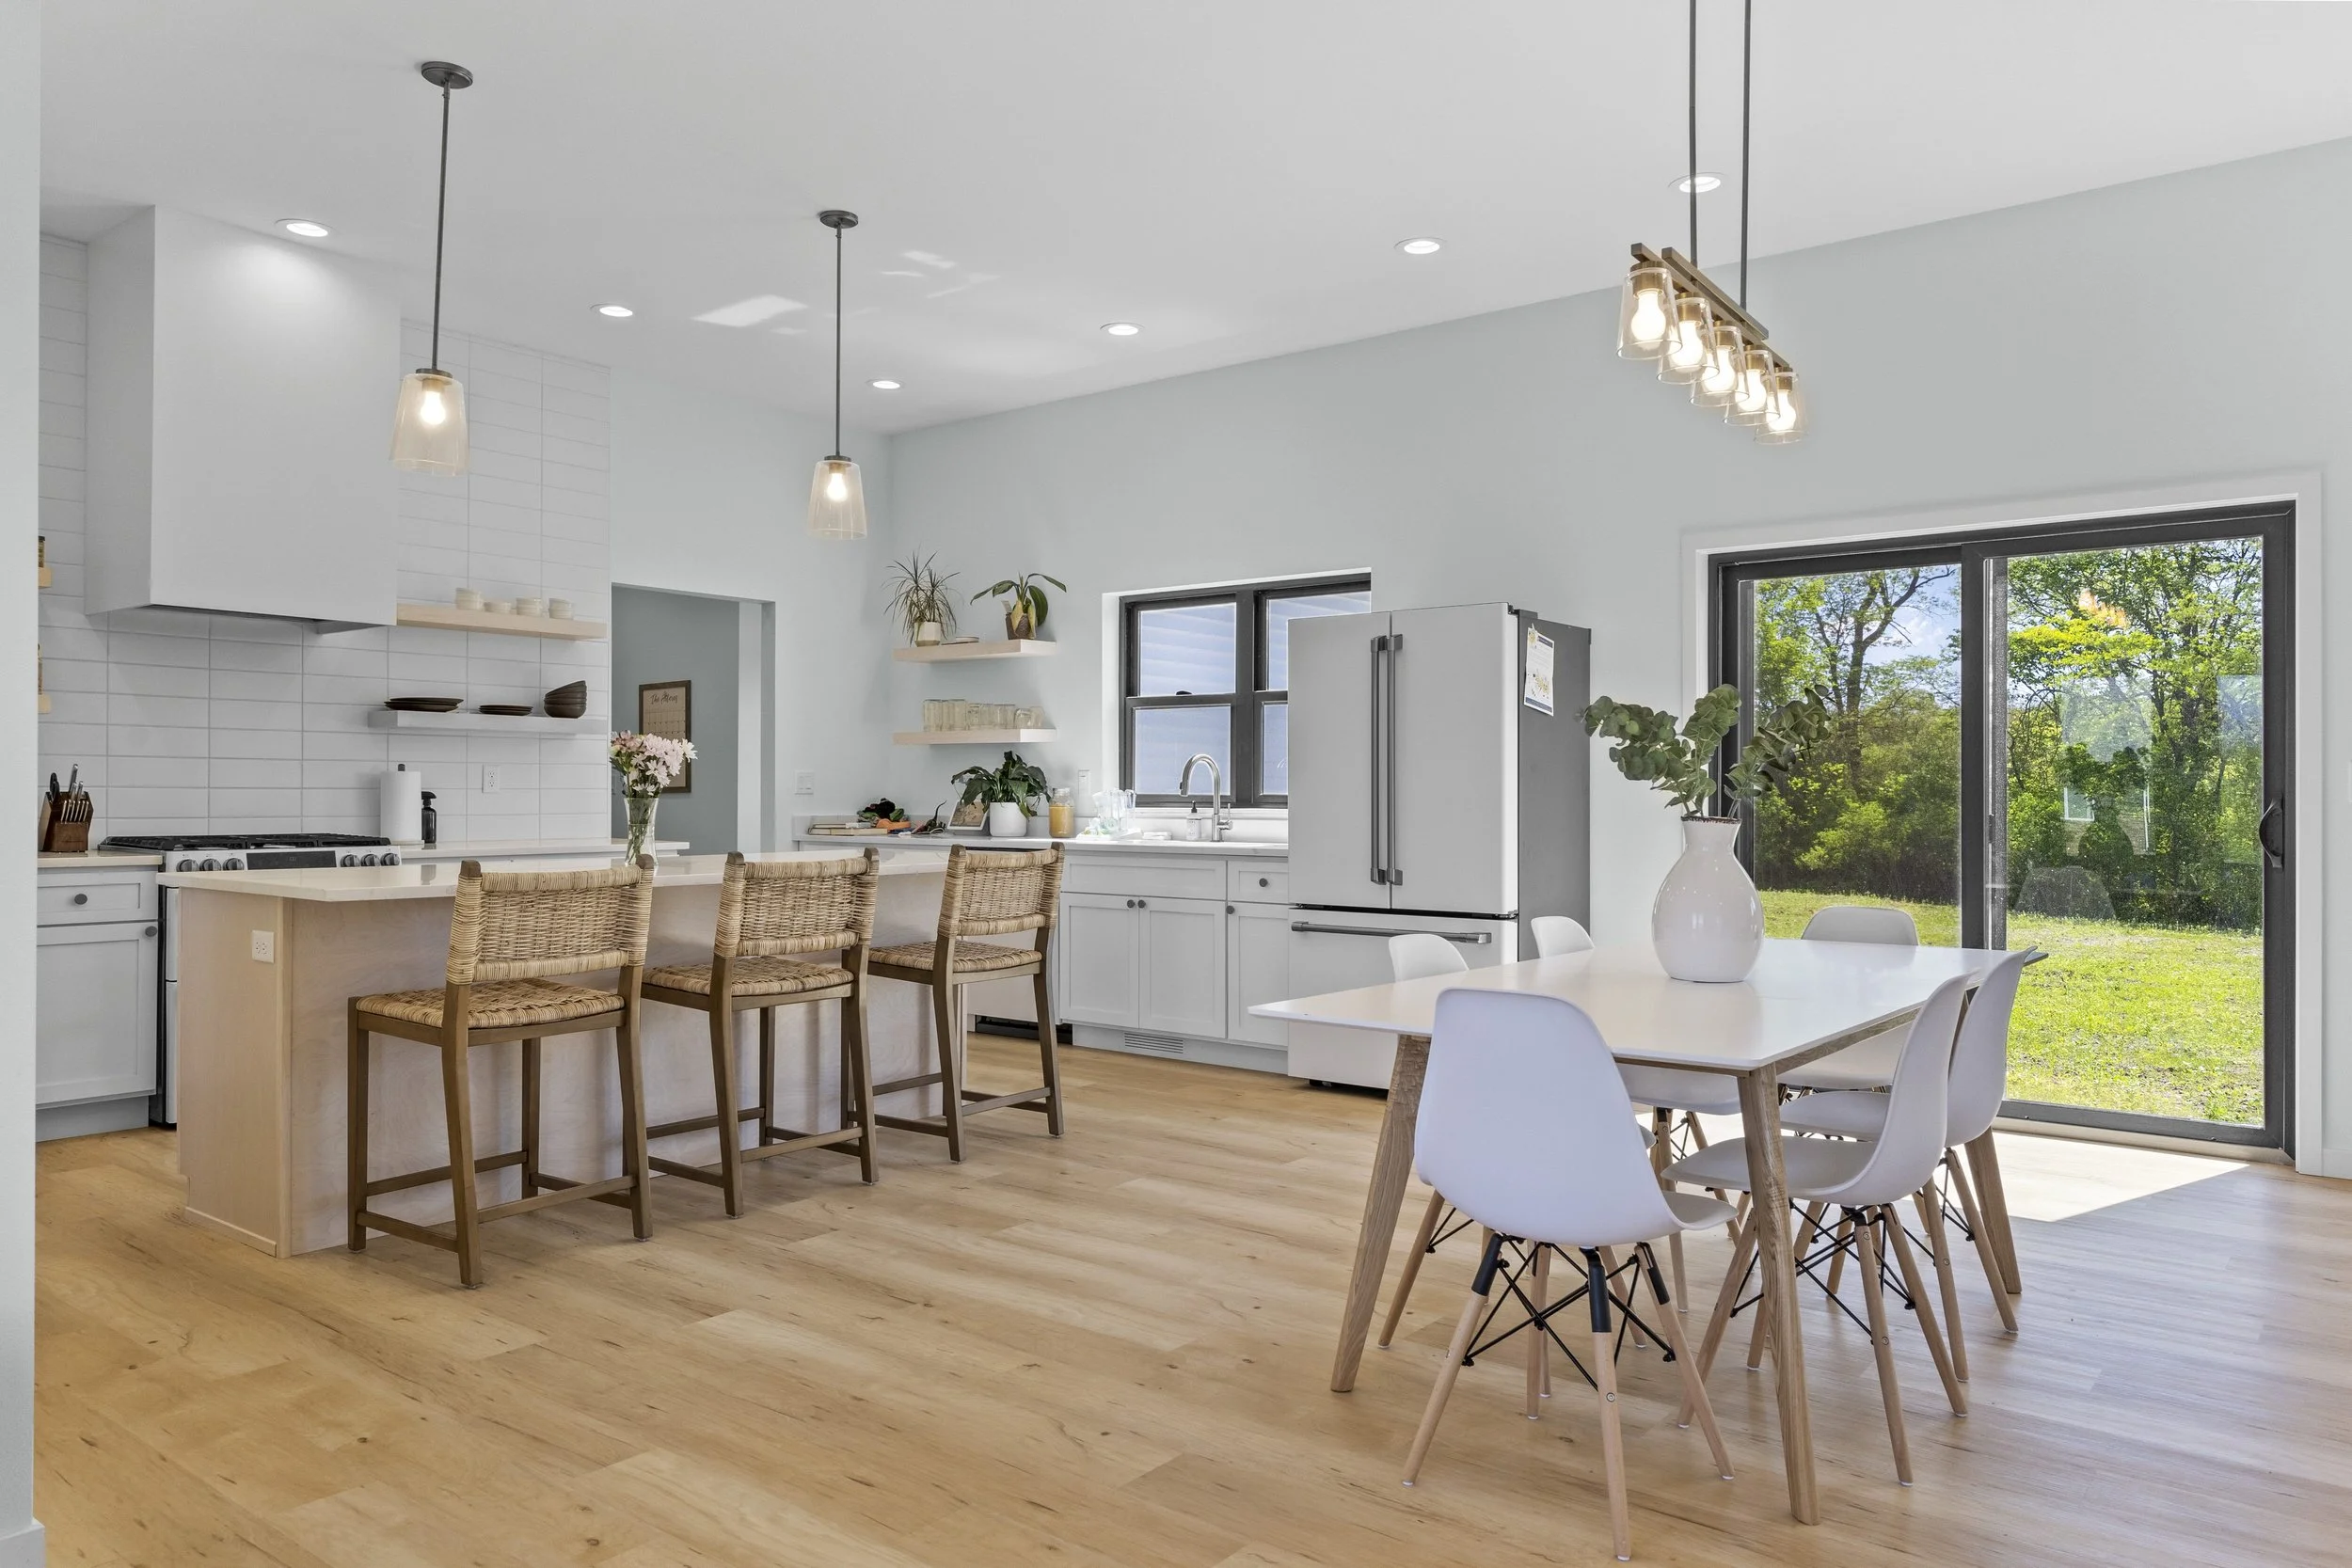
Let’s start with the kitchen…


Sink and stove in same position


There’s really nothing the same about this kitchen other than a few of the appliances, everything else is new. We kept the kitchen the same size and roughly the same layout, but this new space is much brighter with an added window and lots of lighting!
Here’s another before and after set…the upstairs bedrooms!

Bedroom 1 before…

Bedroom 1 after

Bedroom 1, second angle

Bedroom 1, second angle

Bedroom 2 Before

Bedroom 2 After
These bedrooms both received new windows, flooring, paint, doors, trim, electrical, and some drywall. The photos from the first bedroom show the new set of stairs and new railing as well. New stairs were essential, as the previous stairs were no where near the correct size, but there weren’t building codes 120 year ago!
The living room was part of the original structure that was kept intact during demolition, and we really wanted to keep as much of the home's character as possible. We tore off multiple layers of ceiling, added all new drywall, windows, electrical wiring and fixtures. We also took up the flooring and sanded down decades of carpet glue and stain. These next photos show the transformation of the living room, which is one of my favorite parts of the home.
We kept the same door in the same place, for reference.


Next up is the main bathroom, which was also serving as the laundry room. We moved the laundry into the (newly added) master closet, and this room got to return to single function status after it was torn down and rebuilt, of course.


Last but not least, the exterior. You might notice no window air conditioners in the after photos….that’s because this home finally has central air. I’m not sure how previous owners managed the sweltering Iowa summers for 120 years with no air!

Front view

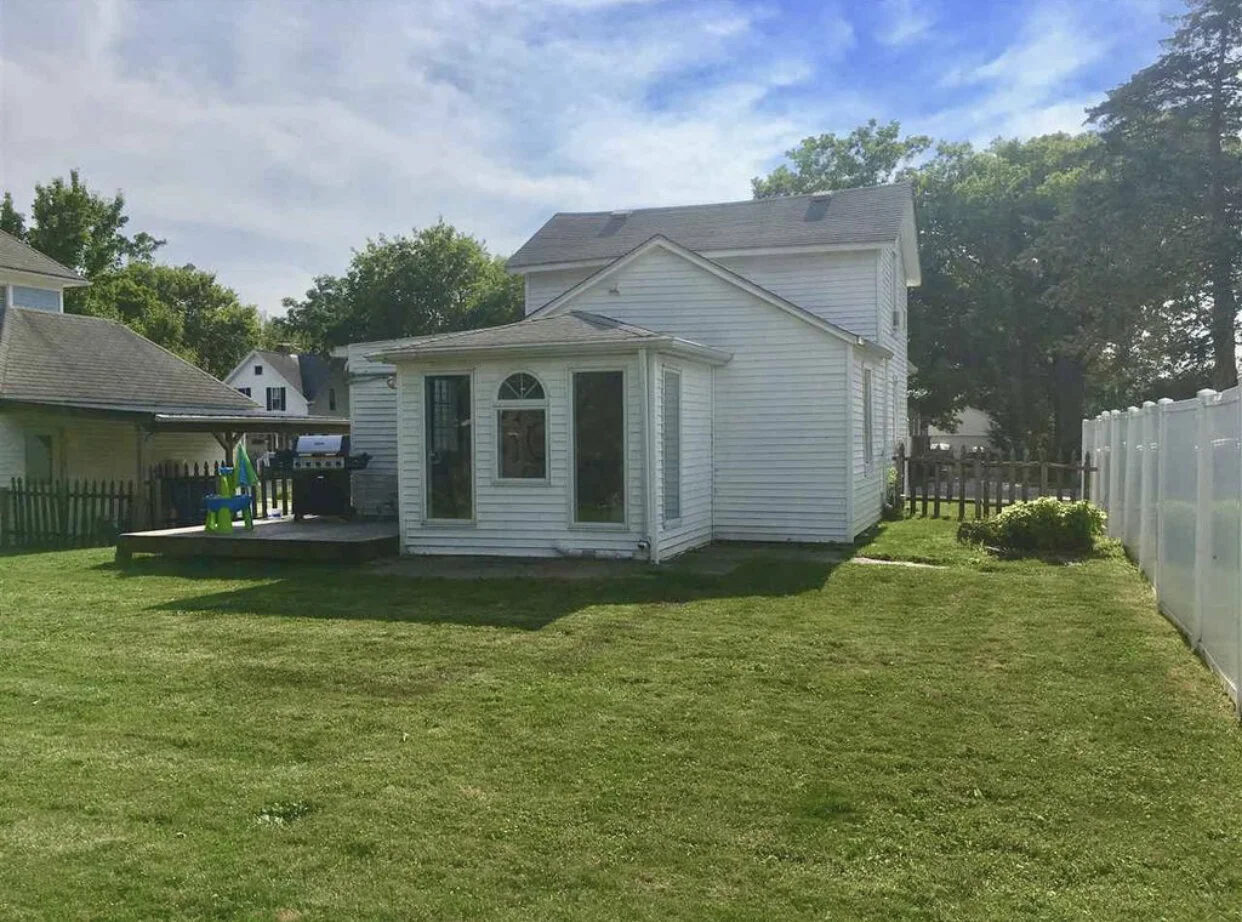
Back View

New Back view, with deck! (and central air!)
It was a long 9 months, but it was all worth it in the end. Throughout the renovation process, we had neighbors stop by almost every single day and express how happy they were to see this older home in the heart of their community get the help it needed to see its next 120 years. We even had a person stop by that used to live in the home in the early 2000s, she was amazed at how far it had come since then.
These encounters with the community members were so heartwarming, and often the motivation we needed to get through another 16 hour or 100 degree day (or both!).
Last week it was time to see this house off to its new owners, and while it was almost sad to pass the keys along, it was also very rewarding. It’s in good hands.
Our ‘inspector’ even gave her final seal of approval!


What’s next for us?
Well as you can imagine this project took up most of our free time, but now that it’s completed we have a few other small things in the works, along with some storm damage repairs from our most recent natural disaster. In October we officially will own our acreage, which will bring on another list of projects. It’s going to be a down-to-the-wire finish for us to complete everything before winter but we wouldn’t have it any other way.
Stay safe out there and we will chat soon!
-Rachael
DIY Gas Pipe Kitchen Shelving
Hi friends!
Today I have a fun DIY for the kitchen, gas pipe shelving! I know the open shelving trend has been around for a while now, and personally my kitchen cabinets are not organized enough to have the contents visible, but I do enjoy the open look. Recently, we installed gas pipe shelving for the kitchen at the farmhouse project (which is allllmost done!) and I took a few quick photos to show you the process, in case anyone else has been thinking of tackling this type of project. Y’all know I am a fan of all things budget friendly, and this project falls right in line with that! Let’s get to it….
PREP:
Honestly, the worst part about working with gas pipe, is taking all the stickers and adhesive off. The pipes are greasy, and I swear they use some extra adhesive to stick the purchase labels on them. For this project, we used the 1/2 inch version of pipe that can be found at any hardware store, and picked up the corresponding wall plates and end caps as well.

After prepping all of the materials, it’s time to measure out and mark the wall. Traditional cabinets sit about 22 inches off of the counter top surface, so that is the height we used for the bottom shelf. A stud finder is a must, as these shelves will carry some weight!
For the top shelf, we just spaced it 12 inches higher, as that is the height I thought looked the best with the remaining wall space available. Each shelf gets two support pipes, and placement of each of the wall plates was marked in pencil on the corresponding stud.
INSTALL:
The next step is attaching the wall plates to the studs, and while the plates have four holes for screws to attach them, we have found it is best to use only two at this step since there is usually some amount of adjustment later on. The below picture is an example, as well as a photo of the type of screws that we use.


Once the wall plates are installed, it’s time to attach the gas pipe and end caps. This step is fairly straightforward, except make sure to not over-tighten the pipe to the wall plate.
Now it is time to level up the shelving, so the wood pieces lay flat and dishes don’t lean or fall. For this shelving we used a 6 foot level, but you can use whatever size works for your project. I would say the most tedious part of installing this type of shelving, is making sure they are level. Some wall plates will need to be adjusted by tightening or loosening the screws, or even moving them a quarter of an inch or so. I tend to be very particular for kitchen shelving, and less with shelving for other purposes, but it is up to your personal preference. Either way this step is not difficult, just a bit time consuming.

Once all of the shelves are level, this is the time to add in the additional screws to the wall plates, if that is your preference.
The final step is adding the wood pieces to span the gas pipes, and complete the shelving. Another quick check of the level, and you are all done! Here is a picture of how this project turned out.

We chose open shelving for the kitchen at the farmhouse project mostly due to the fact the kitchen is pretty small, and would look pretty cluttered with full upper and lower cabinets. There is still plenty of enclosed storage, for all those appliances or bulky items.
We have a different style of gas pipe shelving in our personal home, which is used to display my collection of vintage glass bottles. Overall, the process is the same.
Here is a photo of the other style:

I just want to wrap up this post thanking each of you for being here and supporting us! I feel like 2020 has really thrown everyone’s plans for a whirlwind and we just have to learn to keep adapting to the changes and challenges presented to us (sometimes daily).
Also, I have been really itching to get back into the DIY’s lately (I feel we got away from them a bit over the last year) so feel free to shoot me a message or comment if you have something specific you have been looking for. I hope everyone is doing well, and I will chat with you again soon!
Cheers!
Rachael
Farmhouse Renovation: Month 4 Update
If you are new here, we bought a c.1900 Iowa farmhouse roughly 4 months ago and promptly took a bulldozer to a large portion of it. Over the last couple of months we have completely updated what remained of the original structure, and added on a large addition (for some much needed square footage).
I have posted several updates thus far, but this is the one I have been waiting for!
This is the first update where the layout of the house is easy to understand, since the walls are complete with drywall. Not everyone can look at a room full of stick walls and picture the final product, and I have tried to take that into account when posting in the past, but now everything will be quite easy to picture!
Ok lets start in the kitchen….
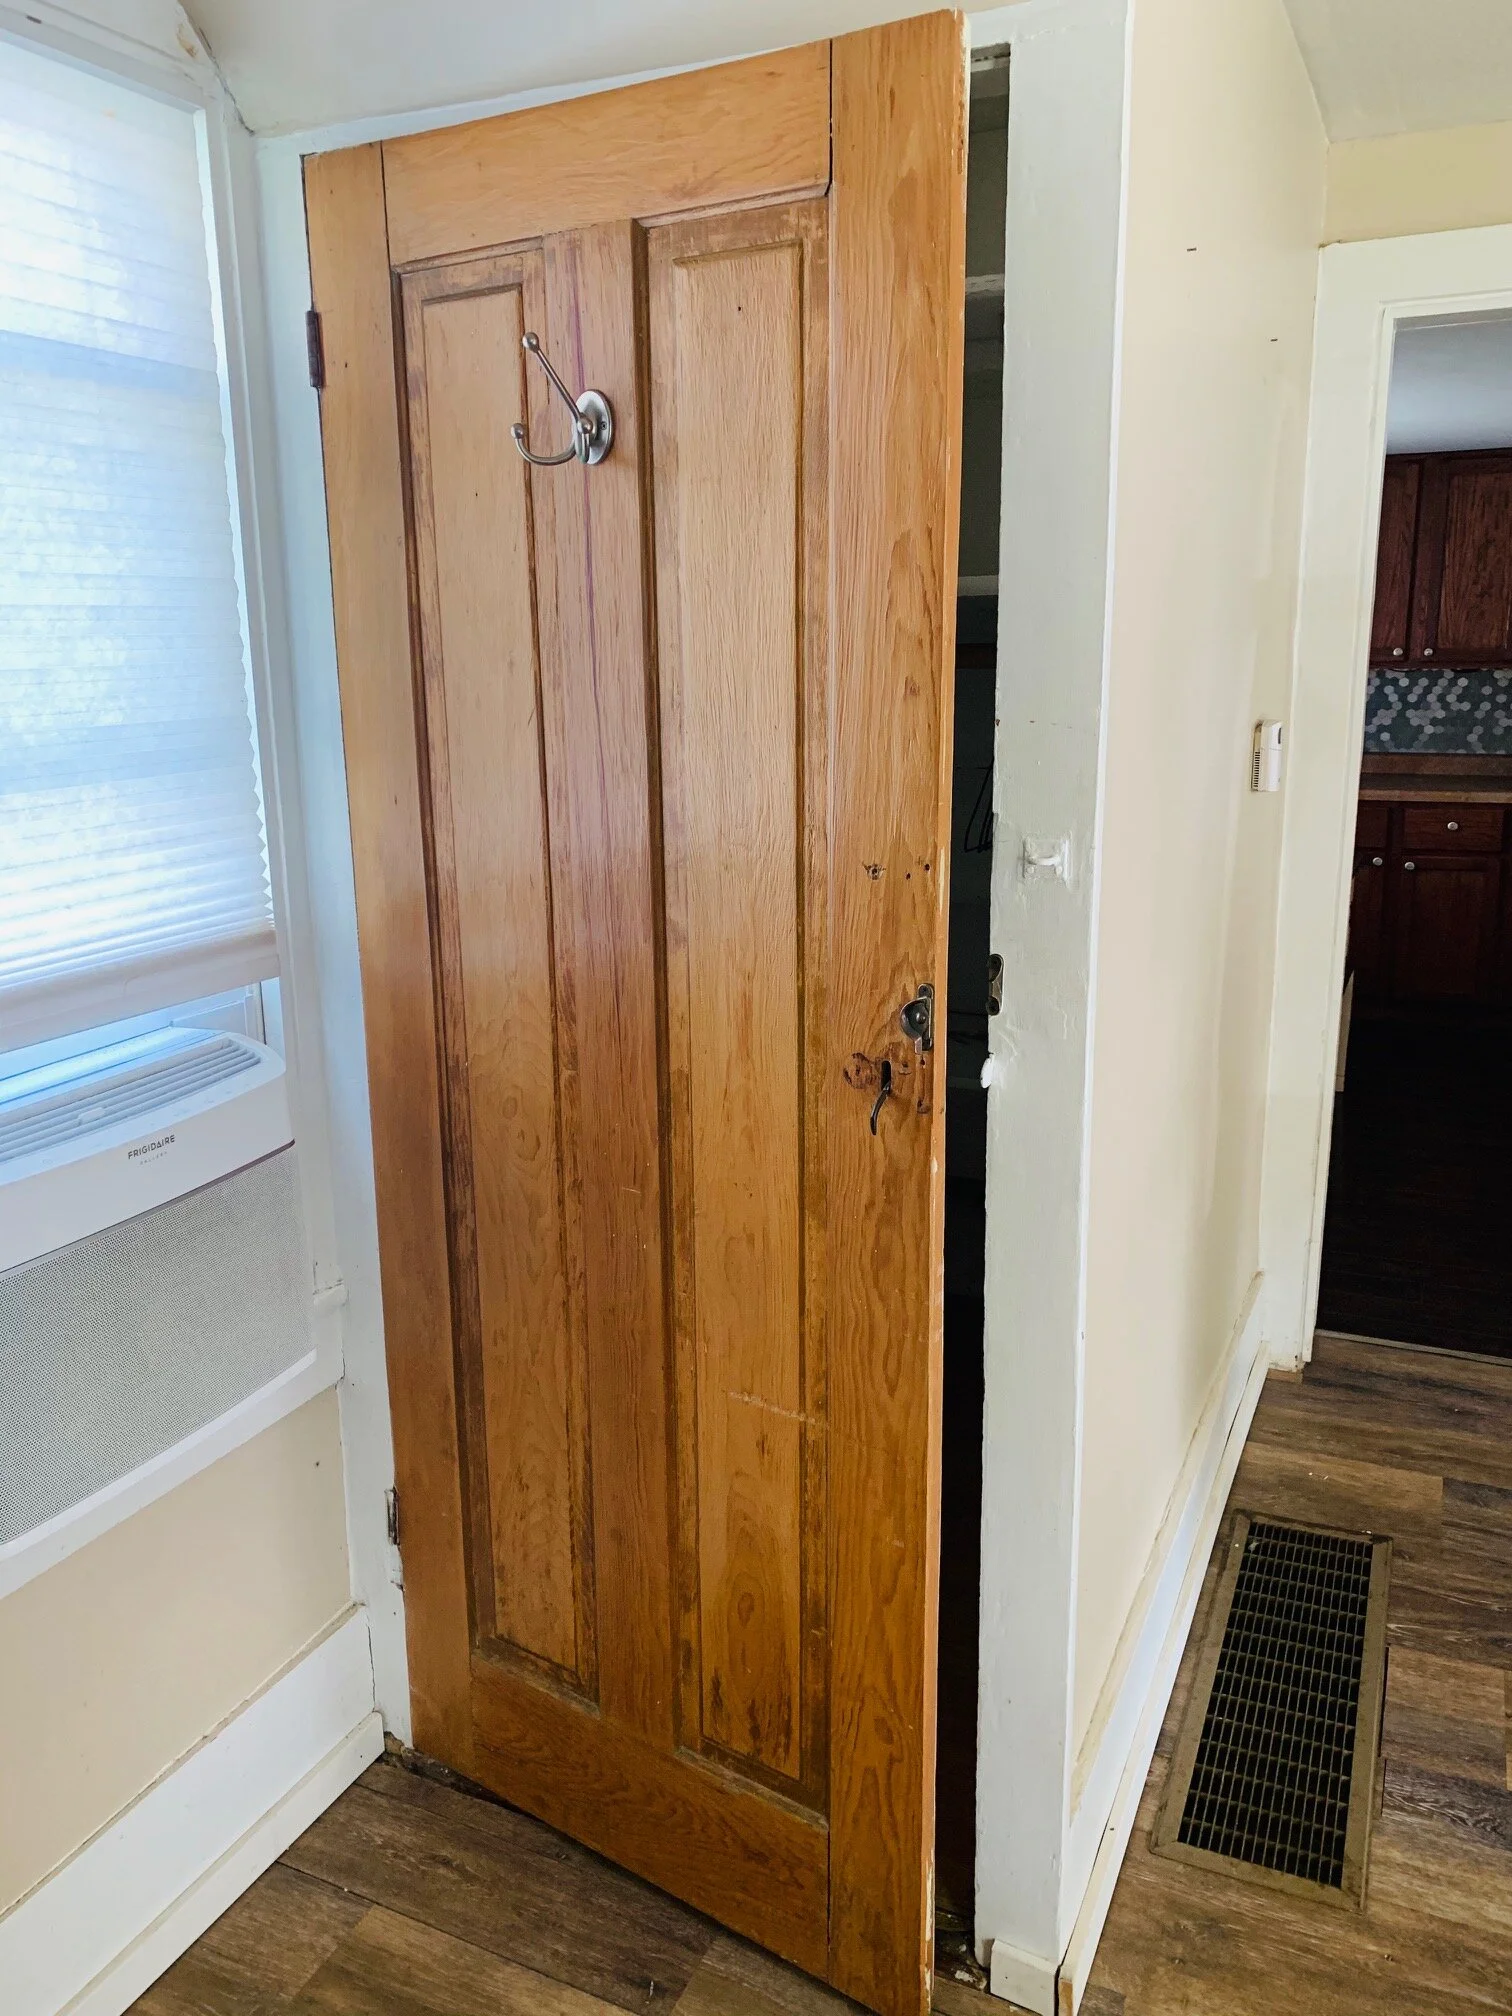
Here’s a throwback photo of the previous kitchen. Adam is 6 foot 4 in tall and he could barely walk underneath the pendant light fixture in the middle of the room without hitting his head. This was due to a significant bow in the trusses, as they could not support the proper amount of weight. Also, check out how close the top of the door frame to the bathroom is…just an inch or two!

Below is a picture of the new kitchen, with a properly installed 8 foot ceiling! The opening on the far left is the same door to the bathroom pictured above, however this time around it has over a foot of clearance between the top of the door frame and the ceiling.

Moving on to the stairs….
You will notice that new the steps are no longer steep, and are also a normal size. In addition, we have a large window at the top of the stairs now, that provides a source of natural light but also serves as an added safety function, should someone need to evacuate out of the second floor for any reason.

I recently caught a photo of our mini inspector checking out the window at the top of the stairs…


The last photo I have for you is of the new master bathroom. The original structure had no master suite, so I have no before photo to share! And while this bathroom is not extravagant by any means, it adds value and much needed space.
Alright, that’s all I have for you today! I am excited to see what the next update brings, as we can start putting our personal touch on the project with paint and flooring, etc. Since we work on the farmhouse in our spare time, and both have other full time jobs and 2 year old child, sometimes things take longer to finish than we would prefer. It’s all about balance, and we are still figuring that out as we go.
Thank you for stopping by the blog today, and we look forward to catching up with you again soon! In the mean time, feel free to follow us on Instagram or Facebook :)
Until next time,
Rachael
Farmhouse Renovation: Month 3 Update
It’s time for another update on the farmhouse renovation project!
For anyone new here, we purchased a c.1900 Iowa farmhouse 3 months ago and promptly tore down a large (sagging) section and have been putting it back together ever since. This has definitely been an interesting project, mainly due to there not really being any building codes or rules to follow 120 years ago, so we have had to allow for extra time (and money) to accommodate unforeseen things along the way….(hello super scary/non supported second floor…i’m looking at you!)
Enough on the recap, let’s get on to the accomplishments for the month….
New this month:
-All Plumbing
-Furnace and all duct work
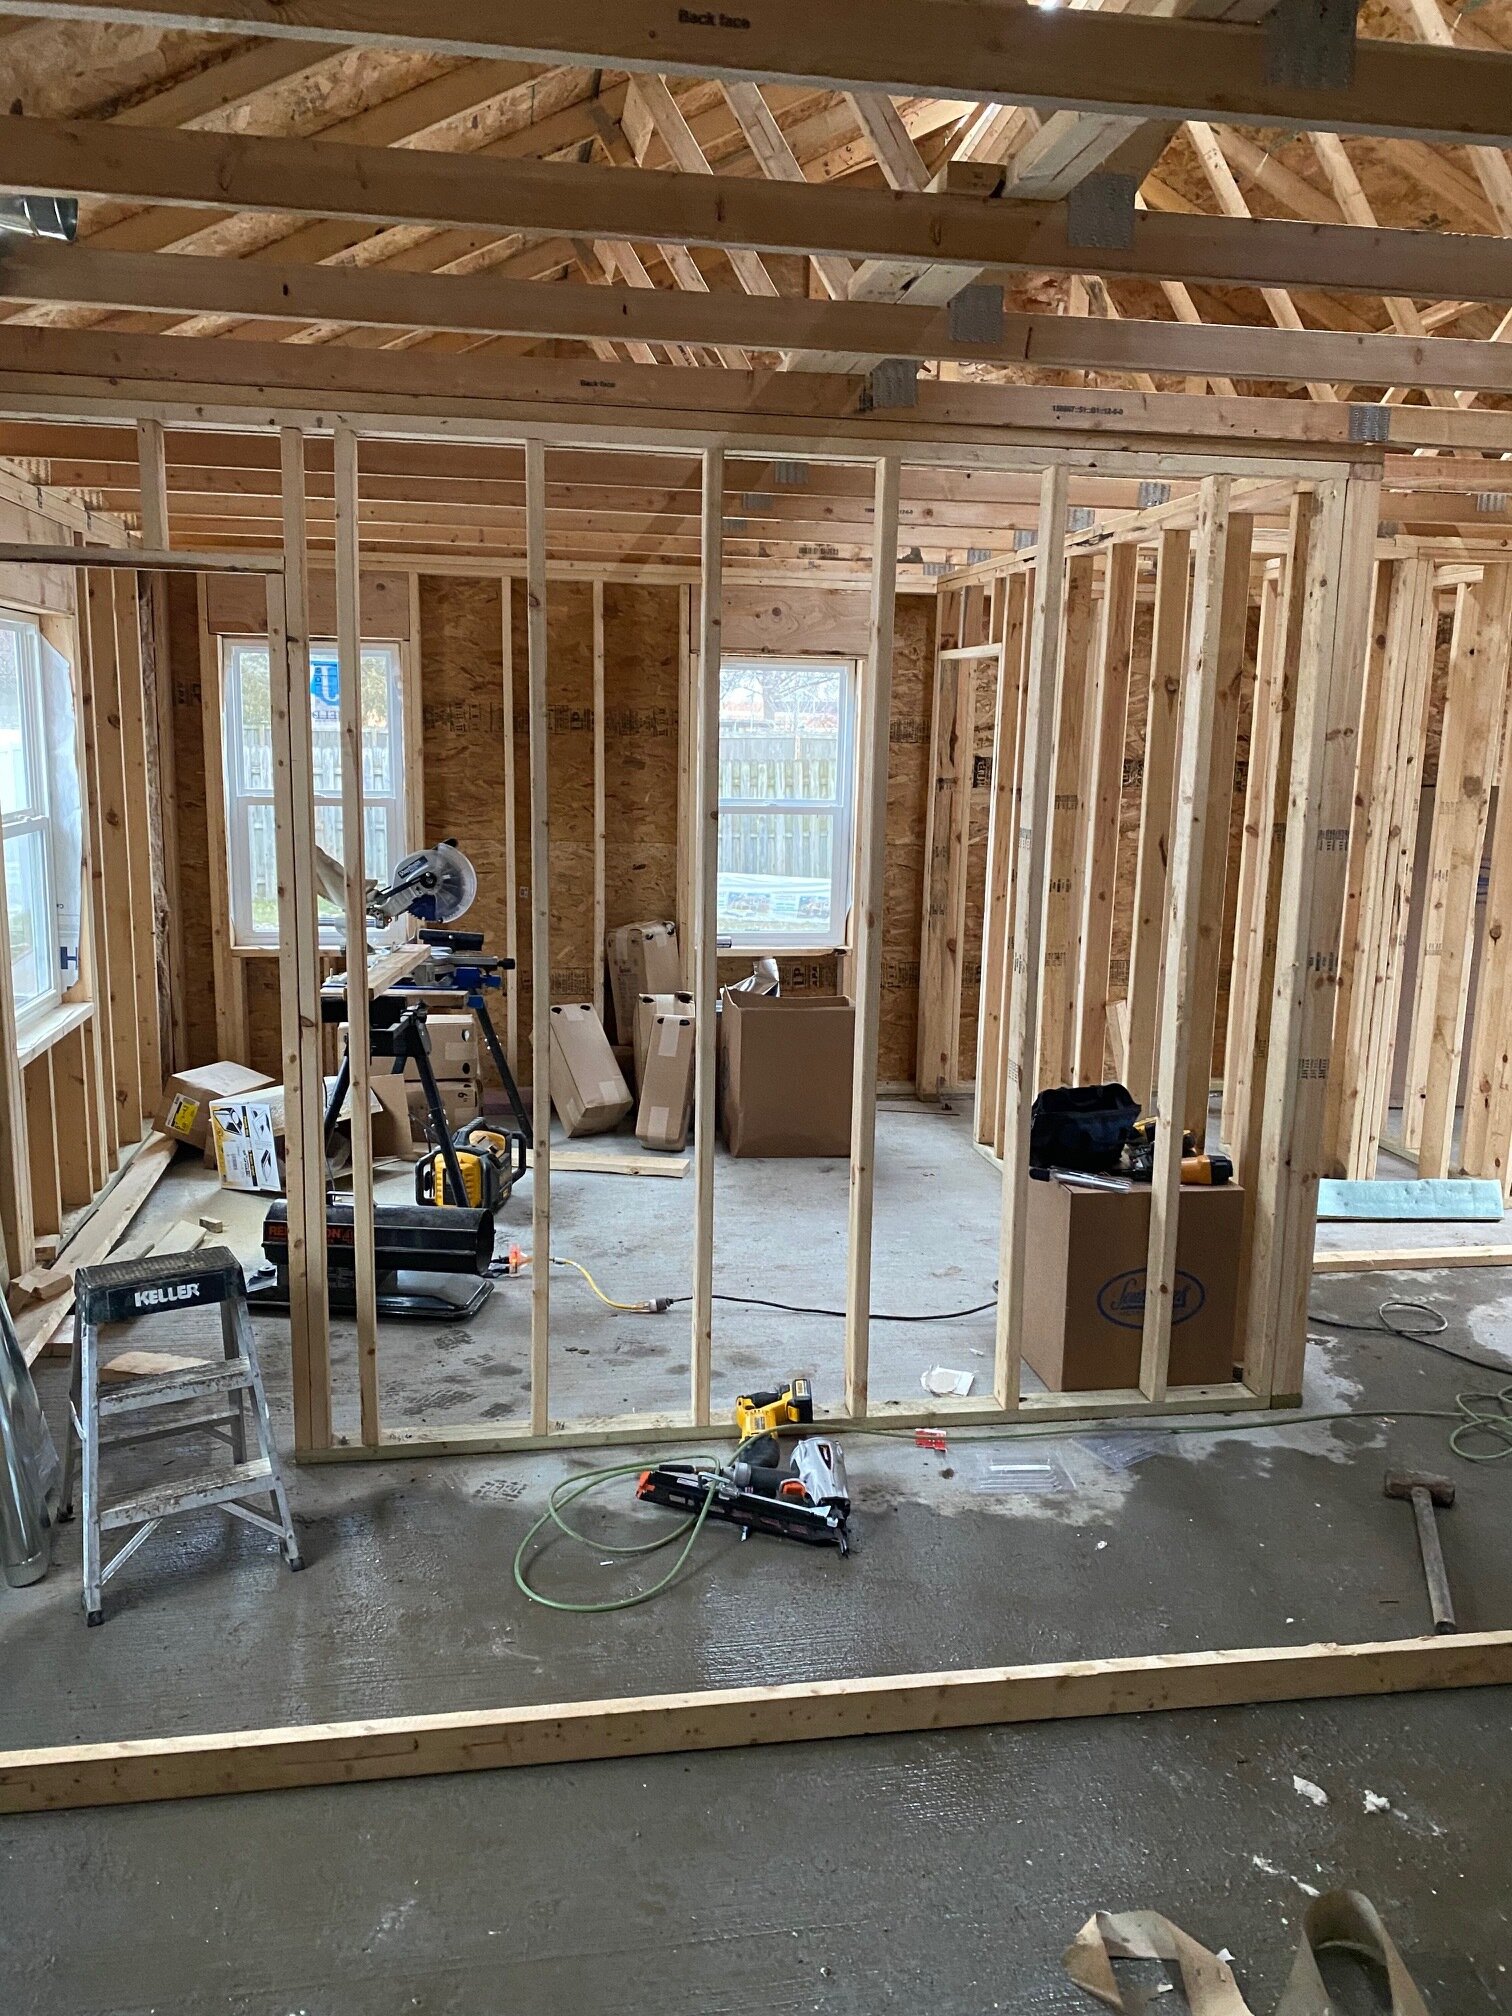
-Interior walls framed up
-All windows replaced
-Almost all the siding torn off original structure, and new OSB and tyvek paper
-All electrical wired up and ready
-A functioning set of stairs
Here are a couple photos showing the updates…

This photo is from the front porch, looking at the front door

The porch view after new walls and windows!
The above photos show just how extensive this renovation has become. Was it in the original plan to tear everything out to the studs? No. However, we needed to replace the improperly installed windows and that meant tearing off all the siding out front. The insulation and sheeting weren’t up to par and not really functioning, so they all had to go too.
Now, this means more work and increased cost, but we would rather spend a few more dollars up front and not have to worry about issues down the road. Plus, this is Iowa so we can’t have poor insulation and improperly installed windows or utility bills will be very high.


We have repeated this same process, section by section, for the entire house. Only one small part remains, and that will be done shortly. It’s particularly time consuming to do this all in January, but that’s what we have to work with at the moment. I mean, icy scaffolding just makes things more interesting…right?
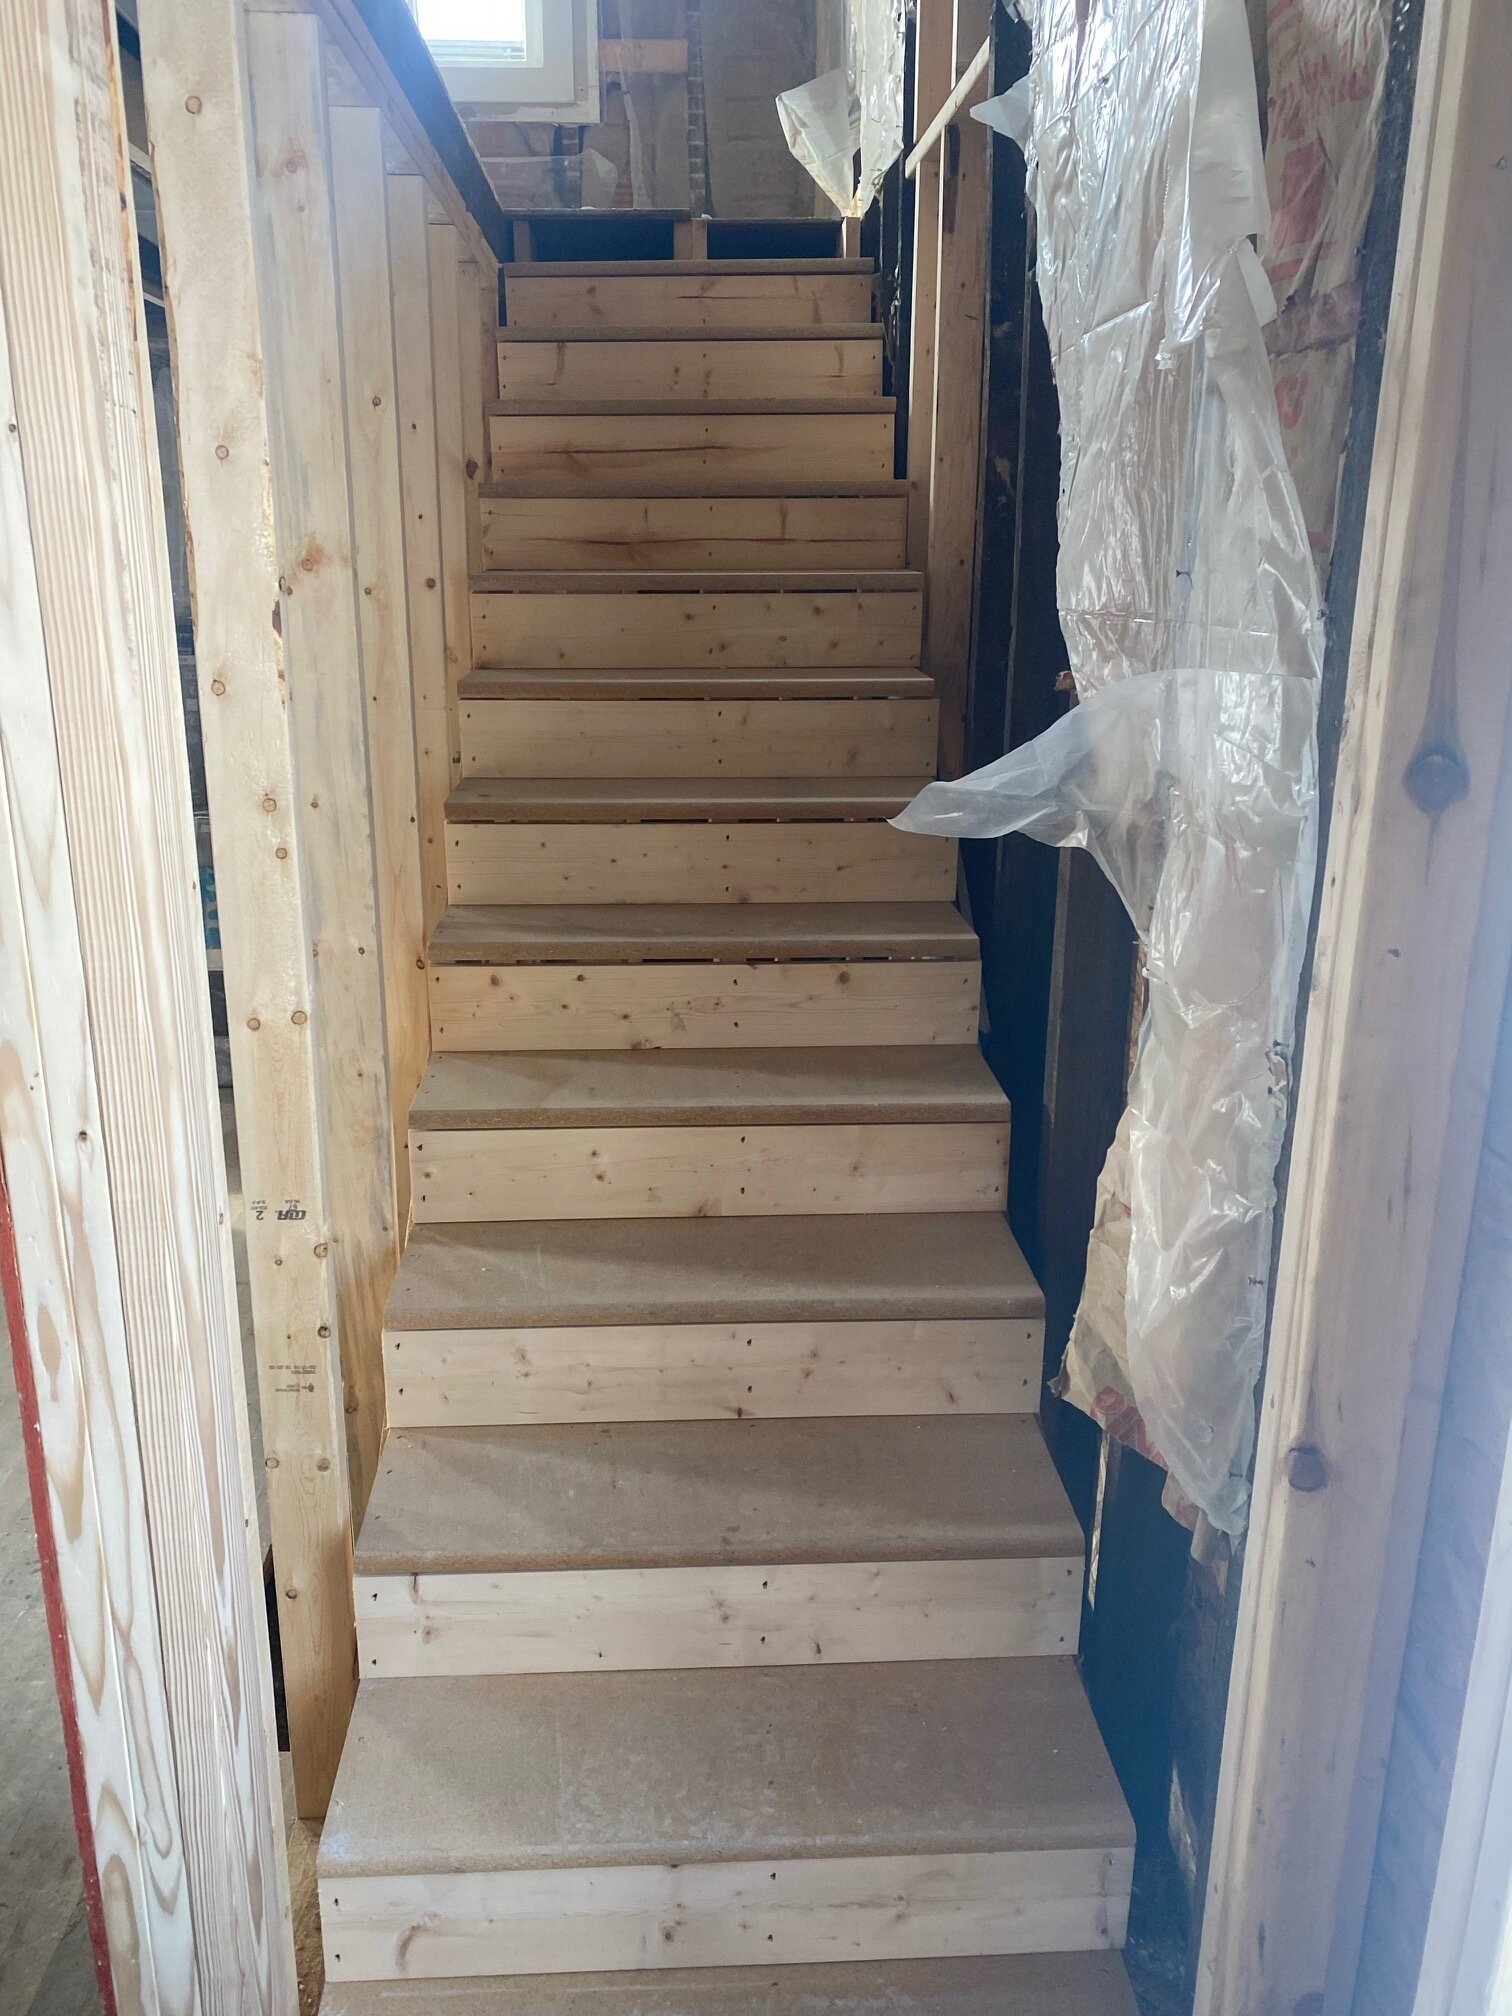

Next up, we have a fully functional and standard size flight of stairs to the second floor. Gone are the days of ducking your head and climbing super small and steep steps with no railing.
Speaking of the second level, we haven’t been up there for several weeks while there were no stairs, and I lost track of how much we have to do up there as well. Obviously the windows will have to be replaced (might as well do them all, right?) but the flooring and fixtures will need work too.
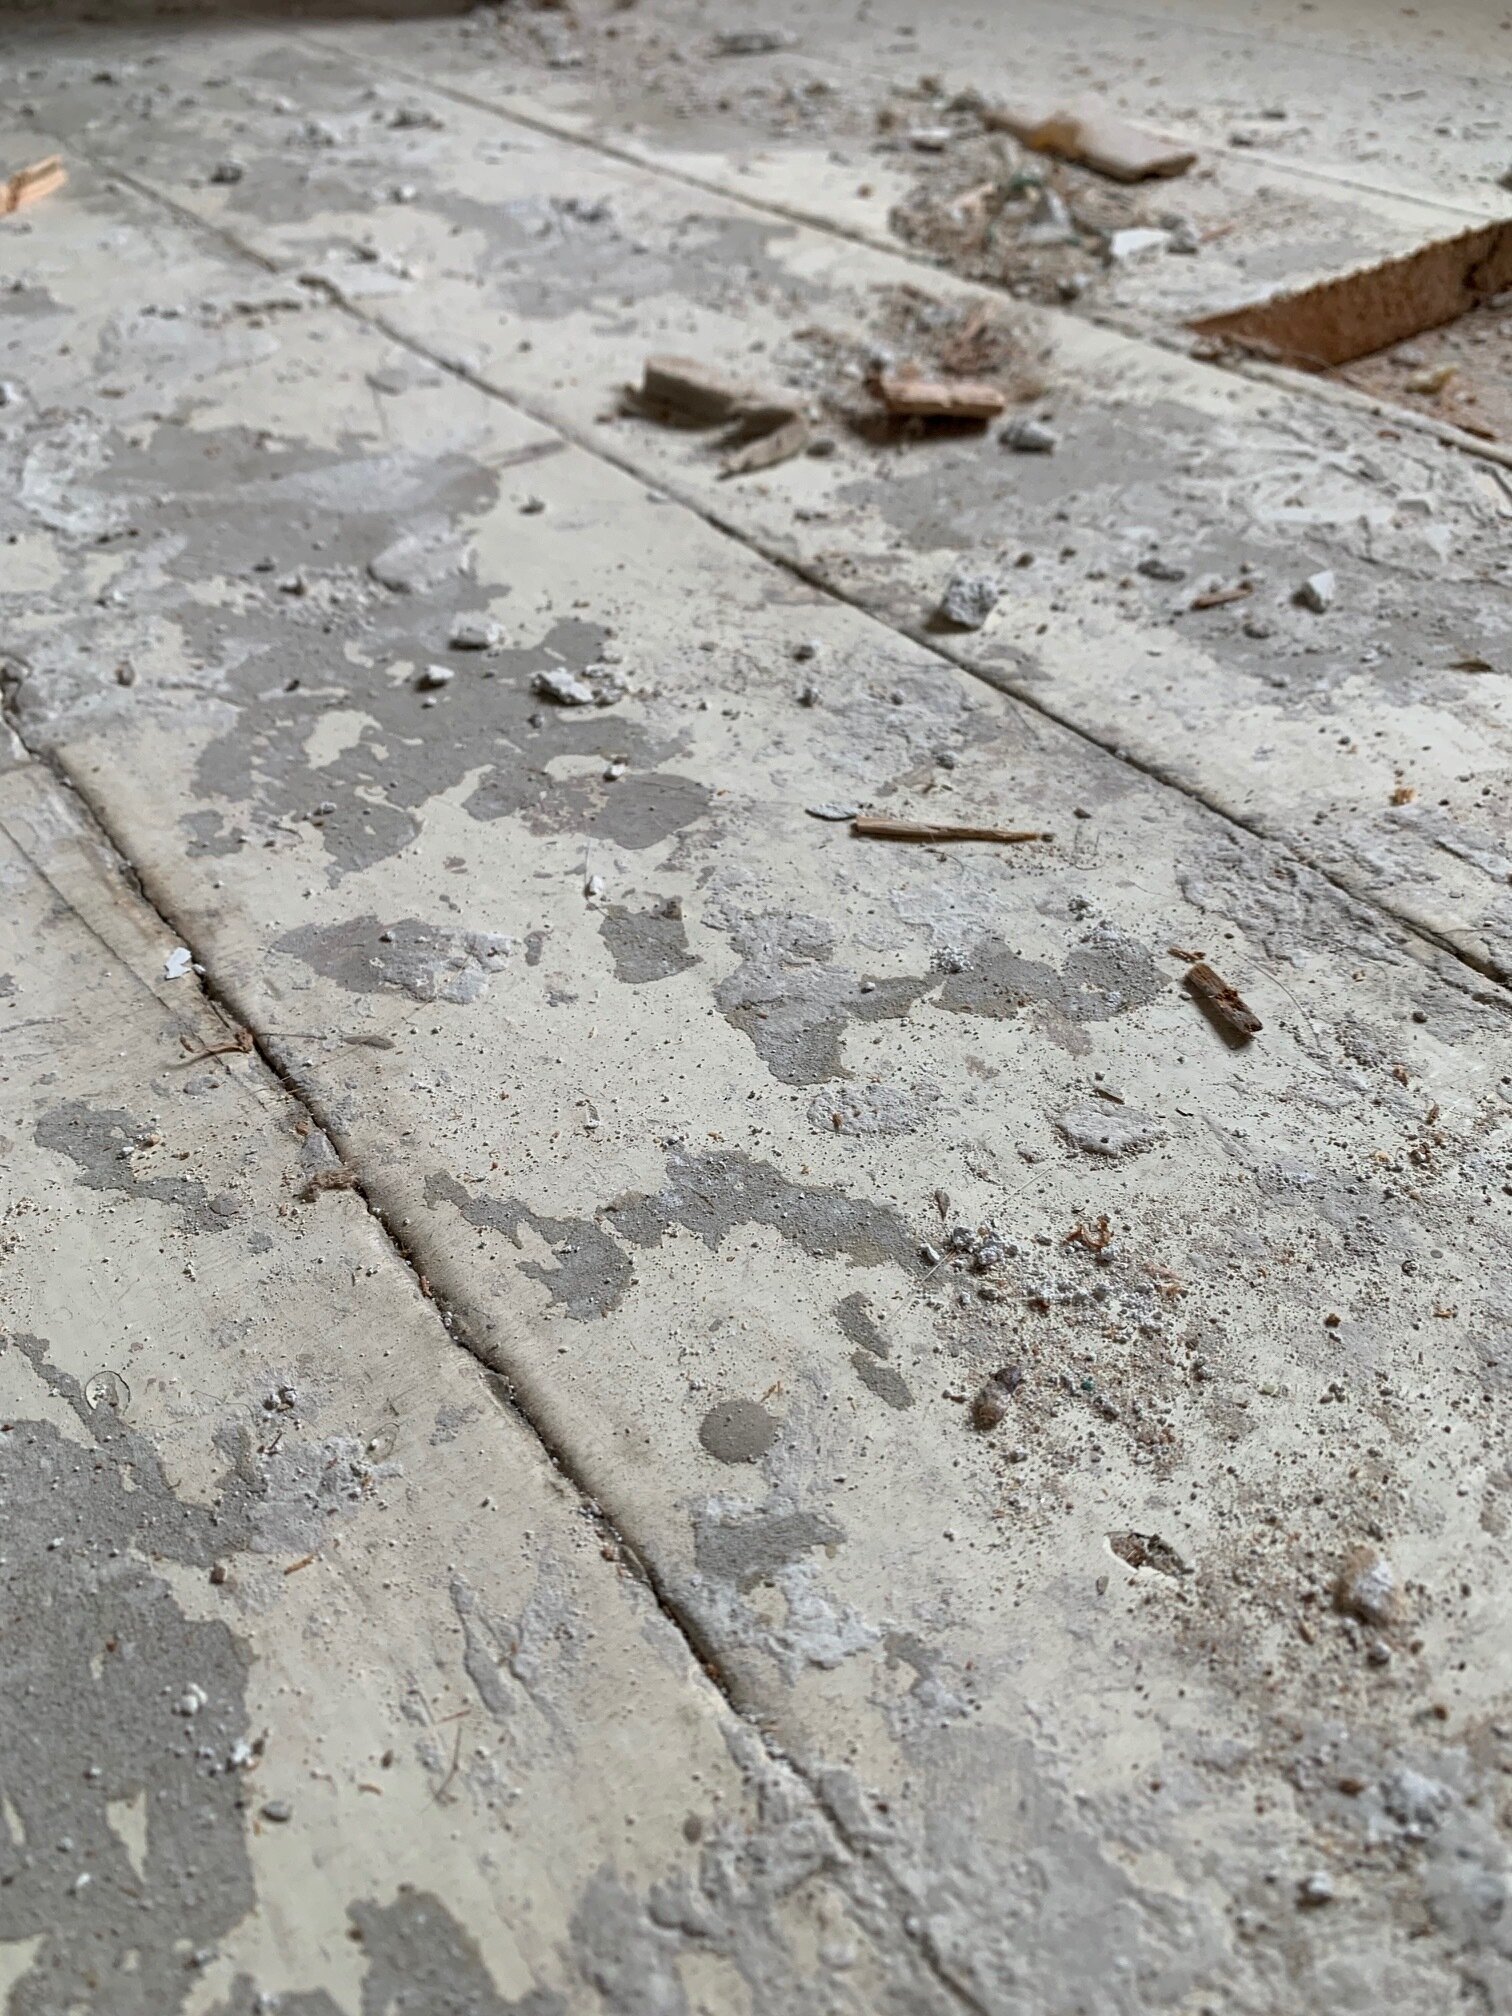

The first photo is of the (likely lead) painted original flooring, and we simply cannot sand that down and use it, for obvious reasons.
The next photo is a view from the stairs, and while things might not look too bad up here there is still a bunch of work to do. For example, the door to the second bedroom no longer closes due to the bracing and raising of the floor that was required in order to ensure it would not come down. We also need proper safety mechanisms such as smoke detectors, railings, and windows that are the required size, in case of emergency evacuation. These things can all be done now, since we can now access this part of the house!
As always, our daughter (who we call ‘the inspector’) is as involved as a two year old can be, and she loves to ‘help’. The weather in January has made this somewhat difficult but we work with it the best we can.

Helping dad with the front door

Giving her approval of the new stairs
That’s all I have for this update! I will leave you with a fun little before and after of the outside. As always, thank you for visiting the blog today, we really appreciate all of your support!
Cheers!
-Rachael


Farmhouse Renovation: Month 2 Update
Two months!
It’s been a little over two months since we purchased a 1900’s farmhouse, and then promptly took a bulldozer to a large section of it. We have since added back a large addition (almost 600 sq feet), to replace the torn down section and add some space.

Out with the old…

In with the new!
Since our last update about two weeks ago, we have the addition completely closed in from the Iowa elements, thanks in part to some amazing December weather. Now if we could just request some daylight after 430 pm…ha!
Now that the new part is enclosed, we were able to open up the wall separating the original section from the new addition, and it was the first time I had seen the old part since we boarded it up! Here are a couple photos…
View inside the new part

Looking into the original part of the farmhouse
Opening up the walls and ceiling of the original section of the home presented it’s own challenges, including 120 years of dirt and grime. Oh and about 3 layers of ceiling in the old living room! Here are a couple before shots…


Tearing into this section was not exactly in the original plan, but in order to update the electrical correctly and put new heating and air duct work in we decided to take it all down. There’s always that one moment in the home improvement shows where something goes wrong, and the owners are left with a decision on how to proceed, and for us it was this ceiling and what was underneath it.
I already mentioned there were a ton of layers to the ceiling, and this left us with quite a mess, but a more alarming issue was how the second floor was being (sort of) supported. The picture below on the right shows ONE board, that is kind of in a notch, and that was what held the floor joists for the second floor. One board, folks!
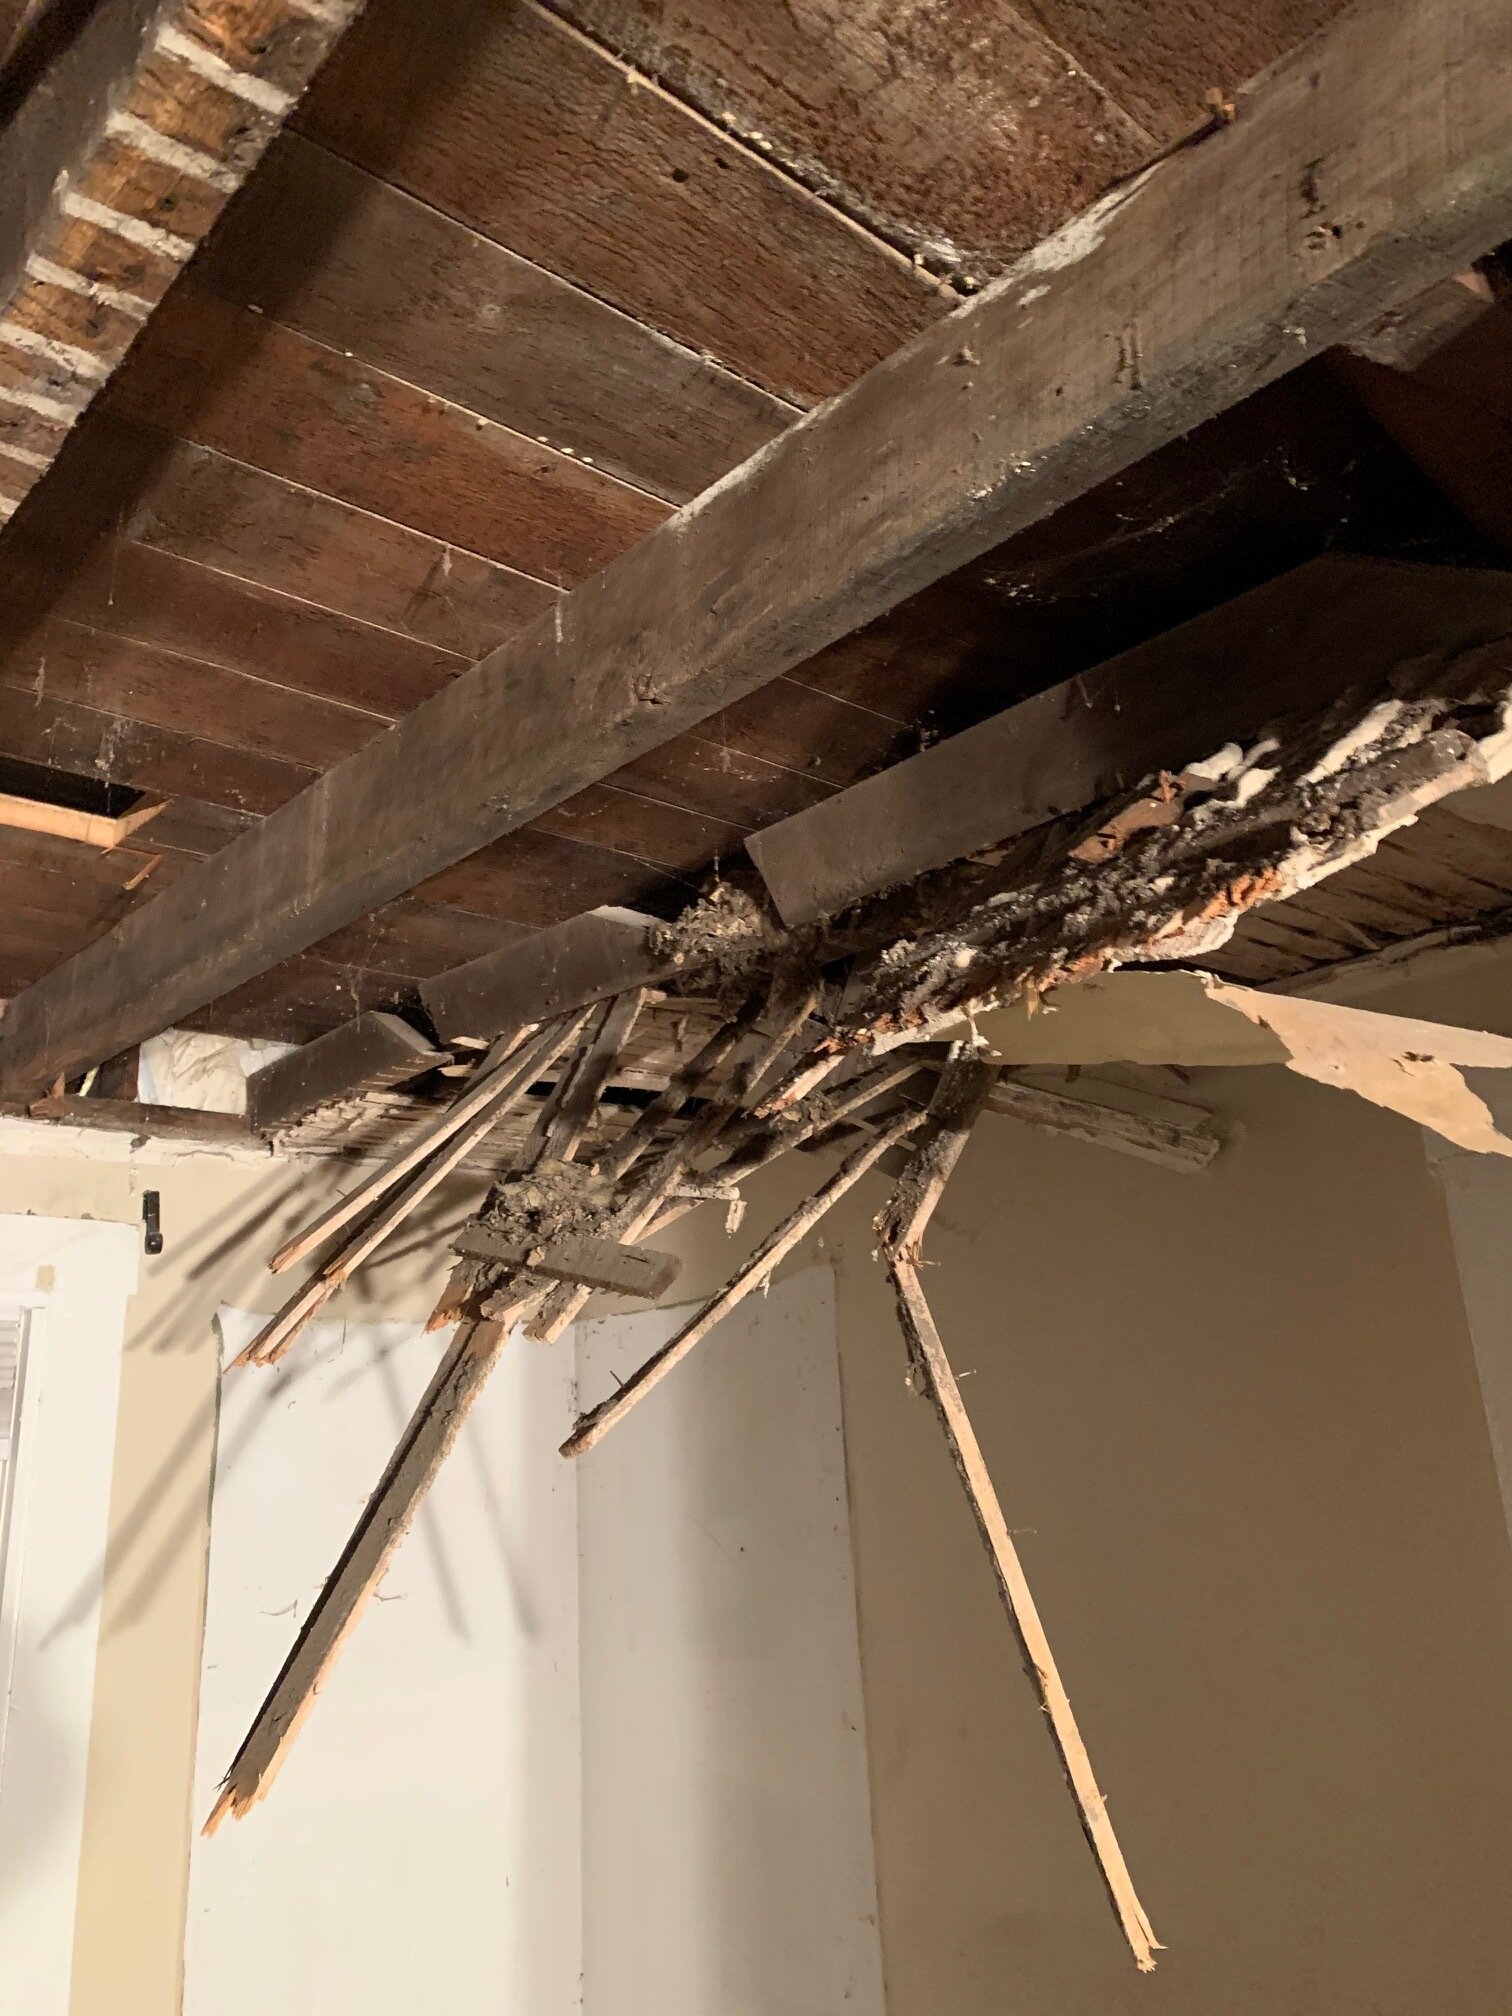
Lots of layers to the ceiling here!
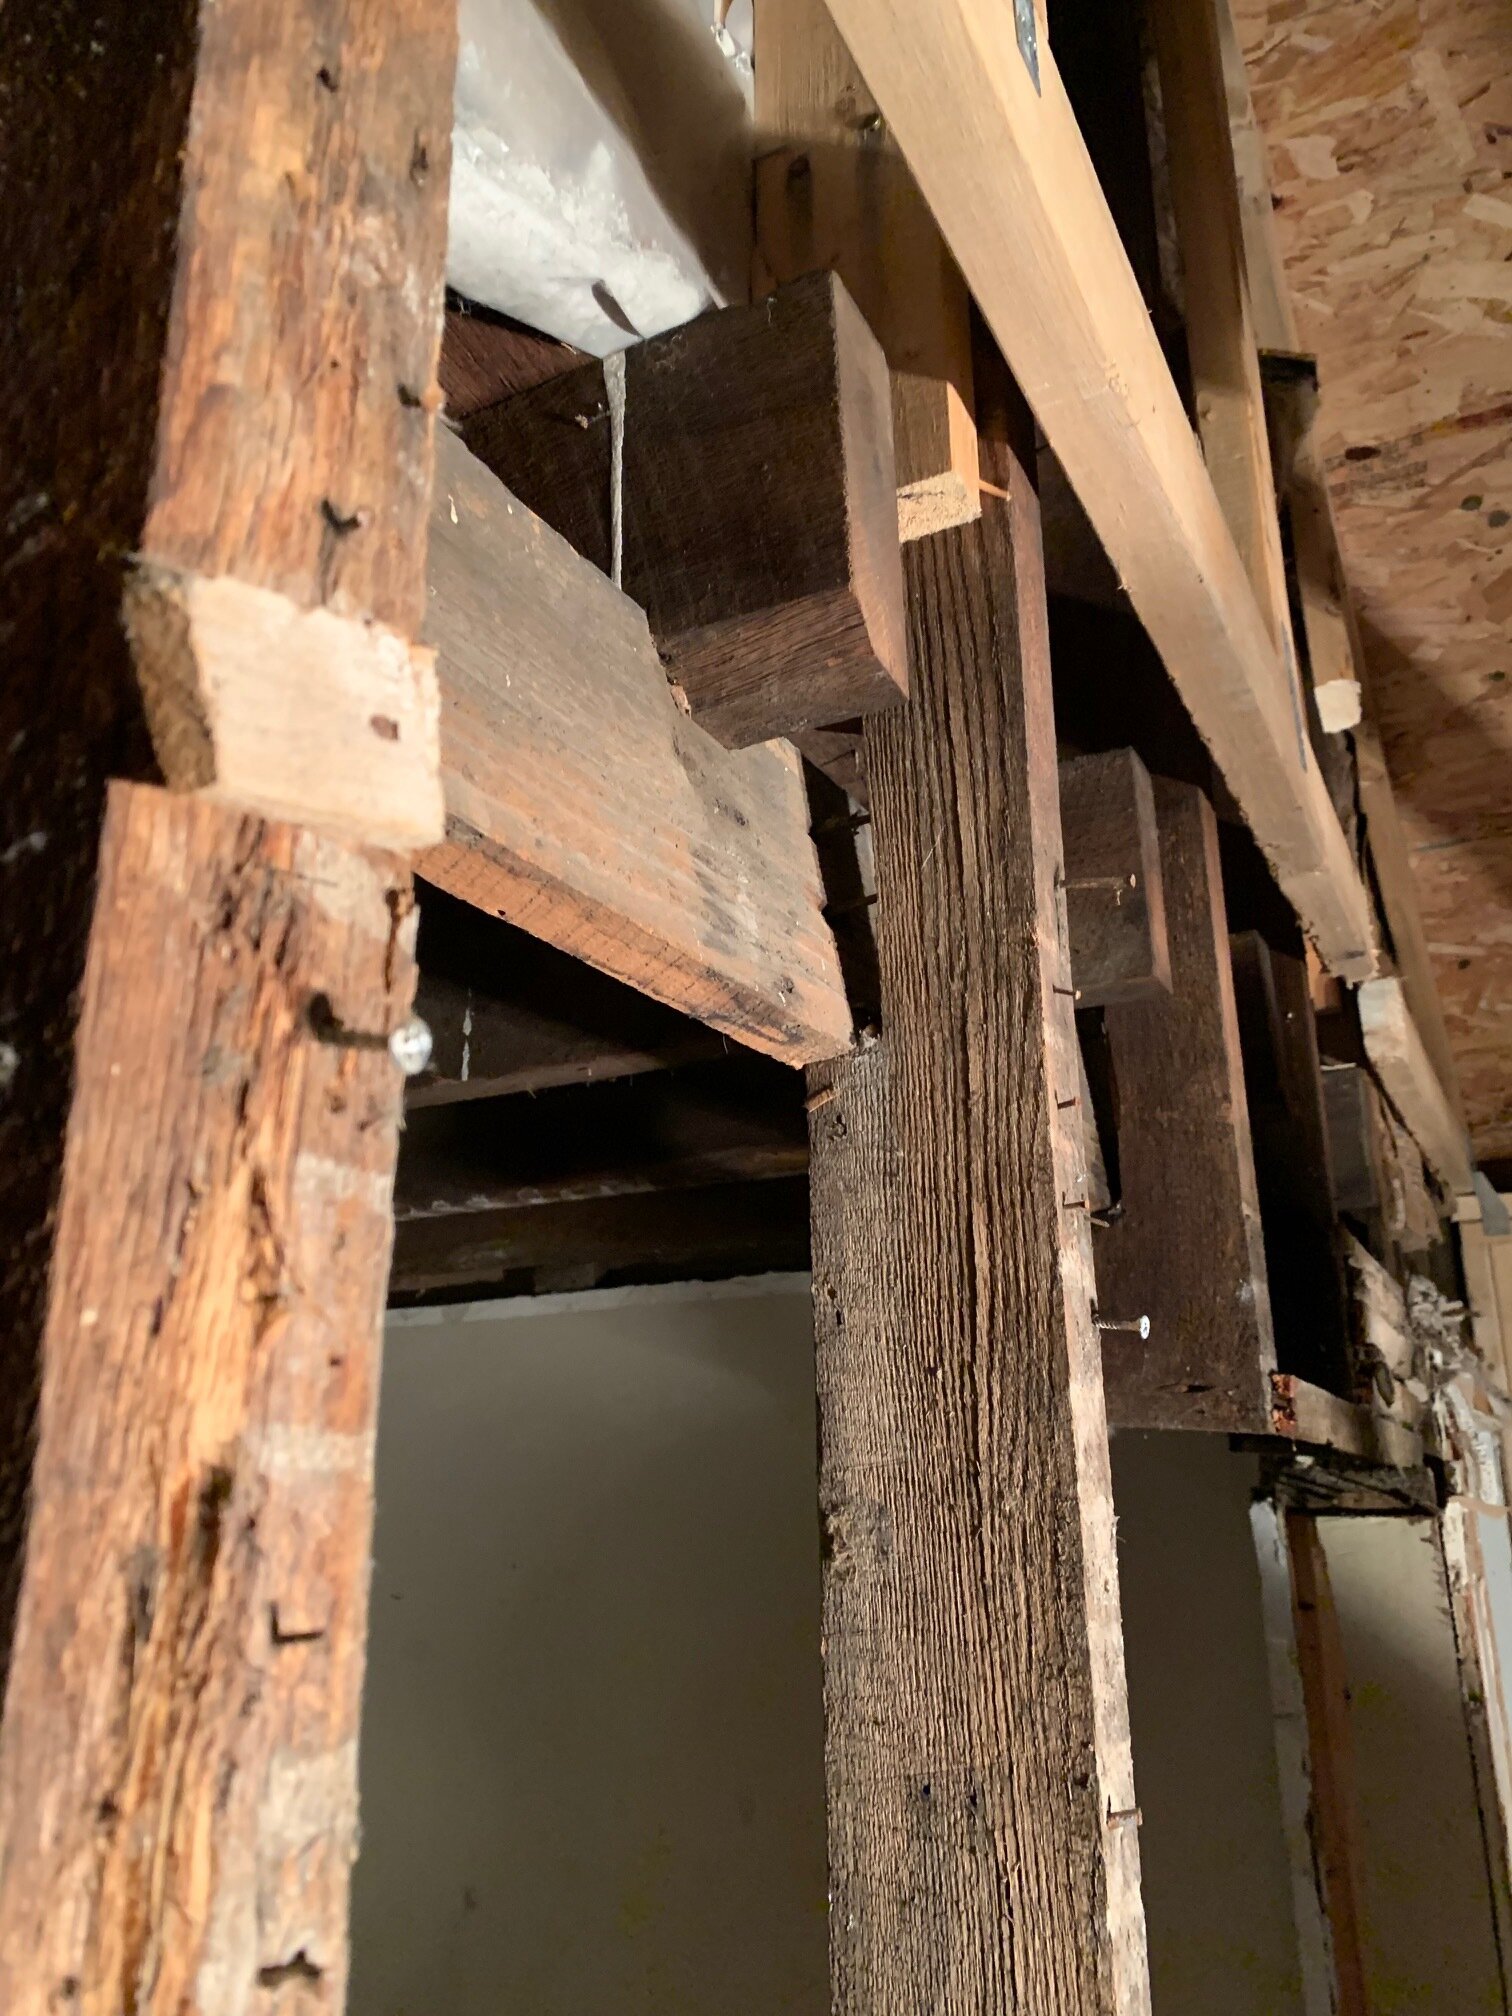
That one board might have made it the last 120 years, but Adam didn’t feel comfortable leaving it one more day, so we had to handle that immediately. Let’s just say that this load bearing wall will soon be almost 12 in thick to provide much needed support to the second floor. Definitely a scary moment, but I am glad we found it when we did!
In other news, you can see in the photo on the above left that there should be some original flooring upstairs underneath the carpet! The second floor will be where our daughter, who we call the ‘inspector’, will have her bedroom and play room. She likes to visit from time to time to sweep and pick up trash, and we will take any help we can get!

Inspector, doing some inspecting