Farmhouse Renovation: Month 4 Update
If you are new here, we bought a c.1900 Iowa farmhouse roughly 4 months ago and promptly took a bulldozer to a large portion of it. Over the last couple of months we have completely updated what remained of the original structure, and added on a large addition (for some much needed square footage).
I have posted several updates thus far, but this is the one I have been waiting for!
This is the first update where the layout of the house is easy to understand, since the walls are complete with drywall. Not everyone can look at a room full of stick walls and picture the final product, and I have tried to take that into account when posting in the past, but now everything will be quite easy to picture!
Ok lets start in the kitchen….
Here’s a throwback photo of the previous kitchen. Adam is 6 foot 4 in tall and he could barely walk underneath the pendant light fixture in the middle of the room without hitting his head. This was due to a significant bow in the trusses, as they could not support the proper amount of weight. Also, check out how close the top of the door frame to the bathroom is…just an inch or two!

Below is a picture of the new kitchen, with a properly installed 8 foot ceiling! The opening on the far left is the same door to the bathroom pictured above, however this time around it has over a foot of clearance between the top of the door frame and the ceiling.

Moving on to the stairs….
You will notice that new the steps are no longer steep, and are also a normal size. In addition, we have a large window at the top of the stairs now, that provides a source of natural light but also serves as an added safety function, should someone need to evacuate out of the second floor for any reason.

I recently caught a photo of our mini inspector checking out the window at the top of the stairs…


The last photo I have for you is of the new master bathroom. The original structure had no master suite, so I have no before photo to share! And while this bathroom is not extravagant by any means, it adds value and much needed space.
Alright, that’s all I have for you today! I am excited to see what the next update brings, as we can start putting our personal touch on the project with paint and flooring, etc. Since we work on the farmhouse in our spare time, and both have other full time jobs and 2 year old child, sometimes things take longer to finish than we would prefer. It’s all about balance, and we are still figuring that out as we go.
Thank you for stopping by the blog today, and we look forward to catching up with you again soon! In the mean time, feel free to follow us on Instagram or Facebook :)
Until next time,
Rachael
Sawhorse Table Refresh
Well hello friends!
It’s been a little while since I posted a decor refresh, and there’s no time like the present! February is when I normally dig out some of the faux greenery, mostly just to remind myself that spring is almost here. The temperatures have been steady in the 30’s lately, which might not sound warm depending on where you are located but trust me it’s pretty darn good for winter in Iowa!
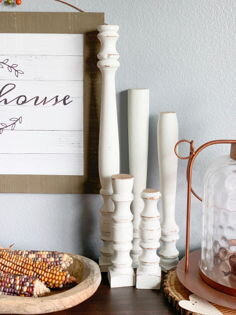
The table I am sharing today is in my entryway, it’s a sawhorse table that my husband Adam built several years ago. Here’s a few photos of what I did with it recently.

These magnolia stems were considered holiday decor at Target, so I snagged them at the end of December for 70% off (y’all know I love a bargain!).

Recently, a friend generously gave me this stack of old books and I stacked them in an old birdcage with some wooden beads. Simple! I also wanted to mention that little green plant in the background, they are currently at target for $5! They are quite nice quality for the price!
Here are a couple photos of the whole table put together…

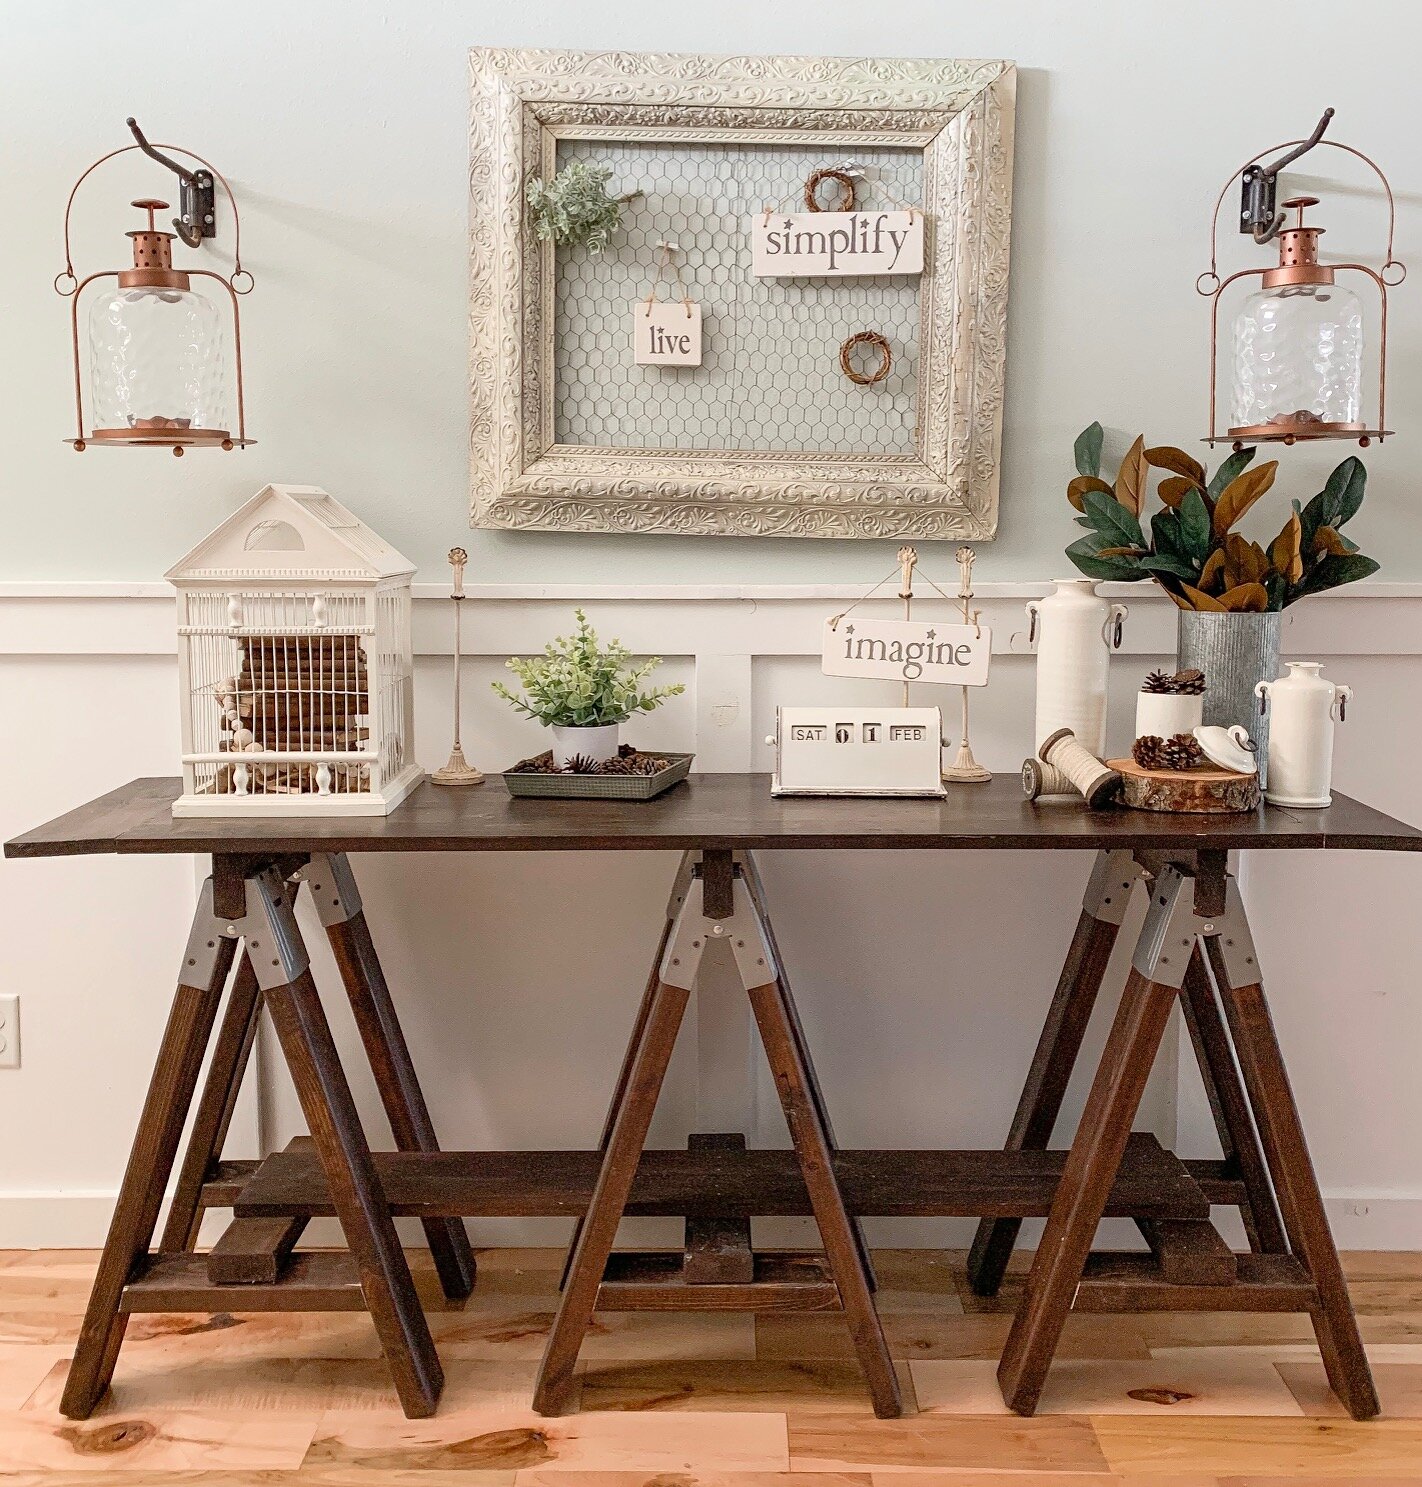
This table came together nicely, minus the crooked frame on the wall but hey, we can’t have it all together ALL the time :)
That’s all I have for you today, thank you for stopping by the blog today and be sure to check back soon for my dining room refresh that I have in the works!
Stay warm out there!
-Rachael
Farmhouse Renovation: Month 3 Update
It’s time for another update on the farmhouse renovation project!
For anyone new here, we purchased a c.1900 Iowa farmhouse 3 months ago and promptly tore down a large (sagging) section and have been putting it back together ever since. This has definitely been an interesting project, mainly due to there not really being any building codes or rules to follow 120 years ago, so we have had to allow for extra time (and money) to accommodate unforeseen things along the way….(hello super scary/non supported second floor…i’m looking at you!)
Enough on the recap, let’s get on to the accomplishments for the month….
New this month:
-All Plumbing
-Furnace and all duct work
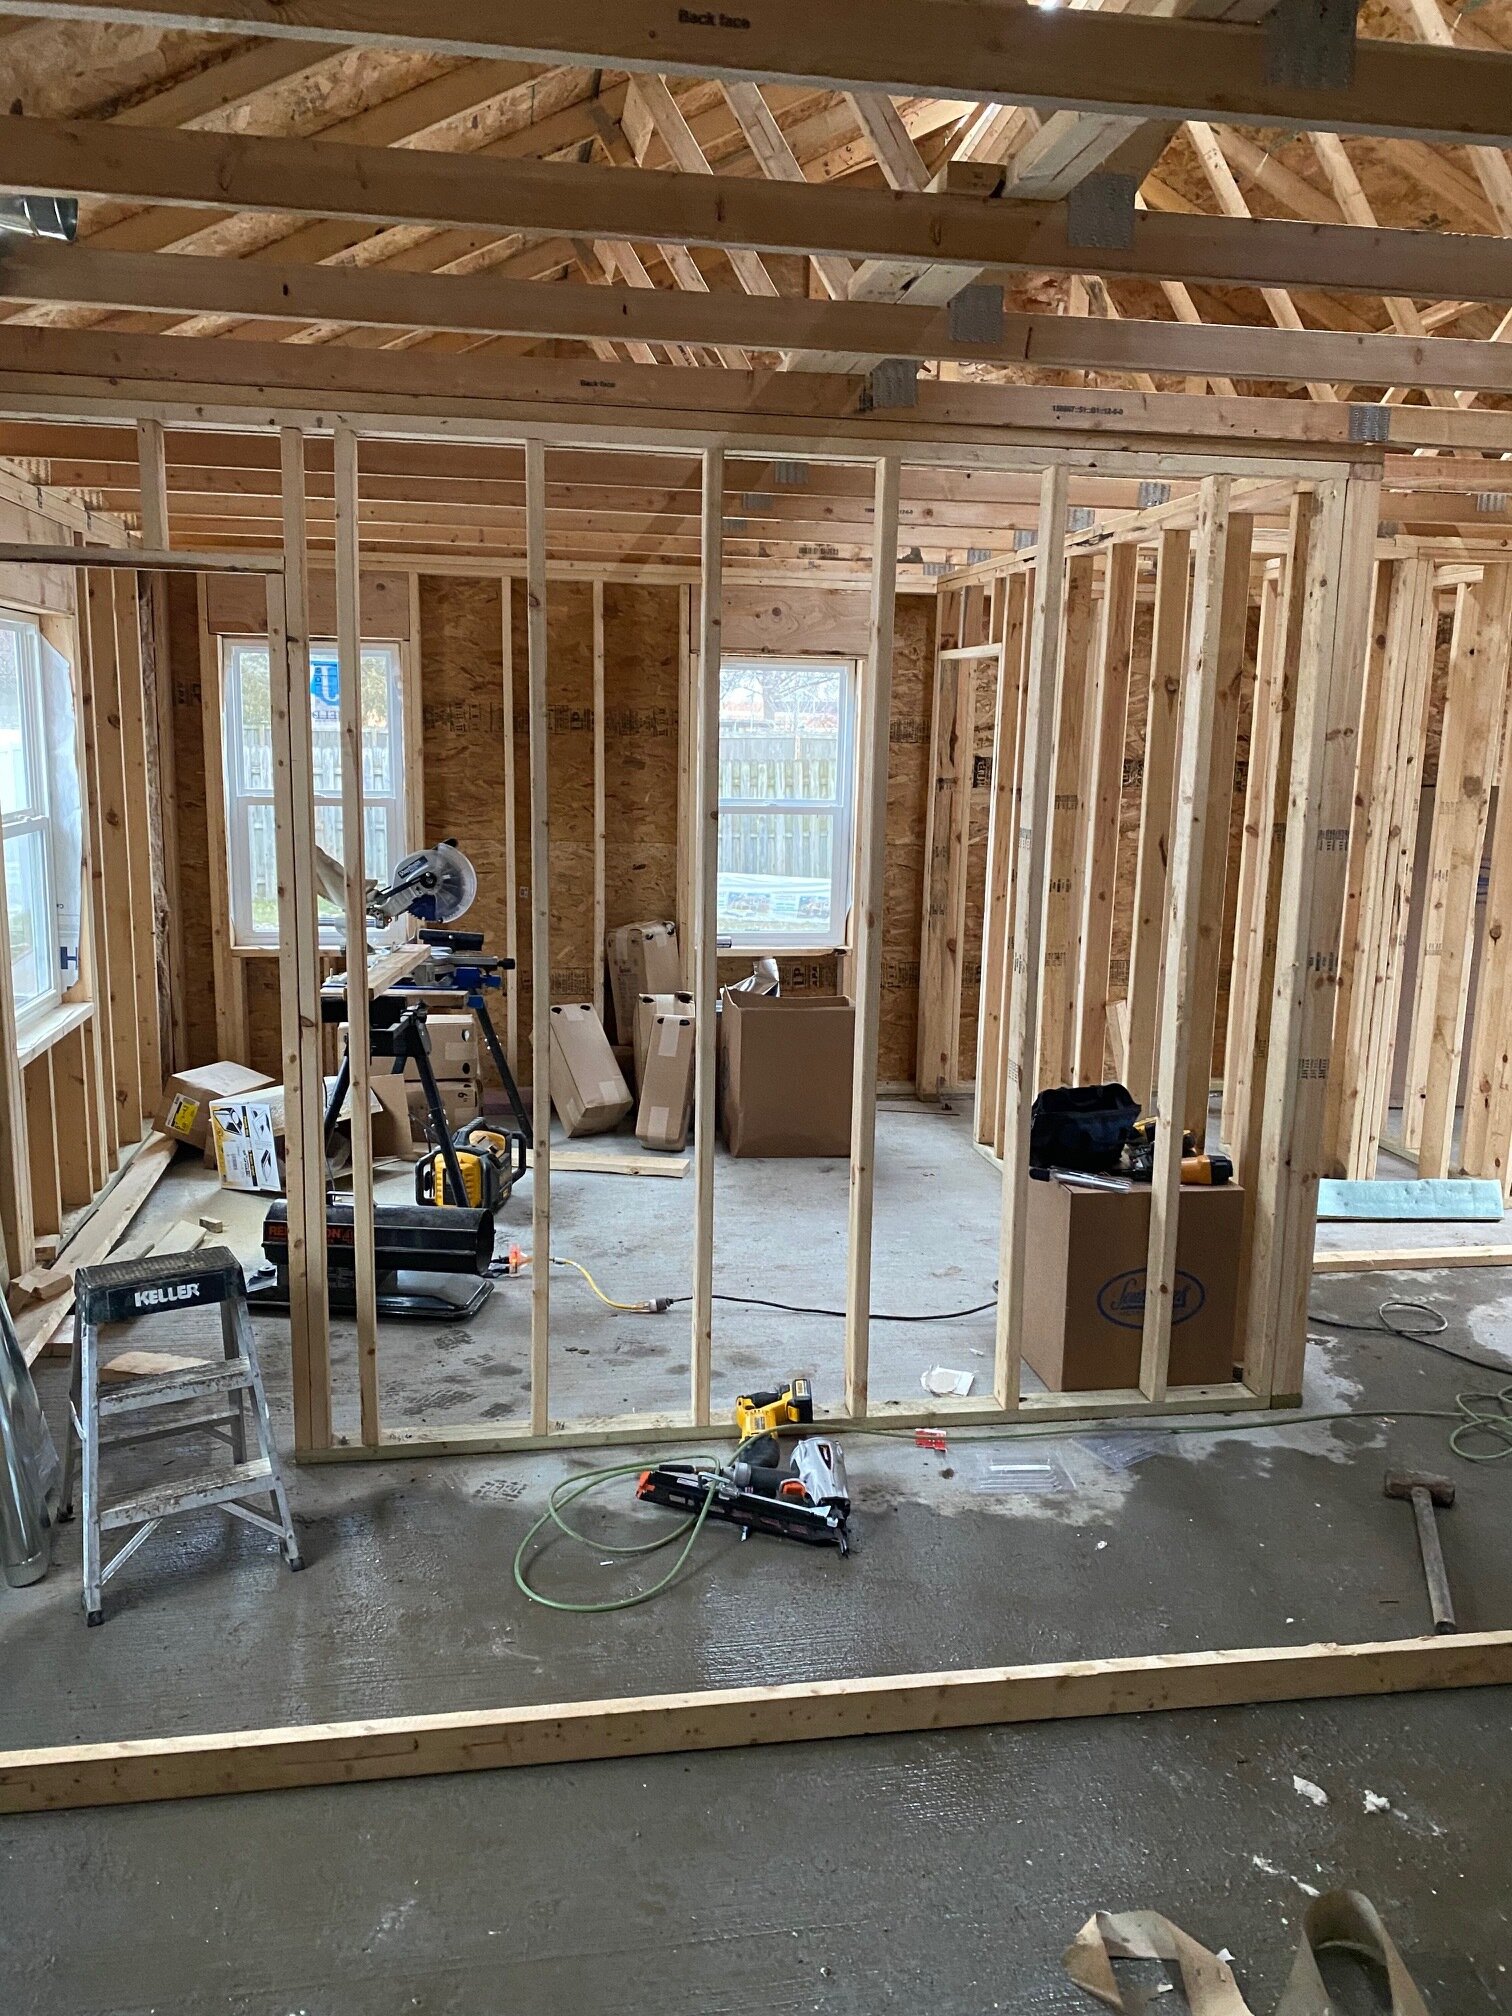
-Interior walls framed up
-All windows replaced
-Almost all the siding torn off original structure, and new OSB and tyvek paper
-All electrical wired up and ready
-A functioning set of stairs
Here are a couple photos showing the updates…

This photo is from the front porch, looking at the front door

The porch view after new walls and windows!
The above photos show just how extensive this renovation has become. Was it in the original plan to tear everything out to the studs? No. However, we needed to replace the improperly installed windows and that meant tearing off all the siding out front. The insulation and sheeting weren’t up to par and not really functioning, so they all had to go too.
Now, this means more work and increased cost, but we would rather spend a few more dollars up front and not have to worry about issues down the road. Plus, this is Iowa so we can’t have poor insulation and improperly installed windows or utility bills will be very high.


We have repeated this same process, section by section, for the entire house. Only one small part remains, and that will be done shortly. It’s particularly time consuming to do this all in January, but that’s what we have to work with at the moment. I mean, icy scaffolding just makes things more interesting…right?
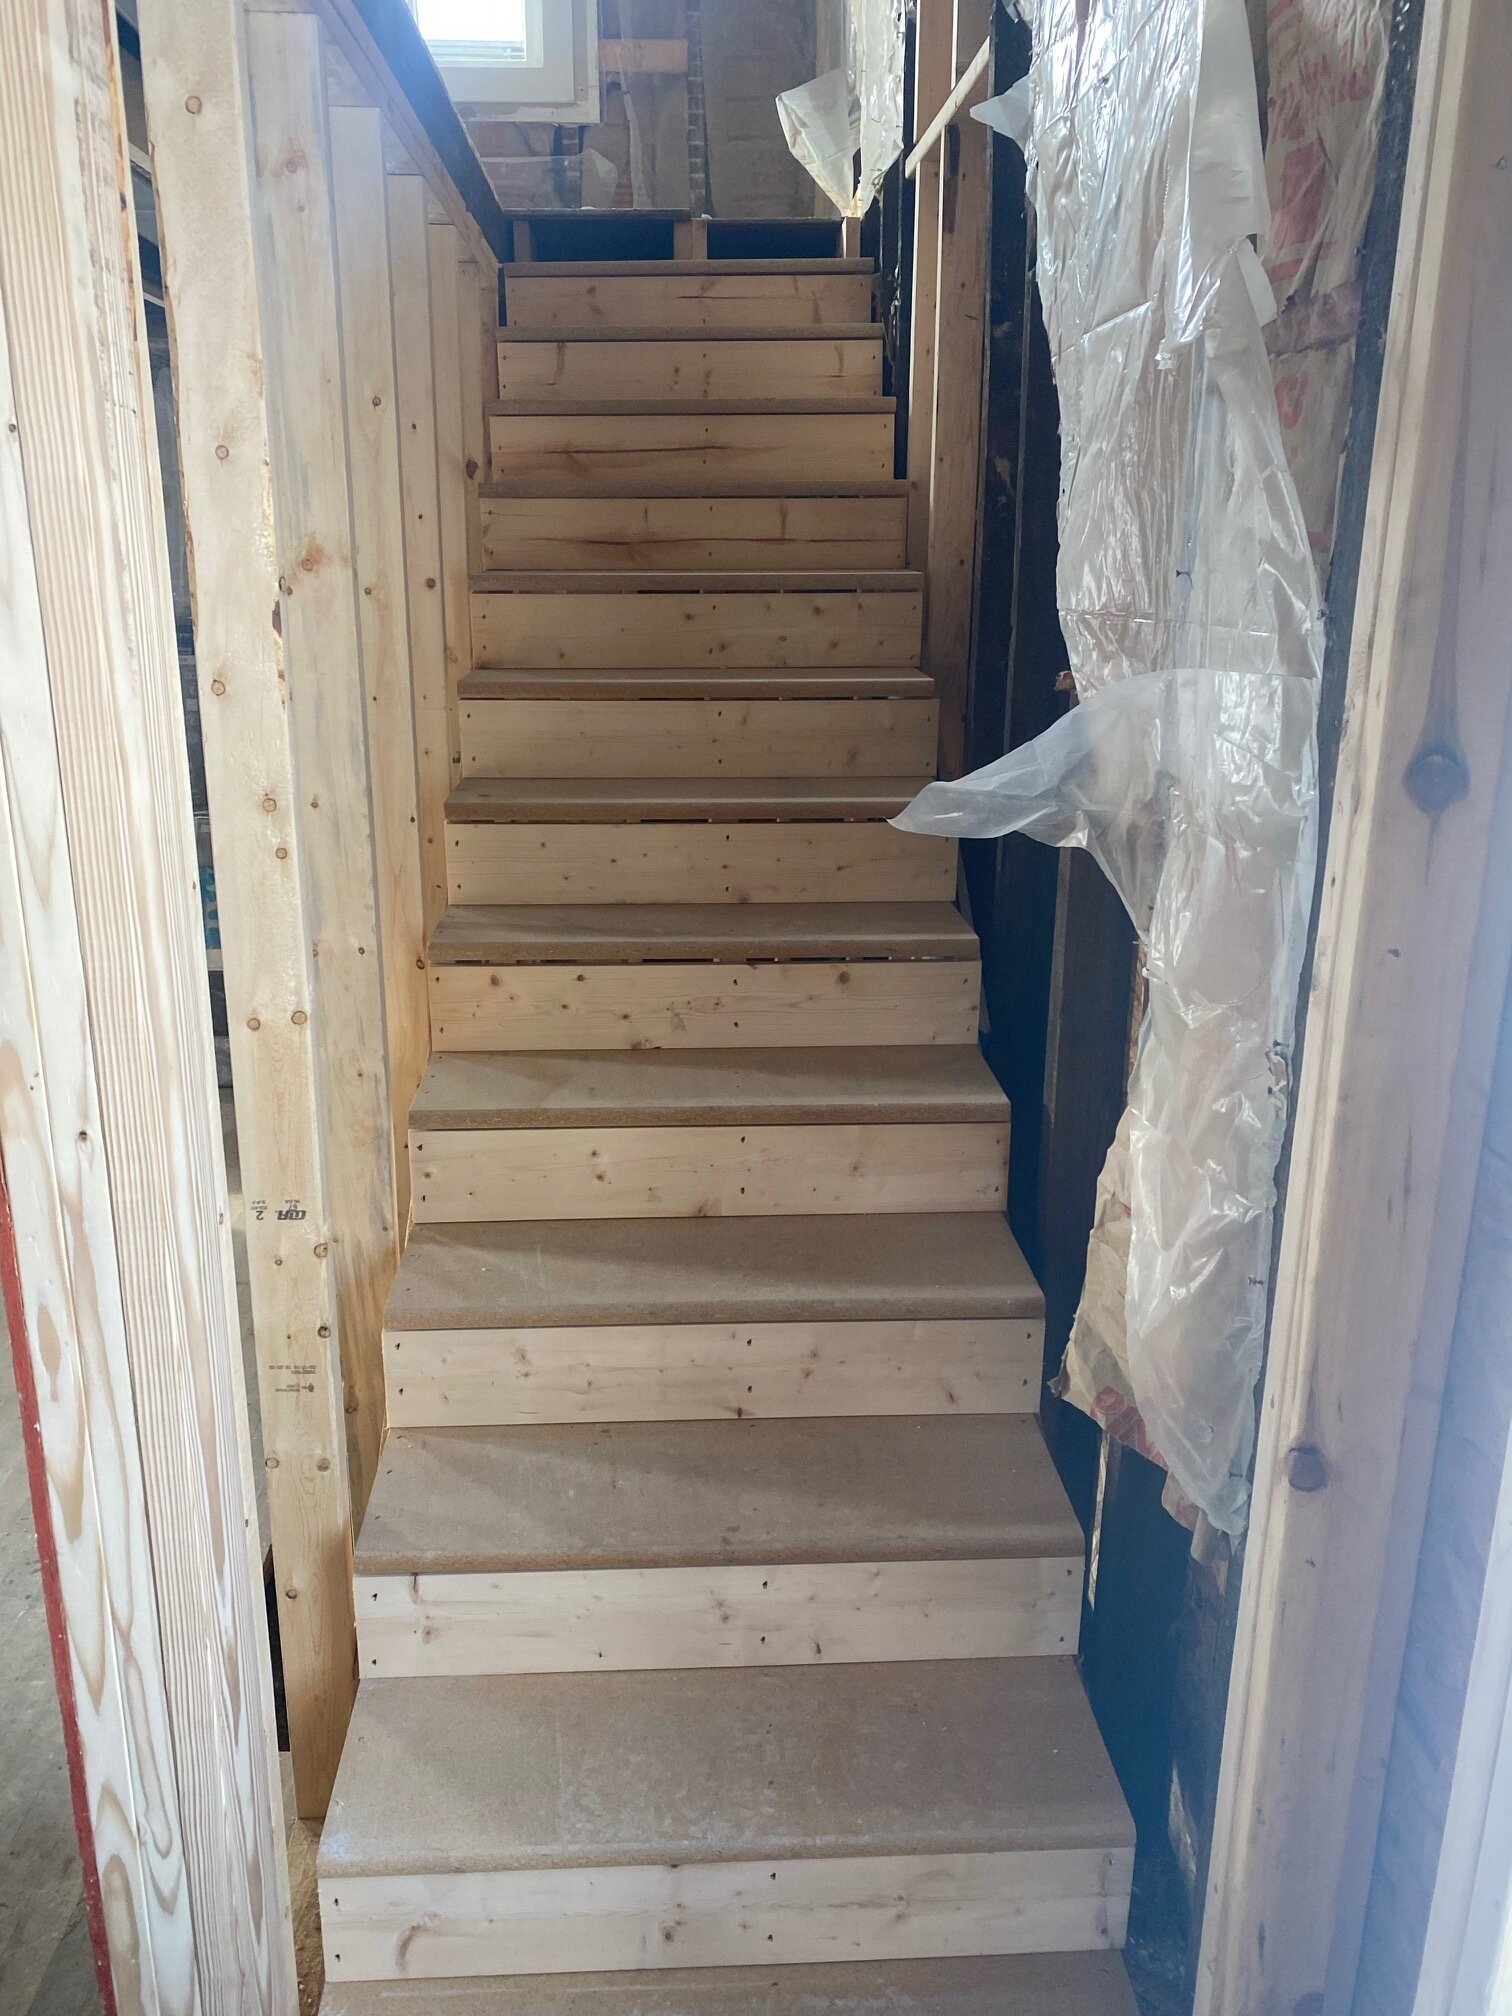

Next up, we have a fully functional and standard size flight of stairs to the second floor. Gone are the days of ducking your head and climbing super small and steep steps with no railing.
Speaking of the second level, we haven’t been up there for several weeks while there were no stairs, and I lost track of how much we have to do up there as well. Obviously the windows will have to be replaced (might as well do them all, right?) but the flooring and fixtures will need work too.
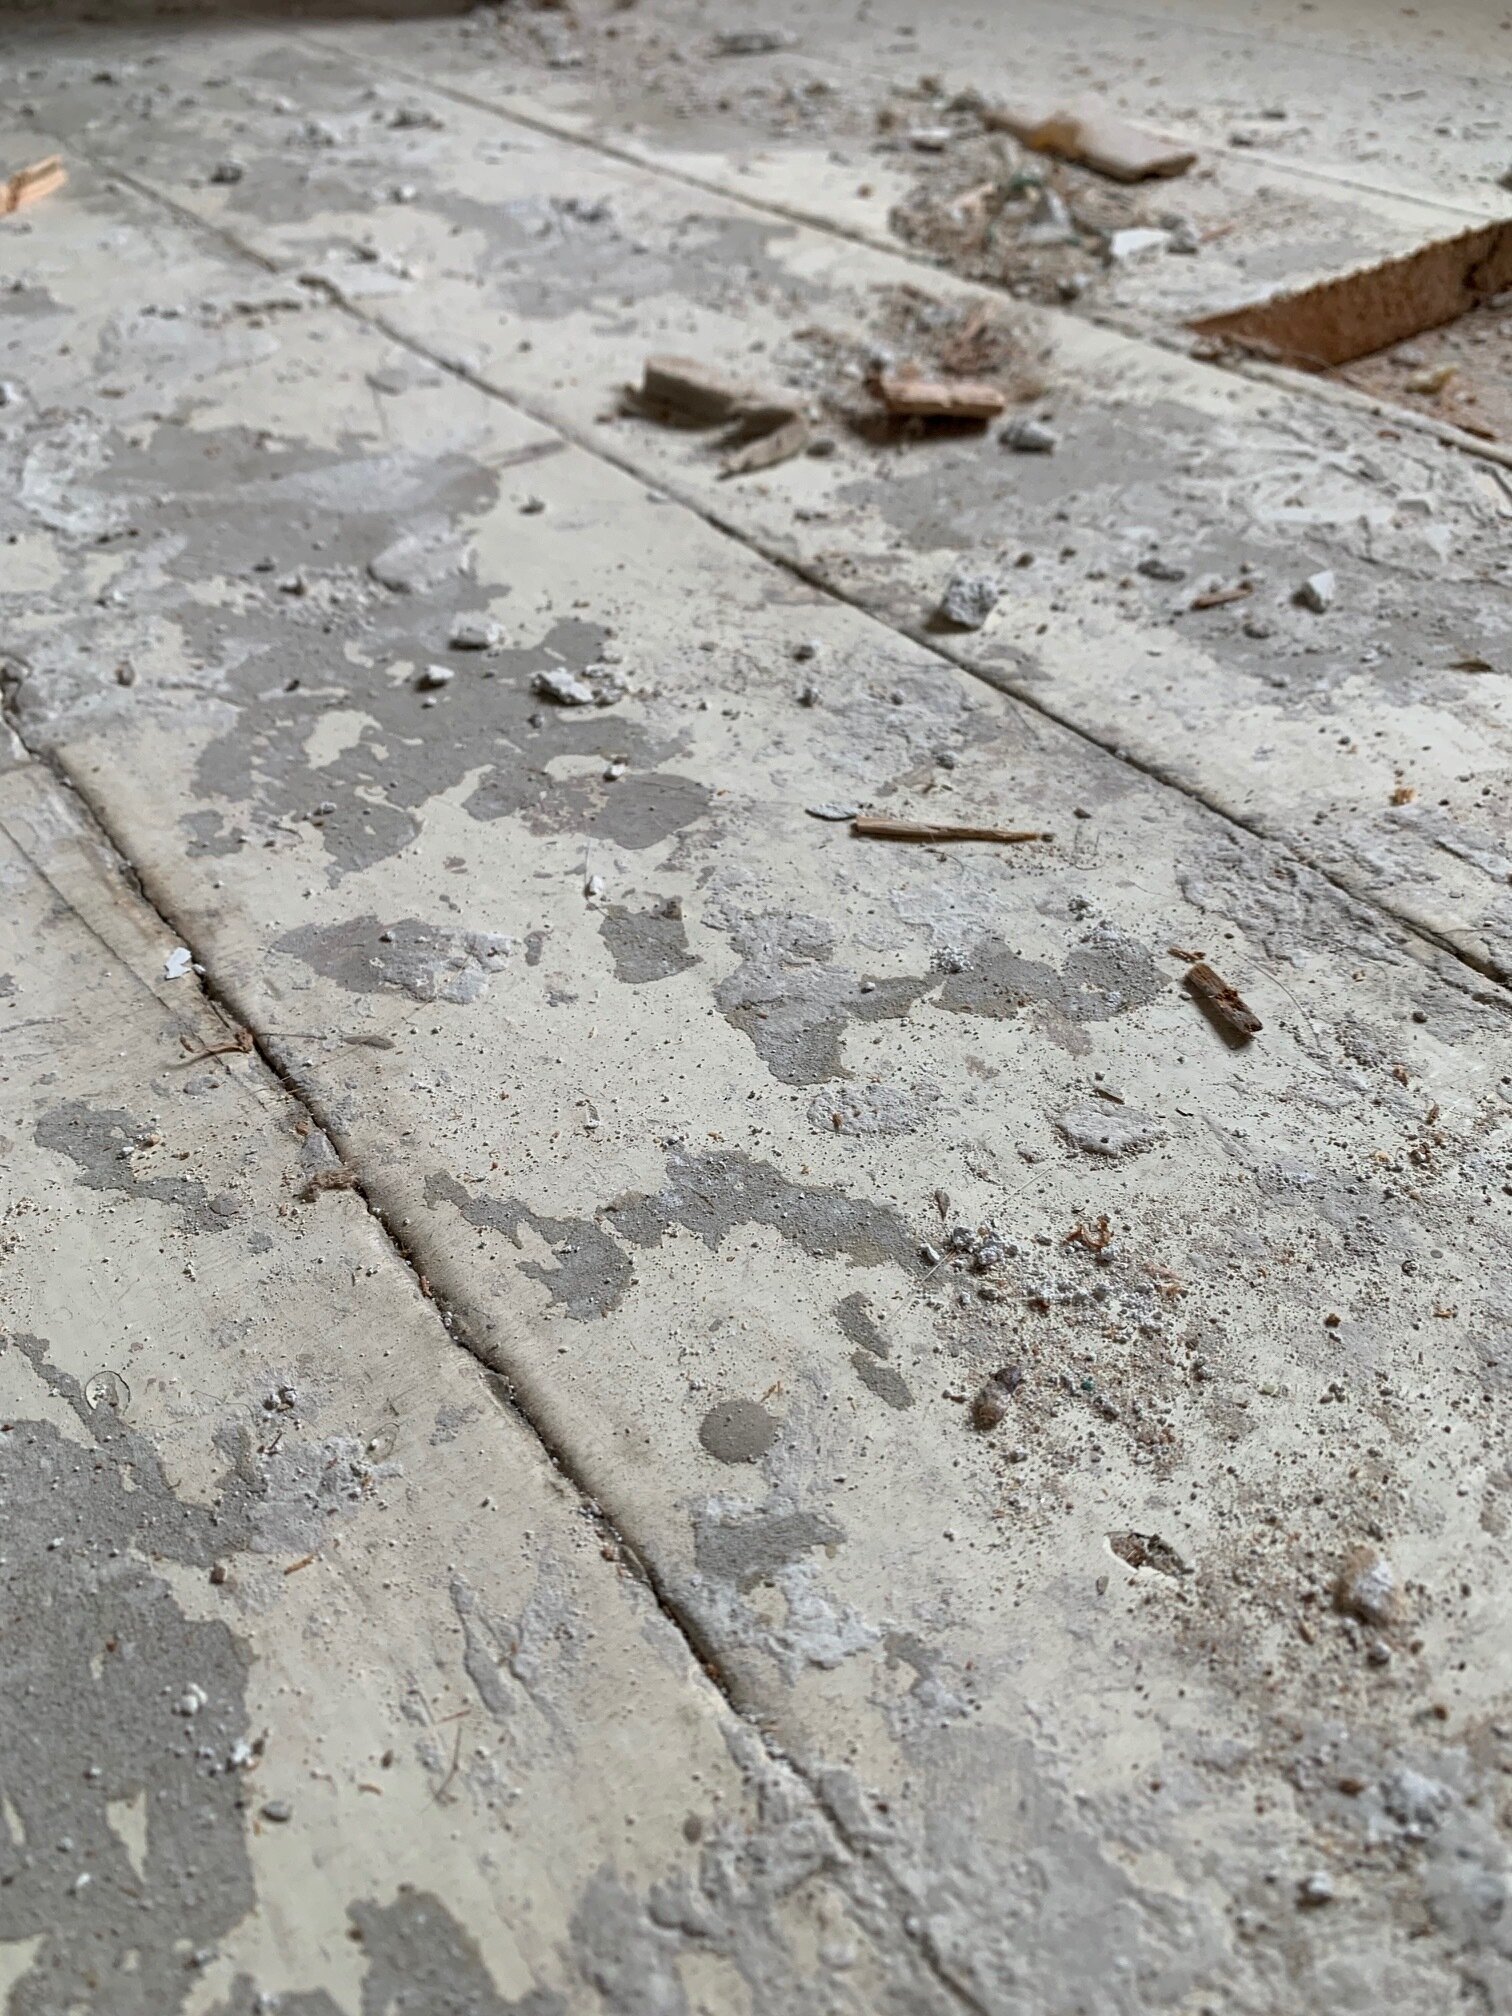

The first photo is of the (likely lead) painted original flooring, and we simply cannot sand that down and use it, for obvious reasons.
The next photo is a view from the stairs, and while things might not look too bad up here there is still a bunch of work to do. For example, the door to the second bedroom no longer closes due to the bracing and raising of the floor that was required in order to ensure it would not come down. We also need proper safety mechanisms such as smoke detectors, railings, and windows that are the required size, in case of emergency evacuation. These things can all be done now, since we can now access this part of the house!
As always, our daughter (who we call ‘the inspector’) is as involved as a two year old can be, and she loves to ‘help’. The weather in January has made this somewhat difficult but we work with it the best we can.

Helping dad with the front door

Giving her approval of the new stairs
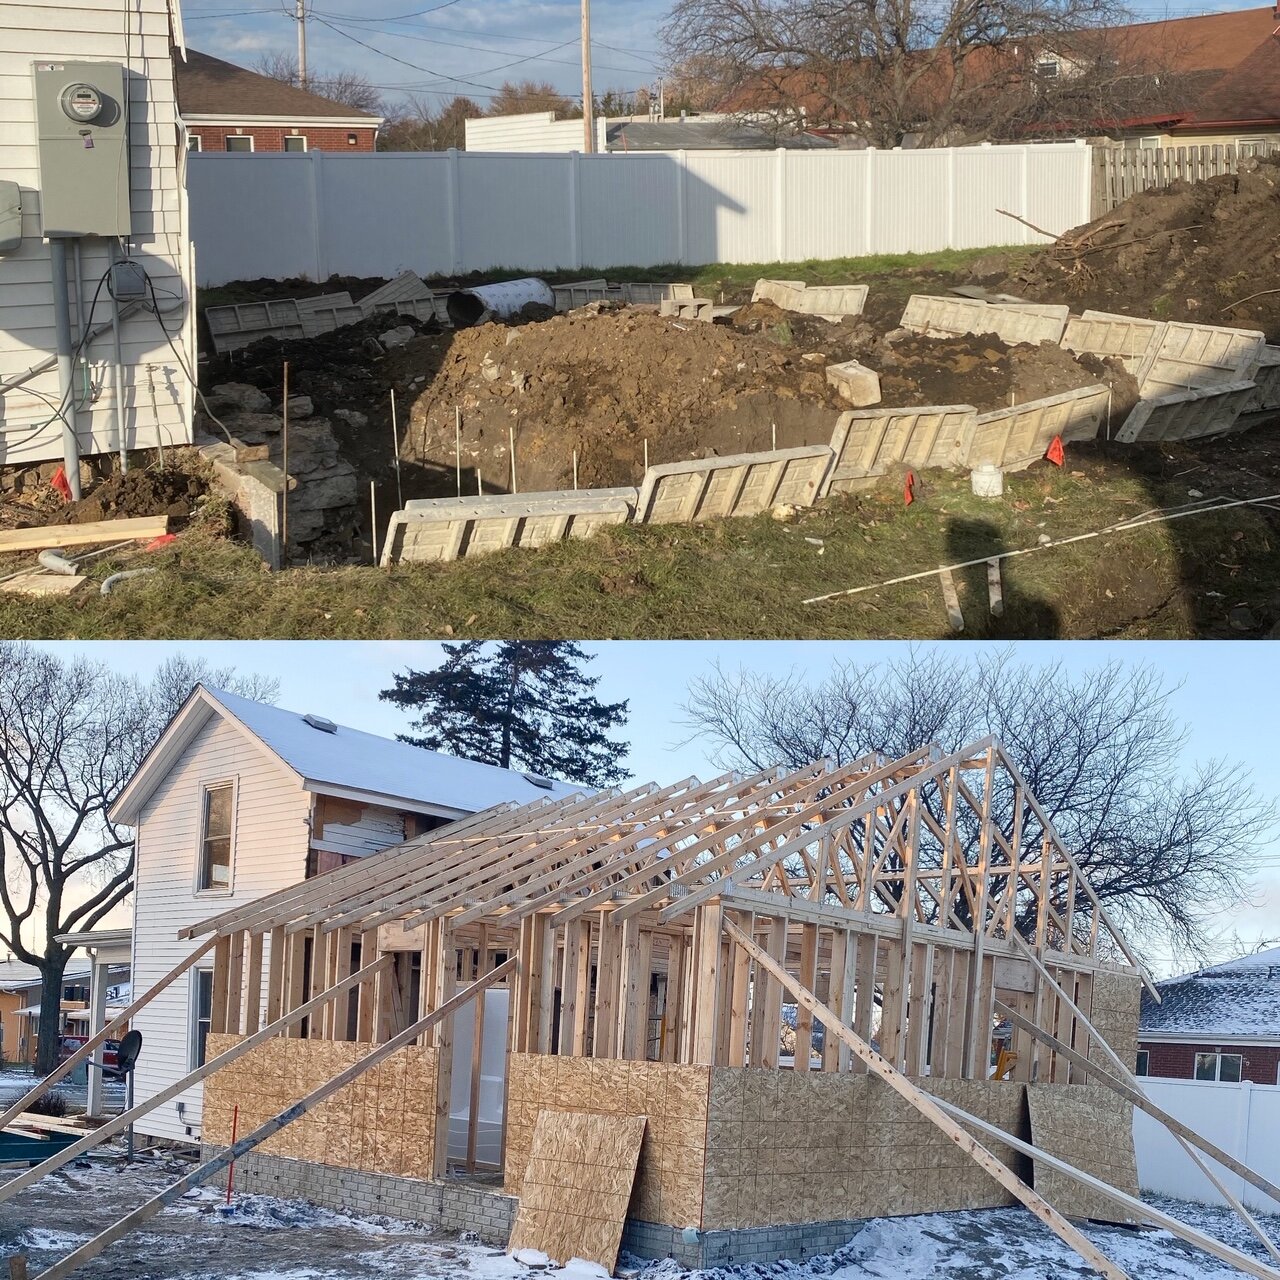
That’s all I have for this update! I will leave you with a fun little before and after of the outside. As always, thank you for visiting the blog today, we really appreciate all of your support!
Cheers!
-Rachael


Farmhouse Renovation: Month 2 Update
Two months!
It’s been a little over two months since we purchased a 1900’s farmhouse, and then promptly took a bulldozer to a large section of it. We have since added back a large addition (almost 600 sq feet), to replace the torn down section and add some space.
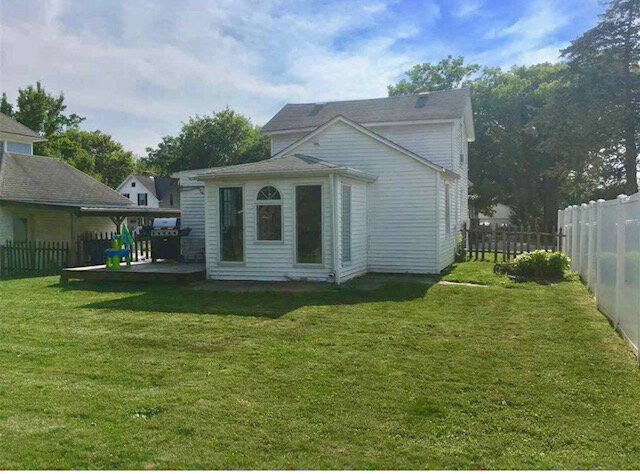
Out with the old…

In with the new!
Since our last update about two weeks ago, we have the addition completely closed in from the Iowa elements, thanks in part to some amazing December weather. Now if we could just request some daylight after 430 pm…ha!
Now that the new part is enclosed, we were able to open up the wall separating the original section from the new addition, and it was the first time I had seen the old part since we boarded it up! Here are a couple photos…
View inside the new part

Looking into the original part of the farmhouse
Opening up the walls and ceiling of the original section of the home presented it’s own challenges, including 120 years of dirt and grime. Oh and about 3 layers of ceiling in the old living room! Here are a couple before shots…


Tearing into this section was not exactly in the original plan, but in order to update the electrical correctly and put new heating and air duct work in we decided to take it all down. There’s always that one moment in the home improvement shows where something goes wrong, and the owners are left with a decision on how to proceed, and for us it was this ceiling and what was underneath it.
I already mentioned there were a ton of layers to the ceiling, and this left us with quite a mess, but a more alarming issue was how the second floor was being (sort of) supported. The picture below on the right shows ONE board, that is kind of in a notch, and that was what held the floor joists for the second floor. One board, folks!
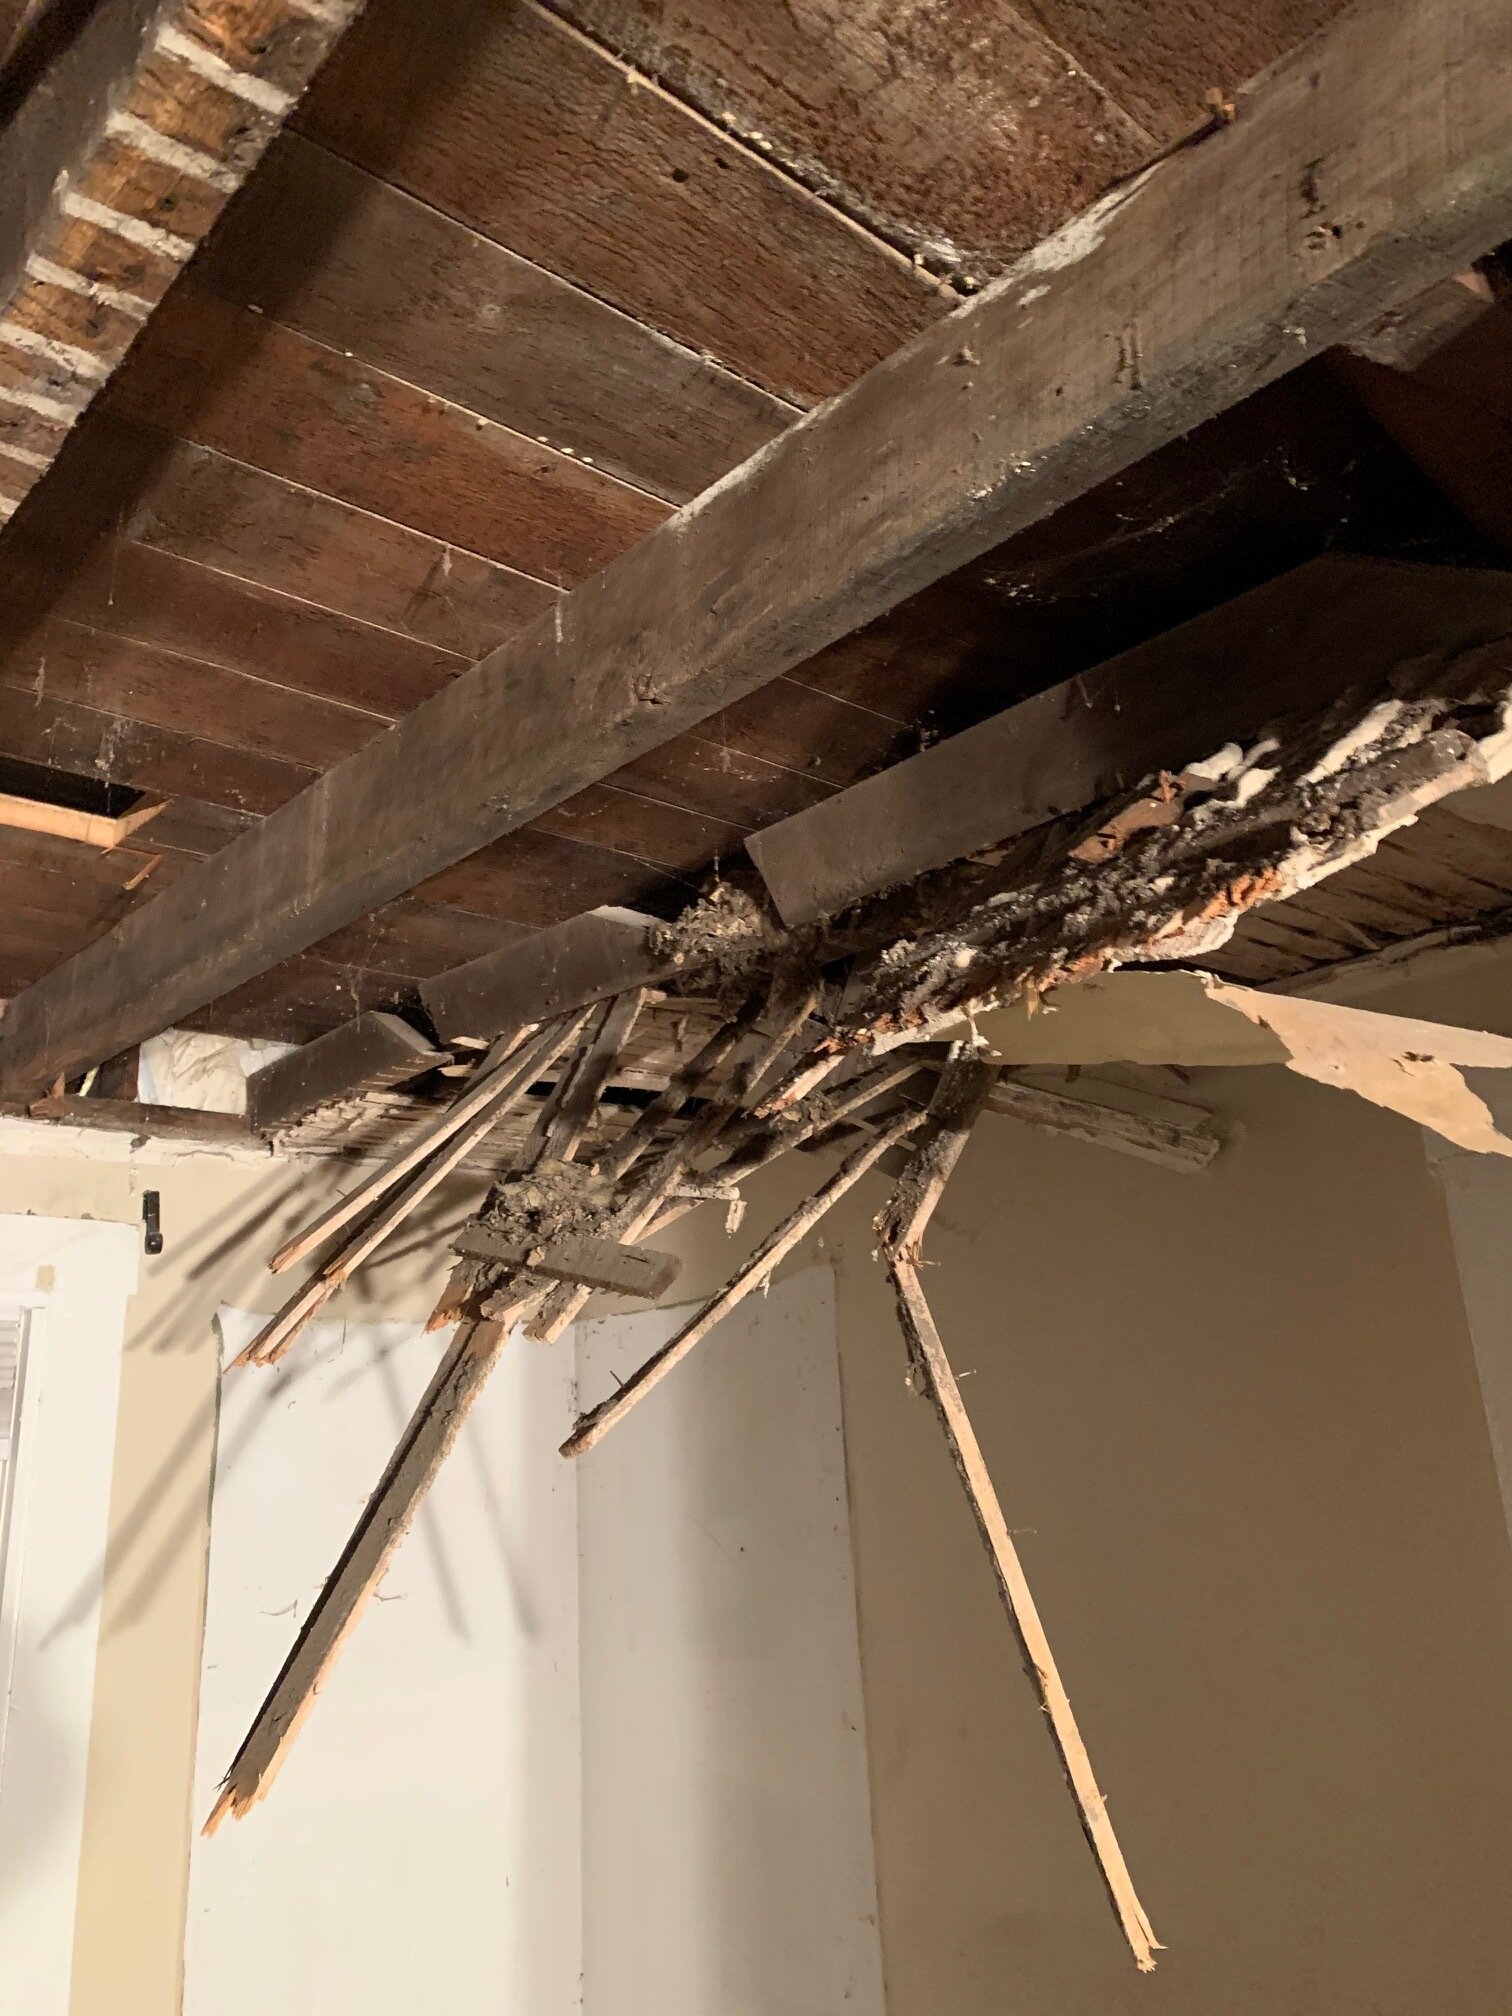
Lots of layers to the ceiling here!
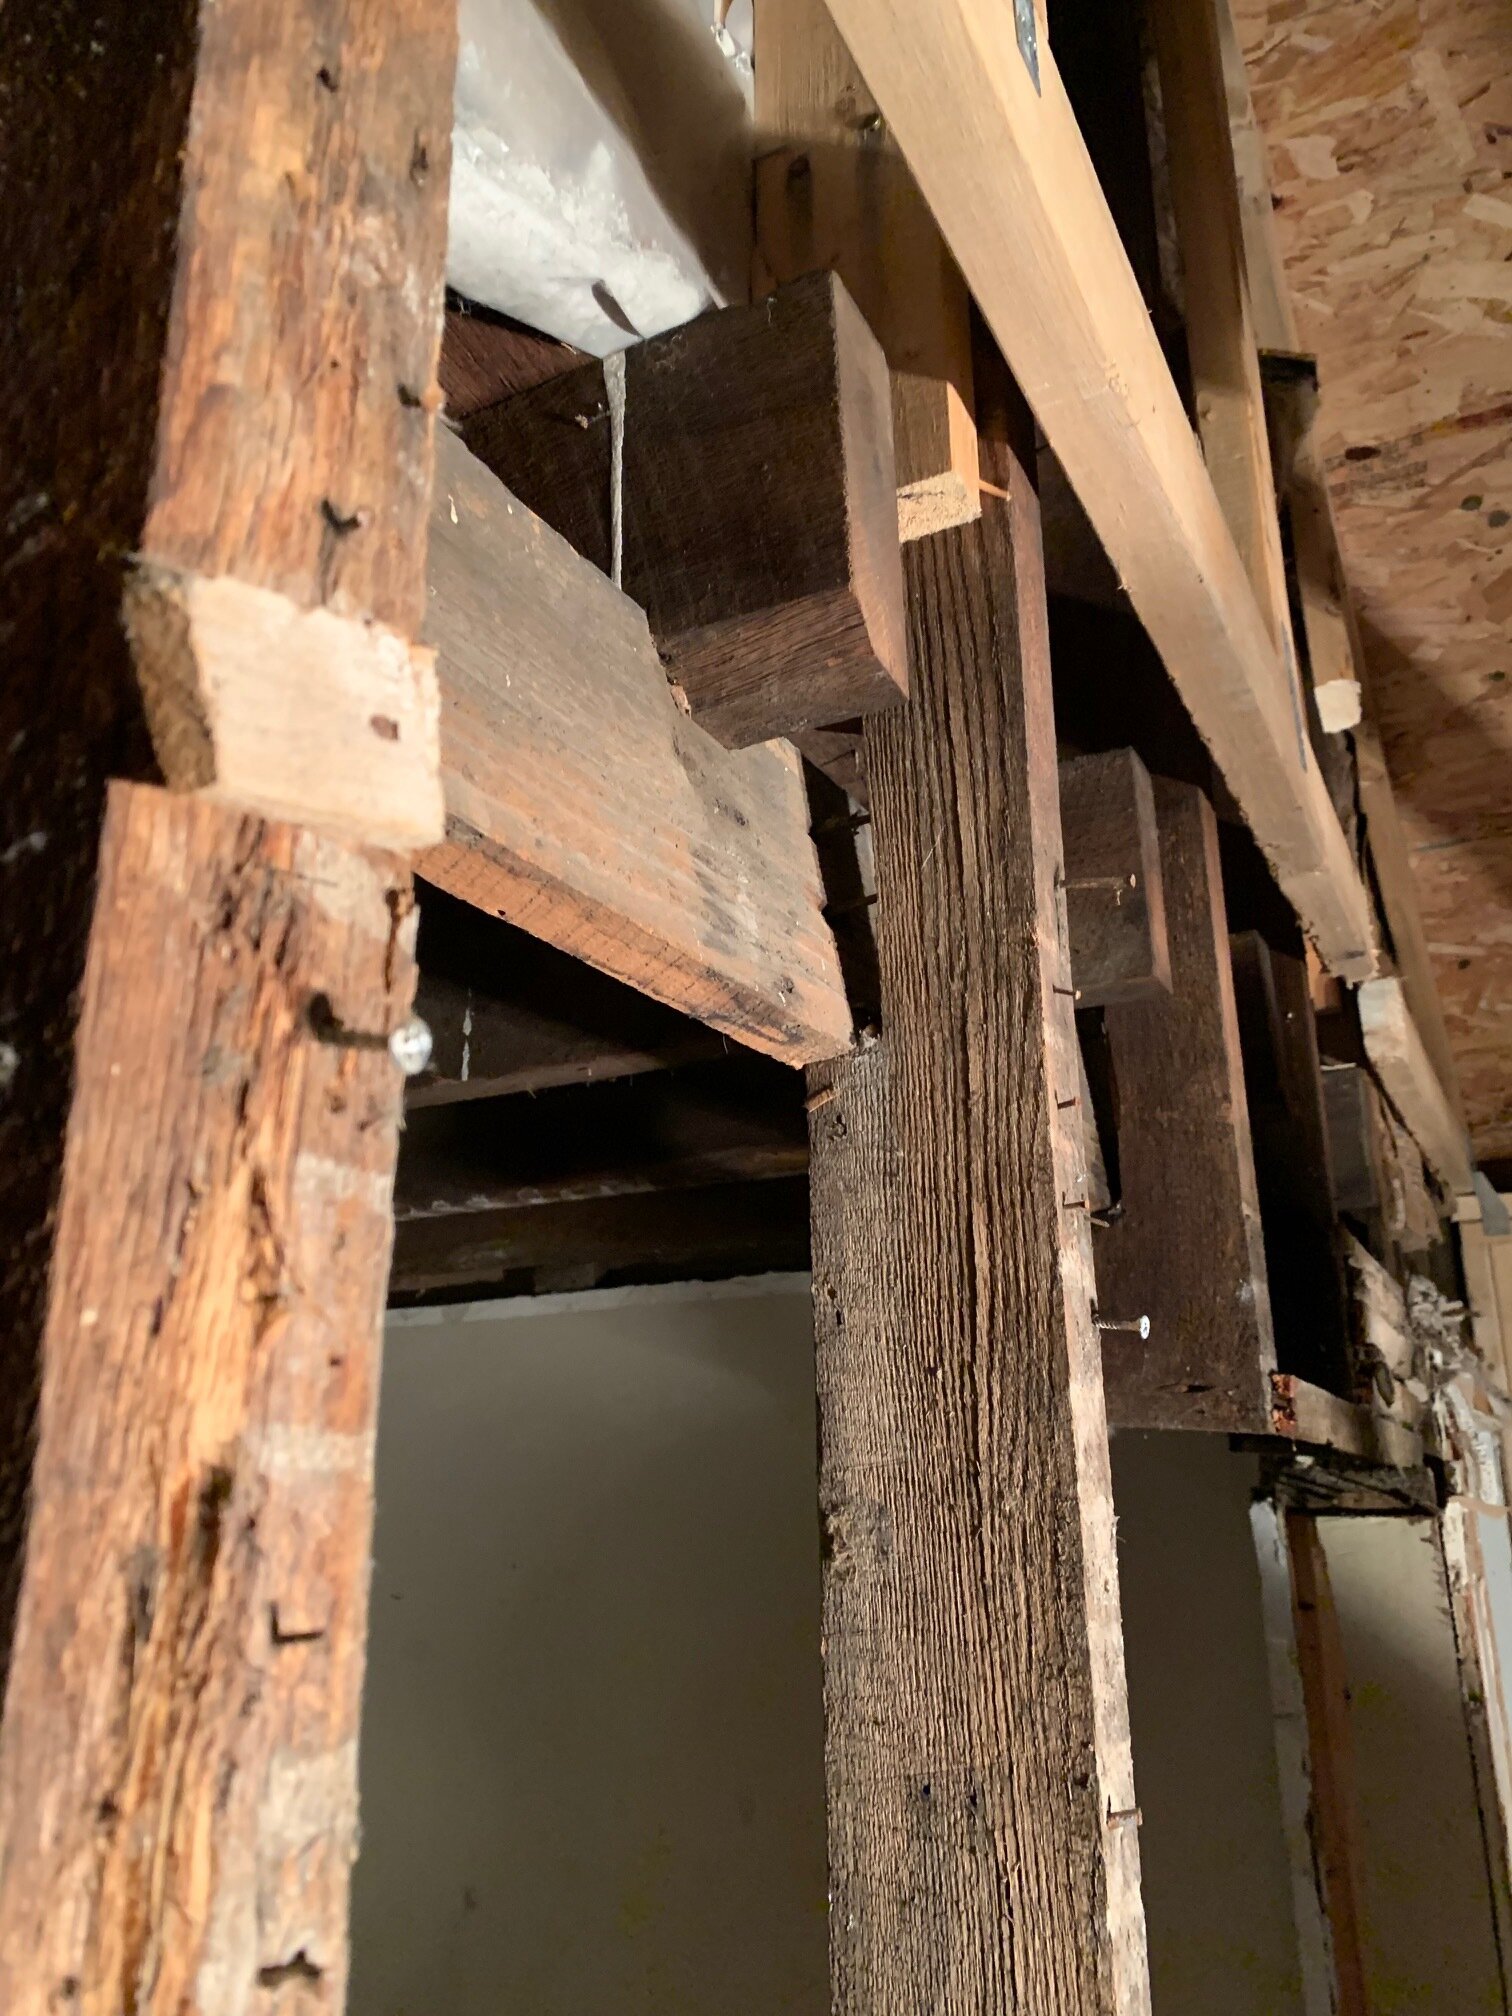
That one board might have made it the last 120 years, but Adam didn’t feel comfortable leaving it one more day, so we had to handle that immediately. Let’s just say that this load bearing wall will soon be almost 12 in thick to provide much needed support to the second floor. Definitely a scary moment, but I am glad we found it when we did!
In other news, you can see in the photo on the above left that there should be some original flooring upstairs underneath the carpet! The second floor will be where our daughter, who we call the ‘inspector’, will have her bedroom and play room. She likes to visit from time to time to sweep and pick up trash, and we will take any help we can get!

Inspector, doing some inspecting
Farmhouse Renovation Update: Week 6
Hello from frigid Iowa!
Major progress on the farmhouse project this week! Adam and crew braved the frozen tundra (and a ‘snow squall warning’) to frame up the walls and add the truss system, which gives this addition some shape and brings the full size and scale of this project into view.
This photo shows the size of this addition, it’s about 2/3 of the total square footage of the house!
The cold Iowa elements aren’t friendly to power tools or air hoses, but fortunately we are really close to having this project closed up (hopefully this week).
And I couldn’t write this post without recognizing the hard work of Adam and his crew, braving the wind/rain/snow last week to get the the trusses set and keep this project on schedule!

Unfortunately, there is no sign of warm weather (above 40 degrees) anywhere in next week’s weather forecast, but that is just how things roll here in the Midwest. Regardless, Adam plans to have the roof closed in and heaters on very soon, so at least the days of frozen air hose lines are numbered!
Well I am off to finish Christmas shopping today, wrap all the things, and try to keep up with the daily grind of this busy household. I am normally an early shopper and have everything done by now for the Christmas prep, but this year time got away from me, so I will just have to grab an extra coffee and make a mad dash to the finish.
Happy Weekend Friends!
Cheers!
Rachael
Farmhouse Renovation: Week One
Well it’s been quite the week over at the farmhouse renovation project, but we have accomplished a lot despite the Iowa weather skipping fall and turning full winter on us. The short version of the long story is the house is officially prepped to have it’s 3 additions torn off, and with any luck that will happen next week. I have had several questions on which rooms are staying and which are being torn down, so here is a breakdown:
Staying
Living Room
Upstairs Bedroom & Bonus Room
Front Porch
1 Car Garage
Going
Kitchen
Bathroom/Laundry Room
Creepy Basement
Sunroom
Deck
Most of the Fencing
Lean-to Driveway Covering
We made some exciting discoveries this week while de-constructing the home, it is so interesting to me to think of the history within those 119 year old walls!

I have no idea who John or Amy are, or how old this touching tribute is! HA!

SUPER SCARY BASEMENT——No thanks!
But the most impressive discovery of the week was by far these original wood floors (covered in wood-look vinyl tile). These floors are in surprisingly good shape and just need some TLC.
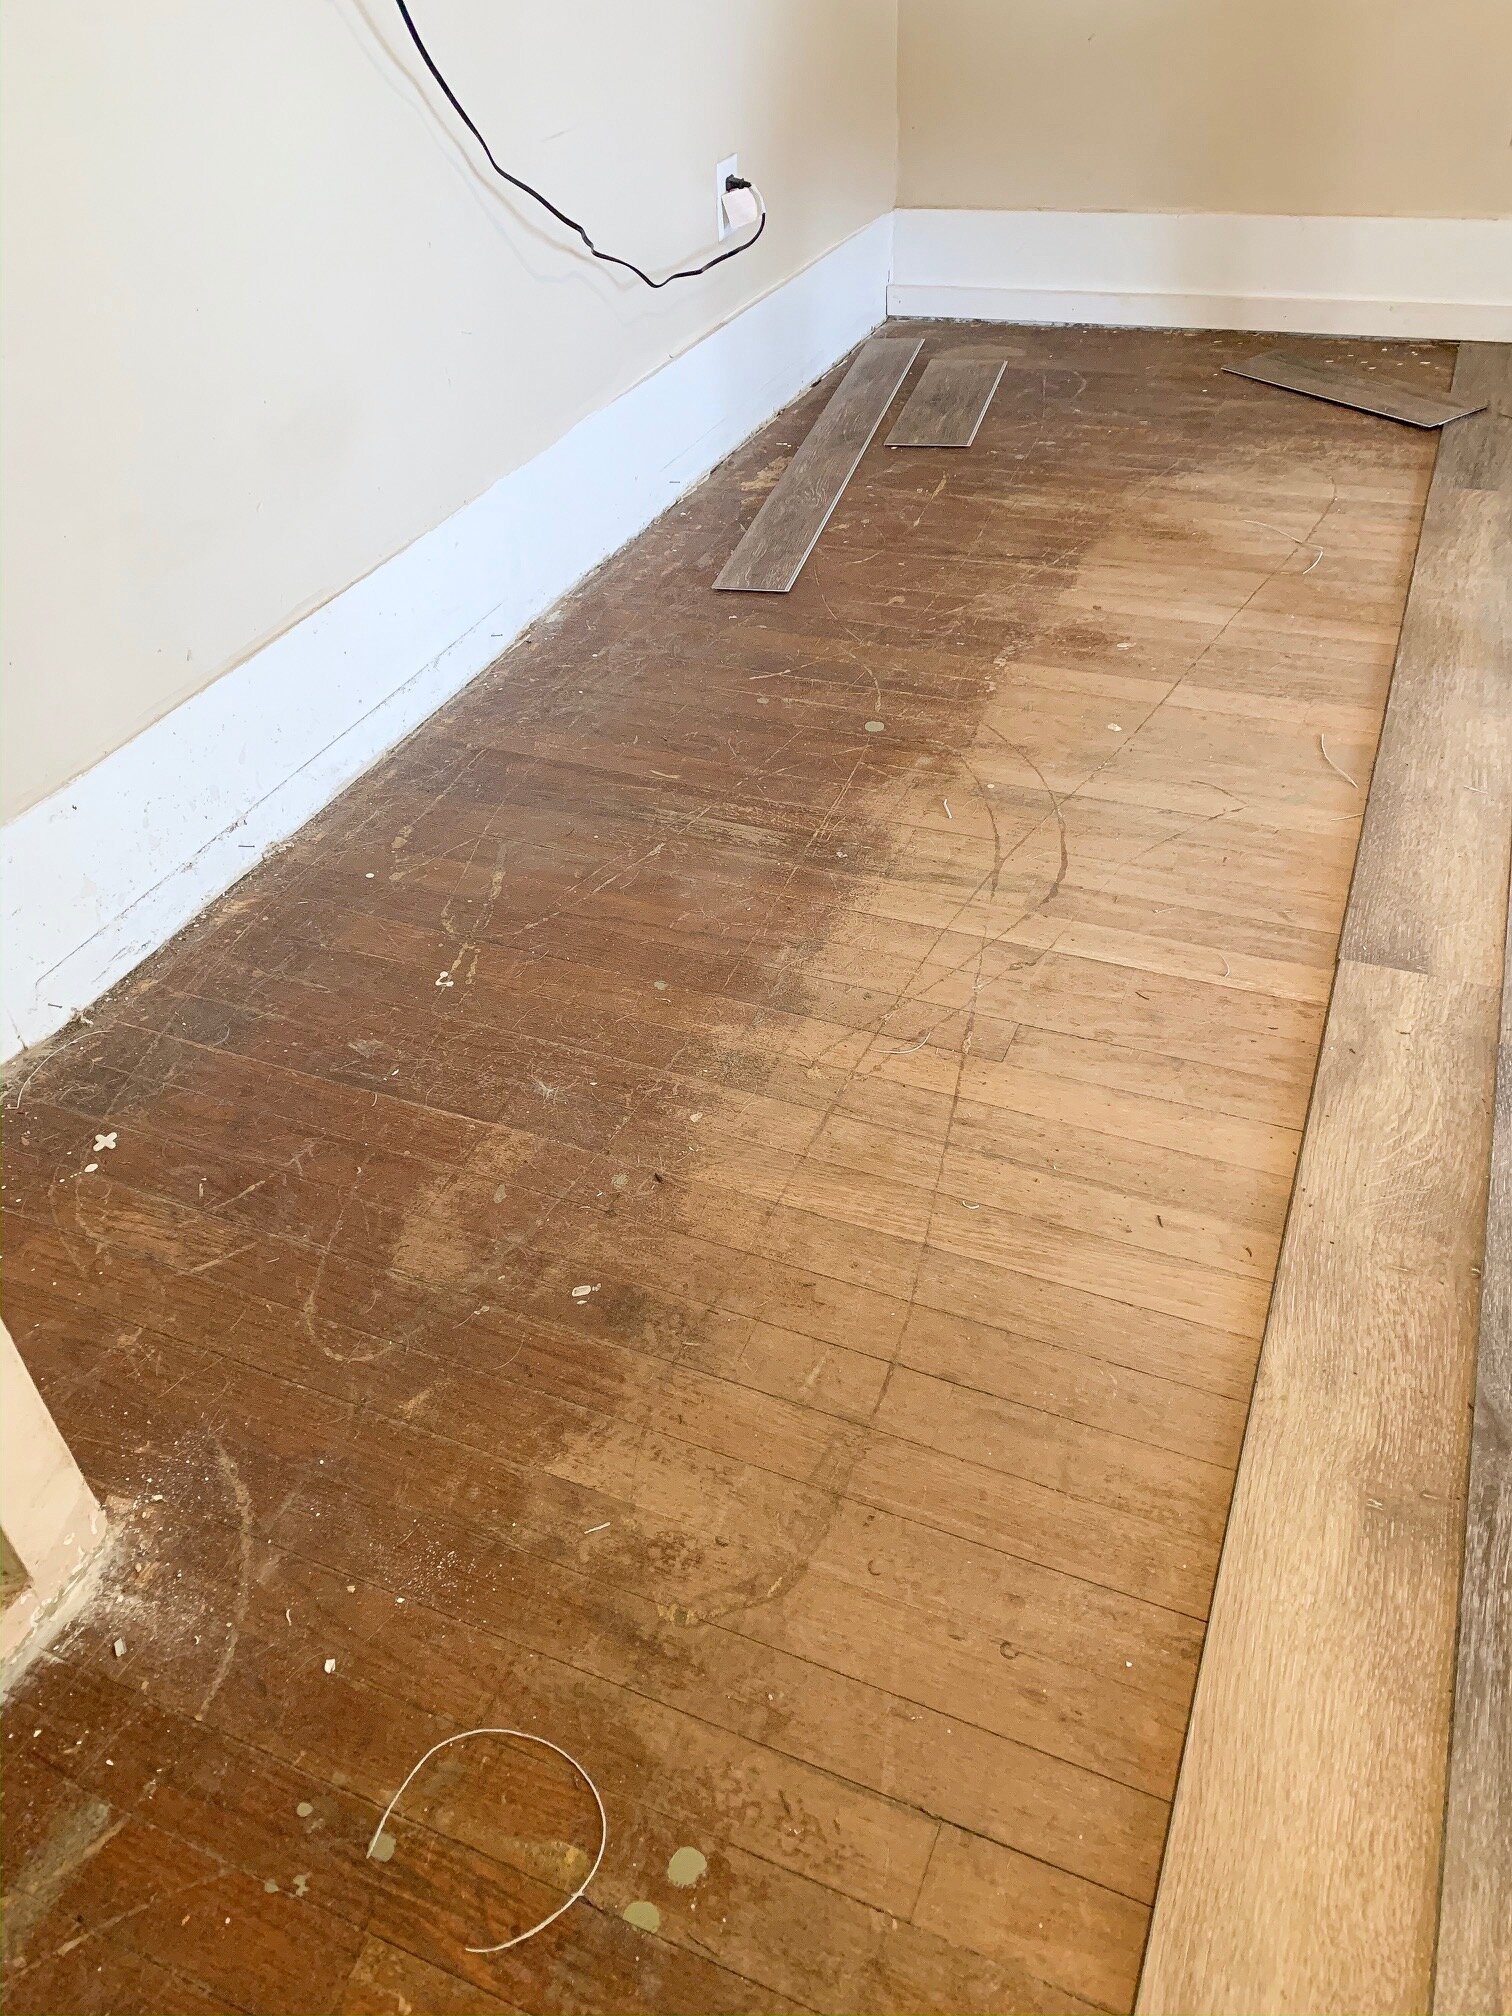

These floors are in the portion of the home that is staying intact, so we will come back to them later on. For now, this section of the home is being boarded up to protect it from the elements while we tear off the rest of the house.
This past week we:
-removed all appliances and fixtures from the tear down portion
-took down the lean-to structure attached to the garage
-took out fencing and other obstacles to make room for heavy machinery
-acquired the necessary permits for demolition
-had utilities disconnected


We had two random snow events this past week, and some unseasonably cold temps for October in Iowa, so that made outdoor work kind of difficult. Despite all of that, we have the property ready for the heavy machinery to come in next week and get to work. Adam is out of town for work all week, so that leaves me to manage whatever issues arise (yikes).
Hopefully the tear down goes as planned and we can start digging for the new foundation next week, as we really need to get that concrete poured before it’s too much colder here. Although, knowing Iowa, it will be 60 degrees in December so maybe we can take advantage of that! All we have to do is get it closed in before the frigid air arrives and then we can work with heaters and etc. It’s not ideal, but it’s where we are at this point.
I have some videos saved under ‘highlights’ on Instagram, if you are interested in seeing some of the excitement over the last week. Also, I will try to record as much of the demolition as possible next week (when I’m not running 1800 errands or handling whatever snags arise).
With that being said, I had better get back to making my list for next week! Thanks for stopping by the blog today, it’s definitely an exciting time in our lives!
Until next time-
-Rachael
We Bought A 1900's Farmhouse!
You read that correctly! Today we just dove right into the deep end and bought an authentic Iowa farmhouse built in 1900. This will be our biggest project to date, and either the best or worst idea we have ever had.
Your first question might be “WHY?!”, and to be honest I have asked myself this daily for the past month while this deal was in the works., including this morning.
The answer is complicated…but in the end it just felt right. The land value will only increase with time, and the home needs major repair but it’s not outside the scope of our abilities. We have always gone with our gut feeling on these types of things, and so far they have turned out ok, but that doesn’t make this huge purchase any easier on the mind! We have other properties that we own, but people live in those and thus pay for them. This home will not have anyone living in it, as it needs a major overhaul, so that’s where the added “yikes” factor comes from!
OK, here it is!

The home is made up of the original structure from 1900, and three separate additions that were added over time. Our plan is to take down those three additions, and then add one larger one, with a single all-encompassing roof structure. The existing additions were either done improperly or they have deteriorated over time, and some of the resulting issues are so major it just needs torn down and replaced (ex: ceiling sags very low in the kitchen).
The good news is, the original structure is in good shape and just needs cosmetic work. There are also several features intact that show the home’s character and age. Here are a few snapshots from just today where you can see the original door, built-in cabinet, and (my favorite) the 8 inch trim.
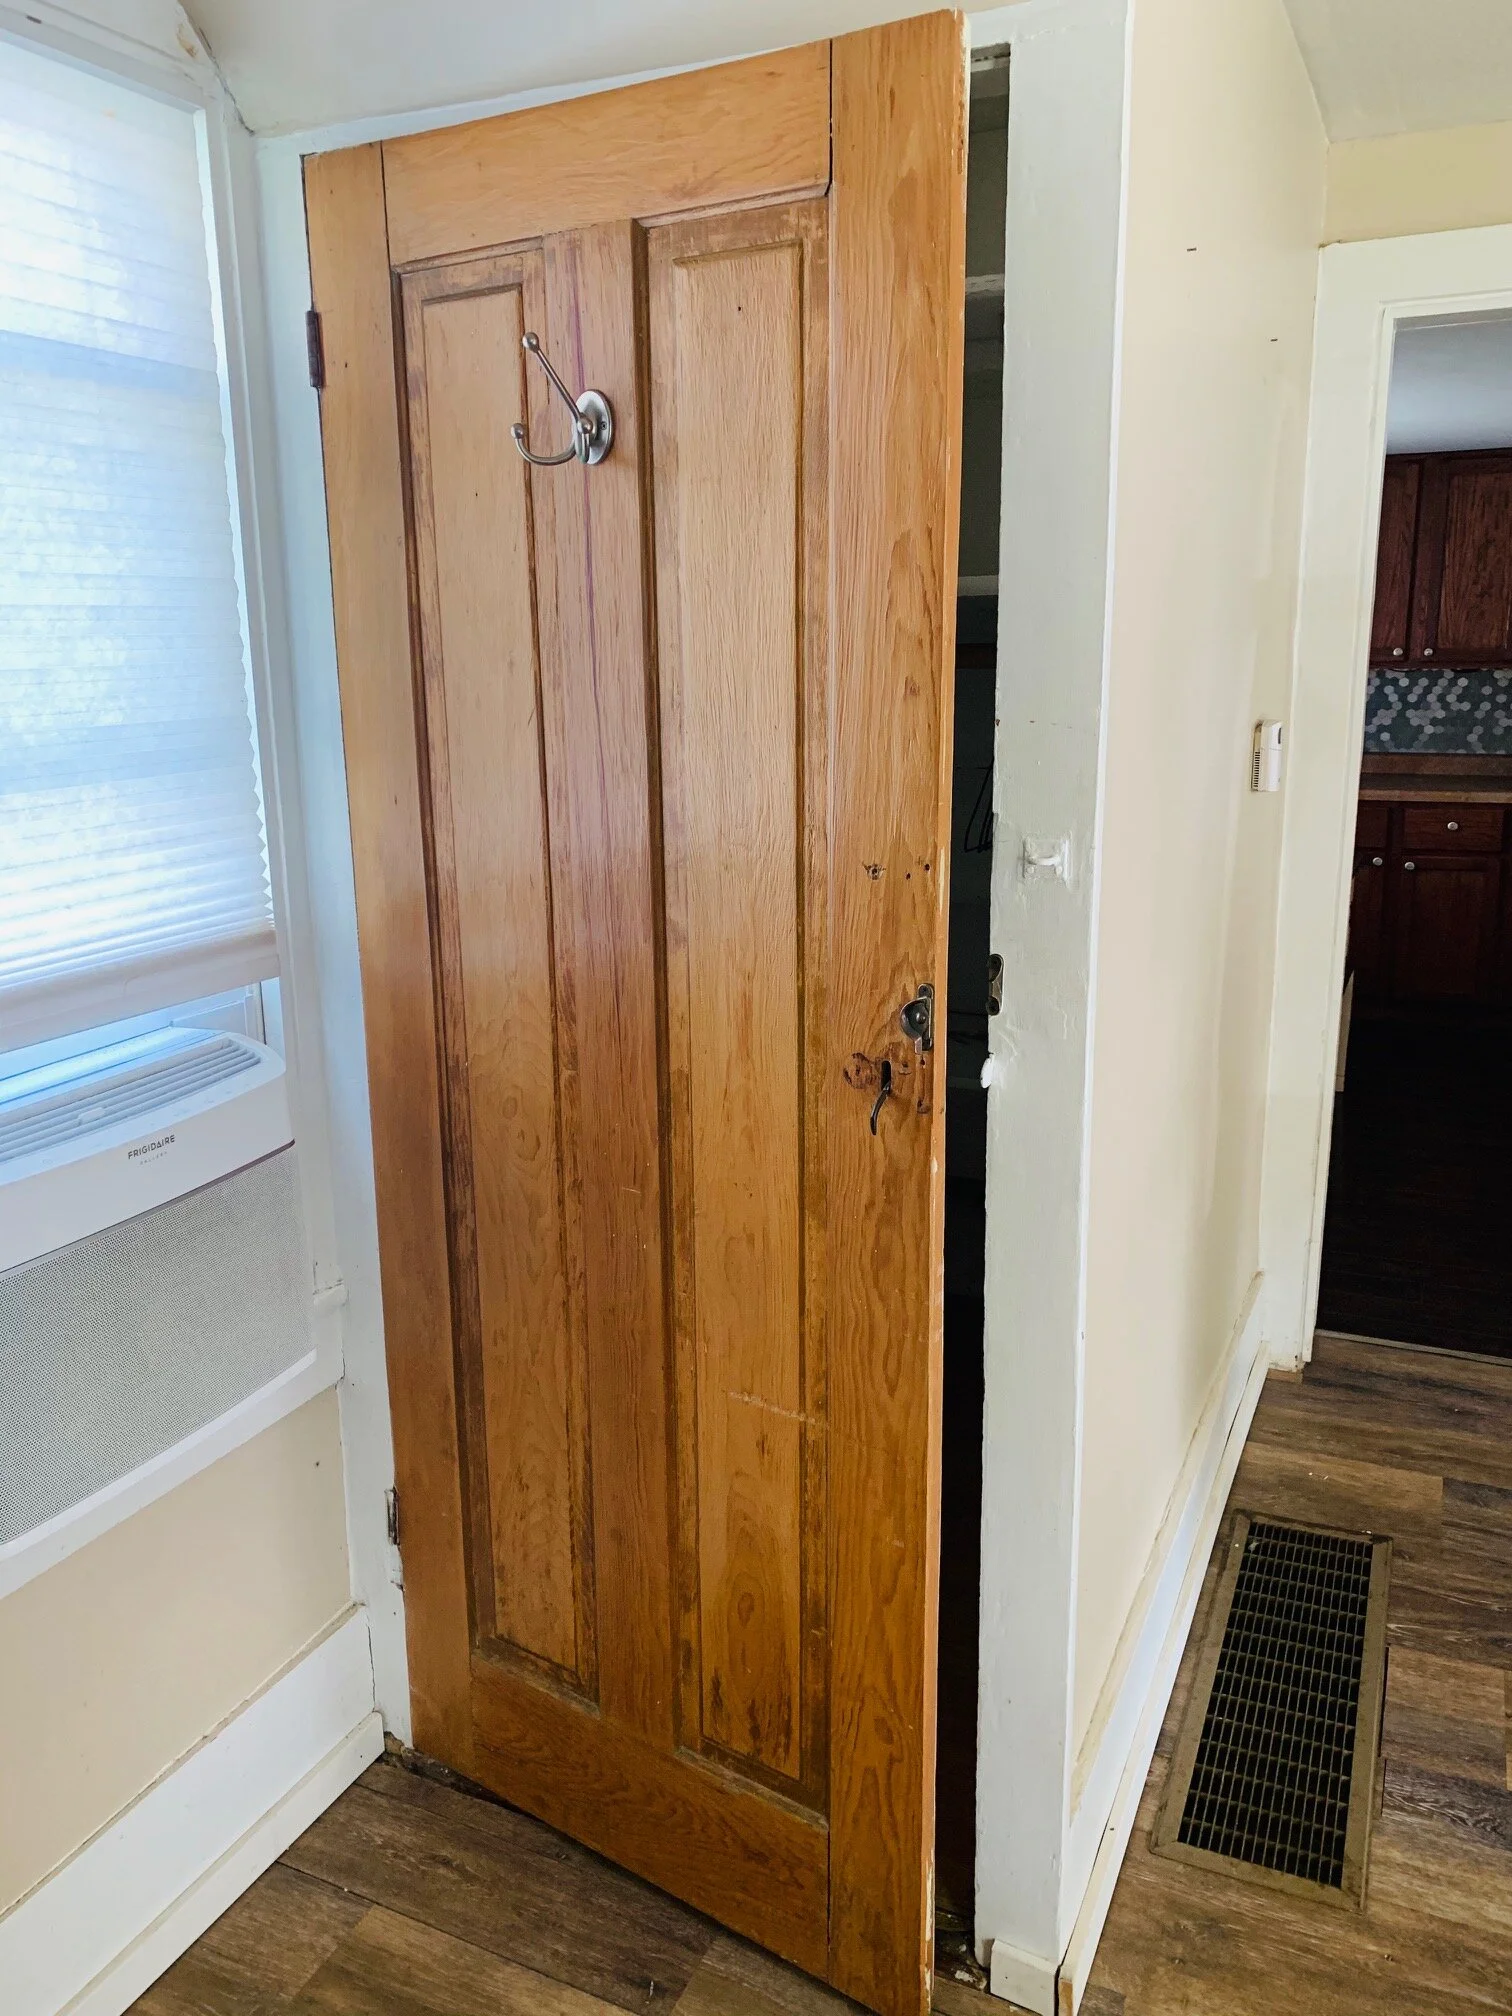

I will get a full set of ‘before’ photos prior to doing any work, but the living room and upstairs bedroom are all that are staying in their original condition, and everything else is being torn down.
Speaking of work, I had better get back to this demolition permit, stay tuned for updates…..it still remains to be seen if this is our best or worst decision to date!
Thank you for stopping by the blog today! Check back with us soon!
-Rachael
Repurposing : The #1 Budget Friendly Decorating Hack
I often get asked about decorating in general, and the cost associated with it. It’s no secret I am an epic bargain hunter, and I think that’s why repurposing old items is my favorite budget friendly decorating hack. The possibilities are only limited by your search terms on Pinterest!
Don’t like an old cabinet or buffet taking up space in your garage? Add some new paint and hardware and turn it into a decor display cabinet or changing table in a nursery. Looking for inexpensive ‘new to you’ furniture? Check out your local thrift store or salvage yard, and then spruce it up a bit.
Today I have a few examples of repurposed items currently on display in my home, and I will share the cost of the items and the updates that I did to them. Feel free to pin any images for later reference!
First up, my medicine cabinet turned decor cabinet! I found this beauty at a local thrift store, and I believe the price was only $10 (it was even on sale!). I completely updated it for only $5, and it now sits as a permanent fixture on my entryway wall, and I simply change out the decor for different seasons. For details on how I updated the cabinet, click here.
Total cost: $15

Medicine Cabinet, original condition