

My (No-Cost) Entryway Table Decor
Hi all! I have (quite unexpectedly) found myself in the middle of a January heat wave here in Iowa, and that has brought about inspiration to purge all things winter, clean, and organize. Now depending on where you are from, you might not think 50 degrees is a heat wave, but to an Iowan this kind of weather calls for opening windows and doing some spring cleaning!
Now if you follow me on Instagram, you know that recently I tackled the large entryway table to my home and cleared all Christmas decor and started fresh. This table has always been challenging to decorate, partially because it is so large and also due to the rest of my entryway being so bare, making it the focal point for all visitors.
Also, being that I was in a cleaning and purging mood, I didn’t want to have to leave and purchase any decor items and interrupt my motivation so I decided to style the table with only items I had on hand. If you have been following along for a bit you might remember that I took this same ‘no-cost’ approach to my front porch this holiday season and that blog post received the highest traffic of any that I have written, so I know you all enjoy my re-purposing and budget friendly take on decorating! If you missed that post, I will link it here.
OK, let’s get to it!
I tackled this large table in sections, pictured below is the right hand side of the table.

Here we have a vintage birdcage that we used as a card holder at our wedding, as well as an old spool (from a friend’s basement clean out), a tray of pine combs, and some twine. Easy!
Up above the birdcage, and on both sides of the table, I have these copper lanterns I purchased years ago at Hobby Lobby, and they are both hanging on iron hooks that were in an old carriage house that we tore down after it sustained wind damage beyond repair. These hooks held the bridles and other equipment for the horses that resided in the barn. You can see an up close picture below.

Next up, the left side of the table!

This end has quite a collection of miscellaneous items! I have absolutely no idea where the basket is from, I have had it for so many years. I filled it with a metal canister I previously picked up at a thrift store, a distressed mason jar that I made, some wood slices and a wooden sign that I had laying around.
Now for the finishing touches and final picture!

Here is the finished table! In the middle I added some additional wooden signs, a small bit of greenery, an old re-purposed shutter and a metal ‘hello’ sign (it’s an entryway after all!).
This metal sign I picked up at JDH Iron Designs down in Waco, Texas when I was there almost two years ago to see the Magnolia Market. If you followed along on the HGTV show Fixer Upper, you might remember that Jimmy Don and JDH Iron Designs made all of the metal signs that were featured in the market and in the finished homes. My sign is even autographed by Jimmy Don! If you ever make it down to Waco I highly recommend visiting his shop. (Not a sponsored post, I just really like his work!)
The actual sawhorse table was built by Adam and APS Construction, I think it might have been the very first piece of furniture he made.
Well, I’m off to take advantage of this warm weather and tackle a few more things outdoors before it returns to January around here! I hope this post has provided you some inspiration for decorating your own home and I will see you guys soon!

The Epic Barn Beam Bed Frame!
Hi all! We are in the home stretch leading up to Christmas and many of you are probably already on break for the holidays (this season seemed like it flew by faster than previous years). I have one final post for you before we transition into full Christmas mode at my house, which will consist of a few days computer-free to enjoy this time with family. So if you are sitting in an airport waiting to travel to your holiday gathering, or maybe need a 5 minute ‘break’ from all things Christmas, I have just the post for you!
Recently, we finished up a client project that turned out to be the biggest piece of furniture we have ever created, thus the title of this post. This bed frame required long hours of prep, assembly, take down, haul to its final location, and reassembly, but as you will see it was well worth it and turned out stunning!
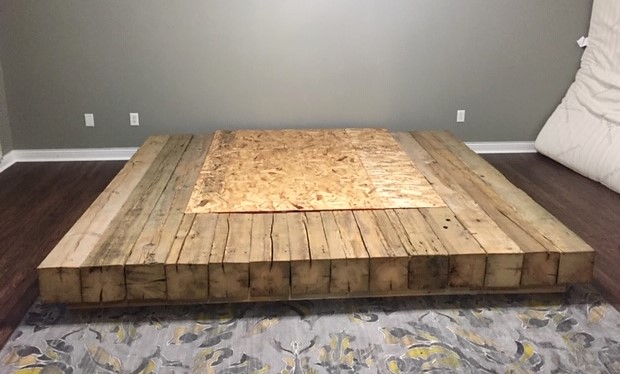
The materials for this project included authentic reclaimed barn beams and these were SOLID 8x8 beams, which made them very heavy.
Prior to use, the beams had to be cut, sanded and assembled at our shop to ensure they all fit together properly and weren’t warped by the last 100 years of extreme temperatures of Midwest weather. a simple frame was assembled to keep the beams up off the floor in the client’s room.
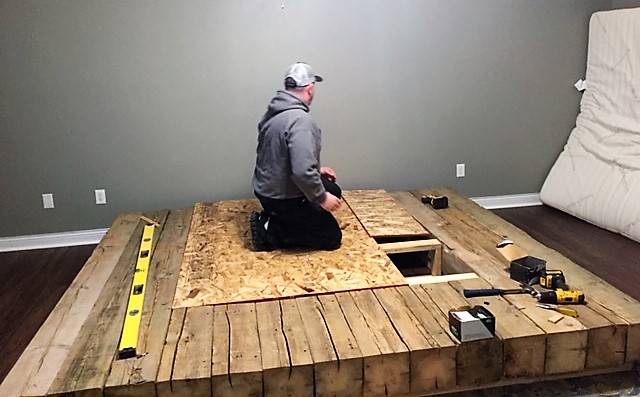
Next, each beam was secured in place. To eliminate some of the weight of this piece, an alternate framing technique was used to comply with floor joist specifications and it was completely covered by the mattress and otherwise not visible once assembled.


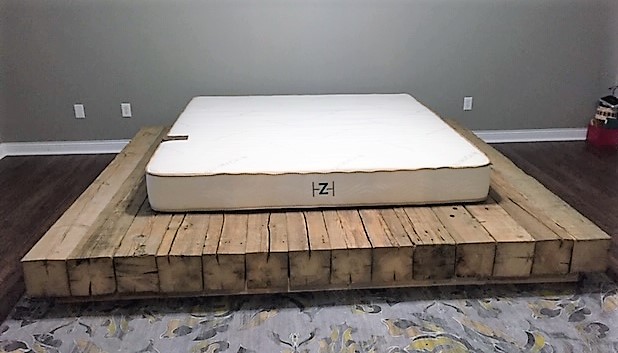
Here the frame is being finished up and mattress added.
To show you just how big this bed frame is, the mattress pictured is king size!
Pictured below are some up close photos of the wood details on the headboard and beams, each of which are unique. There is just something about the look of authentic barn wood that cannot be recreated with other materials.

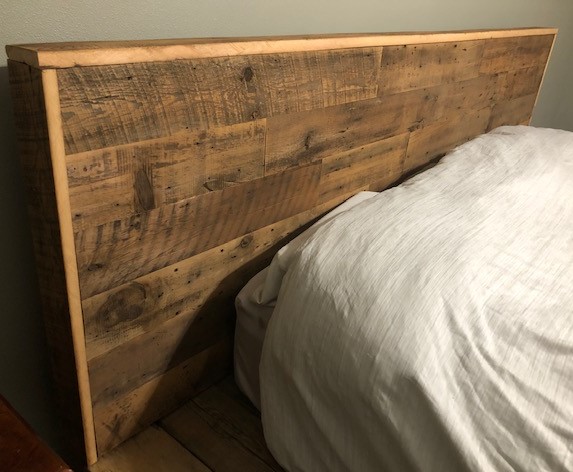
The finished project photos!

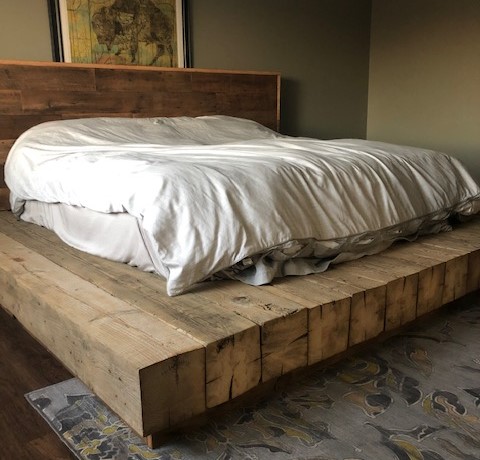
This bed frame turned out truly stunning!
I absolutely love how it all came together. A sincere thank you to the client who chose us to make this item for her!

The Friendship Fireplace Project!
Hey all, one week until Christmas Eve! Are you ready? (It’s OK, I’m not either!) I’m not too stressed about it either, there’s plenty of time left for that! All of that aside, I am excited to share with you a client project we recently finished up called ‘The Friendship Fireplace’. The street address for this home contains the word ‘Friendship’, thus that is how the project name was developed. We do a number of fireplace/mantel projects and have to keep them straight with unique titles!
The fireplace is often the focal point of the living room as well as the backdrop for family photos, and this homeowner wanted a total remodel of this space to bring it out of the 1970’s. To do that, we first had to start with a clean slate!

Aside from the fireplace itself, there was not any part of the original design that was worth keeping…it all had to go.
And as you can see we made a huge mess, but it was worth it!
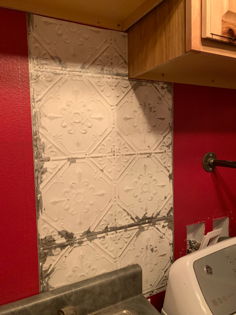
Progress photos after some new framing, insulation, and cement wall board.


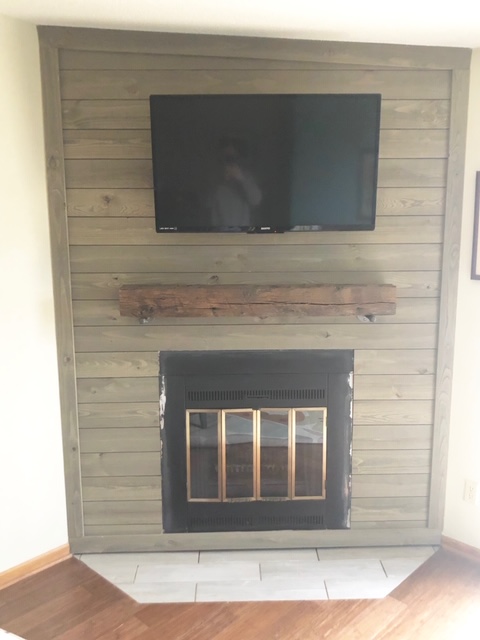
We needed to redefine this space, and the easiest way to accomplish that was to add a new texture or wall surface. The homeowner chose rough sawn weathered shiplap, which is pictured below. It’s a gorgeous light grey, and really makes this space ‘pop’!

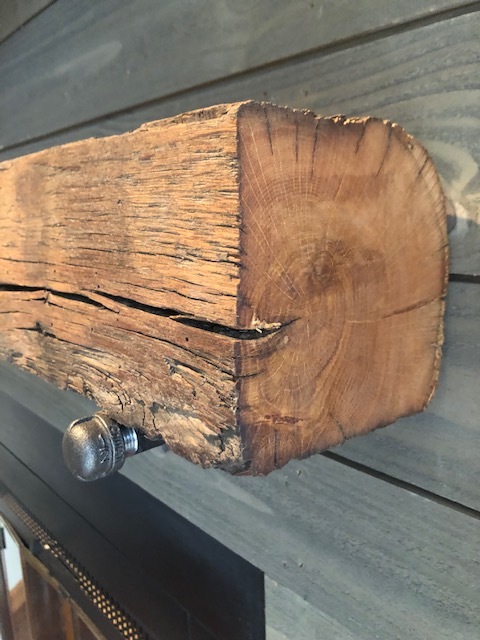
These barn beam mantels are always my personal favorite. Every single one is unique, bringing a different century-old story into each home. This one was mounted with simple gas pipe wall plates and fittings.


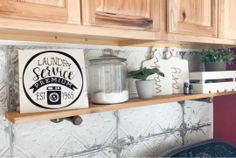
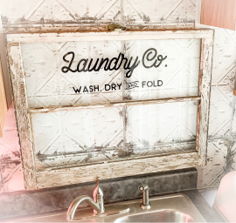
And here’s a full length view, complete with fresh tile at the base of the new wall. This family will have a fresh new space to take all of their family photos and the mantel will surely be a talking point with guests for years to come!
We really appreciate the homeowner choosing our business to complete her fireplace remodel!
The fireplace insert remains in original condition, as the homeowner has plans to resurface that herself