My Budget Friendly Fall Front Porch

Since it’s now October, I thought it was time to take down the Spring décor from the front porch. Somewhere in there I completely skipped over Summer, which is not like me, but hey it’s the year of ‘anything goes’!

I made it to the storage unit and hauled all the Fall bins home, and found quite a few items I had previously forgotten about (my favorite part about decorating for a new season). It’s still randomly hot here in Iowa, so I am holding off on any real pumpkins as my porch faces the west and they just bake in the afternoon sun.

Y’all know I am all about budget friendly decorating, and especially free! I have some decorative grass in the front of my house that we cut down each year about this time, and I saved some of it for my front porch.

IMG_8562.jpg

I have a large milk can that I stuffed full of the cut down grass, and as it dries out it will look really nice and fall-ish (and even better since its free). In fact, the only portion of this porch project that cost any money, are the fresh mums I picked up from the nearby grocery store. They were only $6 each, so I feel pretty confident that I won’t be devastated if they don’t last too long, due to my inability to keep plants alive. Here’s a closeup of these huge (and cheap) mums!

Everything else was from my stash of things I already had, I mean I collect super inexpensive vintage things all year round for these precise moments! Here is how it turned out!

IMG_8924.JPG
IMG_8966.jpg

I hope you enjoyed my budget friendly front porch project! As always, thanks for stopping by the blog, we really appreciate all of the support!

See you soon!

-Rachael

Repurposing : The #1 Budget Friendly Decorating Hack

I often get asked about decorating in general, and the cost associated with it. It’s no secret I am an epic bargain hunter, and I think that’s why repurposing old items is my favorite budget friendly decorating hack. The possibilities are only limited by your search terms on Pinterest!

Don’t like an old cabinet or buffet taking up space in your garage? Add some new paint and hardware and turn it into a decor display cabinet or changing table in a nursery. Looking for inexpensive ‘new to you’ furniture? Check out your local thrift store or salvage yard, and then spruce it up a bit.

Today I have a few examples of repurposed items currently on display in my home, and I will share the cost of the items and the updates that I did to them. Feel free to pin any images for later reference!

First up, my medicine cabinet turned decor cabinet! I found this beauty at a local thrift store, and I believe the price was only $10 (it was even on sale!). I completely updated it for only $5, and it now sits as a permanent fixture on my entryway wall, and I simply change out the decor for different seasons. For details on how I updated the cabinet, click here.

Total cost: $15

Medicine Cabinet, original condition

Medicine Cabinet, original condition

c0edd002344cffd1a190c0d93ee6e9d7.jpeg
61b629c2be992f0a4cde38b896f5be6b.jpeg

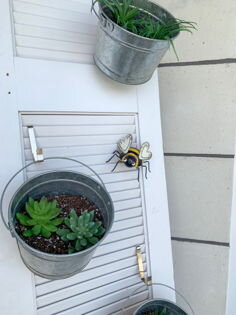
Next, I have an old shutter style hinge door on my front porch that I simply use hooks to hang different decor on depending on the season. This item was FREE, on a local facebook marketplace group. All I did was clean it up and bit and do a small amount of sanding. Here are a couple examples of how I have used it so far, and the photo on the left is how it looks currently.

Total cost: $0

41818817d8985fa0c01dc2d005b50001.jpeg
c7d39c325a8db0d22febb31f53a45ad9.jpeg

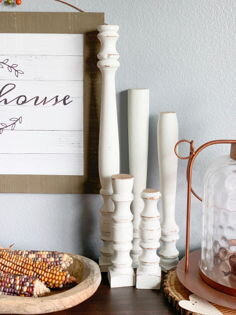
I’m not afraid to get a little dirty and bust out the chalk paint when necessary, and this comes in handy when an item needs a fresh look. A perfect example is a set of 3 spindles I picked up at a salvage store, and I was determined to make them look like candlesticks. I had Adam cut them at different heights, for a total of 5 candlesticks made from the 3 spindles. At $2 a piece, my cost was $6 total. A little chalk paint and sanding later, I have 5 pretty versatile pieces of decor and you will see them in my home during every season. For the full tutorial, click here.

Total cost: $6

IMG_0556.jpg
72180625e2e09fc44735d0b5648560a7.jpeg

Lastly, I have a deep love for decorating with old farm items. These might look like junk to the untrained eye, but the history in each piece is what calls my heart to them. For example, this chicken feeder from a local flea market sits on my dining room table almost year round, filled with various seasonal decor. I sometimes find myself wondering how many chickens ate from this trough over the years and what other stories this item holds, not to mention it makes a great centerpiece because it doesn’t obstruct views of people sitting at the table!

Total Cost $10

7bc5c3be65b2a17a0337531036ca3948.jpeg

I hope today I could show you that having a vast assortment of decor and/or decorating your home for each season doesn’t have to be expensive. In fact, I get such enjoyment searching for that bargain and then bringing new life to old items. How do you decorate with repurposed items in your home? I would love to hear all about it!

I hope October is treating you well, wherever you are!

Signoff.jpg

Our Re-Purposed Pantry Door

Hi there! I hope today finds you enjoying sunny Spring weather! Today I am sharing a little behind the scenes info on our pantry door that received so many questions on Instagram the other evening. Here is the photo I posted in case you missed it.

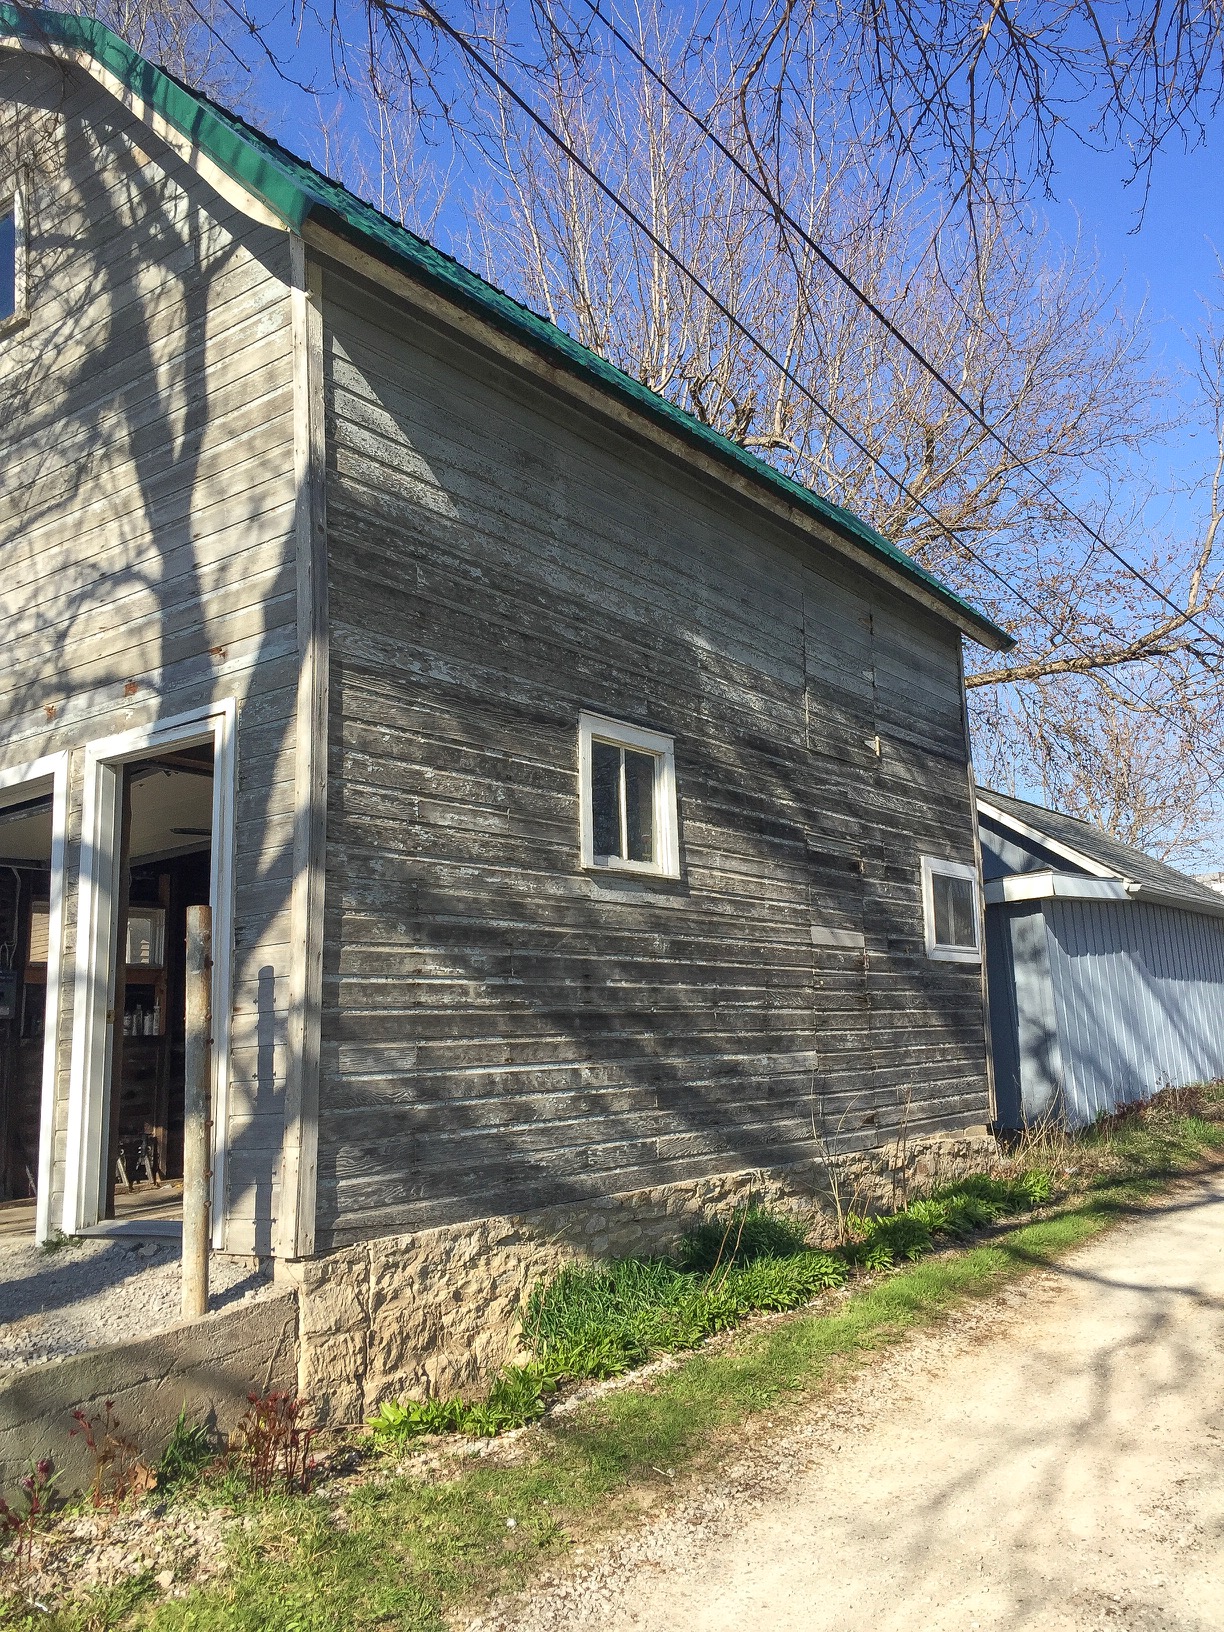
This pantry door is from an old carriage house that we had to tear down due to irreparable wind damage. The structure was two stories tall, with an attic/loft above the area that held the horses and equipment. Here is a photo I found of the carriage house that I took right before we took it down.

IMG_5644.JPG

The wind damage is not visible from this angle, but this building had such a lean to it that it was no longer safe. I did venture inside for a quick photo of the ceiling, which served as the flooring for the loft area and appeared to have already been re-purposed.

Here is the photo :

IMG_5642.JPG

We tore down the entire structure and have reused the materials to make all sorts of things. For example, these 2x4 beams (shown horizontal in photo) are what we use to make our custom farm tables and gas pipe shelving units. Now there’s some history to talk about at the dinner table!

IMG_5767.JPG

This next photo isn’t the best quality, but it’s an action shot of Adam cleaning out the second story of the structure before demolition could begin. Side note: this door that you see is often featured on my front porch!

Unfortunately, I do not have a photo of our pantry door before it was removed, but it served as the door between the first and second floor, as a ‘hatch’ of sorts at the top of the stairs. The metal ring on the front of the door was used to pull it open from the second story. I lifted the ring on the next photo so you could see what I am talking about. The hinges are also original hardware.

IMG_2165.jpg

We attached the door, using the original hinges, to the custom frame we had built with unaltered barn wood we had previously obtained from a different structure. I really enjoy the barn wood door frame in it’s original state, showing nail holes and chipped paint of both red and white.

IMG_2164.jpg

Well, there you have it! I hope this post answered your questions and provided a bit of history along the way. As always, thanks for stopping by the blog today and I look forward to interacting with you again soon!

Signoff.jpg

My (No-Cost) Entryway Table Decor

Hi all! I have (quite unexpectedly) found myself in the middle of a January heat wave here in Iowa, and that has brought about inspiration to purge all things winter, clean, and organize. Now depending on where you are from, you might not think 50 degrees is a heat wave, but to an Iowan this kind of weather calls for opening windows and doing some spring cleaning!

Now if you follow me on Instagram, you know that recently I tackled the large entryway table to my home and cleared all Christmas decor and started fresh. This table has always been challenging to decorate, partially because it is so large and also due to the rest of my entryway being so bare, making it the focal point for all visitors.

Also, being that I was in a cleaning and purging mood, I didn’t want to have to leave and purchase any decor items and interrupt my motivation so I decided to style the table with only items I had on hand. If you have been following along for a bit you might remember that I took this same ‘no-cost’ approach to my front porch this holiday season and that blog post received the highest traffic of any that I have written, so I know you all enjoy my re-purposing and budget friendly take on decorating! If you missed that post, I will link it here.

OK, let’s get to it!

I tackled this large table in sections, pictured below is the right hand side of the table.

IMG_0513 (1).JPG

Here we have a vintage birdcage that we used as a card holder at our wedding, as well as an old spool (from a friend’s basement clean out), a tray of pine combs, and some twine. Easy!

Up above the birdcage, and on both sides of the table, I have these copper lanterns I purchased years ago at Hobby Lobby, and they are both hanging on iron hooks that were in an old carriage house that we tore down after it sustained wind damage beyond repair. These hooks held the bridles and other equipment for the horses that resided in the barn. You can see an up close picture below.

IMG_0504 (1).JPG

Next up, the left side of the table!

IMG_0505 (1).JPG

This end has quite a collection of miscellaneous items! I have absolutely no idea where the basket is from, I have had it for so many years. I filled it with a metal canister I previously picked up at a thrift store, a distressed mason jar that I made, some wood slices and a wooden sign that I had laying around.

Now for the finishing touches and final picture!

IMG_0509 (1).JPG

Here is the finished table! In the middle I added some additional wooden signs, a small bit of greenery, an old re-purposed shutter and a metal ‘hello’ sign (it’s an entryway after all!).

This metal sign I picked up at JDH Iron Designs down in Waco, Texas when I was there almost two years ago to see the Magnolia Market. If you followed along on the HGTV show Fixer Upper, you might remember that Jimmy Don and JDH Iron Designs made all of the metal signs that were featured in the market and in the finished homes. My sign is even autographed by Jimmy Don! If you ever make it down to Waco I highly recommend visiting his shop. (Not a sponsored post, I just really like his work!)

The actual sawhorse table was built by Adam and APS Construction, I think it might have been the very first piece of furniture he made.

Well, I’m off to take advantage of this warm weather and tackle a few more things outdoors before it returns to January around here! I hope this post has provided you some inspiration for decorating your own home and I will see you guys soon!

Signoff.jpg

The Epic Barn Beam Bed Frame!

Hi all! We are in the home stretch leading up to Christmas and many of you are probably already on break for the holidays (this season seemed like it flew by faster than previous years). I have one final post for you before we transition into full Christmas mode at my house, which will consist of a few days computer-free to enjoy this time with family. So if you are sitting in an airport waiting to travel to your holiday gathering, or maybe need a 5 minute ‘break’ from all things Christmas, I have just the post for you!


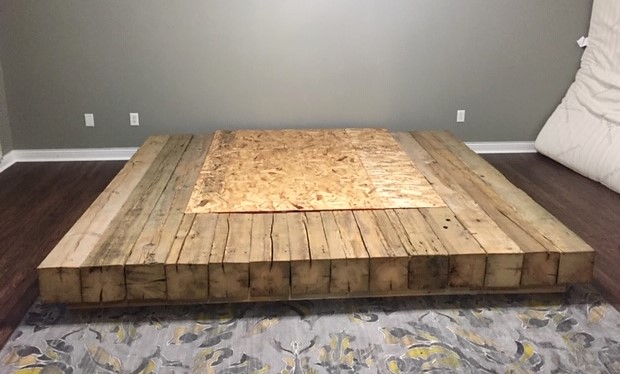
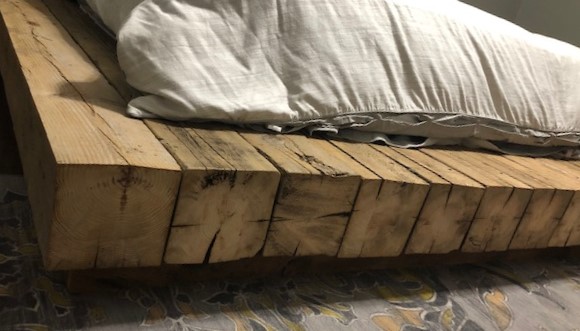
Recently, we finished up a client project that turned out to be the biggest piece of furniture we have ever created, thus the title of this post. This bed frame required long hours of prep, assembly, take down, haul to its final location, and reassembly, but as you will see it was well worth it and turned out stunning!

The materials for this project included authentic reclaimed barn beams and these were SOLID 8x8 beams, which made them very heavy.

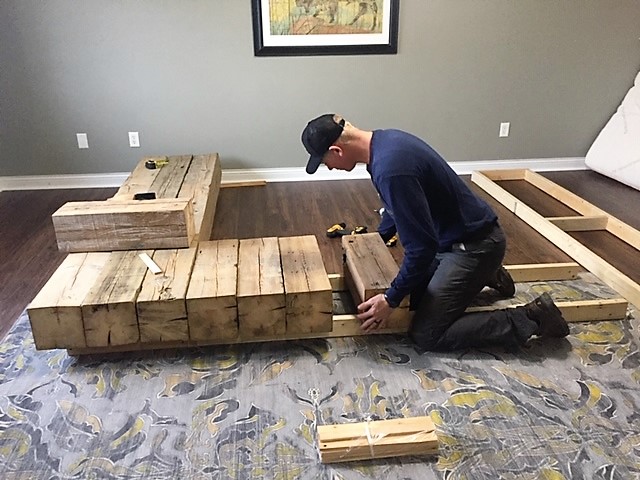
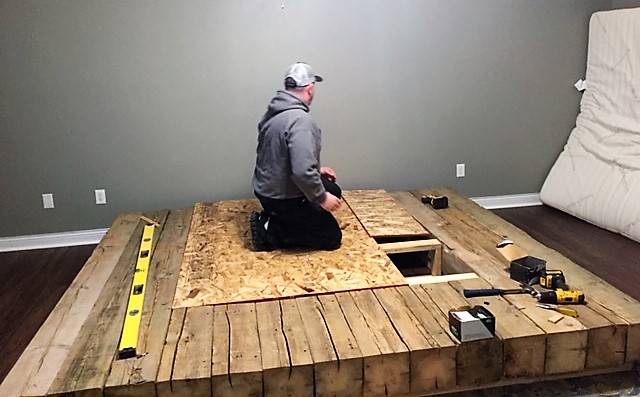
Prior to use, the beams had to be cut, sanded and assembled at our shop to ensure they all fit together properly and weren’t warped by the last 100 years of extreme temperatures of Midwest weather. a simple frame was assembled to keep the beams up off the floor in the client’s room.

Next, each beam was secured in place. To eliminate some of the weight of this piece, an alternate framing technique was used to comply with floor joist specifications and it was completely covered by the mattress and otherwise not visible once assembled.

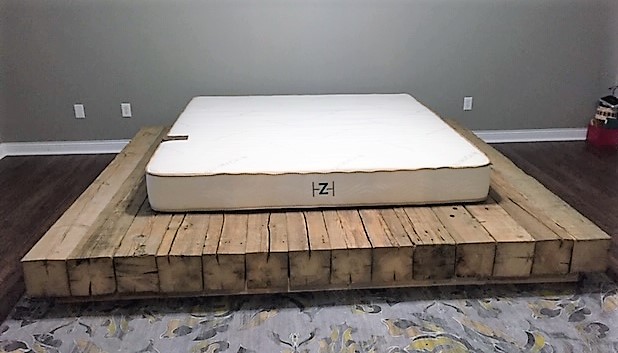
Here the frame is being finished up and mattress added.

To show you just how big this bed frame is, the mattress pictured is king size!

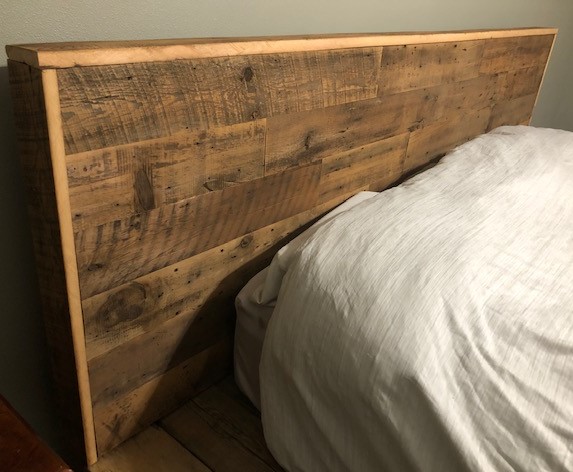
Pictured below are some up close photos of the wood details on the headboard and beams, each of which are unique. There is just something about the look of authentic barn wood that cannot be recreated with other materials.

The finished project photos!

IMG_4653 (1).jpeg

This bed frame turned out truly stunning!

I absolutely love how it all came together. A sincere thank you to the client who chose us to make this item for her!

Signoff.jpg

The Friendship Fireplace Project!

Hey all, one week until Christmas Eve! Are you ready? (It’s OK, I’m not either!) I’m not too stressed about it either, there’s plenty of time left for that! All of that aside, I am excited to share with you a client project we recently finished up called ‘The Friendship Fireplace’. The street address for this home contains the word ‘Friendship’, thus that is how the project name was developed. We do a number of fireplace/mantel projects and have to keep them straight with unique titles!

The fireplace is often the focal point of the living room as well as the backdrop for family photos, and this homeowner wanted a total remodel of this space to bring it out of the 1970’s. To do that, we first had to start with a clean slate!

IMG_4355 (1).jpeg

Aside from the fireplace itself, there was not any part of the original design that was worth keeping…it all had to go.

And as you can see we made a huge mess, but it was worth it!


Progress photos after some new framing, insulation, and cement wall board.

IMG_4356 (1).jpeg
IMG_4357.jpeg
 

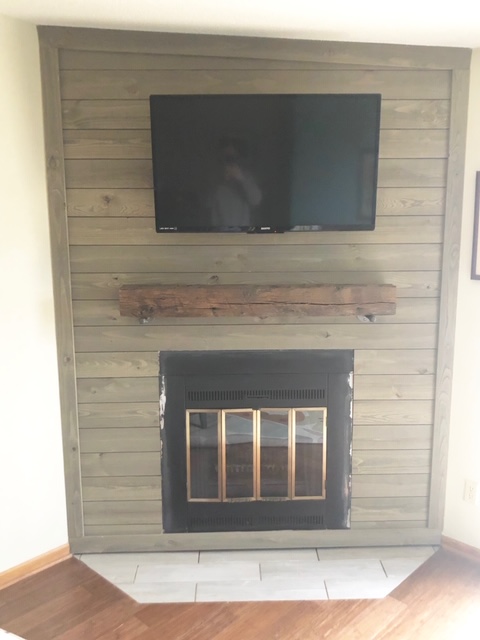
We needed to redefine this space, and the easiest way to accomplish that was to add a new texture or wall surface. The homeowner chose rough sawn weathered shiplap, which is pictured below. It’s a gorgeous light grey, and really makes this space ‘pop’!

IMG_4395 (1).jpg
 

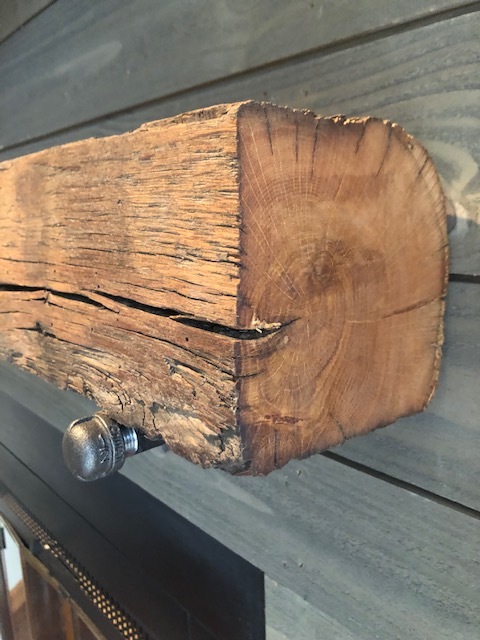
These barn beam mantels are always my personal favorite. Every single one is unique, bringing a different century-old story into each home. This one was mounted with simple gas pipe wall plates and fittings.

IMG_4626 (1).JPEG
IMG_4623 (1).JPEG
 

And here’s a full length view, complete with fresh tile at the base of the new wall. This family will have a fresh new space to take all of their family photos and the mantel will surely be a talking point with guests for years to come!

We really appreciate the homeowner choosing our business to complete her fireplace remodel!

The fireplace insert remains in original condition, as the homeowner has plans to resurface that herself

The fireplace insert remains in original condition, as the homeowner has plans to resurface that herself

And some bonus mantel pictures, because I can’t help myself!

IMG_4622 (1).JPEG
IMG_4625 (1).jpeg
IMG_4624 (1).JPEG

Coffee, Tree Trimming, and Christmas Decorating

Hi! Can you believe next week is already Thanksgiving? I still cannot wrap my brain around it. Either way, Christmas decorating is in full swing at my house and while I’m not quite ready to share what I have done so far, I did help a dear friend decorate her home yesterday over some much needed Starbucks, and wanted to quickly share what we did in case some of you are planning on whipping out your holiday items on Thursday night.

You all know I love everything budget friendly, and holiday decorating is no exception. While I do often buy a small item here or there, I reserve most of my décor shopping for after the holiday (or season) to take advantage of those steep discounts. As a result, I often forget what I have from the year before when it’s time to dig it all out of storage again, and this is why I prefer to get all decorations spread out in one place before beginning to place them throughout my home. I often reuse items in a new way than the year prior, or simply put them in a different room to give the illusion of ‘new’, without going over budget.


Ok, lets get to it!

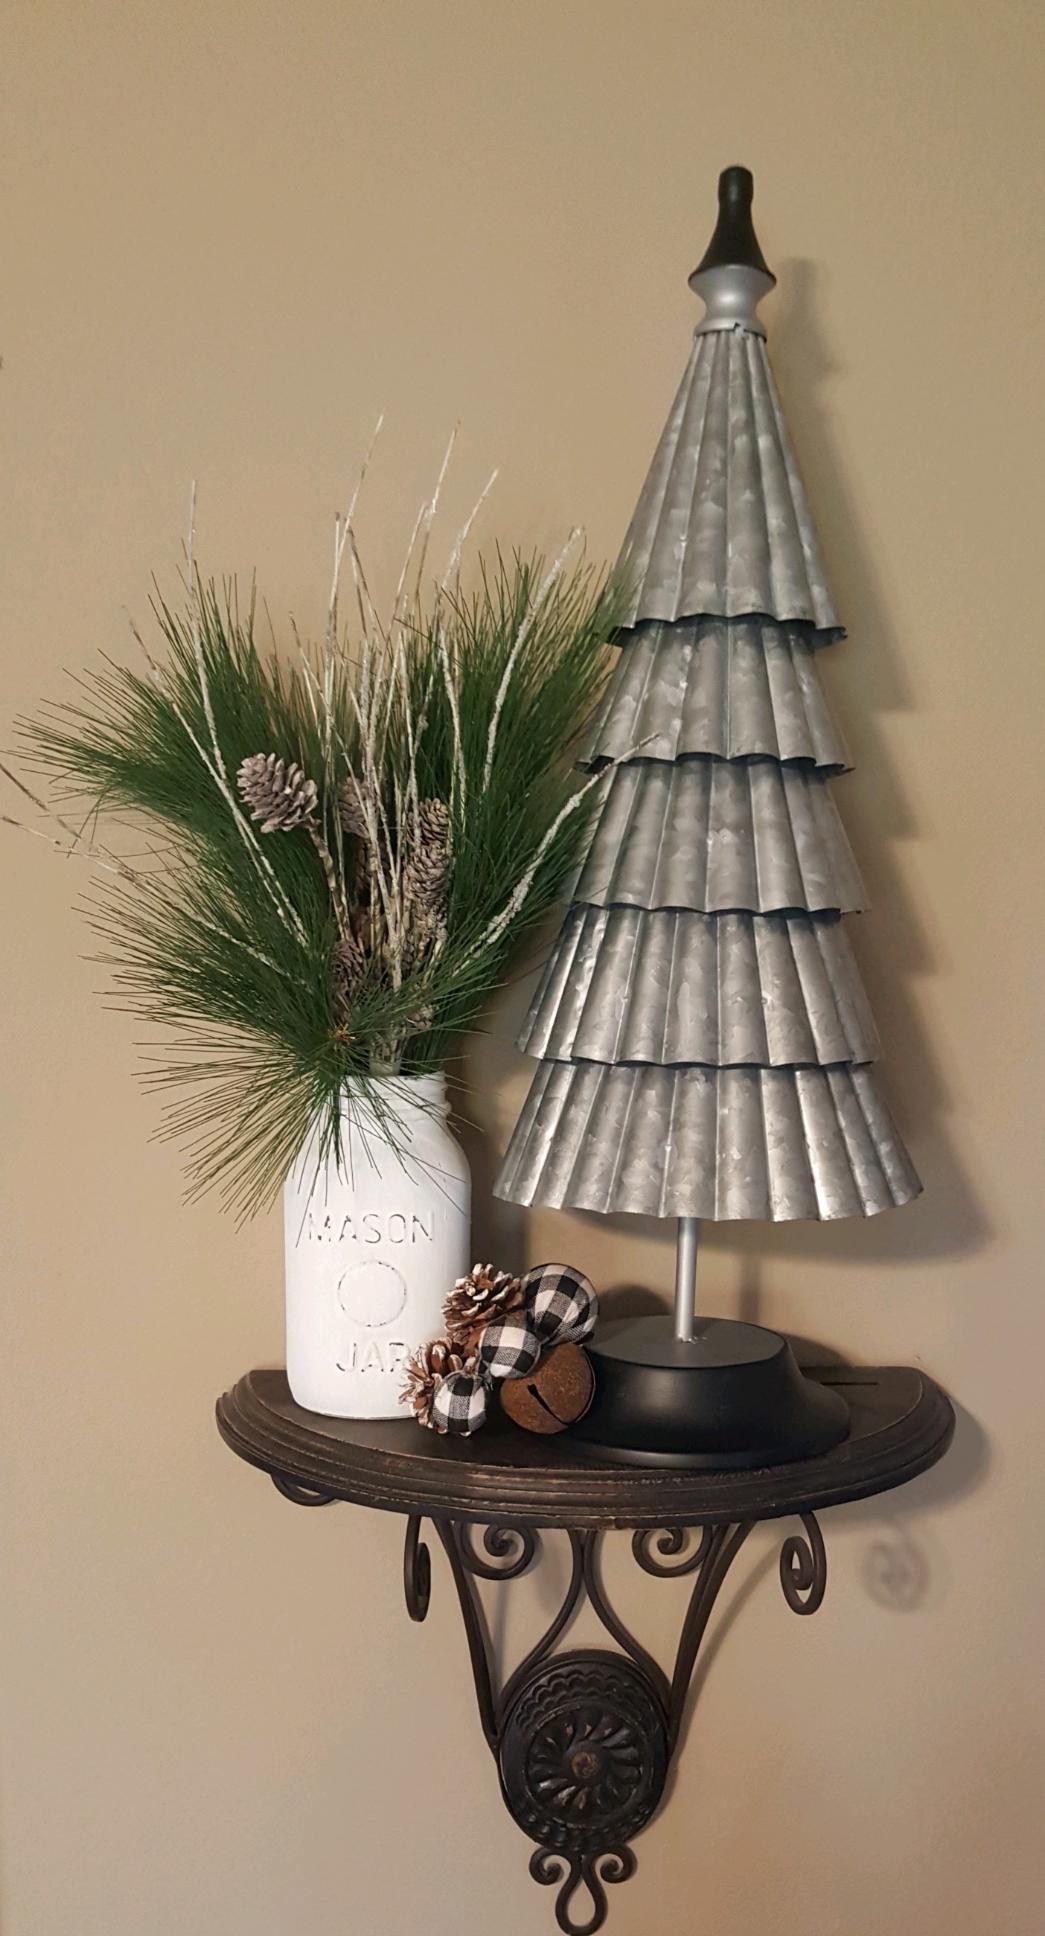
Having an infant on the move, my friend wanted to utilize some higher spaces in her home to place décor that her baby could not get into. She had two shelves on either side of her fireplace/tv area that she wanted to fill, and we also needed to figure out something for her tree to make it somewhat baby friendly.

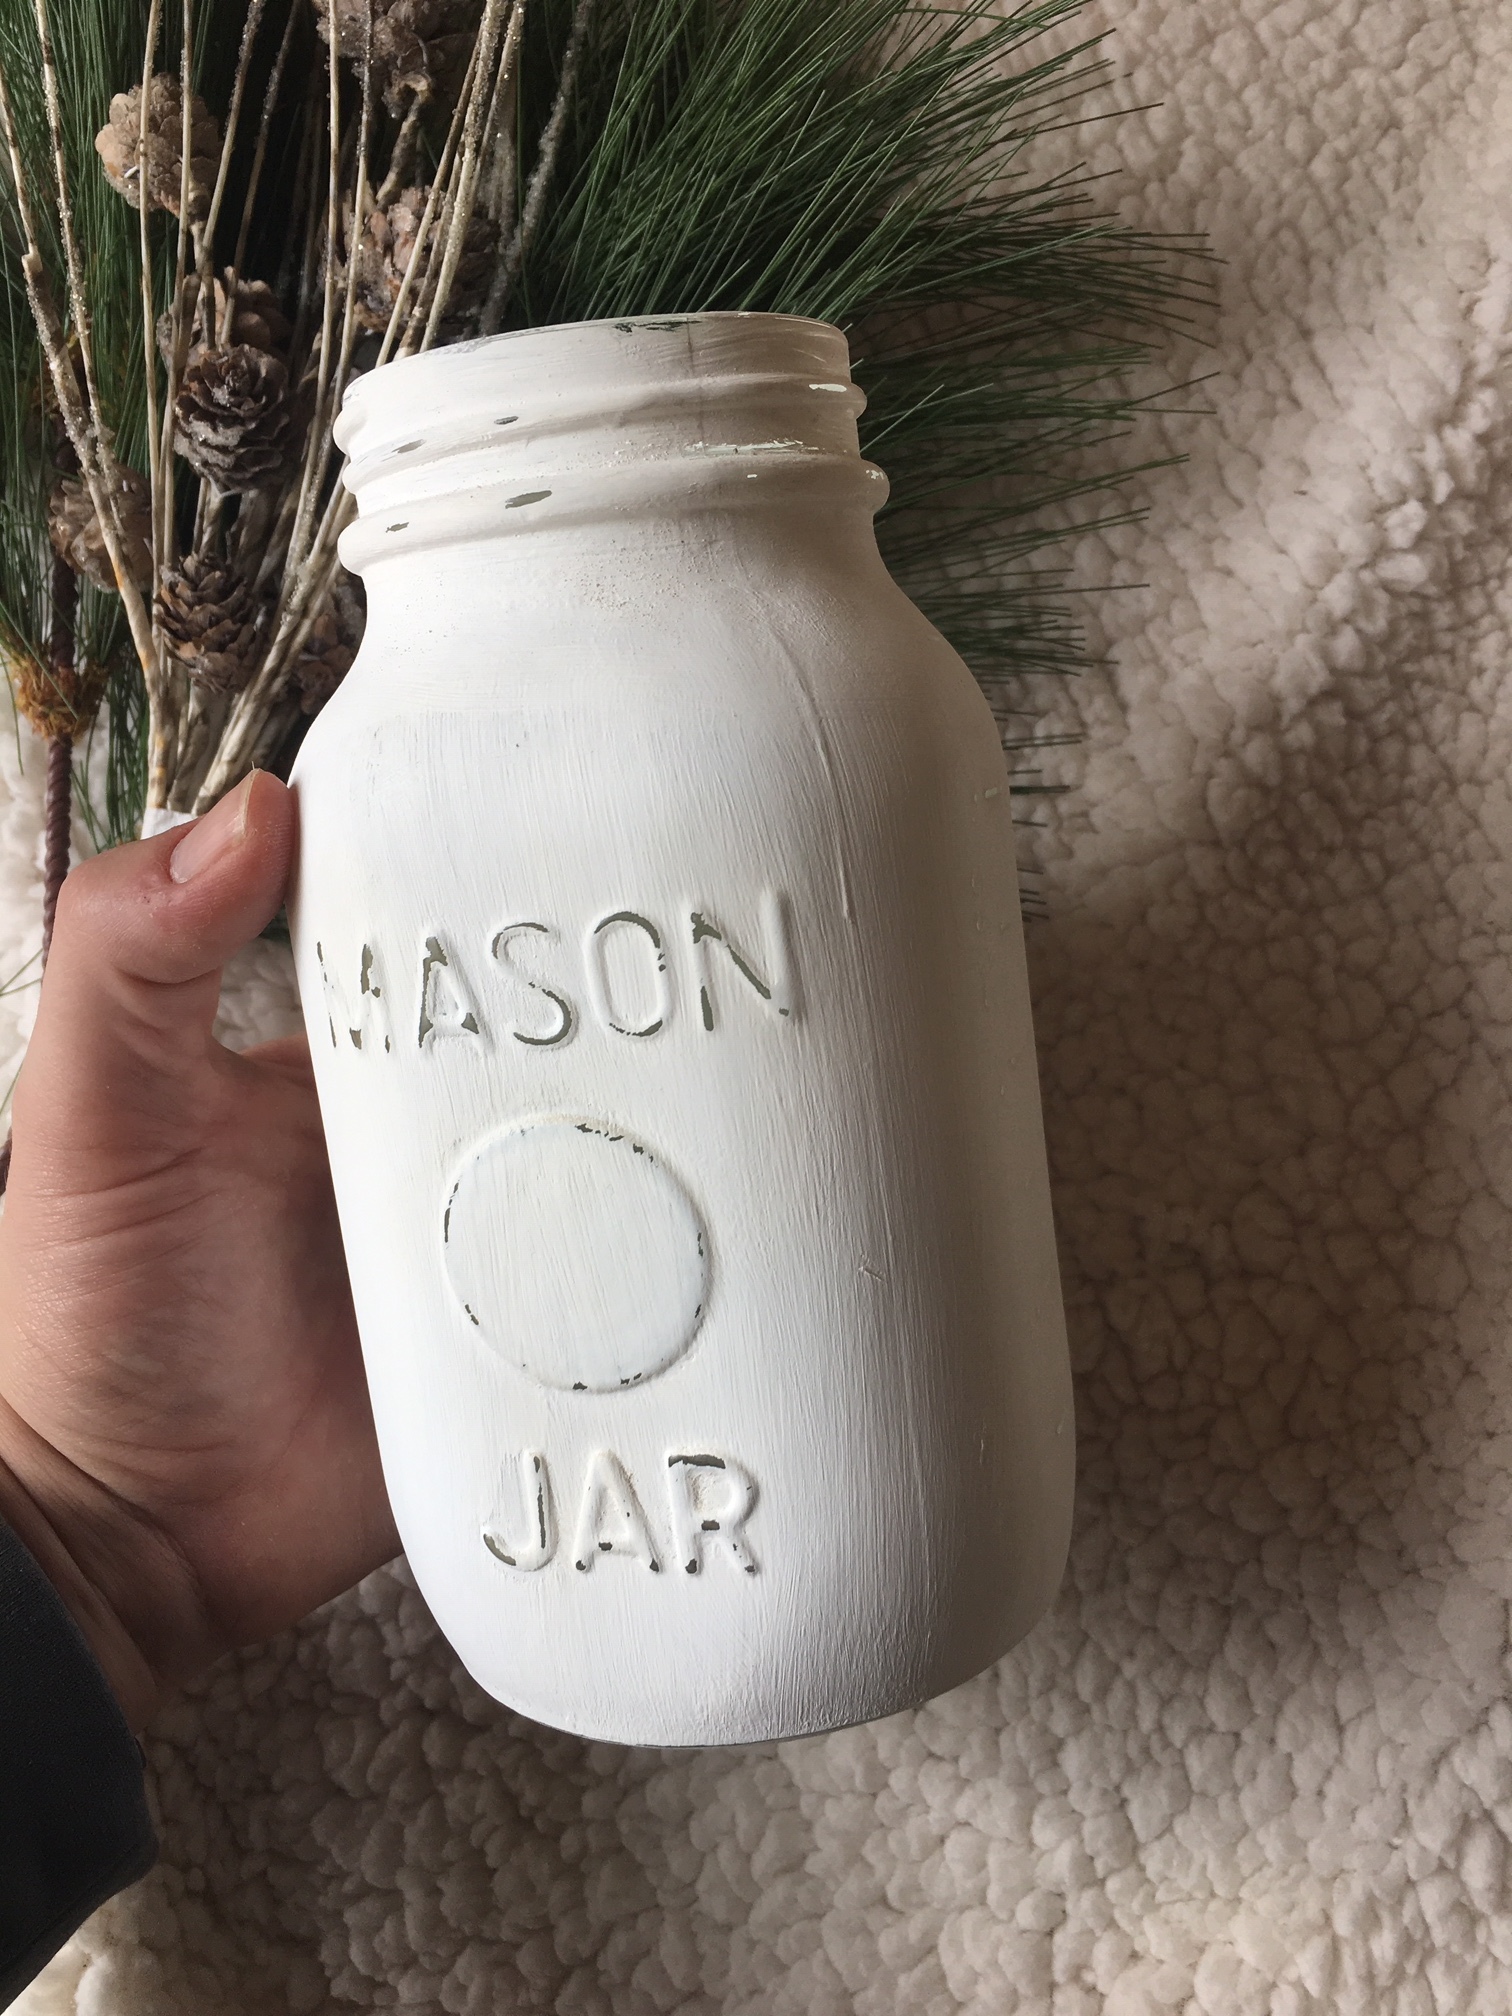
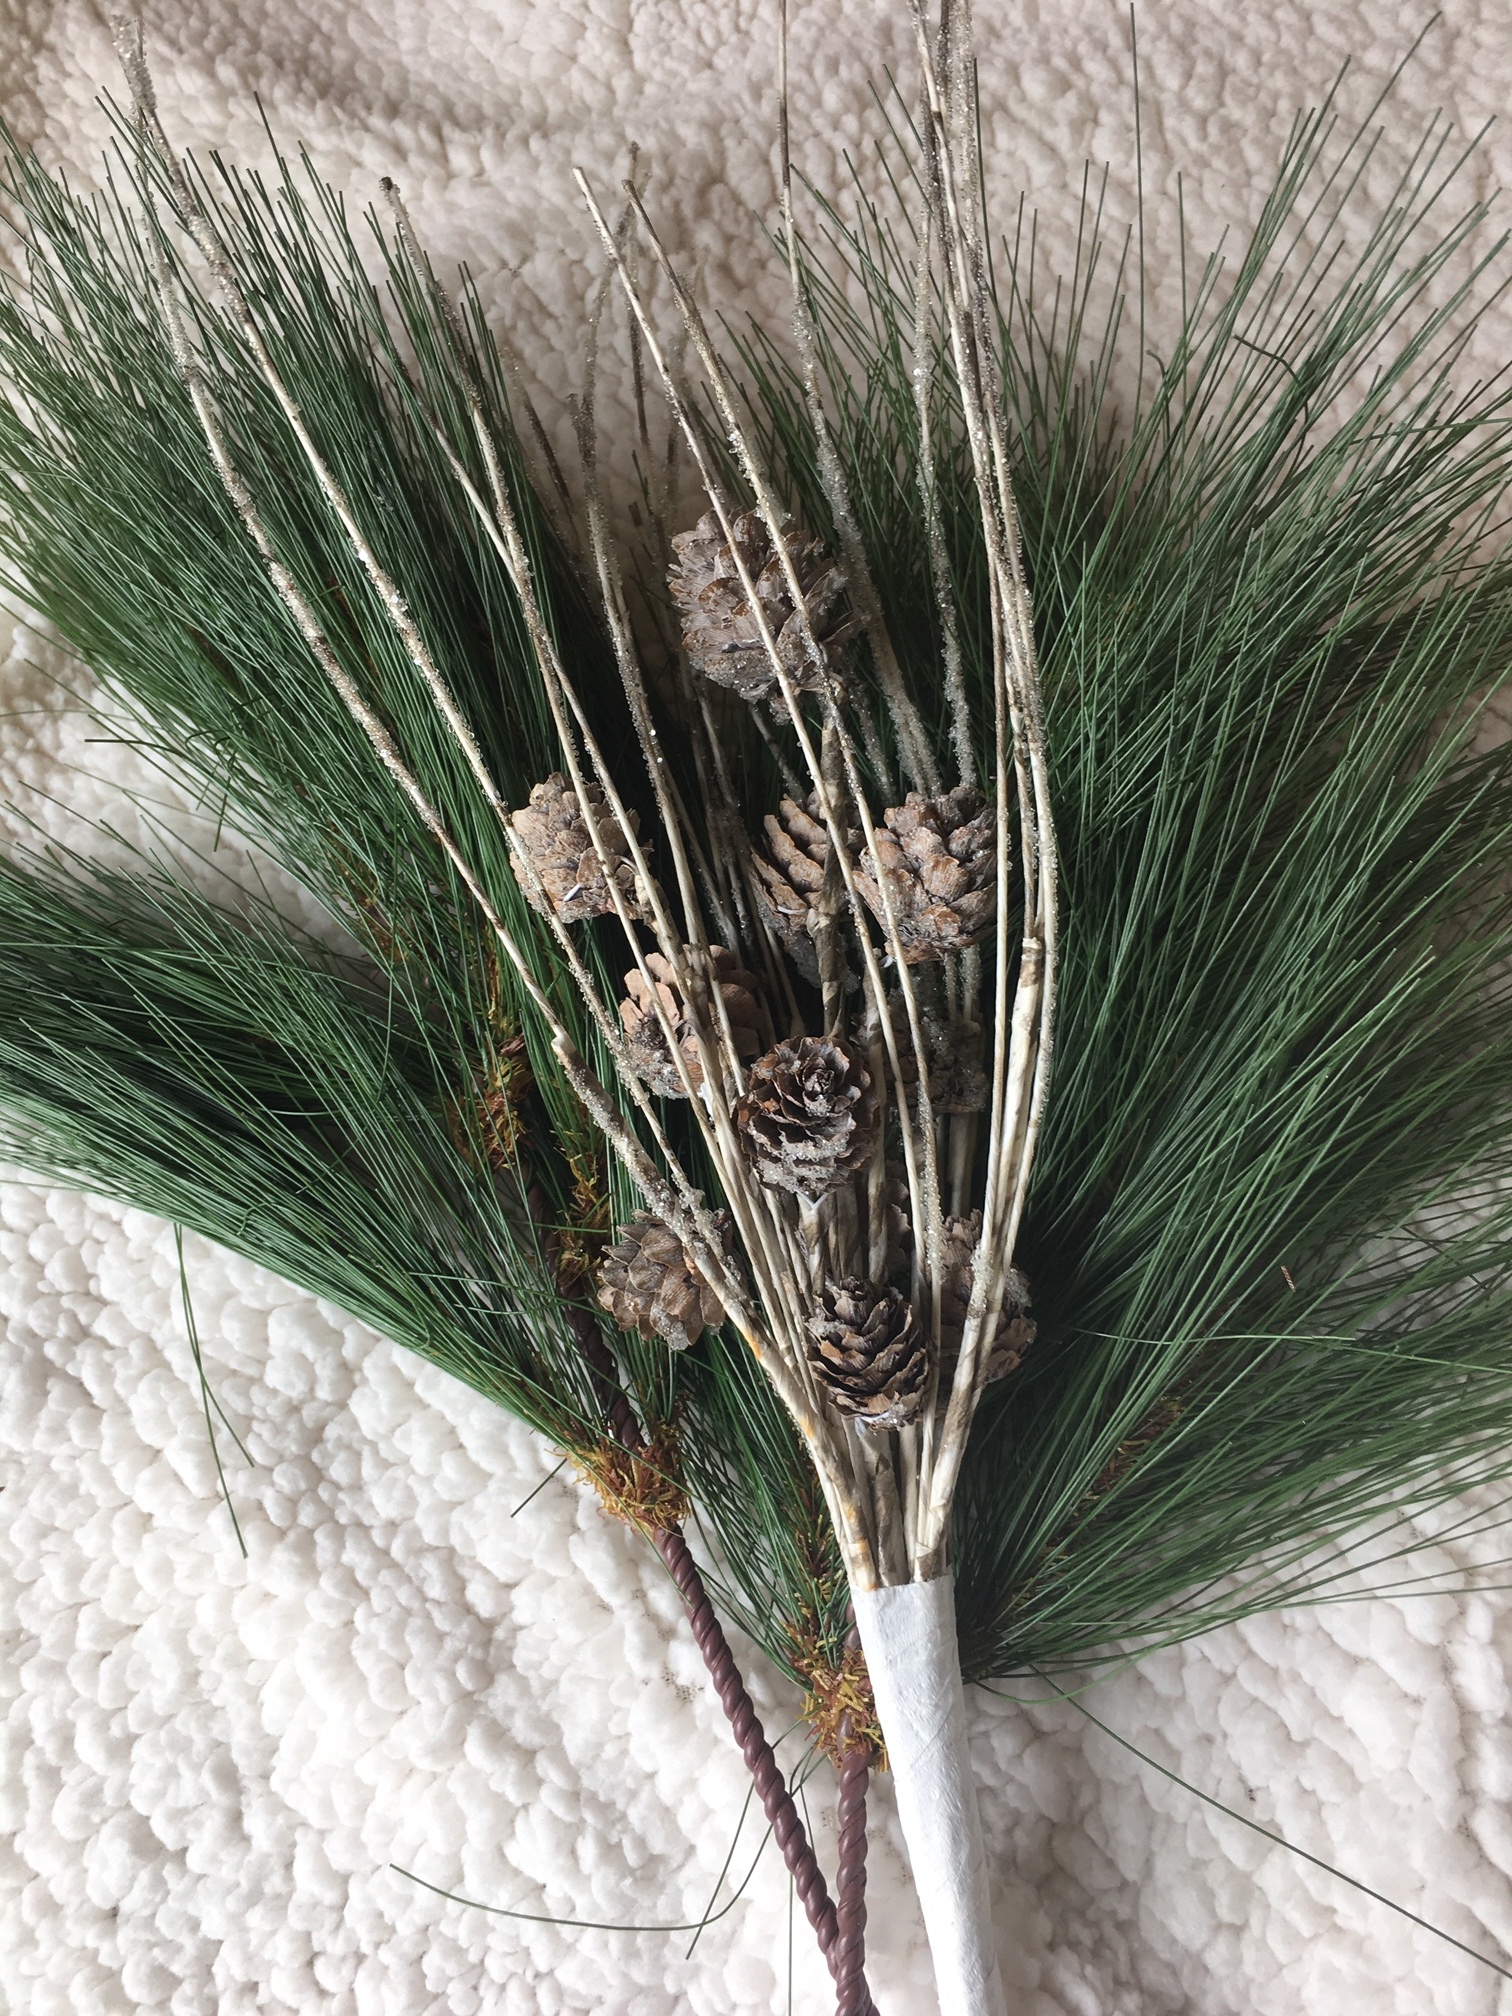
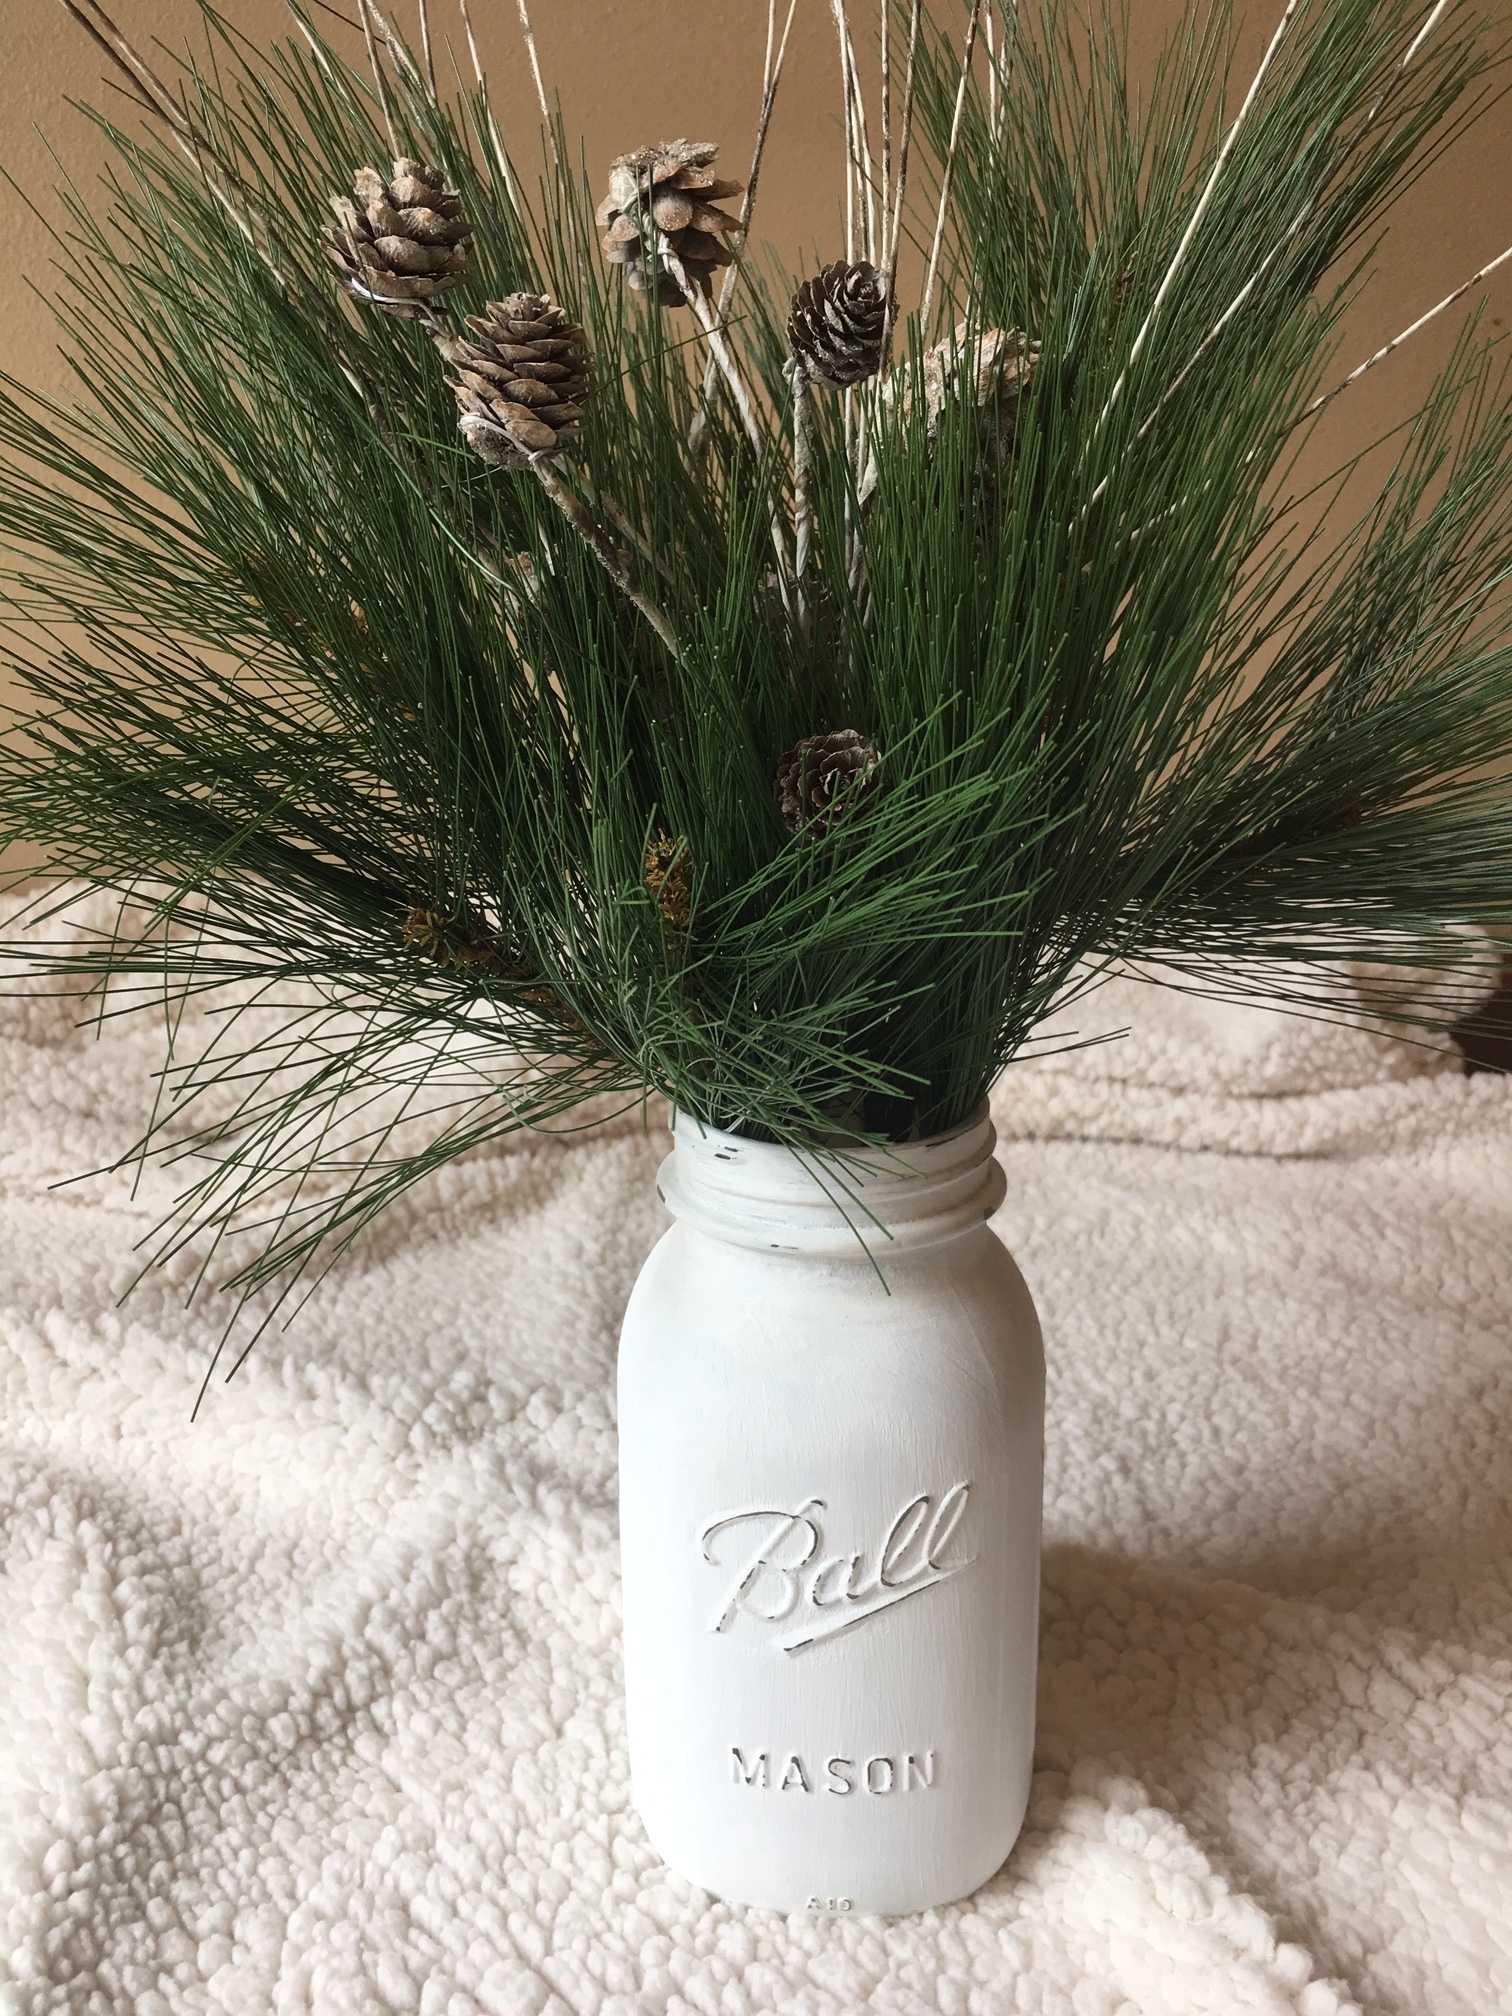
We tackled the shelving first, and to do so we needed to paint a few mason jars white to go along with her Christmas theme this year. If you need a DIY tutorial on how we did it, click here.

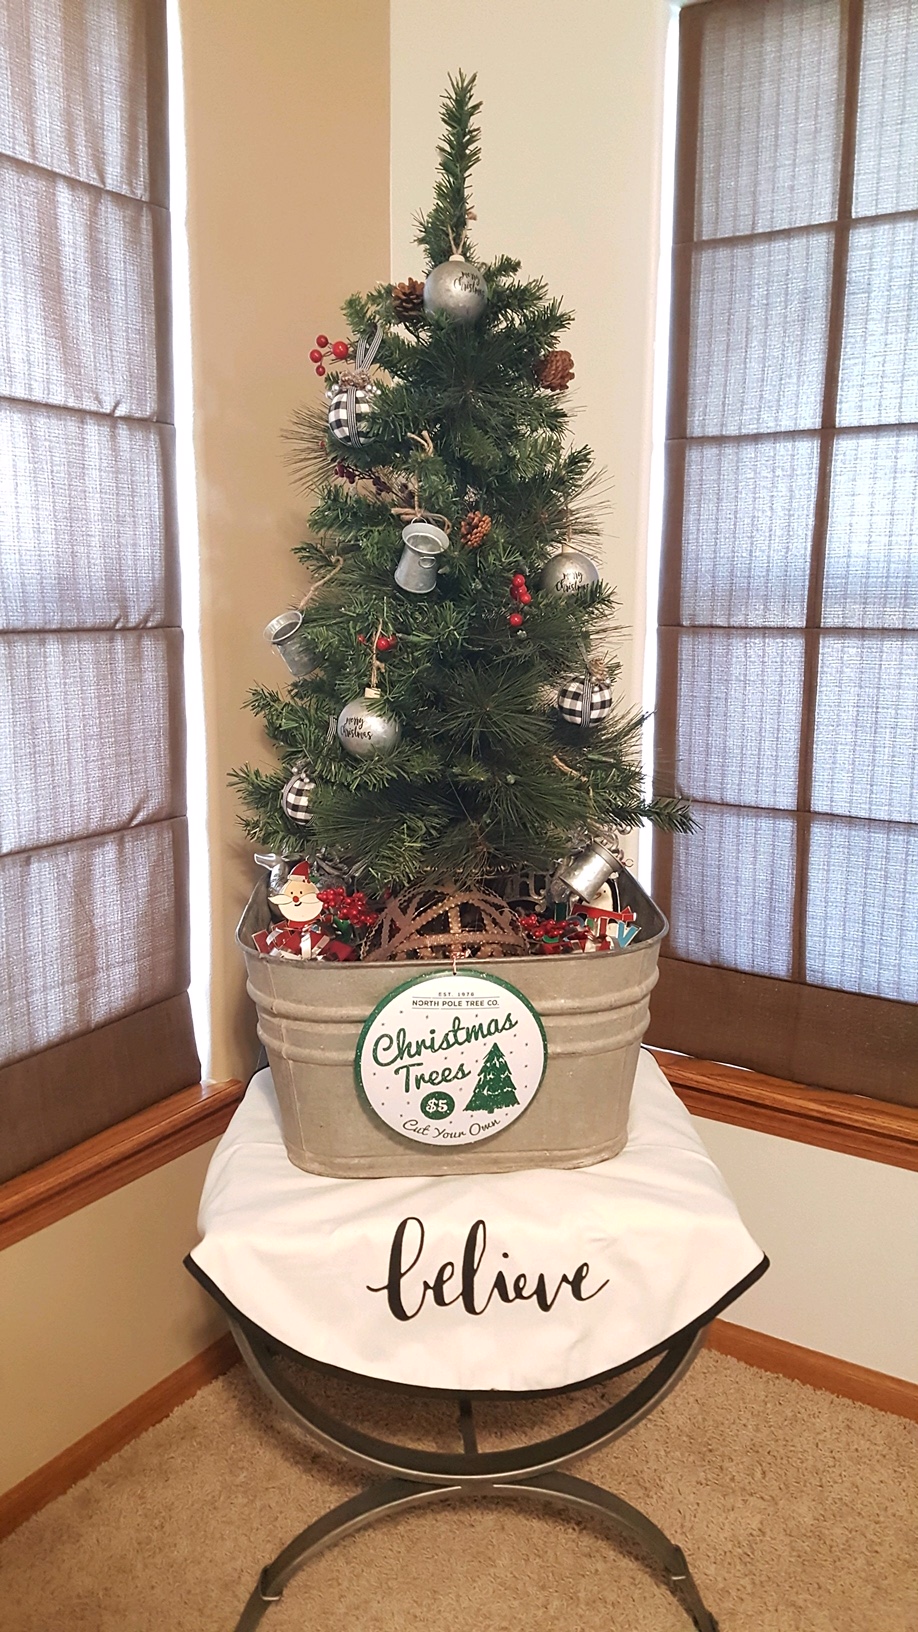
Next, we needed to figure out how to keep the little one out of the Christmas tree. To do this, we used a smaller, 'planter’ style tree that would normally be used on a front porch or as an accent tree. I trimmed most of the red ‘berries’ off of it, since red wasn't really in the color scheme this year. We snagged a $3 tree skirt from the Target dollar spot, an old metal tub that I had laying around, and got to work!

IMG_5155 (1).JPG

The tree base looked a bit ‘empty’ in the large wash bin by itself, so we gathered up other items (ornaments, stocking holders, random things) and filled the wash bin until the base of the tree was no longer visible.

We placed the whole thing on top of an end table, out of reach of little hands.

We finished the look with a metal Christmas tree sign, which was another Target dollar spot deal.

The dollar spot is on point this season!

We had a great time decorating while catching up and spending some time with each other, after all, that's what this season is all about!

Here are some pictures of our finished products! Happy decorating!

Thrift Store Thursday!

I have a passion for decorating with repurposed, old salvaged items whenever possible and I often find myself imagining what stories a piece might share with me if it could.

Would a former 4 square farmhouse front porch column tell me about the generations of children it watched lean up against it as they waited for the school bus? Or the epic thunderstorm from decades ago that took out the neighbor’s house? Would a vintage bathtub share the names of all the family pets that were washed in it over its lifetime?

Even though these items cannot share their stories, I still seek out their history and showcase their story as much as possible when I am designing or decorating.

And this is precisely why I love thrift and salvage shopping!

So much history packed into one place!

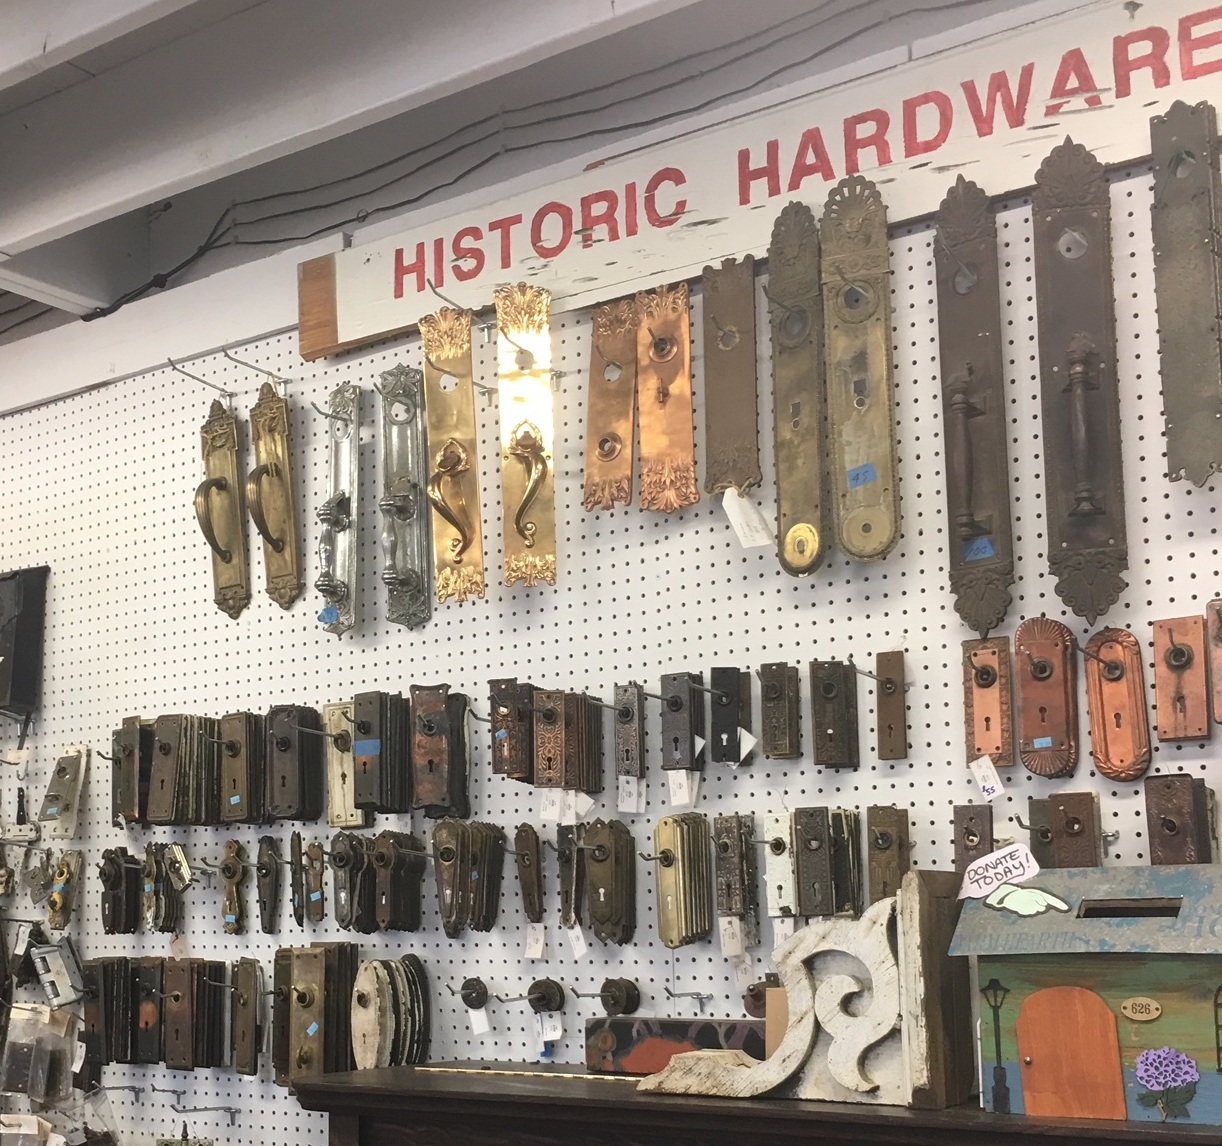
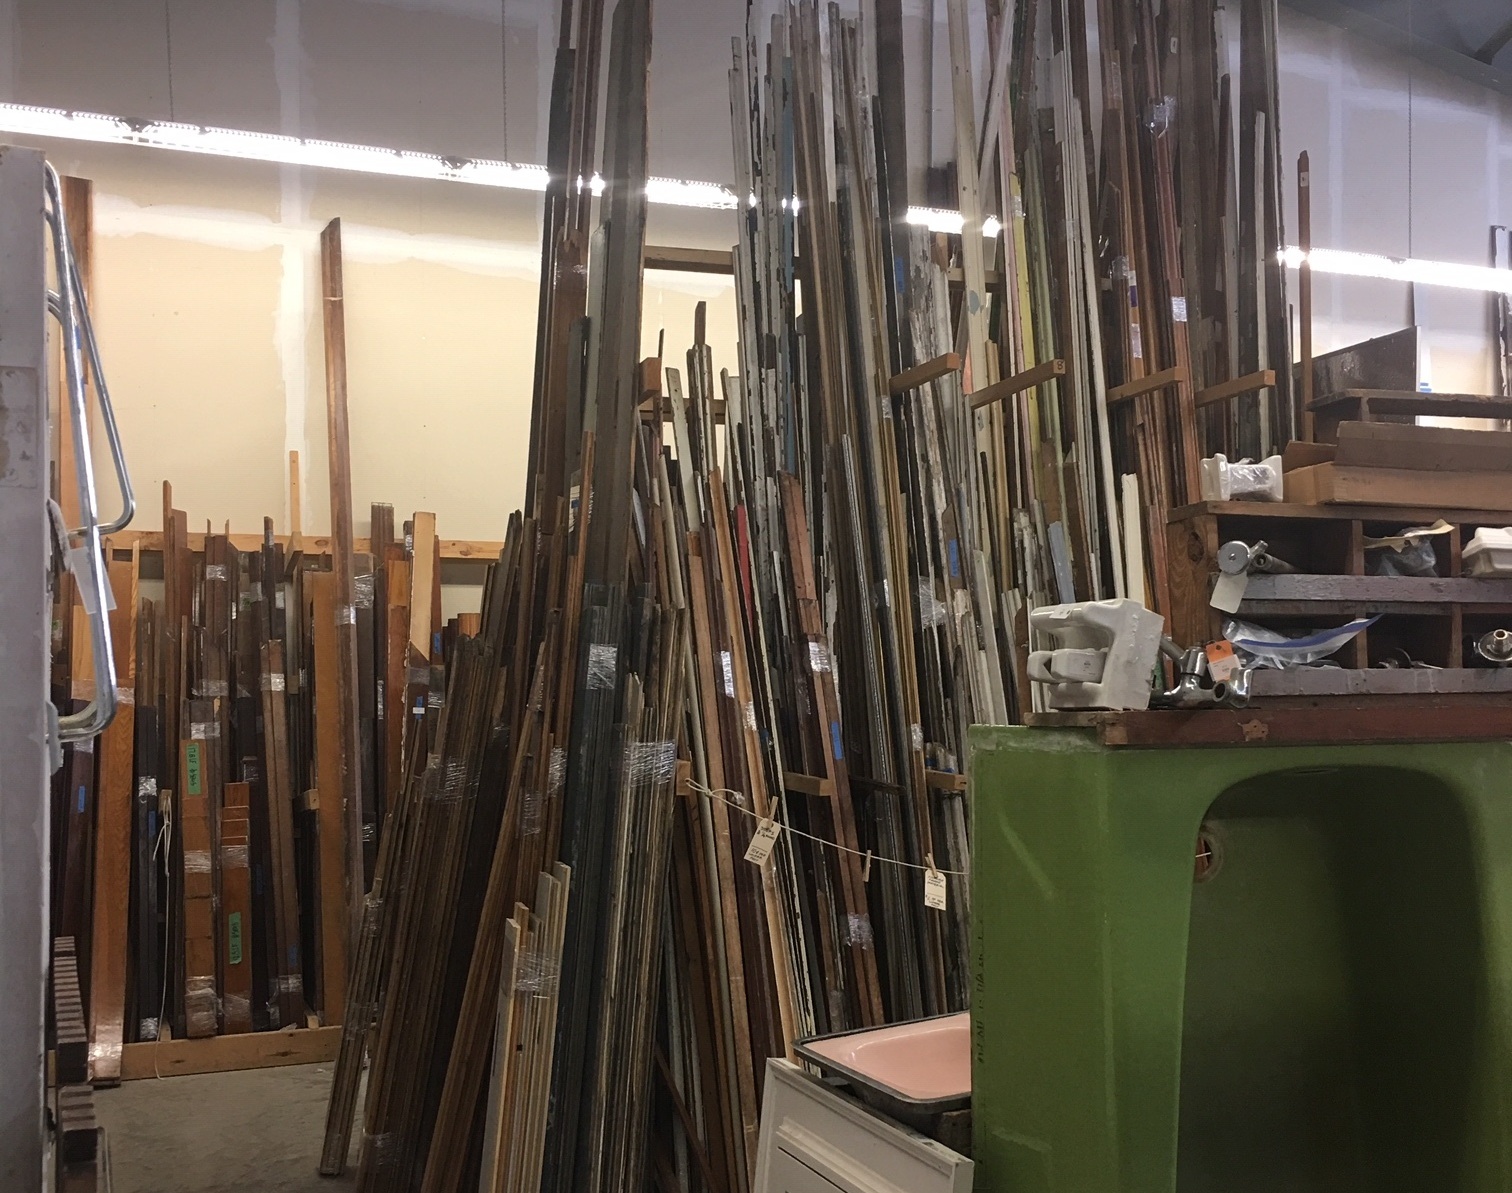
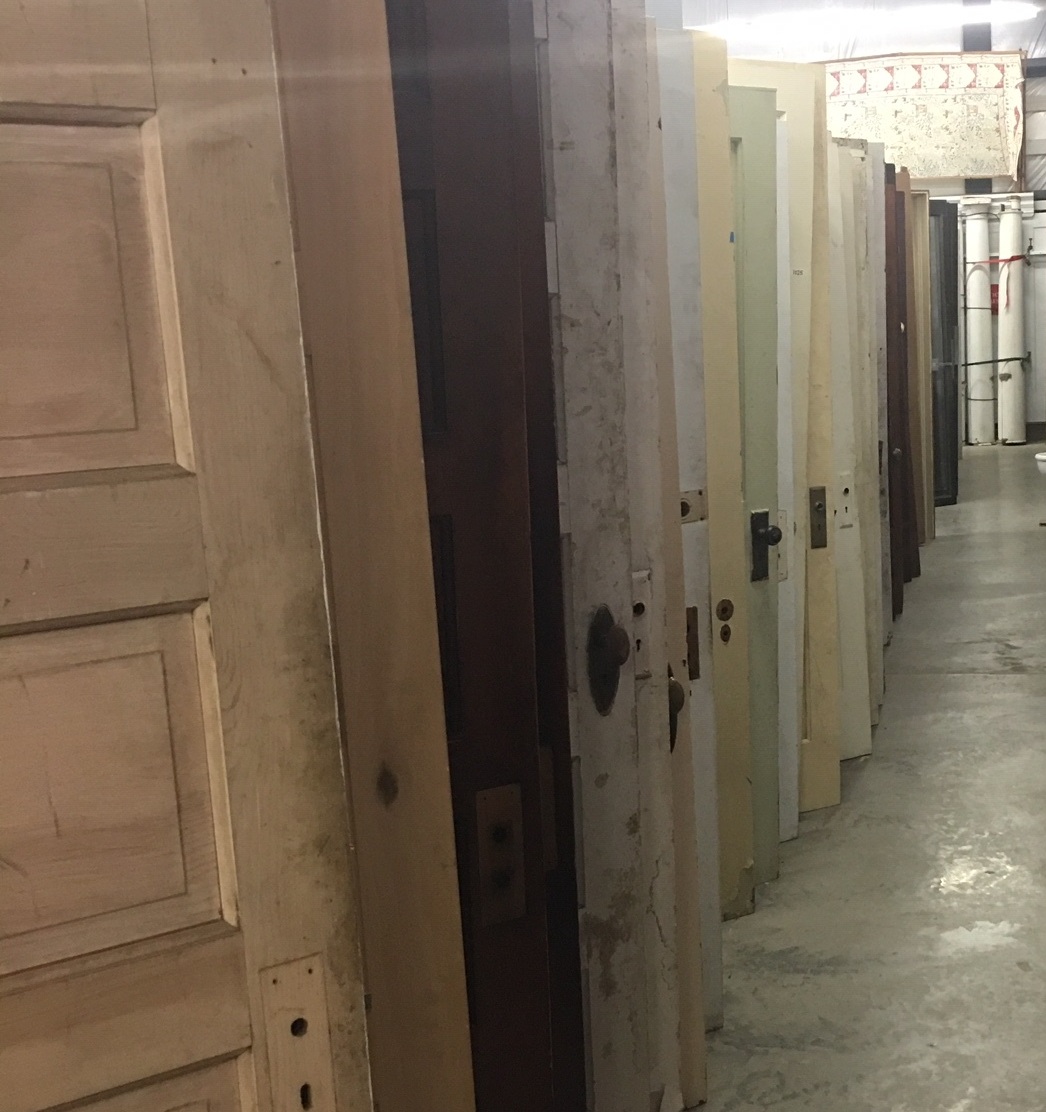
I won’t share what all I purchased just yet, I have to get crafty first. But if you are like me and enjoy the historical aspect of old vintage and salvaged items, enjoy some of the pictures I snapped today.

Do you have an item with a story? Feel free to share in the comments, I would love to hear about it!