Entryway Table Refresh
Hi there! I’m writing to you from a cold and rainy day here in Iowa, but it’s just for one day so I can handle it. If you follow me on Instagram, you know I have been stalking my plants to see when they will come out of the ground and they have made some progress the last couple of days! There is finally hard evidence we are at the end of this epic long winter, and all this anticipation just makes it that much more enjoyable. It’s seriously like Christmas for me, I cannot wait until the weather permits me to be outside full time.
In celebration of all things spring, its time to refresh the entryway saw horse table. I’m not sure why I dread styling this table, maybe because it is such a focal point to the interior of my home and I always want it to be perfect. Or it could be that I just need more things in the epic huge entryway so it doesn’t seem like it’s the only thing to look at. EITHER WAY, I tackled it yesterday and wanted to share it with you all.
As you know, I usually divide this long table into sections, which I highly recommend if you are trying to style a large piece. My husband Adam always pokes fun at me moving things around 100x until I get them right, but if I start small and build on it then this usually eliminates at least 50% of the rearranging. Anyway, here’s the first section I completed, which is the left side of the table.
I went back and forth on using books in front of the large spool, a lot, but here’s the version without them. These are all things I gathered up around my house and took out of my decor stash. I am a firm believer that you don’t need to buy new things and spend a ton of money to decorate your home, just collect over time and reuse the same items.
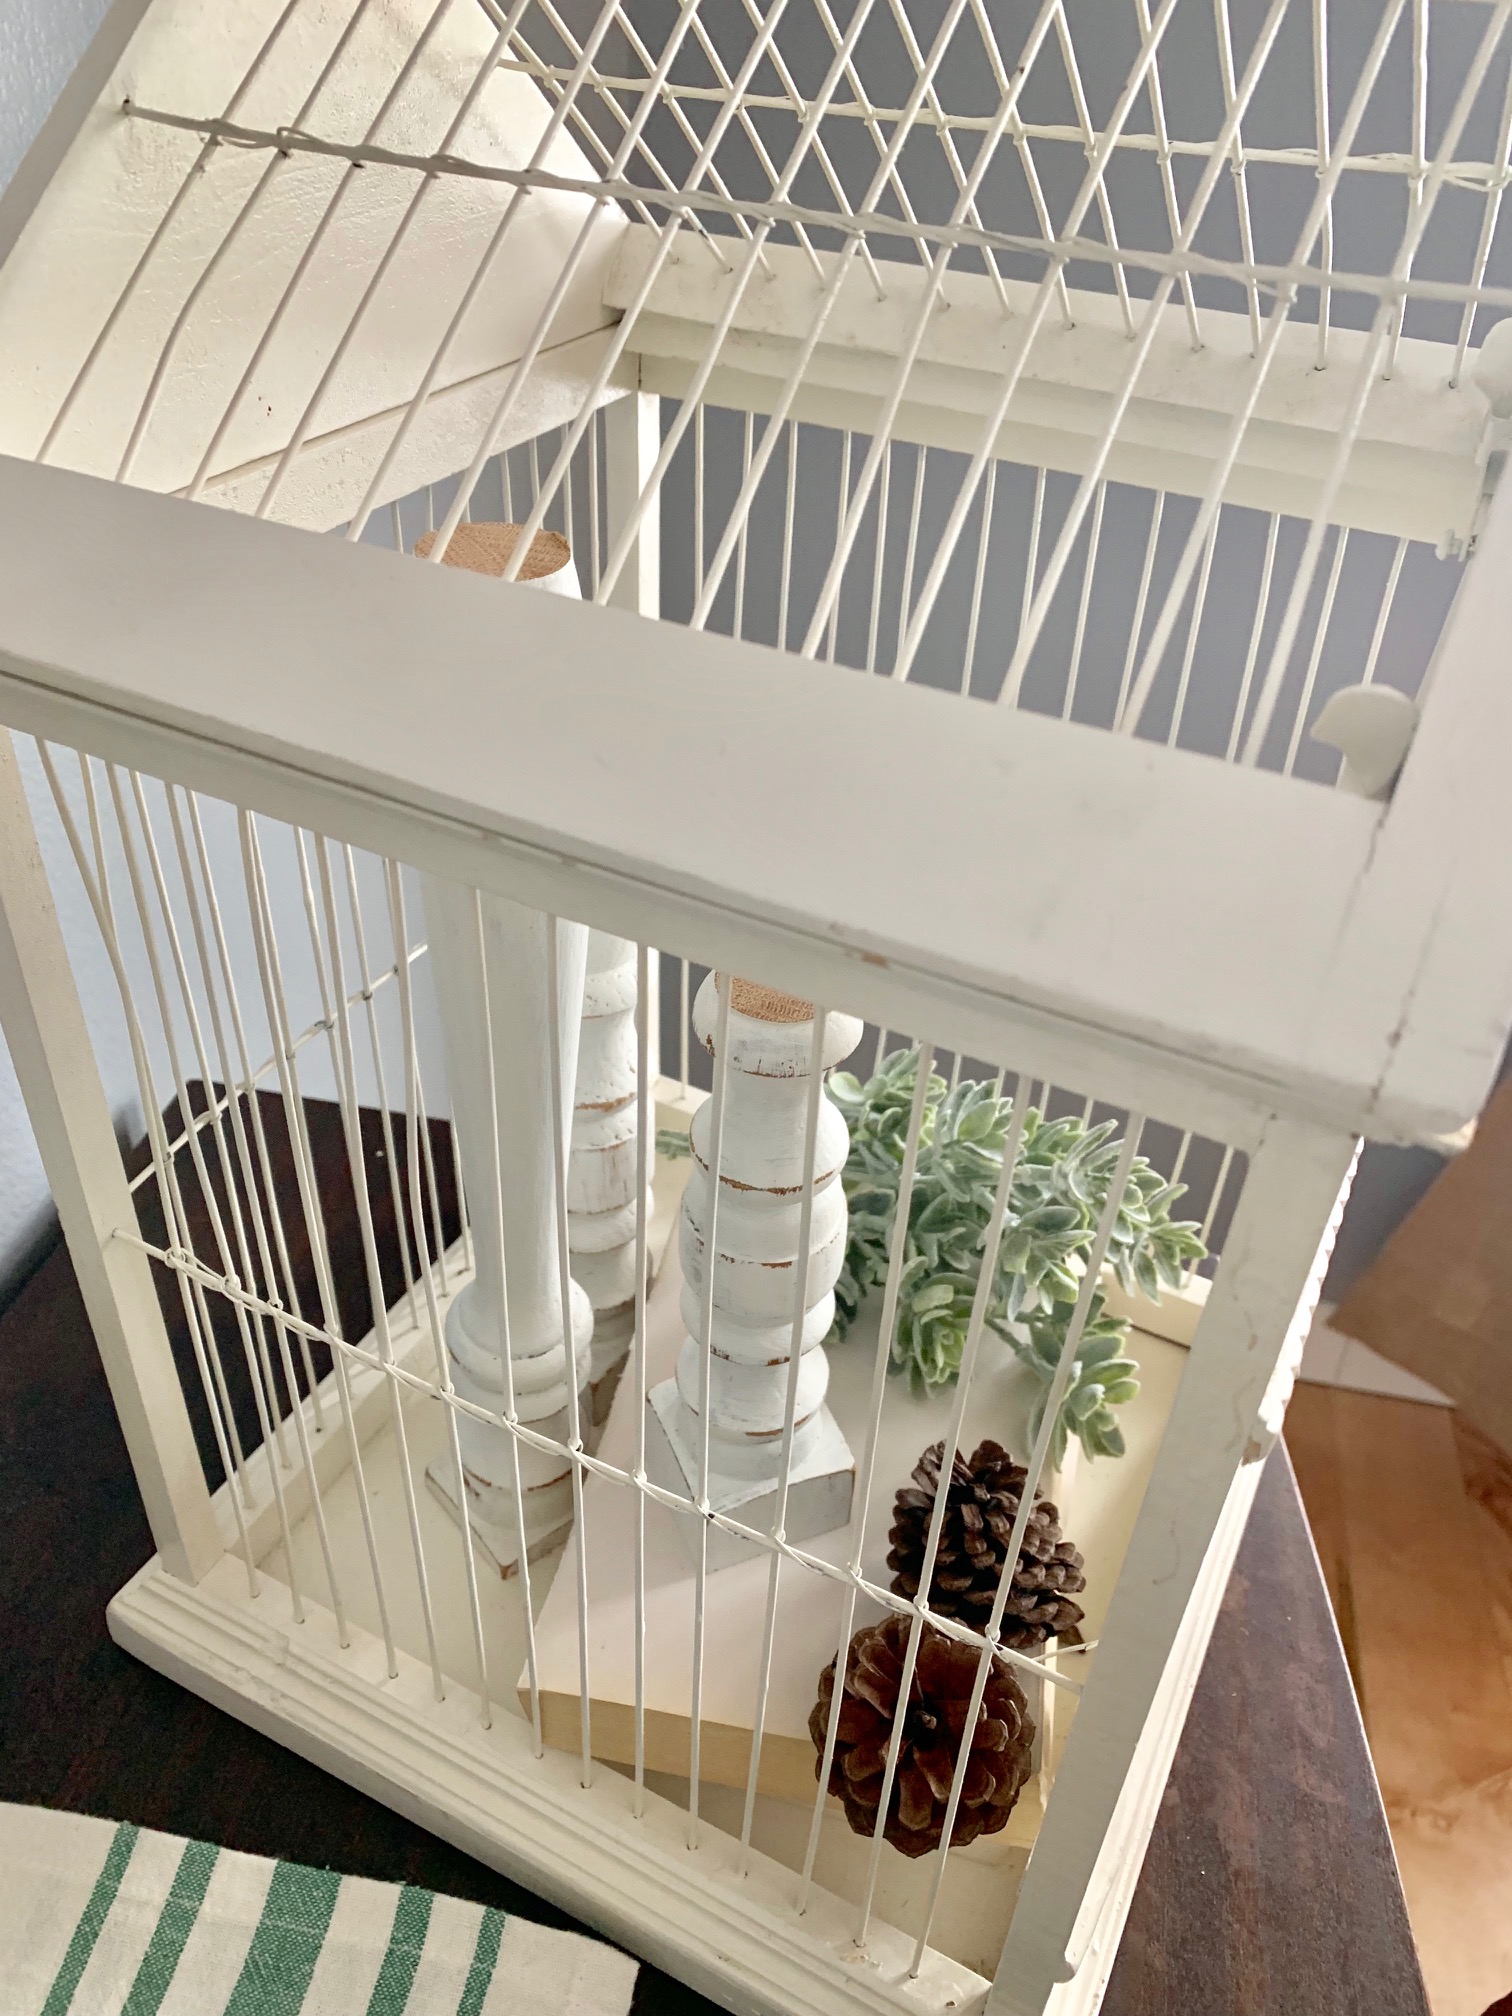
Here we have the right side of the table. I am a huge fan of this vintage birdcage and try to incorporate it into every season’s decor. Check out my post on the DIY clothespins here, if you want to make some of your own.
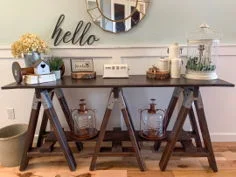
And here is a photo of the entire table! I moved the copper lanterns down below for this photo, but they are glass and not conducive to being played with by a 1 year old, so they had to be moved out of reach. I am happy with how this table turned out and now I need the weather to cooperate so I can give some spring vibes to the front porch.
Soon. Very soon.
Until then, I want to thank you for stopping by the blog today and I hope you were able to gleam some inspiration for your own homes. I’m off to finish my list before nap time is over!

Homemade Dog Food
Disclaimer: I suggest you consult your pet’s veterinarian (as I am not one) to determine the best food for your dog’s breed, activity, etc.
I’m changing it up a bit for today’s post….let’s talk food. Dog food to be specific!
Recently, I have been paying close attention to the chemicals and preservatives found in food and how they can have adverse health affects. While reflecting on my family’s grocery list and meal habits, I couldn’t help but notice that we feed our dogs dry processed kibble, which seemed to represent everything I was trying to avoid consuming myself. Why couldn’t I extend these healthy eating habits to the canine members of our family as well? How would I go about doing that?
There seem’s to be a meal delivery plan for every lifestyle and diet these days, and dog food is no exception. While having fresh dog food delivered each week in perfectly portioned bags would be nice, I found out it comes along with a significant cost, and a bit more inconvenience on my end. With extreme heat and cold here in the Midwest, I would need to make sure someone would be home to receive the shipments each week and that would be nearly impossible.

Boat ride!

Sometimes you just need carried around!
Also, our dogs are used to eating ‘free choice’ (they have a bowl filled each night and choose when they want to eat during the day), which would have to change to them being fed twice a day, and while doable it would be an added task. We already fed them a very high quality dry food, they appear to have no allergies and also no issues with digestion. I knew there had to be a budget friendly way to incorporate fresh food into their diet, and that idea started a path down a Pinterest rabbit hole.
After reading several articles, recipes, and suggestions, I came up with my own dog food recipe and I have used it for the past three weeks. I didn’t want to cut out their dry food completely, as I am sure there are some added vitamins/minerals/proteins that they need from it. Instead, I simply give them one bag of homemade food once per day, on top of their free choice dog food (each bag is about 1.5ish cups). Here is what I have found so far:
1) Our dogs love the taste, and it fills them up! They are eating significantly less dry food, which means less cost!
2) They drink less water, which is normal, since they are eating less dry food.
3) They remain VERY active, and continue to have no issues with allergies or digestion.


The Recipe!
This is a very easy recipe, substitute with whatever you have on hand, just google to see if it is healthy for your pet first (again, I am not a pet health expert).
You will need:
1 pound ground beef (I sometimes substitute a beef/deer mix)
1 can kidney beans
1 1/2 cups frozen peas
2 cups uncooked brown rice
4 large carrots, sliced
2 sweet potatoes, cut into 1in chunks
4.5 cups water
Add everything to a crock pot and mix well. Cook on high for 5 to 6 hours, stirring occasionally. Let cool completely and portion into baggies, I use one heaping cup per bag which is probably closer to 1.5 cups. Toss in the fridge until you are ready to serve, or make a large batch and store in the freezer. This recipe makes around 12 servings, which lasts just under a week between my two dogs.

Start

Finish

Bagged up!
And there you have it, my simple and budget friendly homemade dog food recipe! Feel free to pin this post for later use, and as always, thanks for stopping by the blog today!

How To Clean Up Your Vintage Glass Bottles
Today I am writing from SUNNY and WARM (ish) Iowa! I can’t tell you how excited I am to not have to brace my face for the cold every time I open a door. Today’s post goes along with all things ‘spring cleaning’ which is the theme at my house these days! We have been doing all those yearly tasks, cleaning out dryer vents and bathroom fan motors…safety first!
If you have been following along you know I love everything budget friendly, and therefore I find a lot of my decor pieces at thrift shops. I love the hunt for a good deal, and I recently came across a collection of medicine bottles and many were marked $1 . I have a plan to display them in my bathroom (after I re-paint it) and while I love the look of vintage bottles, I noticed some of these had a residue or film on the inside that was taking away from the look.
After a little research, and some trial and error, I came up with a fairly simple method to cleaning some of the residue out of the bottles that didn’t use any harsh chemicals and also didn’t damage them. The end result was not a sparkling clean look, but it’s better than where we started!
Here are a couple before photos to show you what I was working with…

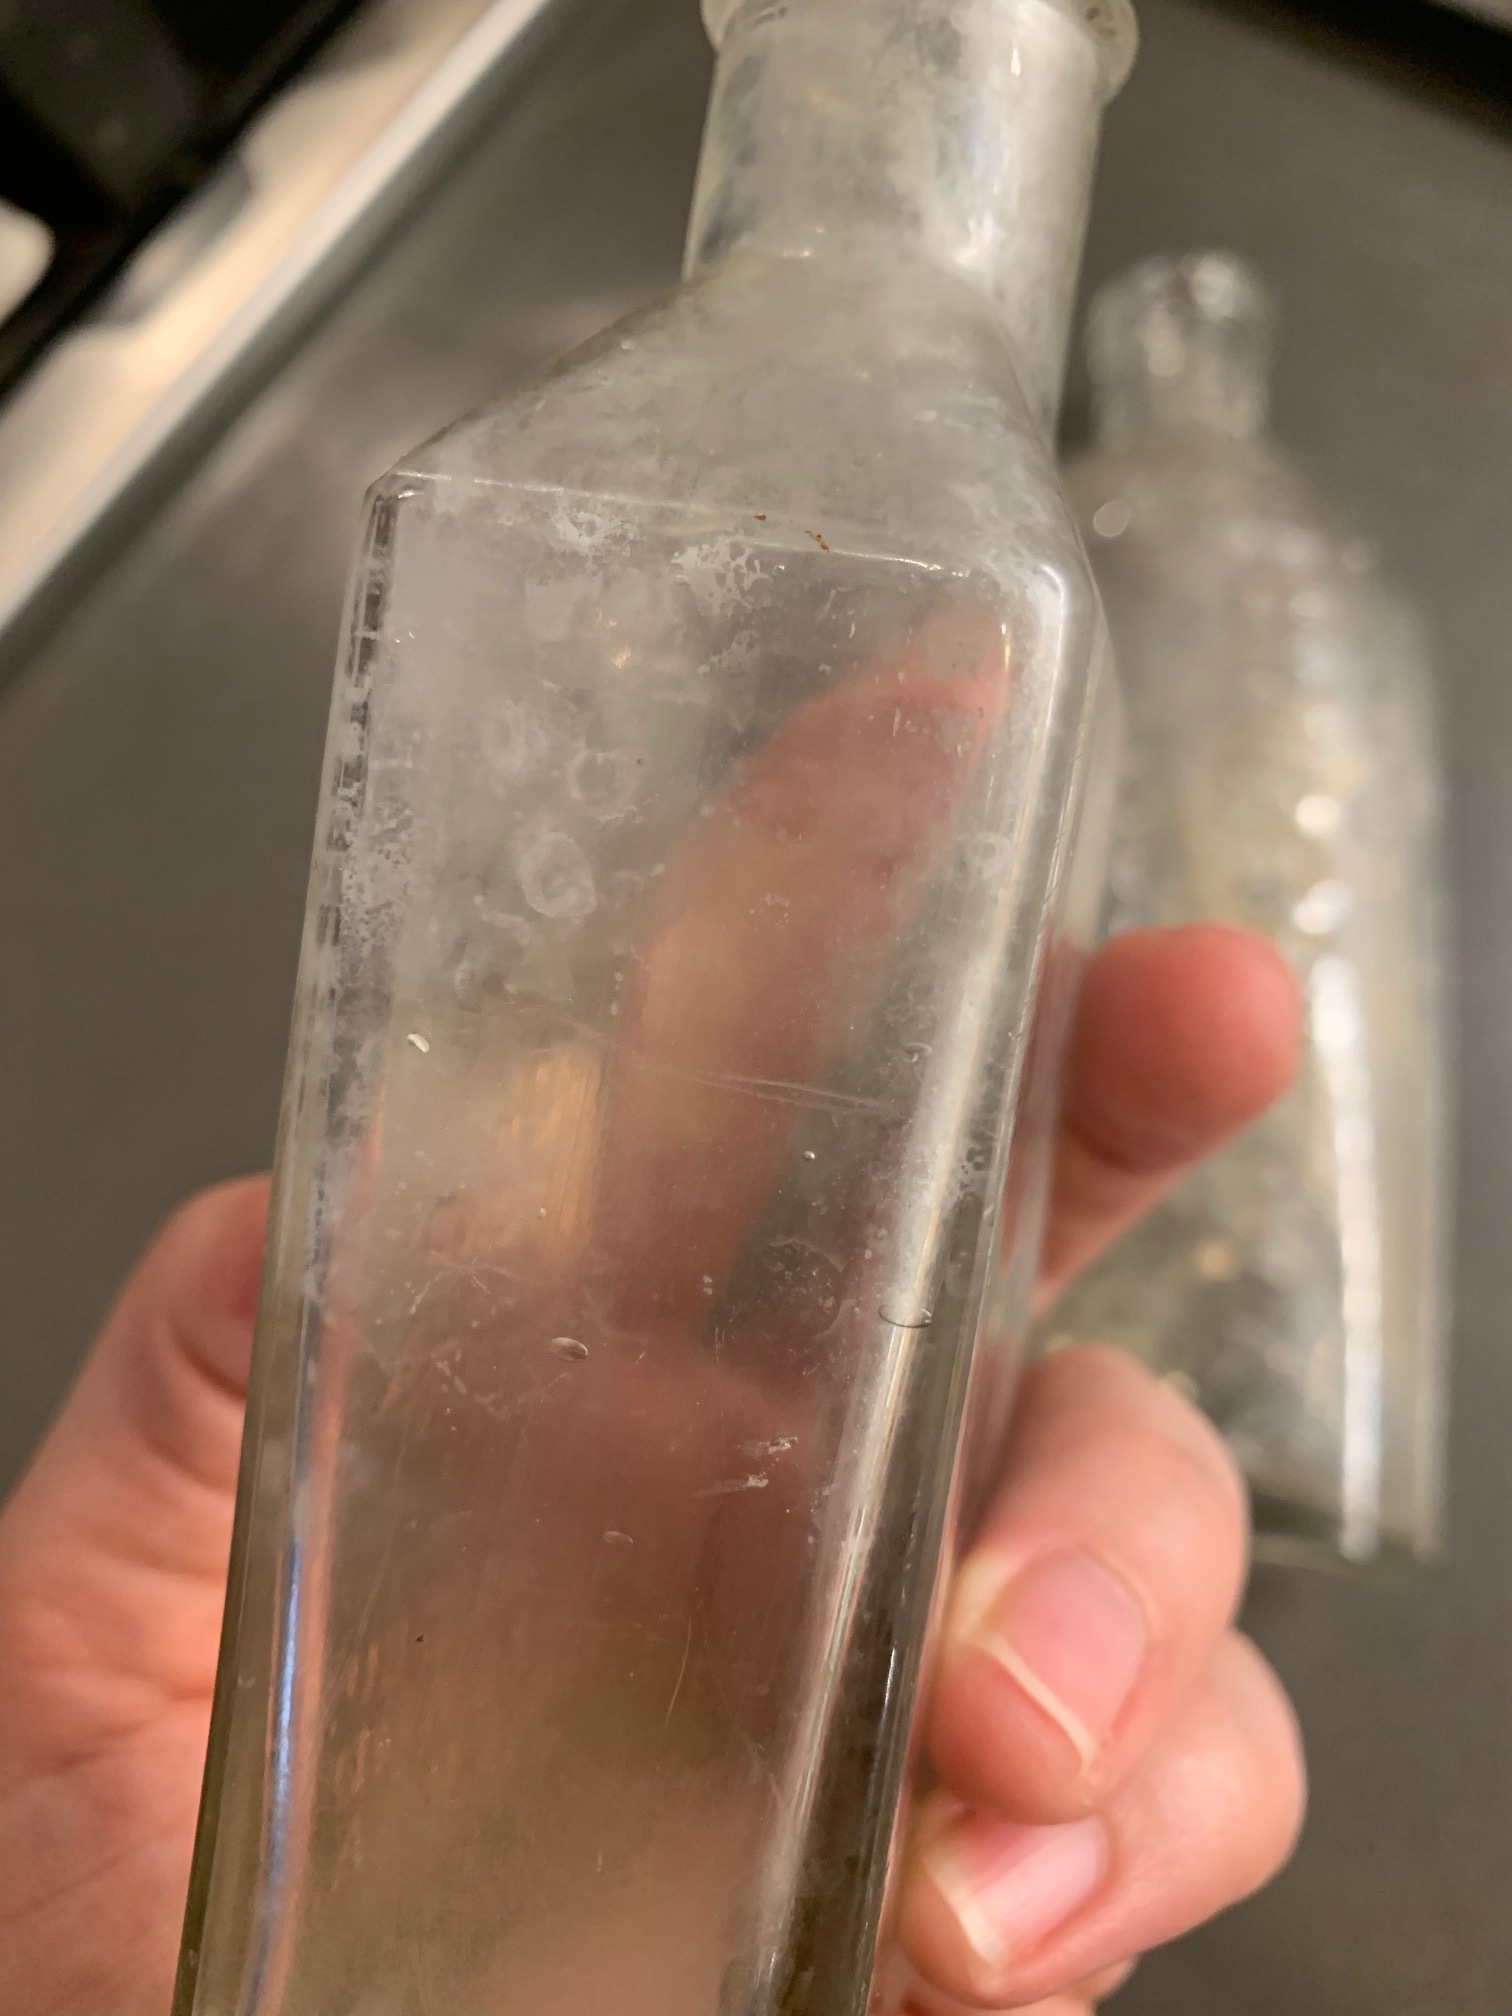
As you can see there was quite a bit of buildup on the inside of these bottles, and it was taking away from their appearance. Here is how I cleaned them up:
Fill them half way with warm water and other half white vinegar
Let them sit on the counter for 24 hours
Rinse well
Fill them completely with white vinegar
Let them sit for another 24 hours
Rinse well and dry
You could repeat this process as many times as you wish to achieve your desired result.
Here are the after photos…again they are not perfect but definitely an improvement!


These bottles are now ready to be added to my collection that I’m working on for the spare bathroom, and of course I will share that cabinet and collection when I get it completed. Now that the weather is nicer, we have been working outside most days but I will find time for the indoor projects again soon!
As always, thanks for stopping by the blog today, and feel free to pin this post for later use!

Toy Chest Makeover - DIY
Hi friends! It seems we have found ourselves in an endless cycle of snow days here in Iowa, but I’m using this time to complete all those small projects I never seem to have time for. Today I’m going to share with you my most recent project, a quick and easy makeover of a children’s toy chest.
My husband found this toy chest on Facebook marketplace a few months back, and it had been sitting in our garage as a kind of ‘rainy day’ project. Well recently I found myself with some free time due to terrible weather, and decided to give it a quick makeover.
Here are a couple before photos of the top and sides of the piece.


I removed the hardware that attached the top to the rest of the box and ran a sander over the entire piece to smooth out any rough edges, since a one year old would soon be climbing all over it.
Next, I painted the entire toy chest with some furniture paint and allowed it to dry. The original hardware was a dull brass color, but some black spray paint fixed that!
I decided to add a little DIY stencil to the top piece of the toy chest, and if interested you can see my complete stencil tutorial here.
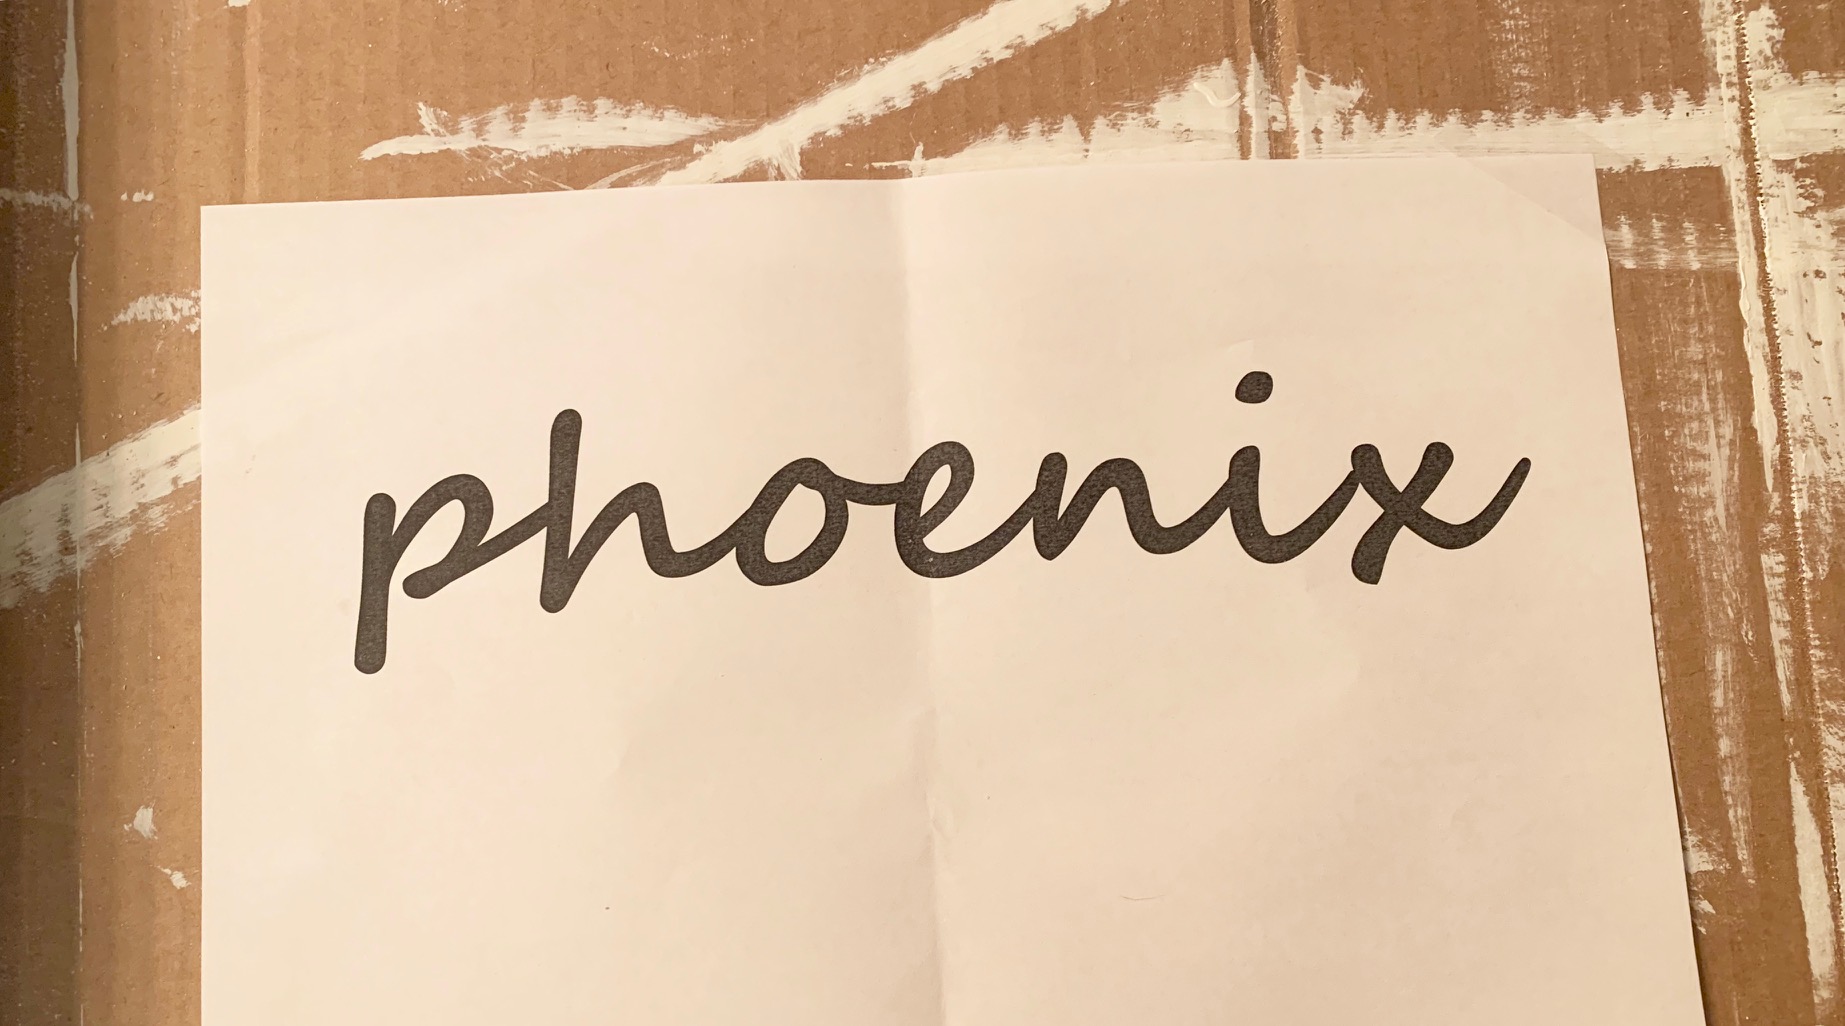
My ‘stencil’, which is just large font printed on regular paper.
Below is an up-close photo of how the stencil turned out, ignore the mess!

After everything was dry my husband was nice enough to put it all back together, and he added a couple rubber stoppers to the inside of the lid to prevent little fingers from being pinched. Overall, it was a quick no-cost makeover and now matches the decor in my daughters room.
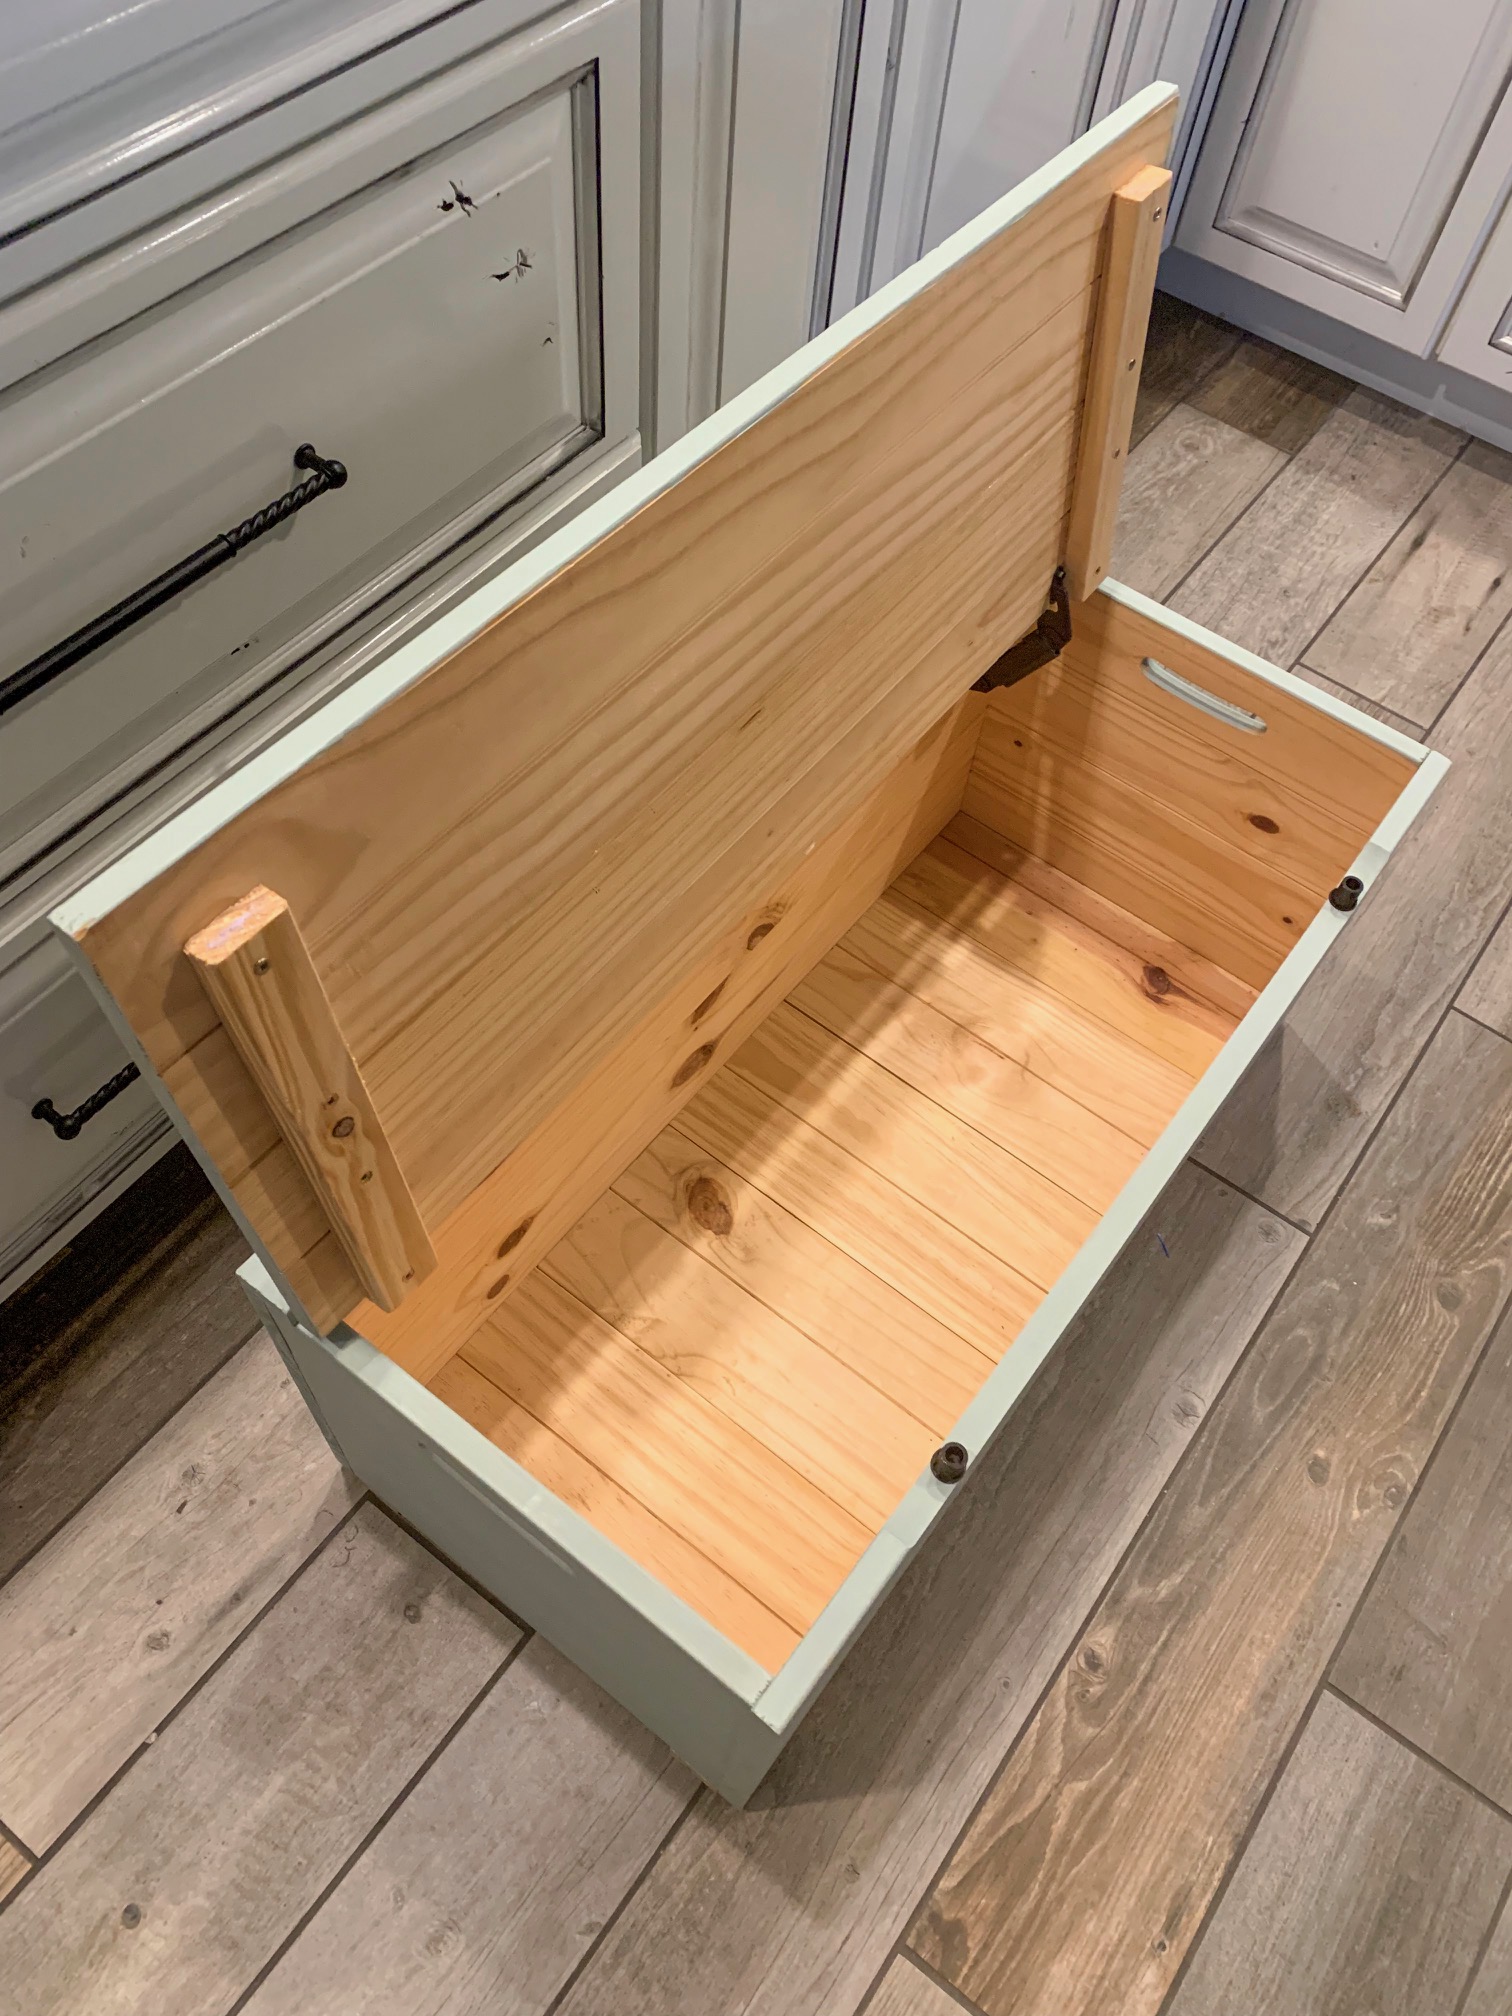

Rubber stopper to prevent pinched fingers

That’s it! This project was a little time consuming due to the stencil, but with several days in a row of negative windchill, it seemed I finally had the time to take this on so I went for it!
As always, feel free to follow us on Instagram (@aps_design) for all of our up to the minute projects and behind the scenes antics! :)

DIY Laundry Detergent
Hi friends! Today I want to share a quick post on my DIY laundry detergent. If you have been following along you know that I love all things budget friendly, and when it comes to cleaners and detergents I prefer as few chemicals as possible for my family. Now I also believe there is a time and a place for bleach, and I am not opposed to busting out the heavy duty cleaners if needed, I just prefer not to use those for laundry.
Let’s get to it! This recipe is SO simple, and makes a large amount!
Here are the ingredients:
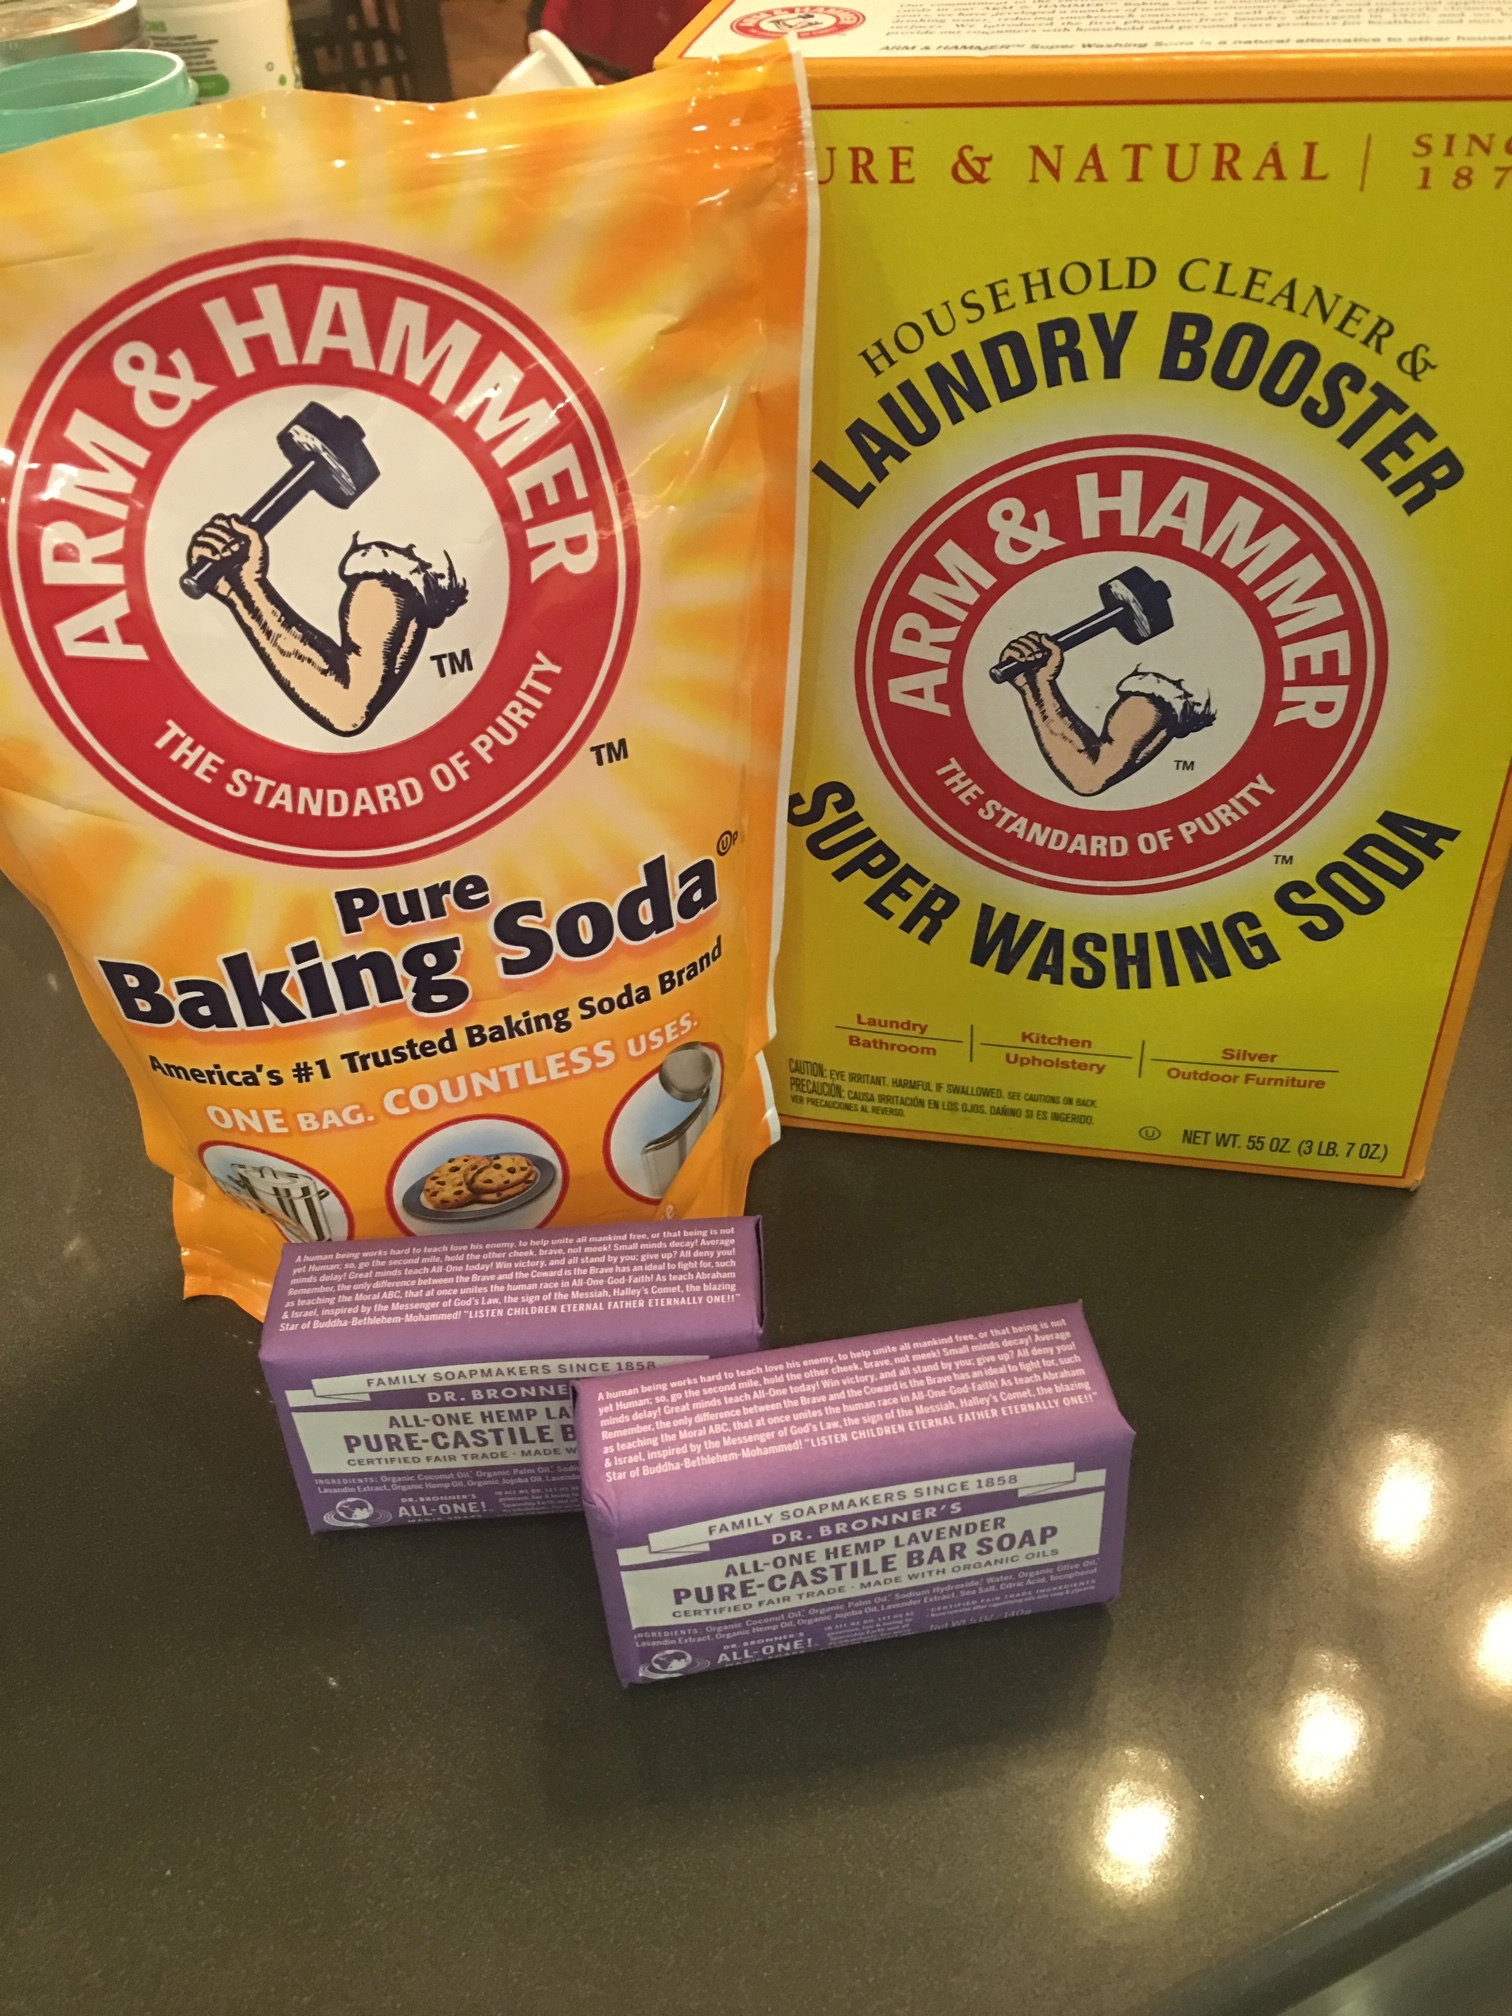
8 cups Baking Soda
6 cups Super Washing Soda
2 bars castile soap (grated)
I like to use one bar of peppermint and one of lavender, but this time I only had lavender on hand.
Mix the baking and washing soda together in a large bucket, grate the bars of soap and mix again.
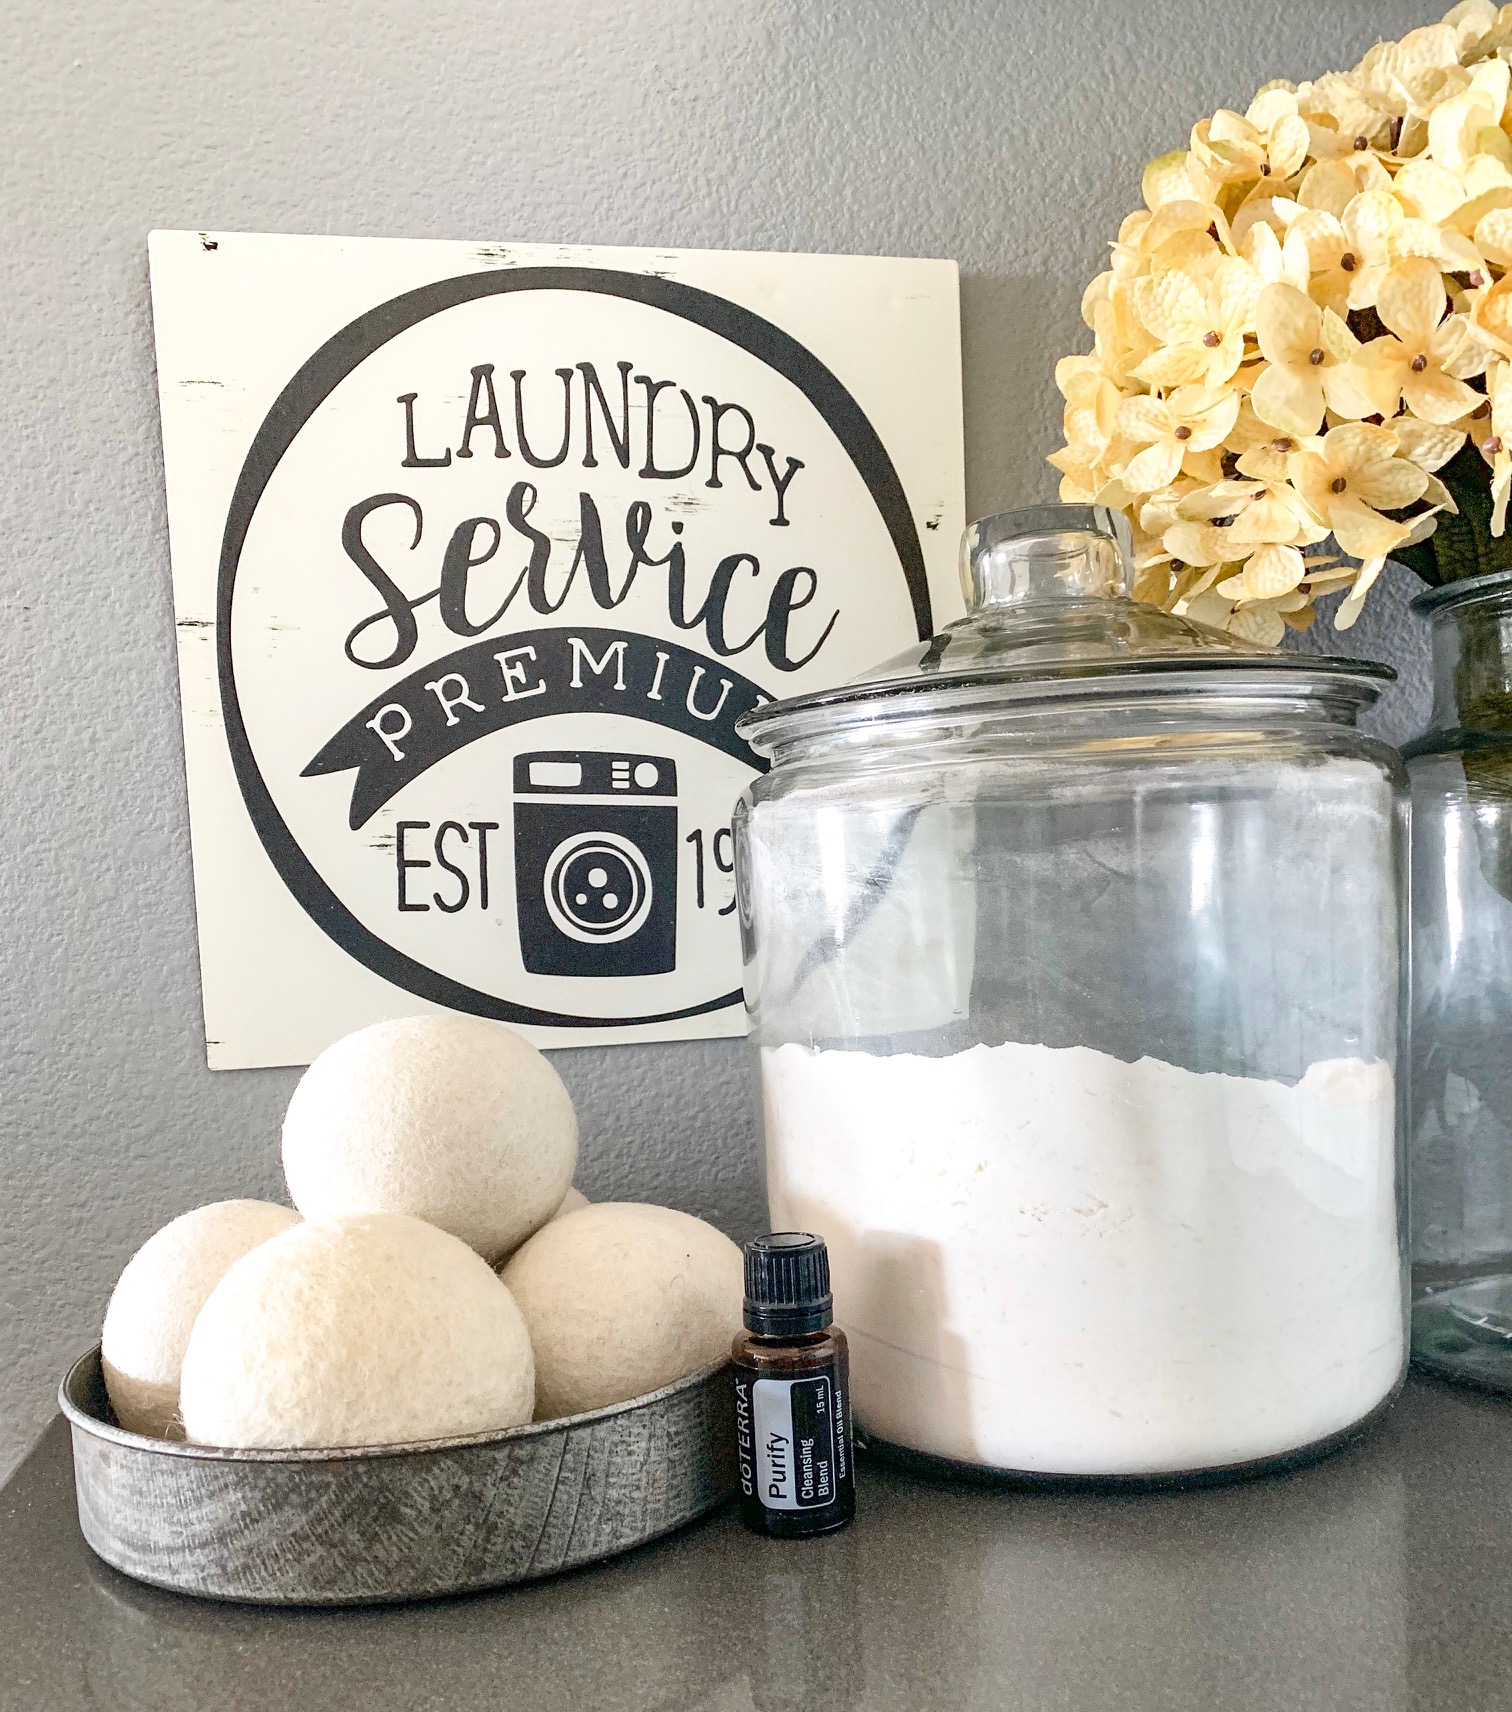
That’ts it! I use 1/8 cup per load. Not only does this clean your clothes and smell amazing, but it also cleans your washing machine! I store my detergent in a large glass jar, pictured below.
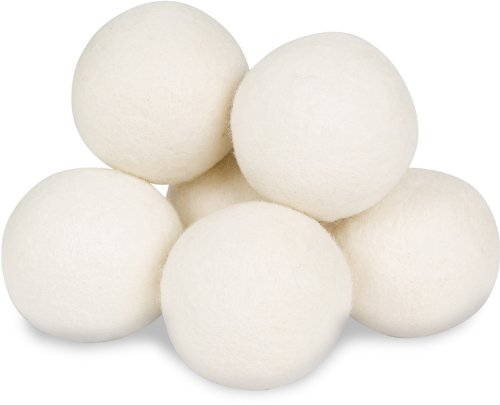
I also have been using wool dryer balls for YEARS (in place of fabric sheets) and never had to replace them! I use them with or without a drop of essential oil (for scent) and I have found that the more dryer balls I put in with my clothes, the faster they dry. This saves energy as the machine runs for a shorter amount of time.
This little DIY laundry routine has really cut down the cost of washing/drying laundry in our family, and I hope it can bring some inspiration to yours! Have you tried this homemade detergent? Let me know how you like it!
Looking for the products I used for this post?
These are affiliate links, to see my full disclosure click here.

DIY Candlesticks
Hello! I hope January is treating you well, wherever you are located. Iowa is gearing up for a major winter storm, and while the snow is pretty, it generates some long days and nights of snow removal. If you find yourself snowed in, I have a super easy winter craft to share with you today, and if you are fortunate enough to have great weather then pin this post for a rainy day!
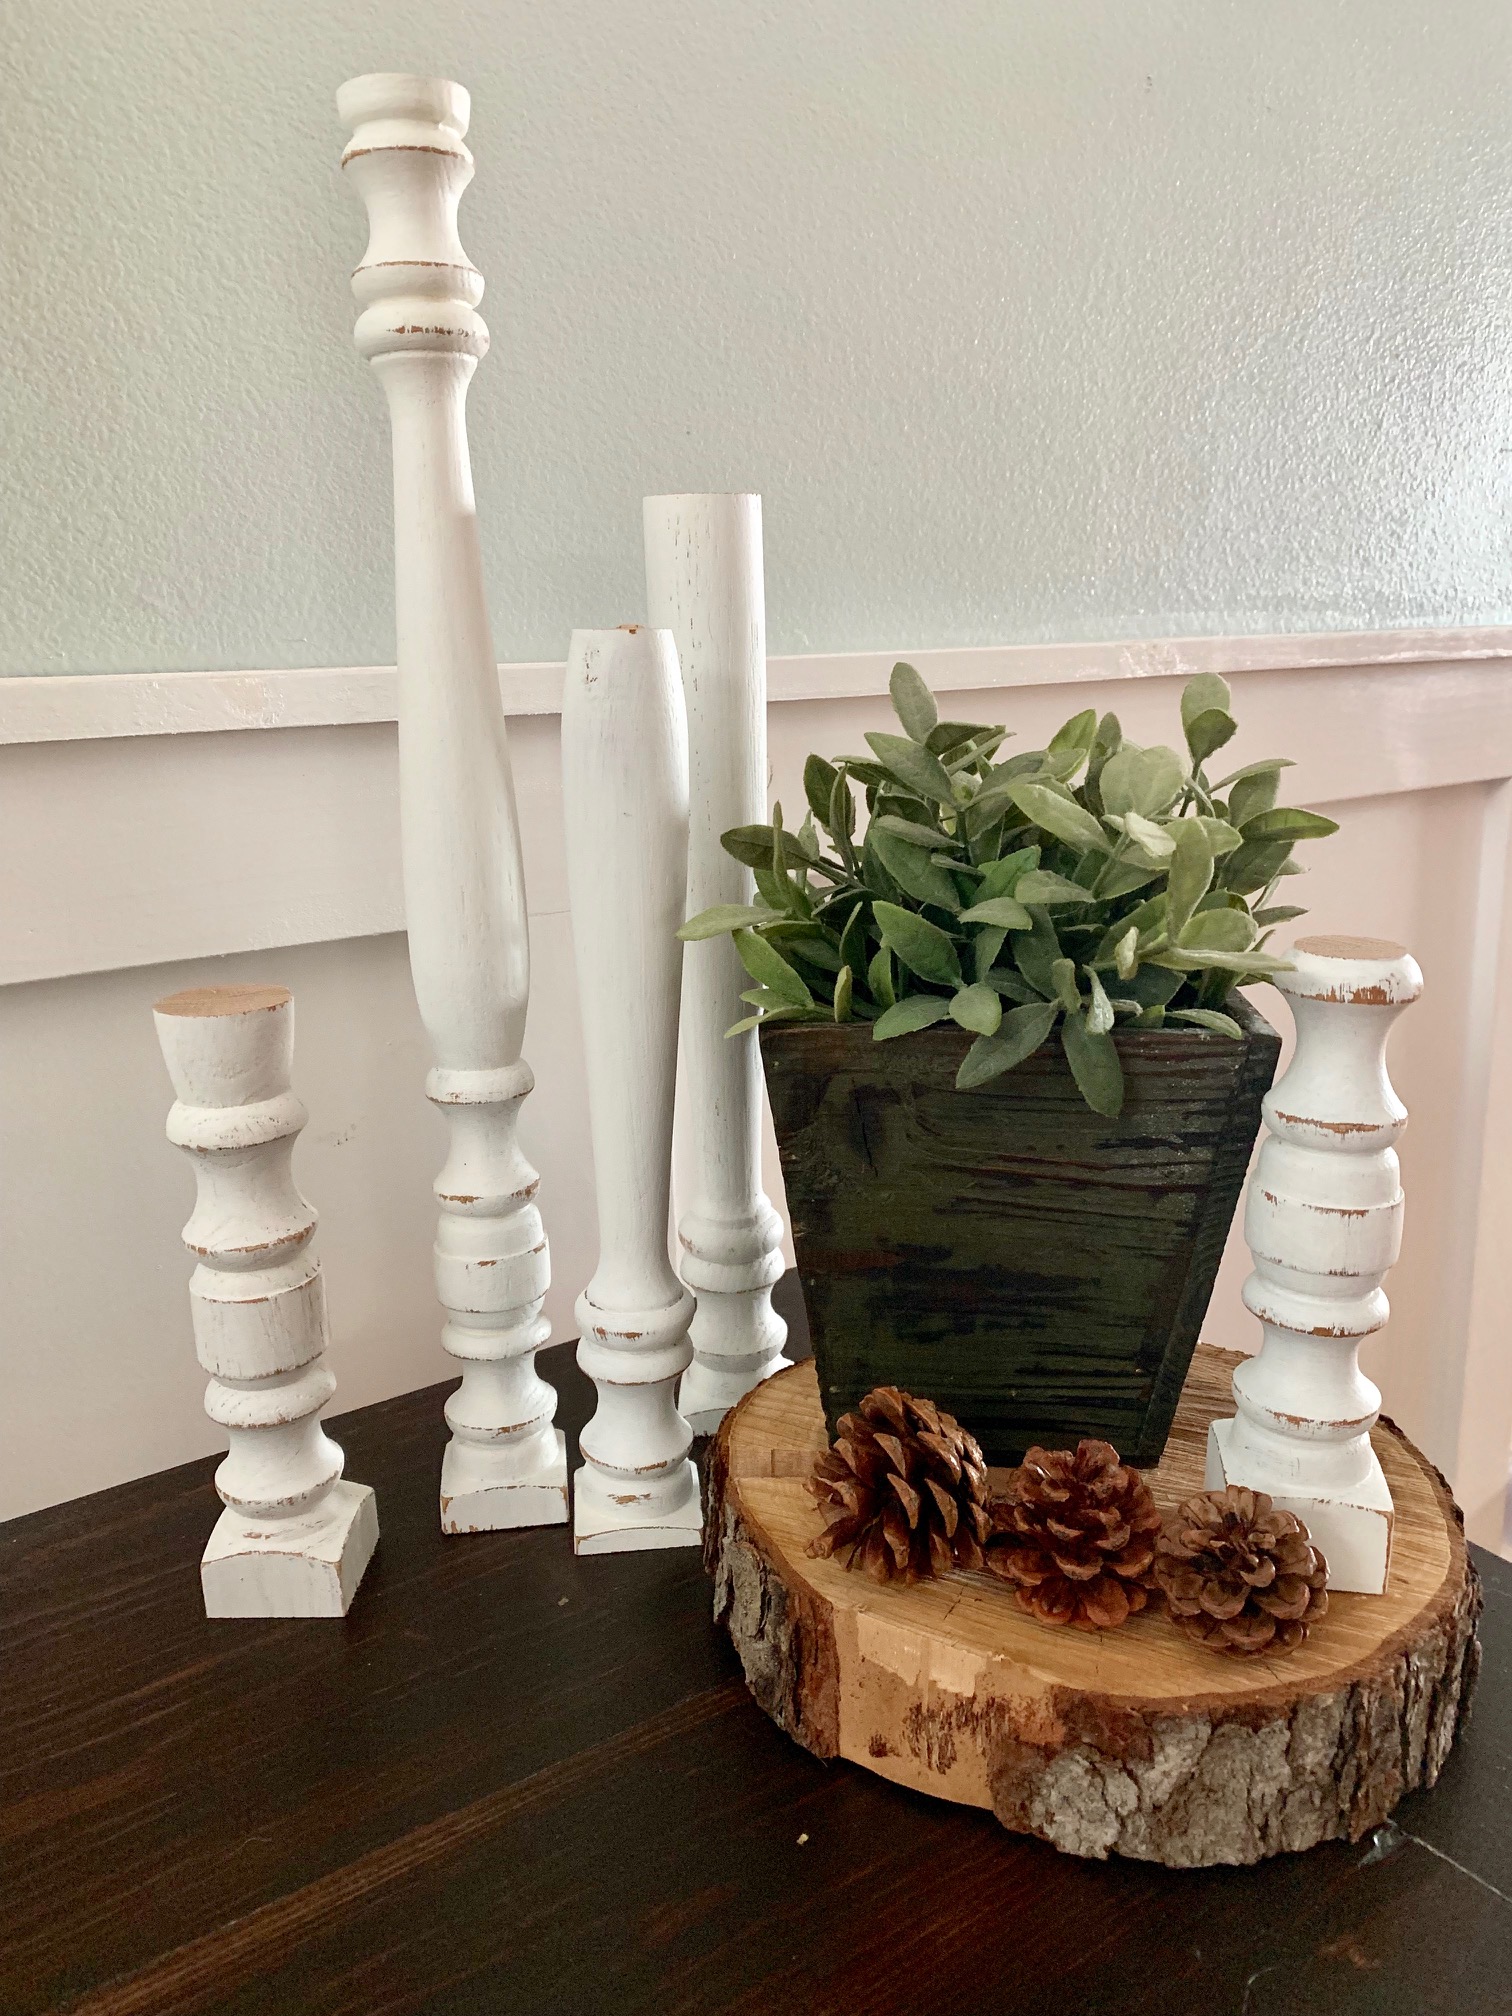
Candlesticks are new to my personal decor, although I have seen people use them for years and always admired their versatility. I had planned on purchasing some the next time I saw a good deal (I never pay full price for anything) but recently I went to a thrift store and saw they had old staircase spindles for $2 a piece, so I picked up a few and decided to try making my own. I think they turned out really well, and I wanted to share how I made them since it was SO easy! Let’s get to it!

Here are the staircase spindles straight from the thrift store, very budget friendly at $2 a piece!
The first step is to wipe them down of any dust or grease, I used a bleach wipe but you could use anything you have on hand.

Next, I used some white chalk paint that I had on hand to paint the spindles, using two coats. Make sure to take a brush and wipe out any excess paint within the details/grooves in the woodwork.

Then, grab a piece of sandpaper and sand down/distress to your taste.
Clean off the spindles using a lint free cloth, and apply a VERY thin layer of wax to seal, wipe off excess with another lint free cloth.

After these dry completely, preferably overnight, cut them to desired sizes. I was able to get 5 different sized candlesticks out of these three spindles.
Now for the fun part! Decorate!
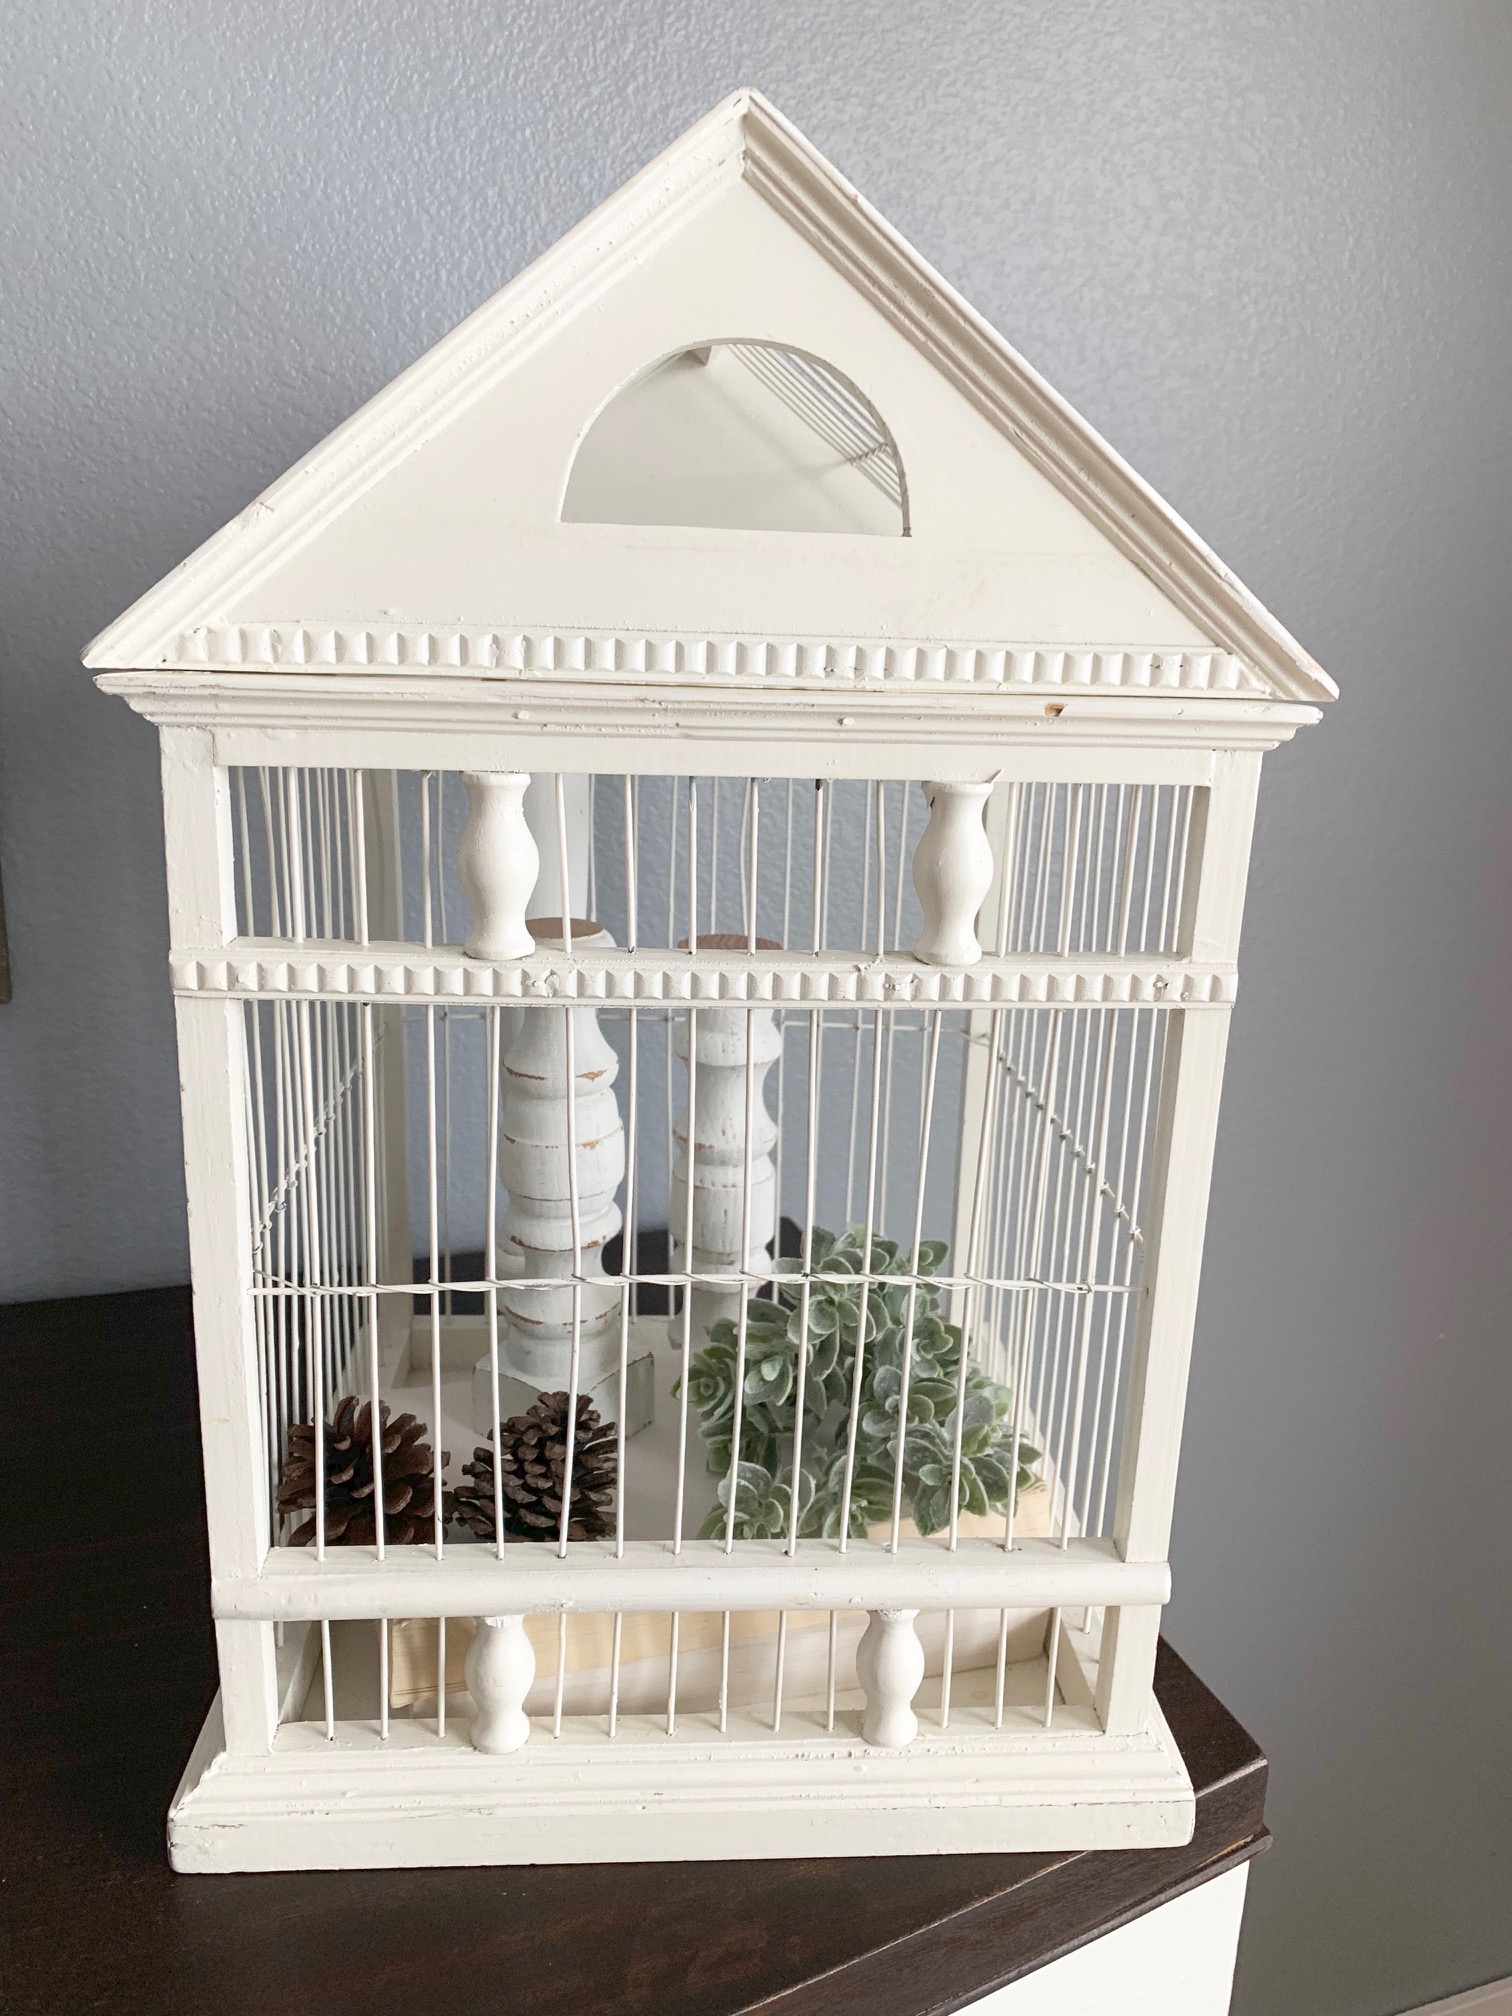
I had fun styling these candlesticks with greenery and even put them in a birdcage that I had on hand. Next fall I plan to use them to hold pumpkins, and maybe even ornaments next Christmas. These are such a versatile piece of decor, I can’t believe I didn’t have any until now, but better late than never!.
My (No-Cost) Entryway Table Decor
Hi all! I have (quite unexpectedly) found myself in the middle of a January heat wave here in Iowa, and that has brought about inspiration to purge all things winter, clean, and organize. Now depending on where you are from, you might not think 50 degrees is a heat wave, but to an Iowan this kind of weather calls for opening windows and doing some spring cleaning!
Now if you follow me on Instagram, you know that recently I tackled the large entryway table to my home and cleared all Christmas decor and started fresh. This table has always been challenging to decorate, partially because it is so large and also due to the rest of my entryway being so bare, making it the focal point for all visitors.
Also, being that I was in a cleaning and purging mood, I didn’t want to have to leave and purchase any decor items and interrupt my motivation so I decided to style the table with only items I had on hand. If you have been following along for a bit you might remember that I took this same ‘no-cost’ approach to my front porch this holiday season and that blog post received the highest traffic of any that I have written, so I know you all enjoy my re-purposing and budget friendly take on decorating! If you missed that post, I will link it here.
OK, let’s get to it!
I tackled this large table in sections, pictured below is the right hand side of the table.

Here we have a vintage birdcage that we used as a card holder at our wedding, as well as an old spool (from a friend’s basement clean out), a tray of pine combs, and some twine. Easy!
Up above the birdcage, and on both sides of the table, I have these copper lanterns I purchased years ago at Hobby Lobby, and they are both hanging on iron hooks that were in an old carriage house that we tore down after it sustained wind damage beyond repair. These hooks held the bridles and other equipment for the horses that resided in the barn. You can see an up close picture below.

Next up, the left side of the table!

This end has quite a collection of miscellaneous items! I have absolutely no idea where the basket is from, I have had it for so many years. I filled it with a metal canister I previously picked up at a thrift store, a distressed mason jar that I made, some wood slices and a wooden sign that I had laying around.
Now for the finishing touches and final picture!

Here is the finished table! In the middle I added some additional wooden signs, a small bit of greenery, an old re-purposed shutter and a metal ‘hello’ sign (it’s an entryway after all!).
This metal sign I picked up at JDH Iron Designs down in Waco, Texas when I was there almost two years ago to see the Magnolia Market. If you followed along on the HGTV show Fixer Upper, you might remember that Jimmy Don and JDH Iron Designs made all of the metal signs that were featured in the market and in the finished homes. My sign is even autographed by Jimmy Don! If you ever make it down to Waco I highly recommend visiting his shop. (Not a sponsored post, I just really like his work!)
The actual sawhorse table was built by Adam and APS Construction, I think it might have been the very first piece of furniture he made.
Well, I’m off to take advantage of this warm weather and tackle a few more things outdoors before it returns to January around here! I hope this post has provided you some inspiration for decorating your own home and I will see you guys soon!

Wrap It Up! An Easy Christmas Wrapping Guide
Hey friends! It’s officially December! the purchased gifts have started rolling in from all those black Friday sales and they are just waiting to be wrapped!
How do you tackle this final stage?
Maybe you are a seasoned professional and have the picture perfect gifts under the tree….?
or
Maybe you put everything in a gift bag 10 minutes before they are exchanged…?
OR
Maybe you wish to have some cute & matching wrapped gifts but don't know where to start and also don't want to tack on a bunch of expense making it happen…?
Well, I am here today to give you some simple and inexpensive solutions to this gift wrapping dilemma…
Just follow these easy steps!
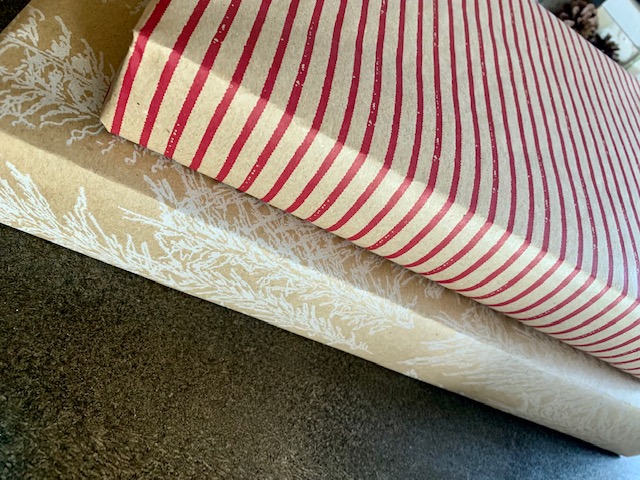
Choose at least two different papers that coordinate well together. I always go with a simple brown paper and then add in something else with a little color. This year I accented with red, which i normally stay away from during holiday decorating but i gave it a shot! I really like lined paper, as it helps eliminate waste. These are from the hearth and hand collection at target.
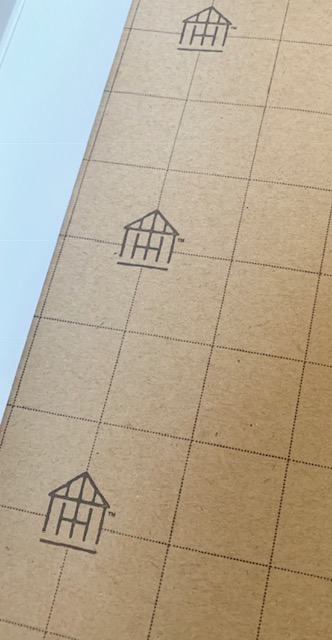
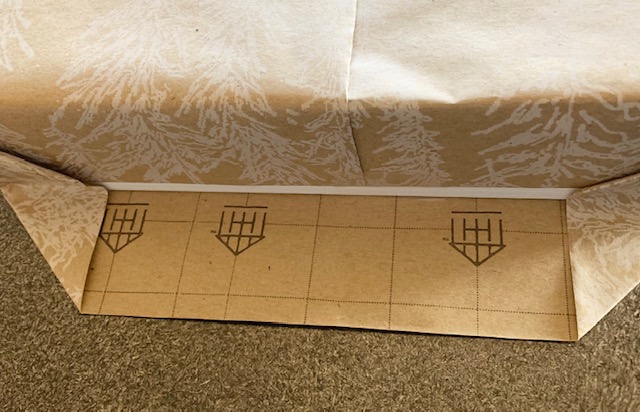
2. I like to use a stamp to address the gifts, either with first initial or full name, this cuts down on tag costs and also looks a bit more ‘homemade’. If you prefer tags, these on the right are some cute and inexpensive choices from the target dollar spot.

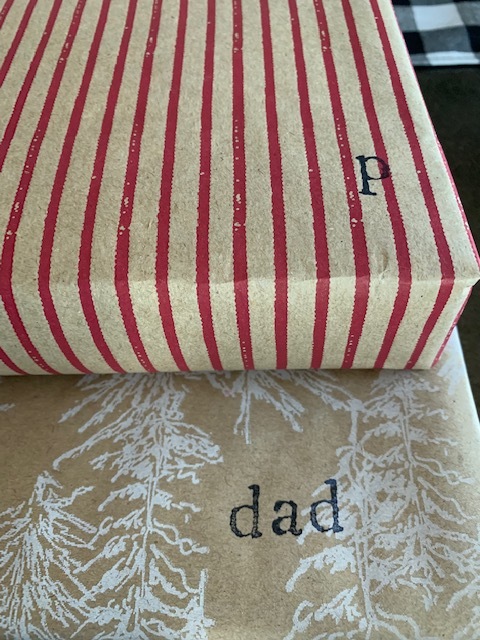
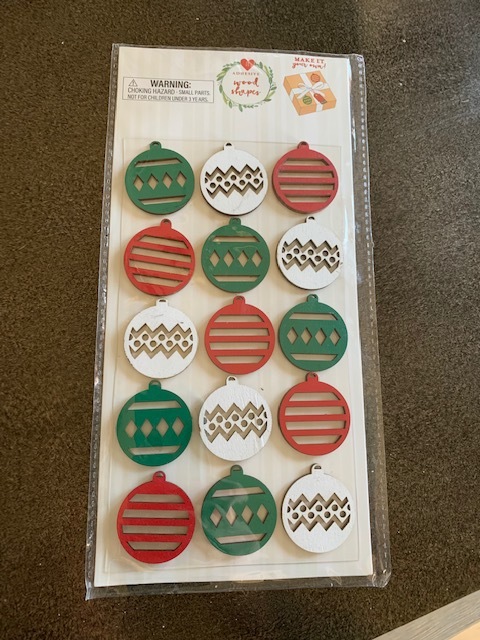
3. Next, select your gift toppers. This year i gathered up some wooden stickers from the target dollar spot (pictured below) and faux greenery. .
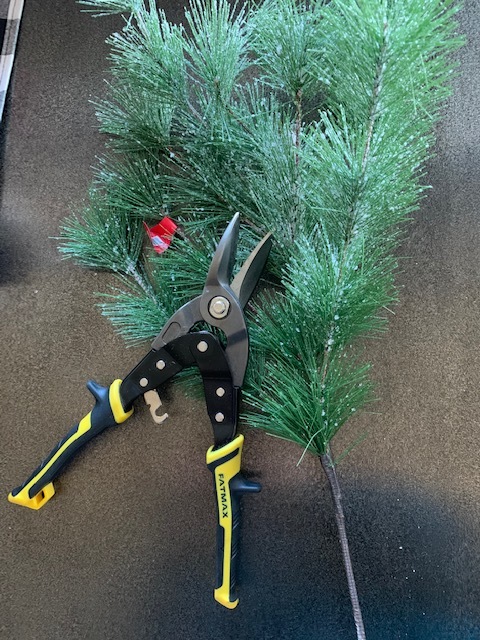
4. Assembly! I went through my craft bin and grabbed a couple different styles of twine, and a mini bell ornament (displayed on the red package).

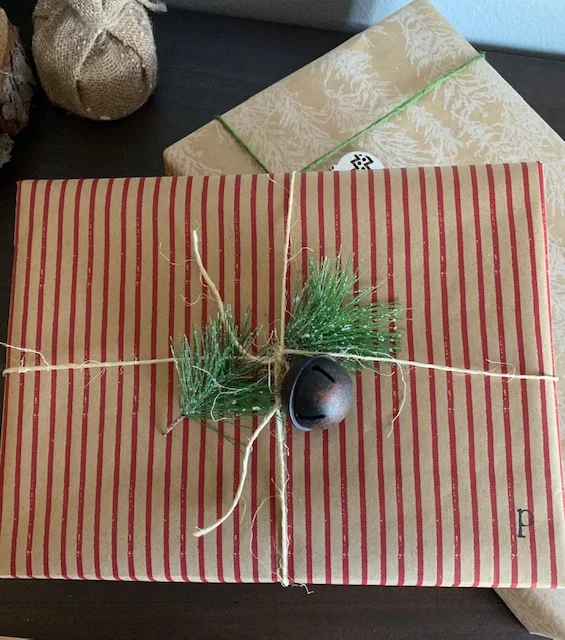
That’s it! I really like how handmade these packages look with no fancy bows or glittery ribbon, but that is just my style. your style might look different and that’s ok, this post is just meant to be a guide.
Also, the total amount spent on wrapping materials this year is around $14, which will cover dozens of gifts. Budget friendly and cute!

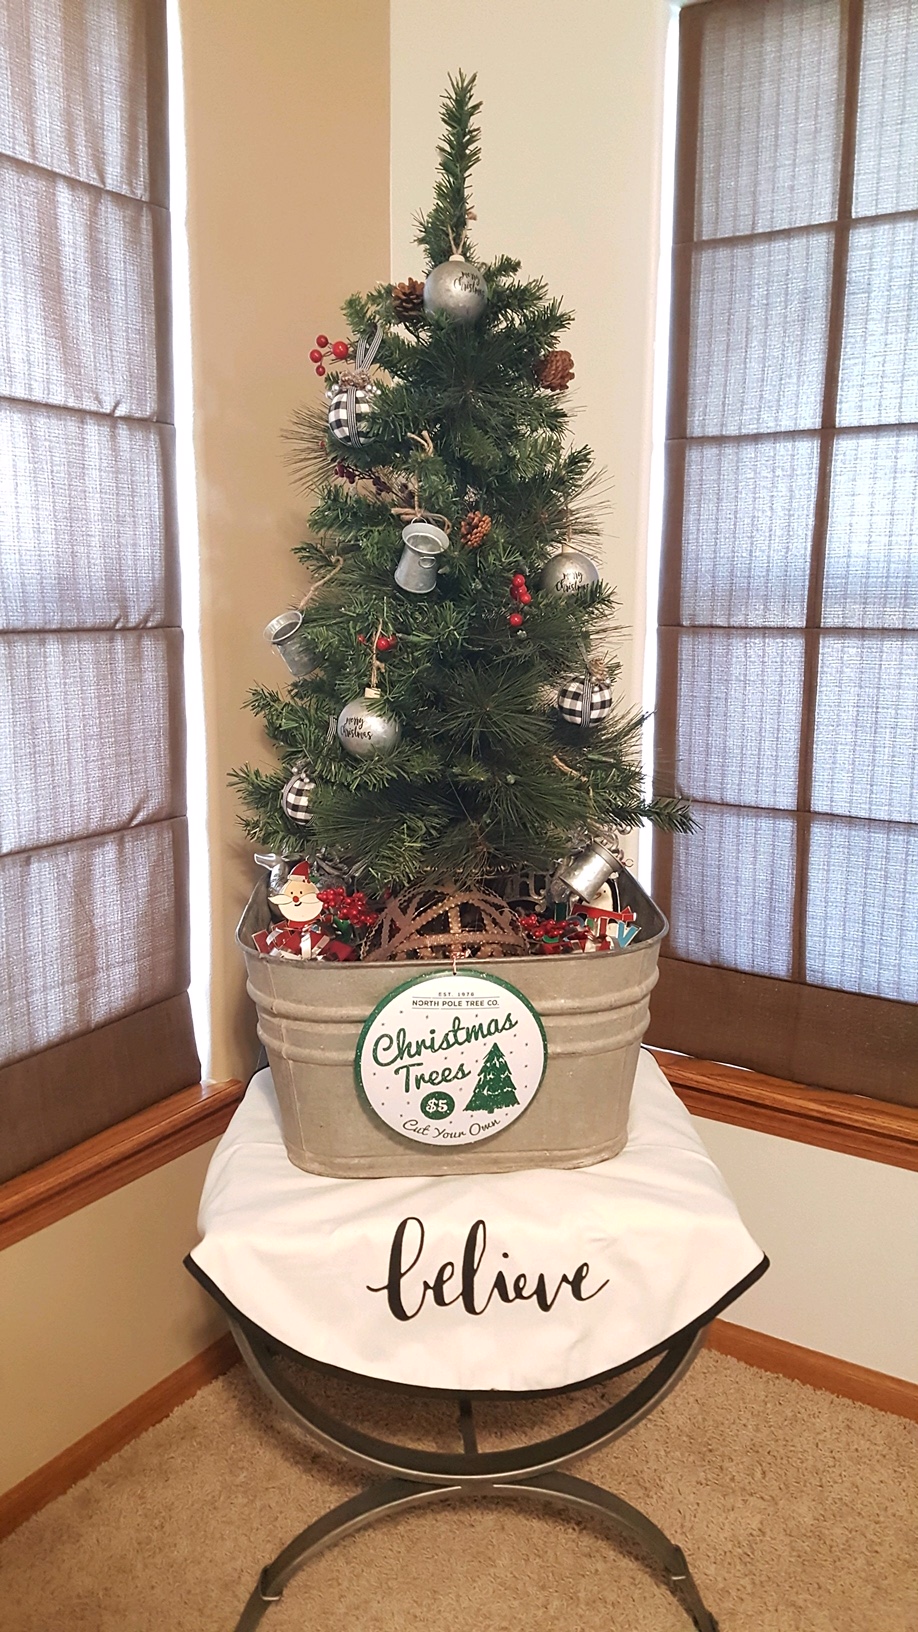
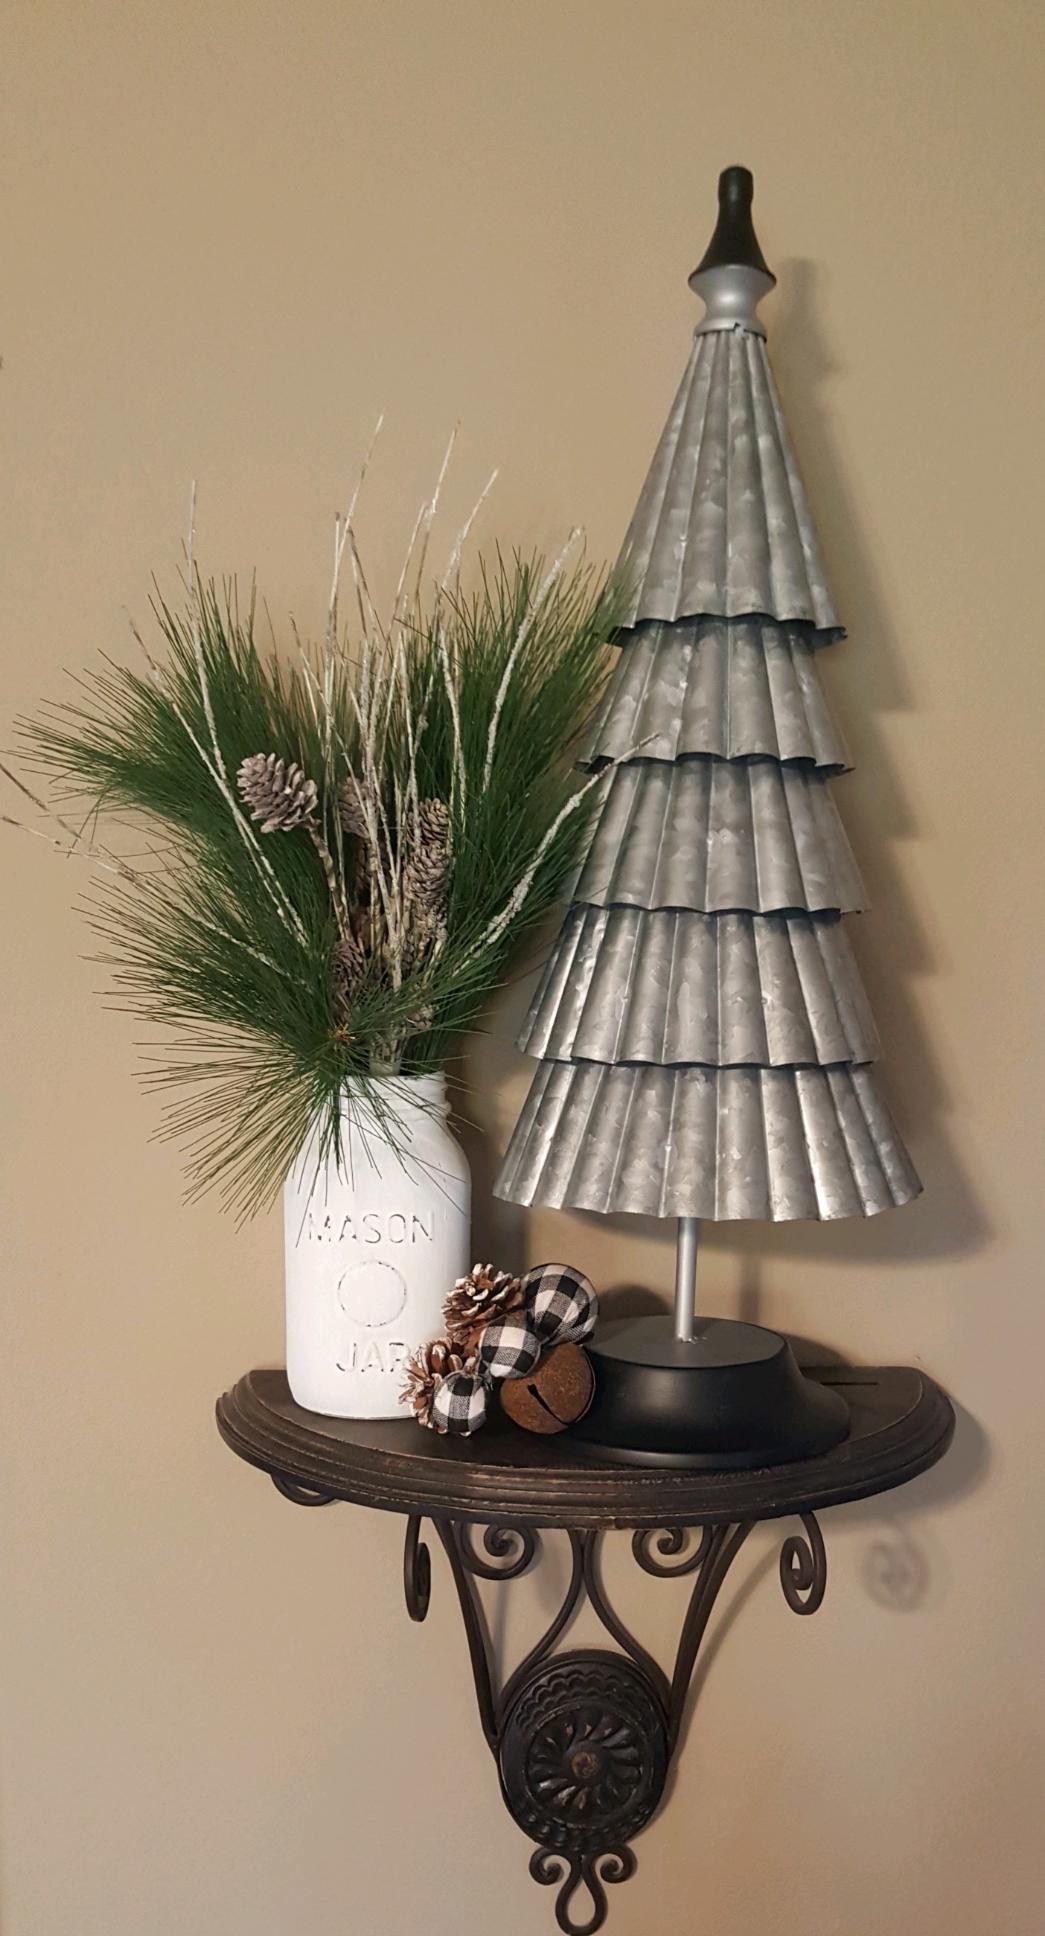
Coffee, Tree Trimming, and Christmas Decorating
Hi! Can you believe next week is already Thanksgiving? I still cannot wrap my brain around it. Either way, Christmas decorating is in full swing at my house and while I’m not quite ready to share what I have done so far, I did help a dear friend decorate her home yesterday over some much needed Starbucks, and wanted to quickly share what we did in case some of you are planning on whipping out your holiday items on Thursday night.
You all know I love everything budget friendly, and holiday decorating is no exception. While I do often buy a small item here or there, I reserve most of my décor shopping for after the holiday (or season) to take advantage of those steep discounts. As a result, I often forget what I have from the year before when it’s time to dig it all out of storage again, and this is why I prefer to get all decorations spread out in one place before beginning to place them throughout my home. I often reuse items in a new way than the year prior, or simply put them in a different room to give the illusion of ‘new’, without going over budget.
Ok, lets get to it!
Having an infant on the move, my friend wanted to utilize some higher spaces in her home to place décor that her baby could not get into. She had two shelves on either side of her fireplace/tv area that she wanted to fill, and we also needed to figure out something for her tree to make it somewhat baby friendly.
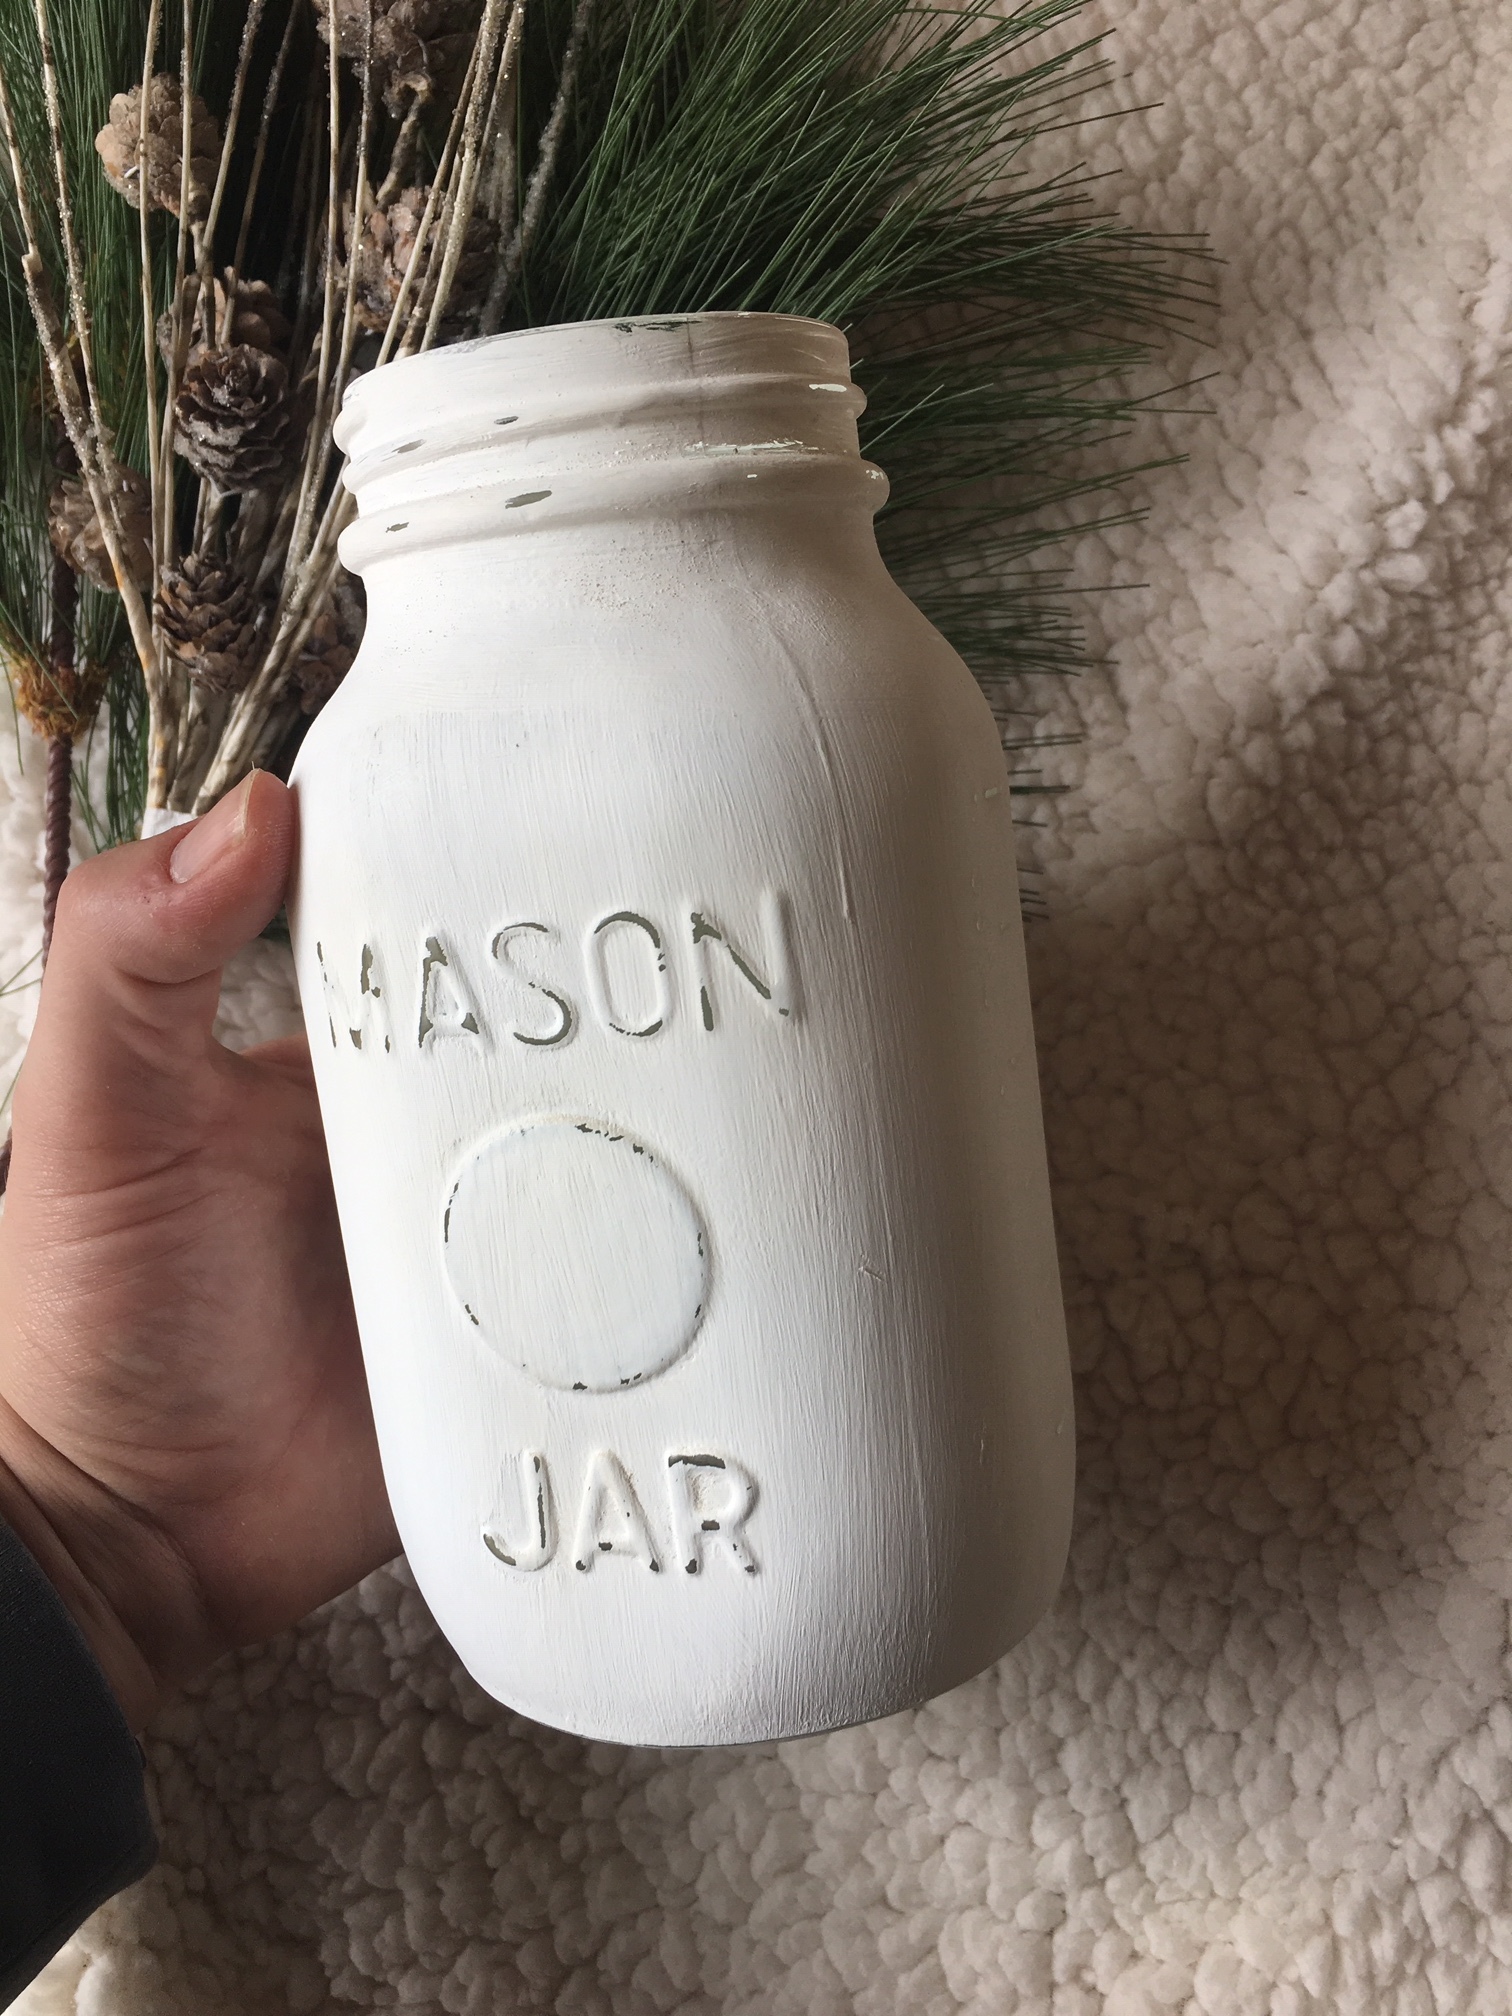
We tackled the shelving first, and to do so we needed to paint a few mason jars white to go along with her Christmas theme this year. If you need a DIY tutorial on how we did it, click here.
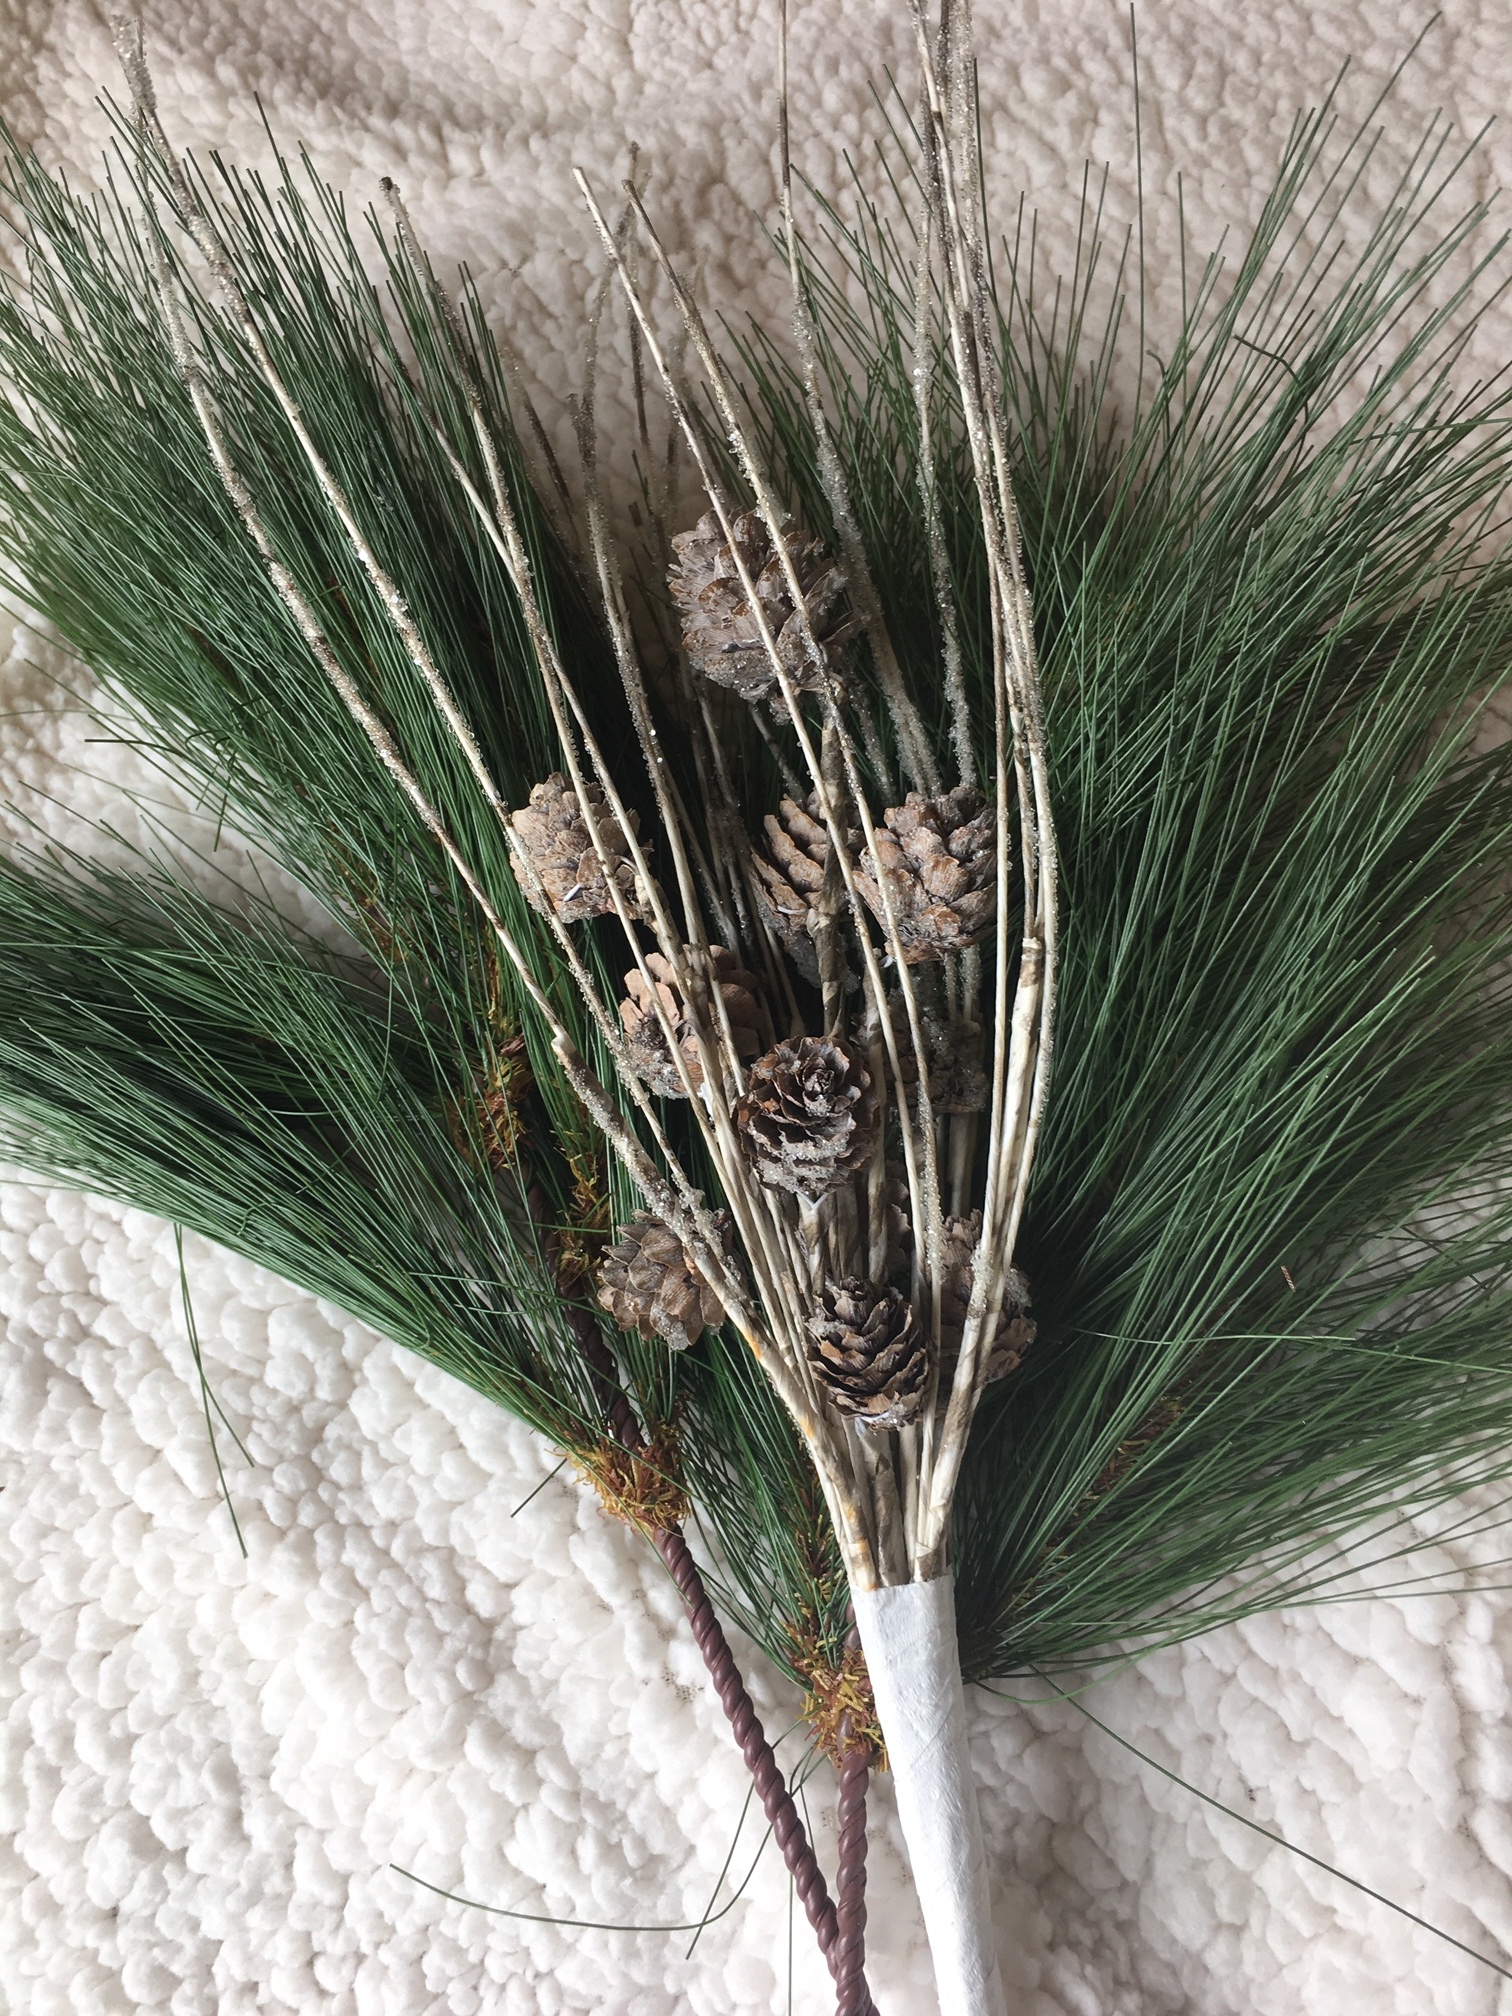
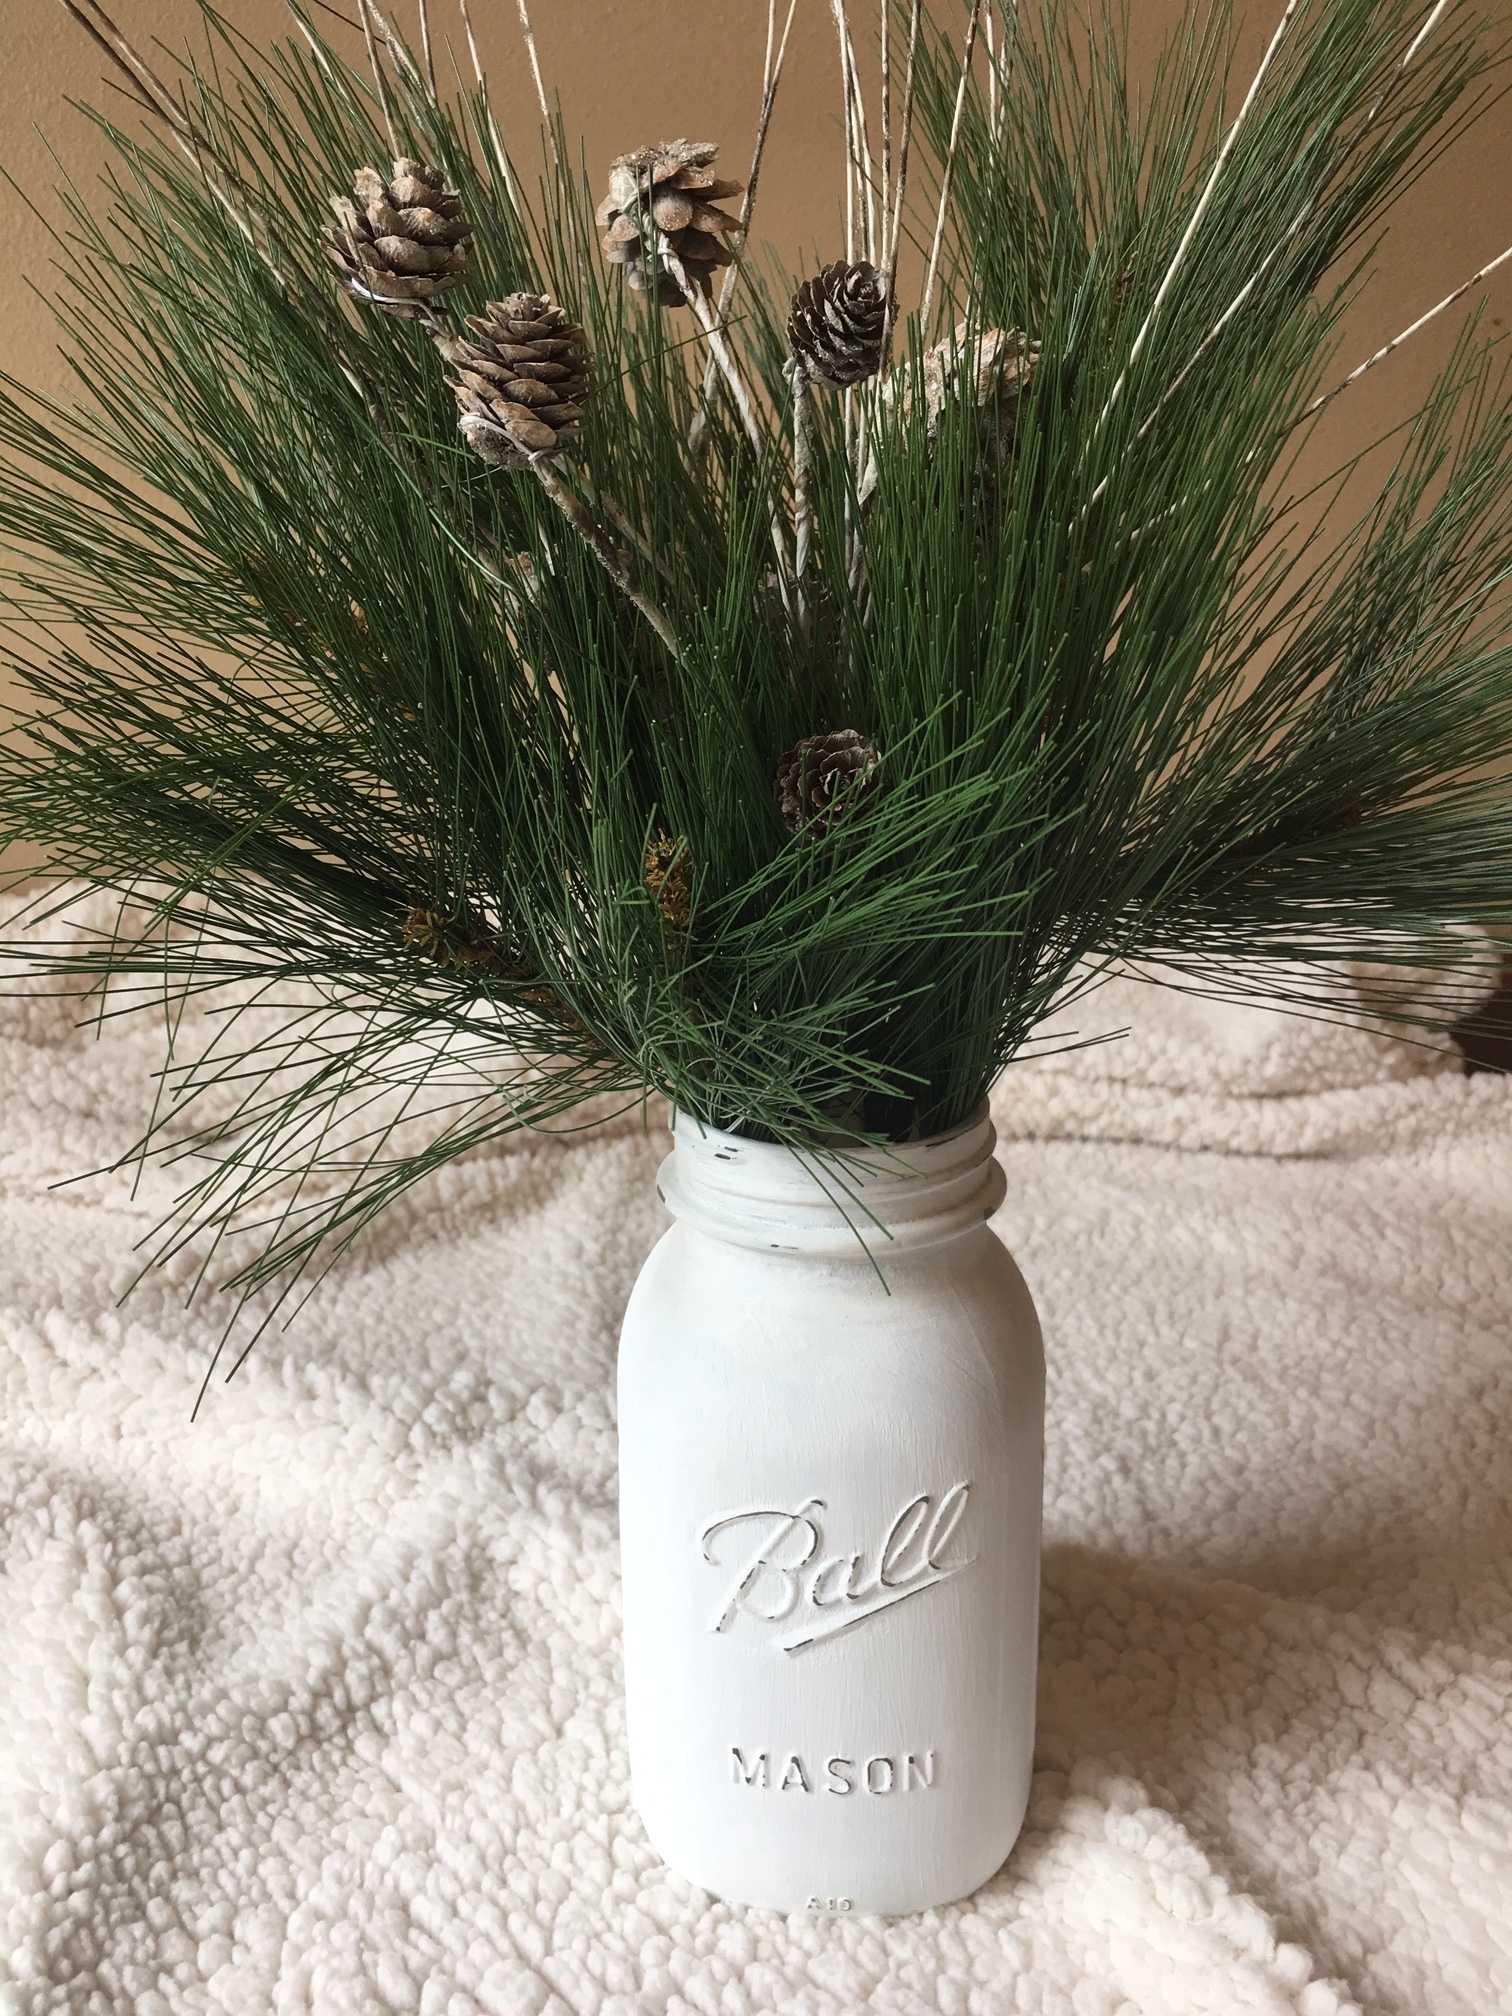
Next, we needed to figure out how to keep the little one out of the Christmas tree. To do this, we used a smaller, 'planter’ style tree that would normally be used on a front porch or as an accent tree. I trimmed most of the red ‘berries’ off of it, since red wasn't really in the color scheme this year. We snagged a $3 tree skirt from the Target dollar spot, an old metal tub that I had laying around, and got to work!

The tree base looked a bit ‘empty’ in the large wash bin by itself, so we gathered up other items (ornaments, stocking holders, random things) and filled the wash bin until the base of the tree was no longer visible.
We placed the whole thing on top of an end table, out of reach of little hands.
We finished the look with a metal Christmas tree sign, which was another Target dollar spot deal.
The dollar spot is on point this season!
We had a great time decorating while catching up and spending some time with each other, after all, that's what this season is all about!
Here are some pictures of our finished products! Happy decorating!